
By Brian Parker - images & text © 2009
|
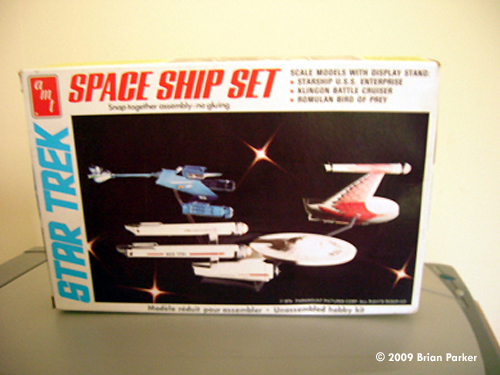
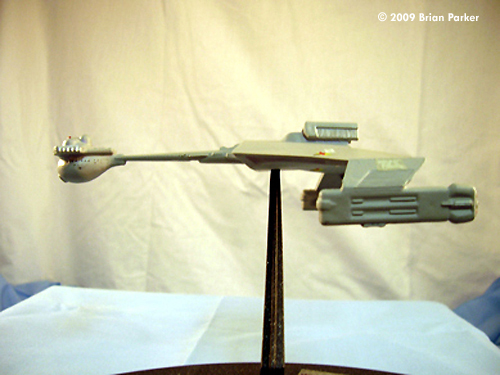
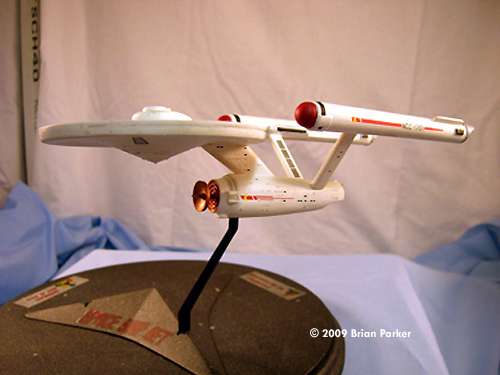
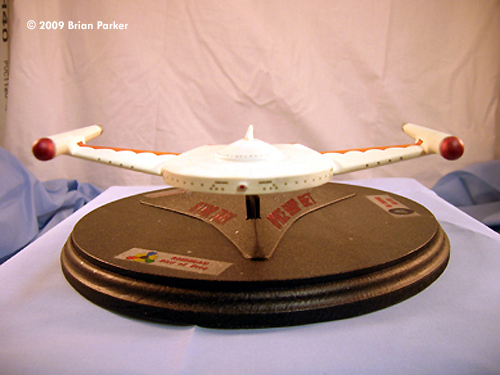
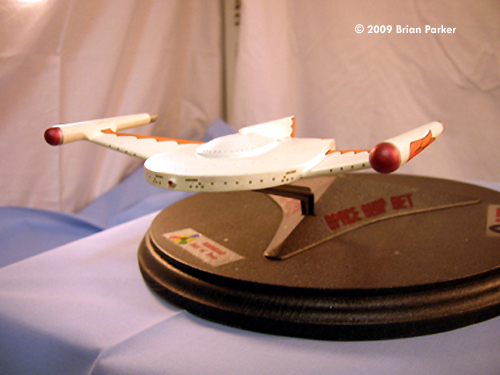
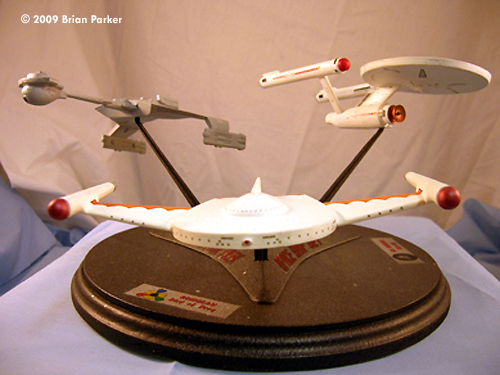
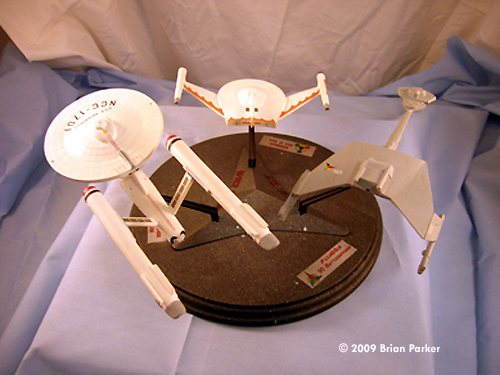
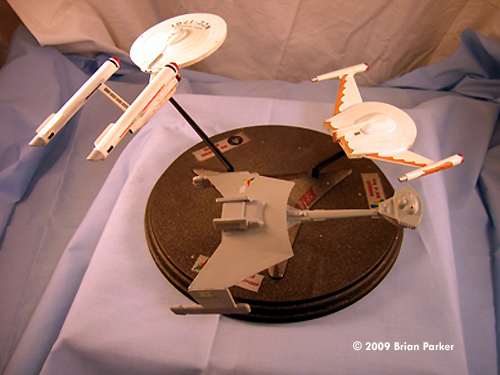
![[Please click to enlarge]](bp_3pc_Set_Above_Front.jpg) This is the 3-Ship "Space Ship Set" featuring the Federation Constitution-Class Starship ( Enterprise ), the Klingon D7 Battlecruiser, and the Romulan Bird of Prey from the original Star Trek series. |
|
Image: Box Image: RBoP's pylons fixed Image: Progress Image: The worst seam Image: D7, above/front Image: Above/rear Image: Rear view Image: Underneath Image: Left side Image: Right/rear Image: Right side Image: Enterprise, left/front view Image: Front/low Image: Underneath Image: Shuttlebay beacon Image: Left/front view Image: Right/rear Image: Right side Image: Saucer Image: From above Image: Top view Image: Bottom Image: Front Image: Left side Image: Plasma emitter Image: Right/front Image: Above/rear Image: Left/front Completed Display Image: Front viewImage: Above/rear Image: Above/right Image: Top Image: Stand |
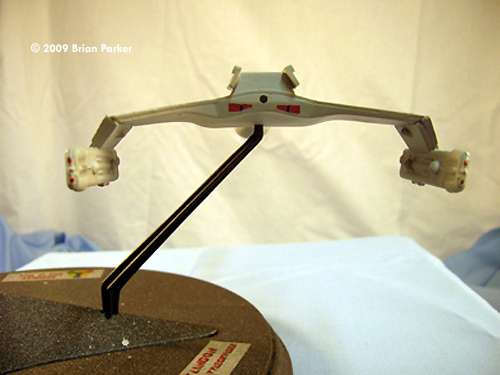
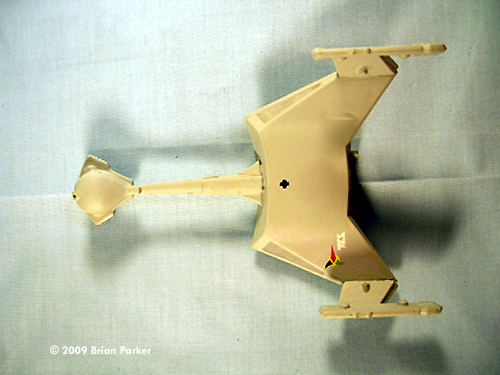
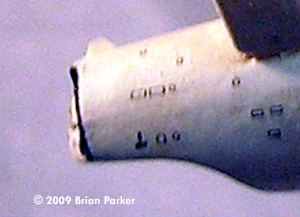
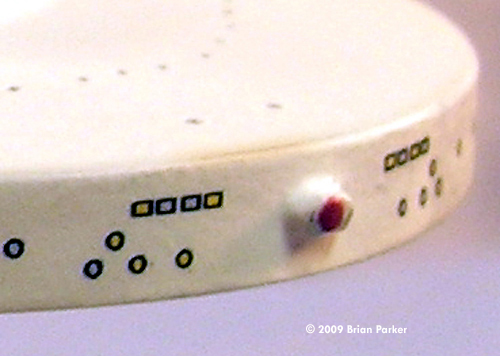
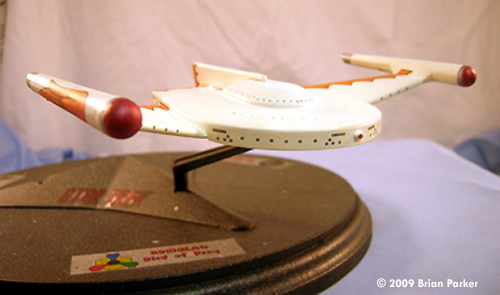
They are 1:1600 scale so each ship is about 6-inches. Although I have made a handful of models in my lifetime, this is the first kit I ever made a serious effort to paint and accuratize. The majority of the kits I have made were snap-together jobs that I slapped together in an afternoon and did not bother to paint. I also had very little experience with waterslide decals. This is probably my favorite kit of all time, however. I am a big fan of the Original Series and these are my three favorite ships from Star Trek. This is actually the third time I have built this kit. I made it as a kid, and then in college, so when I saw it on ebay last year for around $20 I thought it would be fun to build it again. This time I wanted to really try to make it something special, and I am very pleased with the way it turned out. In the Box The kit I bought is the AMT #S953 and is dated 1976. I believe AMT reissued this kit at least once in the '80s as #6677 and then again later as AMT/ERTL with different box art. All of these various kits are out of production but still widely available on the internet and very inexpensive. It comes with 4 trees of injection-molded white styrene parts, one for each ship plus the stand, an 8 1/2x11" instruction sheet, and a very small waterslide decal sheet. My decals had yellowed with age. The Buildup Before removing the parts from the trees I first washed them all in some soapy water and rinsed them. Then I painted the inside hulls of all the ships flat black so that no light would shine through because the white plastic is rather thin. I clipped all of the parts off the trees as close to the sprues as possible and gently filed off any excess plastic. Also, this is a snap-together kit so I had to file off most of the pins so that the various parts would fit tightly together. D7 I decided to build the D7 first. I glued the upper and lower main hulls together, then I glued the neck and forward capsule/bridge section together. I clamped them both with clothespins while I glued the graf units (a.k.a. power pods) together. Once all the glue had set I went about sanding all the edges and seams. There is a seam on the neck that is very visible, especially in the front of the bulbous head, and it took a lot of careful sanding to get to the point where I thought it was acceptable. To be honest, I am a very impatient person and I gouged it a couple of times before I simply quit. A more diligent person could smooth it out a lot better. Also, the rim of the torpedo launcher (a.k.a. antenna) is rather prominent so it had to be sanded down to make it shorter and also to make it flat. It is kind of an oval instead of circular, but I didn't spend too much time rounding it off. I also left the inside as is. In a perfect world I might have filled it with putty and then reamed it out carefully to make the inside a perfect circle, but I didn't. The top of the bridge deck had two tiny depressions on each side of the bridge tower that were molding imperfections. These could also have been filled and sanded but they are symmetrical and hardly noticeable so I left them alone. In addition, there is a horizontal seam where the two halves of the main deck go together but I didn't bother with it. Someone who is more of a perfectionist could probably fill it and sand it down without too much trouble. Next, I assembled the neck to the main hull. This requires some fussing as the neck will sag if you aren't careful. I had to apply a small amount of putty under the lower part of the neck to hold it up to the correct angle and to fill the gaps. Then I glued the graf units on each side. These go on snugly but there is a major seam on the top where they attach that sticks up past the top surface of the hull. This would have required some major filling/sanding to make flush with the hull and smooth out, so I didn't. Besides, I actually like the way it looks - I think it gives the ship a more aggressive appearance. The graf units had to be tweaked a little to give them the proper angle, so that they would curve in slightly under the ship. Enterprise I built the Enterprise second. I glued the upper and lower saucer halves of the primary hull together. Then I glued the two halves of the secondary hull, and both of the nacelles together, clamped them all with clothespins and let the glue dry. The nacelles fit together tightly but the primary and secondary hulls both had seam problems. The top of the primary saucer hull was a little larger than the lower half, and this seam needed a lot of sanding to make the beveled edge of the saucer smooth all the way around. More sanding than I was willing to do. The secondary hull had actually warped very slightly so that about 1/4 inch of the bottom seam did not fit perfectly flush around the cross-shaped hole where the stand attaches, even after I had squeezed it with a tiny quick-grip clamp while the glue set up. This is probably the worst seam on any of the models, but it is on the bottom of the ship and not easy to see when displayed, so I left it. The right and left nacelles have a tab on the ends for lining up the end caps and I glued these on next. Then I glued the nacelles to the secondary hull. The pylons are attached to one side of the nacelle halves and they have a tabs on the ends that fit into a slots in the hull, so there is only one way to assemble them so that they are correctly oriented. Incidentally, on this kit the raised rectangular vents on the pylons were incorrectly molded onto the lower, outside sides of the pylons instead of on the upper, insides. These could be sanded off but they are barely noticeable so I left them alone. The pylons fit into the hull quite snugly and a little wiggling got the nacelles perfectly lined up. There are little gaps where the pylons attach but I simply filled it with paint later. |
|
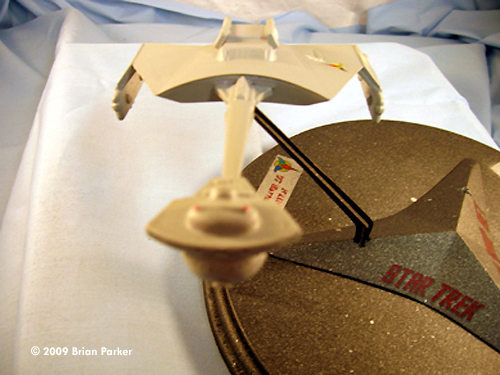
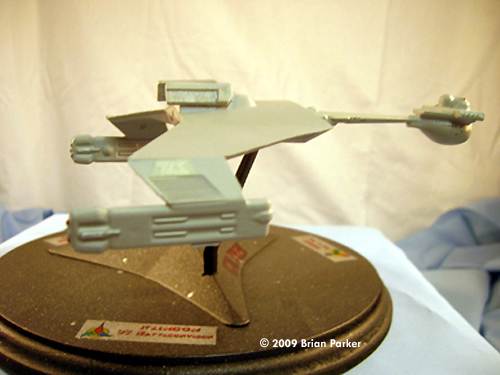
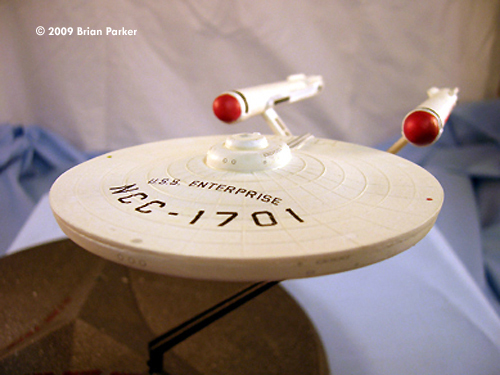
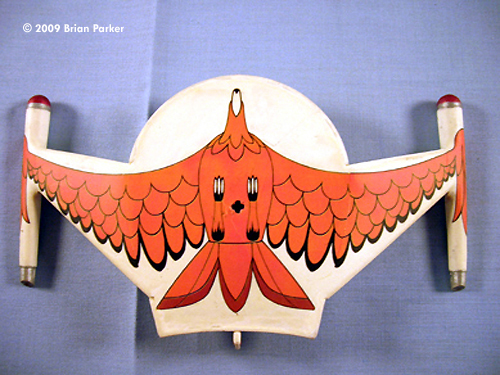
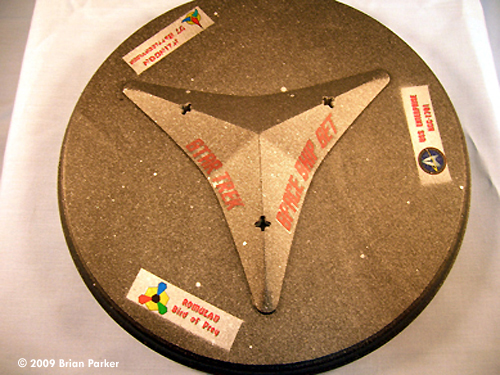
I attached the primary saucer hull to the neck of the secondary hull. It also fits well so there was no gap to speak of here and it did not require any special attention. At this point I just set the ship upside-down until the glue set and afterward the nacelles never sagged or got out of alignment. Finally, I attached the front cap onto the secondary hull where the sensor dish goes. It also has three tabs and is easy to line up. There is a seam here that I mostly sanded down but it really needs to be filled and then sanded. You can clearly see this seam on my finished model. I left the sensor dish off until the painting stage so I could get at the rings underneath where it attaches. Finally, I made a homing beacon from a scrap piece of clear plastic that I filed into a cone-shape with a flat top and glued above the shuttle bay doors. Bird of Prey This was the easiest ship to assemble because it only has three parts, the two upper and lower hull halves and the tailfin. It is the least accurate of the three ships, however, with proportional problems and two significant, well-known flaws. First, the front edge of the ship is at a perpendicular angle instead of beveled like the saucer of the Enterprise . This would require a major modification to fix, and it doesn’t bother me so I left this alone. Secondly, the fronts of the nacelles are completely wrong, with spheres instead of domes. In various articles I have read regarding the AMT 1:650 scale version of this model, it is often recommended that you cut off the balls on the ends and replace them with hemispherical domes. In this case I simply filled the gap between the nacelle and the rear half of the ball with putty and then wrapped it tightly with scotch tape so that it would flatten out evenly. After letting it dry completely I removed the tape and sanded it smooth. I am very happy with the way this turned out. Next I glued on the tailfin. There were small gaps here but I mostly filled them with paint later. I did sand down the seam underneath where the two hull halves meet and also smoothed the edges of the wings. The nacelle seams took very little sanding to smooth out. Overall, the fit of this ship was very good. Last, I scratchbuilt a tiny plasma emitter weapon from a piece of spare sprue plastic, filed it into a rounded rectangle and glued it onto the front of the ship. Painting and Detailing I do not have an airbrush so everything is either hand-painted or I used cans of spray paints. All of my paints are Testors, mostly acrylics, but some are enamels. I hand-painted the D7 Model Master Flat Light Ghost Grey Acrylic (#4762). I gave it three coats. Then I painted the radiators of the top of the main hull, on the sides of the bridge deck, and the sides of the graf units Testors Silver Gloss Acrylic (#921575). I put tiny dots of Testors Red Gloss Acrylic (#921500) on the two running lights on each side of the top of the bridge tower, and two each on the rear of the graf units. Although the D7 from the Original Series does not have visible impulse engines or a rear torpedo port like the K’t’inga class does, I like them so I added them to the model. I masked off the impulse engines and painted them Testors Red Gloss. When they were dry I masked off all but narrow vertical stripes in the centers and painted those Model Master Flat Black Acrylic (#4768). I made the rear torpedo port with a drop of Flat Black applied with a superfine microbrush, which worked well. I should tell you that the Enterprise is molded with raised detailing for the grid lines on the top of the primary hull saucer. These could be sanded off but I like them. In addition, they made it easier to line up the decals later. There are also a small number of rectangular window frames molded on the sides of the secondary hull and neck that I believe are intended to be painted in with black. They are disproportionately large, however, and although they could probably be sanded off quite easily, I was too lazy. Instead, I convinced myself that they added some interesting surface detail and resolved to just paint over them. I don’t regret this decision, as they are barely visible. By this time I had decided to spray the base coats of the other ships, so I painted the Enterprise with three coats of Testors Flat White Acrylic (#1258). I added the navigation lights on each side of the primary hull with tiny dots of Testors Lime Gold Enamel (#1542) and Testors Metallic Red Gloss Enamel (#1152). I painted the sensor rings and dish Testors Copper Enamel (#1151), and the dish antenna Silver Gloss Acrylic. The nacelle cowlings were painted Testors Flat Light Ghost Gray Acrylic (#921577), as was the dorsal top plate at the rear of the primary hull above the impulse engines. The intercoolers on this model are just trapezoidal flanges, and they were too tight to paint by hand so I simply masked off lines on each and painted them Flat Black. I also painted the intercooler screens black but I didn’t like the way they looked so I went over them with a light coat of Flat White, which left a slight shadow that ended up looking pretty good. I masked off the impulse engine squares and painted them Flat Black as well as the upper shuttle bay door frame. I painted a dot of Testors Gloss Blue Acrylic (#921521) on the top of the bridge dome, but this was too bright so I painted it over with Flat White which gave it a nice subtle look. For the Broussard collectors at the front of the nacelles I painted them Metallic Gloss Red, and then gave them an overcoat of Model Master Clear Red (#4630). This gives them sort of a soft glow. The Bird of Prey I sprayed with three coats of Flat White as well. The Nacelle exhaust ports I painted Silver Gloss Acrylic. The Broussard collector domes on the front of the nacelles I masked off and also painted Silver. Technically, I guess I should have stopped here but I thought it looked too monochromatic, so I masked them off again to leave a narrow border and painted the domes Metallic Red Gloss Enamel. I really like this better. This ship also has raised details of disproportionately large circular windows molded onto the top hull. At first I filled these in black with a fine marker pen, but it looked terrible and it was too different from the other models. By this time I knew I was going to be using the JT Graphics decals so these windows would have been so much larger than all the rest it would have looked strange. Ultimately I sanded these off and repainted the Flat White base coat. I really wasn’t sure what I wanted to do with this because I simply couldn’t hand-paint all those tiny little black dots, and cutting out enough little dots from the decal sheets and sticking them on evenly seemed equally impossible. I ended up taking a stick pin and reaming out little holes for all of the windows. Then I sanded them flush with the top and touched up any paint that had been scratched up. This was another successful modification as far as I’m concerned. If you don’t look too closely they really look great – they are the right size and the fact that they are actually holes gives them some real depth. Last, I put a tiny dot of Metallic Red Gloss Enamel on the tip of the plasma emitter. After painting all of the models I sprayed them each with a couple of coats of Testors Gloss Cote (#1261) to seal the paint and ready them for the decals. Decals As I previously mentioned, I did not use the decal sheet that came with the kit, and instead ordered the very excellent JT Graphics replacement decals (#JTG-024). I have a confession to make at this point. This was probably only the second or third time I had ever used waterslide decals, and I made some mistakes. If you are reading this or have a shred of common sense you probably already know this, but the single most important thing I learned is when you cut out the decals from the sheet, leave yourself a little tab to grab onto. Otherwise, you will have a terrible time sliding the decal off the backing paper and onto your model, because you are pinching them together. I was halfway through applying the decals to the Enterprise before I figured this out, and it was extremely frustrating at times. Many of the window decals are so tiny they rolled up and folded over on themselves. The other thing I learned the hard way is even if the decals are dry and even if you have sealed the model with a clear coat, do not use masking tape over the decals or you will peel them up! I wanted to do some minor touch-up to the bottom of the Bird of Prey after I had all the decals on and I pulled off a huge part of the bird decal. I wanted to die. I had to sand off the entire bird and re-paint practically the whole ship. Between these two mistakes I ended up buying a second sheet of the JT Graphics decals in order to fix everything. The method for applying decals that I eventually worked out for myself is this: First, I cut out most of the decal very close to the edge of the design, but leave a small tab of paper to grab onto with the tweezers. Because the JT Graphics decal sheets are completely sealed, I cut a line in the decal film between the tab and the design with an x-acto knife, being careful not to cut through the backing paper. I dip the decal in water for about 15 seconds, and then I set it on a drop of water on a little compact mirror while I brush some decal-set on the model where the decal will go. Holding the decal by the tab with tweezers, I place the decal on the model while I gently coax it off the backing paper with a wet q-tip. Once I have it in place I gently roll a dry q-tip over the decal to press out any bubbles and soak up any excess water or decal-set. I pretty much stuck to the instructions as far as the decals. The decals come with extra names and numbers for various ship registrations, but I wanted to make the Enterprise anyway so I used those. I did add some extra windows to the Bird of Prey on the sides of the hulls behind the wings, and I added some vents on either side of the tailfin that I cut out from one of the extra set of gold vents included for the Enterprise nacelle pylons. There were a lot of extra windows with these decals so I added a pair of hollow circles above the Enterprise shuttle bay door to simulate lights. I also drew on the shuttle bay door seams with a pencil. After all three ships were finished I sprayed them each with two or three coats of Testors Dullcote (#1260) to seal everything and give them a matte finish. The display stand was made using an 8-inch circular pine plaque from a craft store that I painted flat black. Then I glued on the stand that came with the kit, also painted black. I misted some silver dots all over it to simulate a starfield by spraying chrome silver paint from the hardware store in short bursts from about 3 feet away. I also painted the rectangles where the nameplates would go with the same silver paint. I made my own decals by downloading the Star Trek fonts and logos from the internet and printing them onto Testors Clear Decal Sheets using an inkjet printer. I sealed them with two coats of Testors Decal Bonder. The next day I cut them out, applied them, and let them dry. Then I sealed the whole thing with Dullcote. Overall This is a very small kit and I probably should have picked something larger for my first-ever attempt at this degree of detail. Many of the parts are so tiny that it was very difficult to do what I wanted, but the flip side is that you really cannot see many of the mistakes I made unless you get right up close. I am really extremely pleased with the way the whole thing came out and the way the ships look together on the stand. With just a little additional effort an experienced modeler could make near movie-quality replicas with this kit, but even a klutz like me can make a great-looking model. Besides, you get three great ships in one kit! A great, inexpensive kit that I would highly recommend. References: Star Trek the Original Series episodes, “Balance of Terror” ( Bird of Prey and Enterprise ), “The Enterprise Incident” ( D7 and Enterprise ), “Star Trek the Motion Picture” (K’t’inga/ D7 ), and Paul Newitt’s “Starfleet Assembly Manuals” |
![]()
This page copyright © 2009 Starship Modeler™. First posted on 2 April 2009.
![[Please click to enlarge]](bp_3pc_Space_Ship_Set_Contents.jpg)
![[Please click to enlarge]](bp_3pc_D7_FrontL.jpg)
![[Please click to enlarge]](bp_3pc_ENT_Below_FrontR.jpg)
![[Please click to enlarge]](bp_3pc_BOP_Right_Side.jpg)