
By Brad Eastman - images & text © 2003
|
![[Click to enlarge]](be_bay_AssembledNoCeiling.jpg) Fans may know that the Enterprise D had three shuttlebays, but viewers of Star Trek: The Next Generation® never got to see the inside of the massive main shuttlebay, save for a brief glimpse from the outside in the episode "Cause and Effect". |
|
|
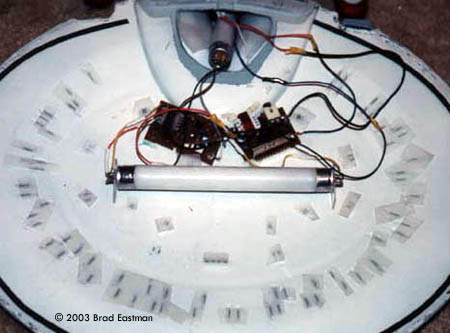
Overview This kit is intended for those builders who want to make their Galaxy -class model a bit more interesting. The kit consists of 5 pieces for the shuttlebay, 20 shuttles and 2 speedboat shuttles. Molding quality was very good. Very little filling of bubbles or voids was required. The instructions are obviously brief, but indicate where parts and decals belong very clearly. I've included an image in which I combined pictures of the kit and the Enterprise saucer to indicate the relative sizes of each kit. Assembly The kit is easy to assemble, since the shuttlebay itself consists of only five pieces. Of course, the kit also includes 20 shuttlecraft and 2 speedboat shuttles. There was some engraved lines which needed to be filled, since they didn't match the provided decals, but this was a very easy fix. The shuttlecraft themselves weren't all perfectly molded, but most of the problems were on the undersides of the shuttles, and are not visible when parked in the shuttlebay. I chose not to use all of the provided shuttles, since I didn't want to the shuttlebay to look like a used car lot. Having so many shuttles is a bit of a bonus, and the remaining shuttles will likely end up in an Ambassador class vessel shuttlebay that I'll now have to scratchbuild. I installed the kit in an Enterprise D model I'd already built which included lighting. The lighting of the bridge, conference room and other nearby windows was provided by a fluorescent tube mounted in the saucer section. It quickly became apparent that the shuttlebay piece was going to block the light source very effectively. I considered using LEDs, but in the end came up with a much simpler solution, as can be seen from the pictures. I simply cut a hole in the kit which cannot be seen when looking at the shuttlebay through the open shuttlebay door once the kit was put back together. This let the necessary light through to the top of the saucer section, and illuminated the front of the shuttlebay quite nicely. Unfortunately, the lighting in that section of the shuttlebay is rather overexposed in the photos. I also chose to add a ceiling to the shuttlebay, since without it, the shuttlebay appeared to be four or five decks high. Not visible in the pictures is a small piece of strip styrene I added to the rear ceiling at 90 degrees to prevent someone looking at the model to see up into the cavity where the bridge is represented in the Enterprise D kit. Painting and Decaling Painting the kit was straightforward. I chose to paint it the same color as the base color of my Enterprise D model - Testor's light gray. Unfortunately, this was a little too light, and the yellow decals do not show up as well as I would like. I painted a few details yellow, added some red markings (visible in the pictures), and coated the piece with dullcoat. I painted the shuttles (painting 1/1400 scale shuttles requires a steady hand) and secured them in place with CA glue. |
|
The decal quality was excellent. Federation models did a great job of providing marking, though it is difficult too see many of them once the kit has been installed. Conclusion Would I recommend this kit? If anyone is interested in setting a Galaxy class model apart, absolutely. The kit is well executed and looks great. However, I would also recommend lighting the kit, even if lighting the whole model seems bit daunting. The instructions indicate where to place LEDs to light the interior. I'd say one should use at least four or five strategically placed LEDs to ensure that most of the shuttlebay is illuminated. Without lights, you'll need a flashlight (or direct sunlight) to see the front of the shuttlebay. Now, how about a shuttlebay for the Enterprise E, complete with a miniature "Argo" from Nemesis? |
![]()
This page copyright © 2003 Starship Modeler™. Last updated on 7 April 2003.
![[]](be_bay_Saucer_n_Bayat50opacity.jpg)
![[]](be_bay_AssembledCeiling.jpg)
![[]](be_bay_MainShuttlebay2.jpg)
![[]](be_bay_MainShuttlebayLit.jpg)