
By April Welles - images & text © 2002
|
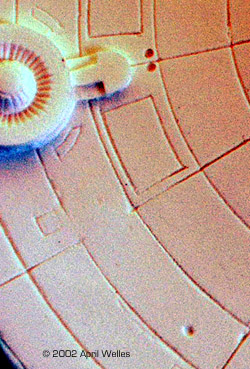
![[Click to enlarge]](aw_enta_Beauty2.jpg) ![[Wonderfest 2002]](aw_enta_Meritaward.jpg) I purchased the Starcrafts model of the 1/1400 refit Enterprise (though actually it is a new ship - there are far too many differences between the TOS version and the ST1 design), through Federation Models for $35. It arrived in the usual type box with good packing with styrofoam peanuts. There were 4 resin parts plus a resin base and the standard water slide decal sheet with the ship's name (Enterprise only) and the appropriate hull number. |
|
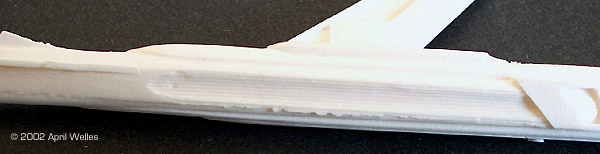
Image: Inboard side of the warp nacelle |
Instructions were merely the standard small 2"x3" paper that says to clean the model well and use super glue. My first impressions were that it looked good. The pieces appeared to be in good shape. There were no pieces that were warped.
But upon closer examination I saw that this model was a nightmare. There were numerous bubbles and pits and the seam lines were pretty bad. I informed Federation about the state of the model and he very graciously offered to exchange it for a new one ( I met the owner of Starcrafts Models at Wonderfest 2002 and he said he would have gladly exchanged it too). I decided to keep the model and see what I could do with it, since I figured that any other resin kit I get from whomever may have similar problems so I'd have to figure it out eventually. A word of advice. If someone offers to exchange an item with you, do it. This model was outrageous. There was a lot of flash. The entire ship was filled with flash. I also purchased a set of decals from JT Graphics. The instructions on the decals state that the model's windows need to be filled so that the model is smooth for them to adhere. That was a plus, as will be shown later. Construction The biggest nightmare was on the upper saucer section. Near the impulse engines there was a resin plateau of pretty good size, plus a smaller one next to it. I had to remove it without damaging the rest of the part. I used my hobby knife and began to gently shave away the plateaus. I then needed to fill in all of the bubbles on the edge of the saucer (there were a lot). The next problem that I had to tackle was the secondary hull (Oy Vey). The secondary hull was... well, it was a lot of work. There wasn't enough resin to fill in the major seam along the middle of the hull upper and lower. That required a lot of puttying and sanding. I used Squadron Putty to fill in the areas. What was also difficult was that there was resin inside one of the pylon locations. The other one was in good shape. Another problem was that the same thing happened with the torpedo/dorsal connection. Half of that was filled in with resin. I used a small bit in my pin vise and drilled out the area on the pylon. With the dorsal I carved as much as I could but instead removed a small amount of the connecting resin in the bottom of the part. There was also a large bubble gap at the back end of the dorsal where the torpedo exhaust is located. That too had to be filled in and sculpted with putty (I think the next time I run into that type of problem I will use A+B Putty instead). There was also a lot of excess resin in the port nacelle Bussard Collector that I also had to remove. With that I took my knife and gently carved out the area. The shuttlebay area was full of bubbles that required filling. That was very difficult due to the small size of the area. That took me a while to get it right. Due to the nature of JTGraphics' decals everything except the shield grids needed to be filled. But that still required a lot of work. I also needed to remove the phaser locations since they were not going to fit with the decals, plus the phaser 'bumps' in many locations were only pits that needed to be filled anyway. I also filled in the saucer section shield grid along the outer edge including the windows and thruster locations since he included decals of the saucer shield. Also the main deflector is a bit too deep so it needs to be filled slightly, yet it still requires a slight concave depression. The benefit of this was that the model needed to be filled in so many places anyway. Painting I painted the model using Model Master (MM) enamel paints sprayed through my airbrush. I used MM Light Gray mixed with a touch of white to lighten it for the proper scale. I then brushed on diluted Humbrol's Duck Egg Blue (which is actually green) along the engineering section, and along the pylons, plus on the dorsal and around the main deflector. |
|
I hand painted around the Bussard scoops in MM Medium Gray. The First Stage Flux Construction was painted MM Burnt Sienna, and dry brushed with MM Copper. I painted the bridge area with a muted MM Yellow and around the base of it with diluted MM Sky Blue. The Impulse Deflection Crystal was painted MM Sky Blue; I dabbed the top of it with paint thinner to give it the illusion of activity. The Magnetomic Amplification Crystals in the nacelles were done with MM Medium Blue and dabbed with paint thinner for the same reason. The Emergency Flush Vents were painted in MM Medium gray. The shuttlebay doors were painted MM Silver and MM Dark Gray for the shuttle deck, and MM Red for the Landing Bay Control windows. For the dorsal windows, which weren't included with the decals due to limited space on the sheet and model, I used a fine point black pen with permanent ink. Decals One main feature that was actually favorable were the decals from JT Graphics. I found them to be extremely helpful, and they made the ship look outstanding. The decals that came with the model are just the standard name, hull numbers and pennants. They look good for a novice builder. However, I went with JT Graphics decals instead. His sheet comes with all of the decals required to make an extremely accurate ship. That sheet came with the name of four ships and correct hull numbers for each (the most interesting one being the USS Eagle NCC-976). I decided to build the Enterprise as it appeared in the first three movies. Just to be a little different. I've noticed that many people build the Alpha (NCC-1701-A). I decided upon the original NCC-1701. The sheet also comes with windows for the entire ship, including a gorgeous looking botanical garden. JT also includes phaser warnings and thrusters for the saucer and around the main deflector array. Impulse engine grills, inboard nacelle grills, Saucer Separation stripes and the 'glowing' deflector array itself. Overall This particular model was a nightmare to clean up and correct. I would not want to work on one this bad again. I would ship it back and trade it. However, I have recently purchased another one and it looks pretty good. There are still some heavy seam lines but not as many bubbles and plateaus. It will still require a lot of clean-up and preparing, but not as much as this one did. I am actually happy with it. Due to the molding process, on this model at least, I would say that experienced modelers attempt to build this one. Sure the parts locations are obvious, but a lot of work and skill is needed to make it look good. Don't fret though: with a lot of effort, and above all patience, an intermediate modeler could tackle it. |
|
![]()
This page copyright © 2002 Starship Modeler™. Last updated on 8 October 2002.
![[Click to enlarge]](aw_enta_Parts.JPG)
![[Click to enlarge]](aw_enta_Sideview.jpg)
![[Click to enlarge]](aw_enta_Aftupper.jpg)
![[Click to enlarge]](aw_enta_Aftuppercloseup.JPG)
![[Click to enlarge]](aw_enta_keel.jpg)
![[Click to enlarge]](aw_enta_Starboard2.jpg)