
|
|
|
|
By TrekFX@aol.com (copyright 1997) Tthe Enterprise "E" has finally warped onto store shelves. Here's a review of the newest addition to AMT/ERTL's Star Trek line in the box. |
![[Enterprise-E]](ent_e.gif)
|
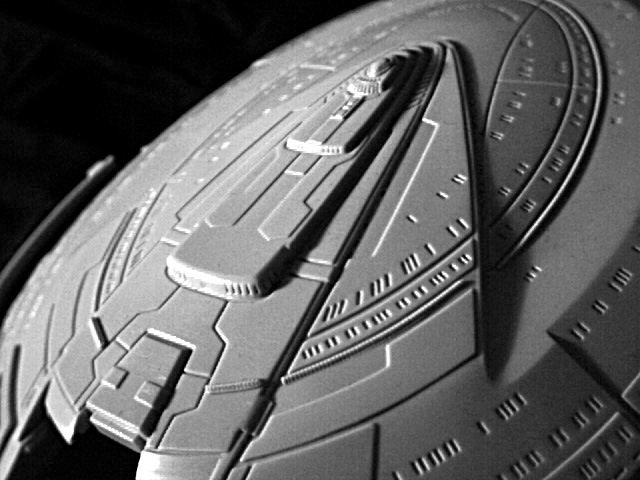
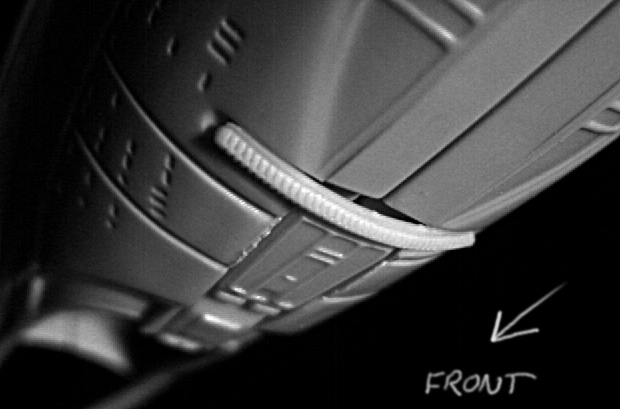
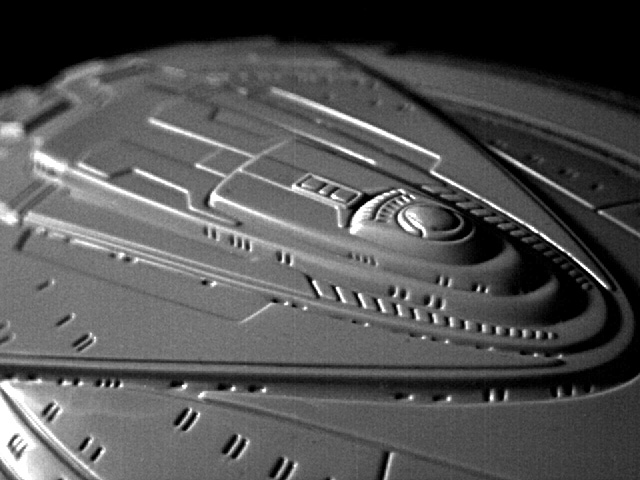 Saucer top showing bridge detail. |
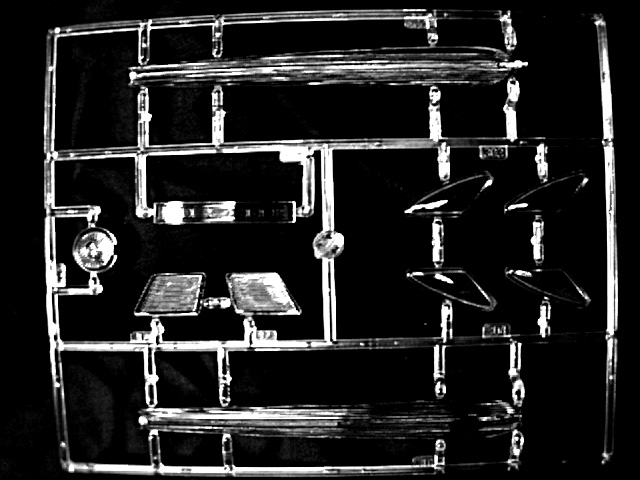
The finished model is 19.25" long, 7" wide across the saucer, and is in-scale with ERTL's Enterprise "D". My test shots show light gray styrene, with a clear parts tree containing the 2 warp nacelle top grilles, 4 bussard collectors, the deflector dish, 2 saucer section impulse engine grilles and saucer-section shuttlebay door panel. |
|
There are about 38 kit parts , plus a two-part stand
(a Starfleet badge 8" high x 7" wide, with raised "First Contact" movie logo and "USS Enterprise E, NCC
1701-E", and a very flimsy support arm. Use a 1/4" acrylic or brass rod instead...) Though decals were not available in
the test shot I saw, it appears that all the lifeboat-cover detailing will be on the decals (there is no such detailing
engraved on the kit parts). Editor's Note: Jay Chladek
has provided info on the decals - see following note. Instructions were also not available in the shot.
General Impressions: I must admit that my first reaction was "It's so small!" The 10' miniature used in "First Contact", so packed with detail, just begged for a kit at least 30" long...but then we'd have yet another solo-scale model to add to the collection. So I got over my disappointment fairly quickly (but not completely ; - ) Overall hull shapes and proportions look good. Engraved ports appear to be correctly placed. See Errors and Ommissions for nitpicks. The phaser strips in all locations have a raised-ribbed texture. I have three test shots, and each one had a nacelle top grill with the forward 4.5 mm of the tip (a small rectangular-section protrusion about 3mm long, with the forward location pin on the bottom) broken off. These probably broke coming out of the mold, a problem ERTL will hopefully correct. Quality of Molding: The kit has an abundance of wide (for the scale) panel lines...but that's how it is on the prototype.. They are more like channels separating raised hull sections versus grid lines per se. Raised panel detail looks a bit "soft", lacking the razor crispness a model of this small scale requires for authenticity. Some shapes are also a bit soft and/or crude, like the saucer's torpedo launcher blister. Details at the edges of the engineering hull suffer due to the undercuts required for the molding process. This is especially noticeable along the top of the hull. A multi-part mold would have been much better (but more expensive). Fit is acceptable overall, with some locating pin holes requiring enlargement for proper mating. Major Assembly Breakdown: |
 Saucer and Engineering hull. |
The saucer is top and bottom halves, with the bottom fitting into the top as with the Voyager kit. Two clear impulse engine grilles mount from the inside, along with the clear curved shuttlebay door panel. The shuttlebay observation area is a small tack-on part. There are three small (2mm) "cups", representing docking ports, which are mounted aft of the bridge. |
|
Engineering hull has left/right halves, plus insert panels for the navigation deflector "tunnel" and torpedo launcher blister, and the aft shuttlebay cove (underside). A U-shaped part which is essentially the fairing between the top of the enginneering hull and the rear of the saucer at the shuttlebay attaches to the top of the hull assembly. Small parts include the clear deflector dish, a small belly detail panel with phaser strip (a sloppy fit), the stand mounting point, the aft shuttlebay doors and a small part at the aft belly which I can't identify. The saucer and engineering hull mate almost exactly as they would per production sketches depicting separation...you can, with just a few modifications, do a saucer-separation display! Engine pylons are top/bottom split, with large rectangular mouting "pads" fitting to the engine nacelle undersides. The pads should line up with corresponding raised panels on the engine undersides, but a mismatch of just under a millimeter is enough to be noticeable. The pylons have large mounting tabs which insert into slots on the sides of the engineering hull. The tabs needed to be filed down a little to allow full insertion. Engines are left-right halves with 2 clear bussard collectors mounted from the inside and clear top grille. The area under the grille is solid and would have to be removed for lighting. There is a rectangular part which sits just ahead of the grille which inserts into a 20mm x 4mm slot; it's a sloppy fit requiring putty in an awkward location. The aft end of the engine is capped off with a small insert part. Errors and ommissions: |
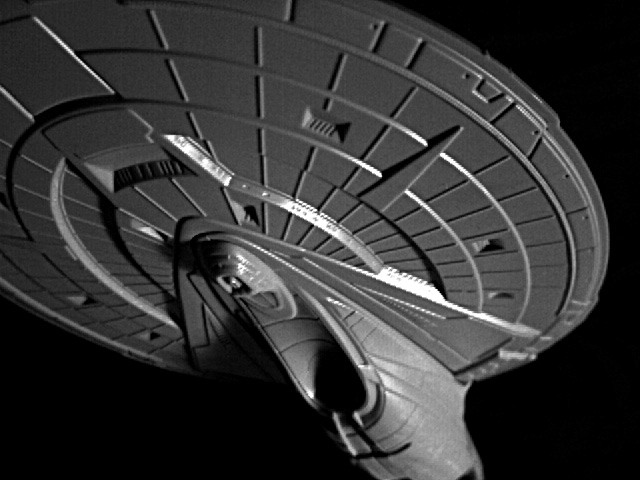
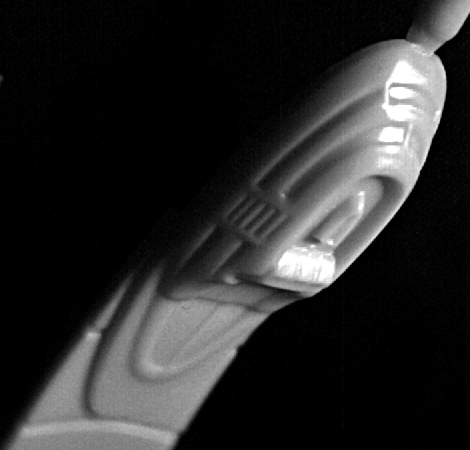
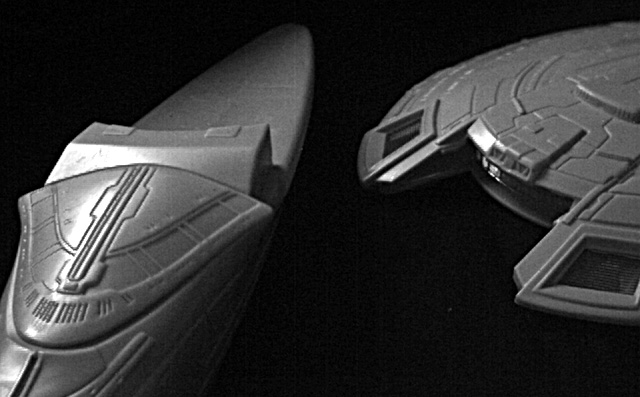
![[Rear view showing pylons]](e_rear.gif)
|
The nacelle pylons go straight from the engineering hull to the engines. They should leave the hull at a very shallow angle (if not flat) almost up to the flush vents or whatever they are, then angle up to the engines. This is a bit tricky to correct. The starboard (right) nacelle pylon is obviously thicker at the root (hull joint) than the port pylon. It can be filed to proper thickness if you don't do the angle correction above. The shape of the navigation deflector tunnel where it meets the dish is a bit off; it should be a bit flat at the top but is round in the kit. There is some pronounced "channel" detail which either shouldn't be there or is grossly out-of-scale. |
|
Areas on the sides of the engineering hull (where the stripes and ship ID belong) are long raised panels. These should be wide "channels", flush with the tabs that extend out to the edge of the deflector dish tunnel (this may not be clear until you see the kit or check out the movie...) Some filing and sanding can fix it. Nitpick: The raised area on the underside of the engines is simplified at the front. It should flare out under the bussard collectors to the edges of the engine. Actually, it should look like a little groove was cut into the bottom edge of the engine starting near the collectors and running aft, not like a planted-on panel. Sheet styrene will fix it; just slap on a piece, butted up against the front edge of the raised panel, and trim it flush with the engine edges. Conclusion: Some might be disappointed by the small size and the soft details give it a hint of "toy quailty" but this kit builds an acceptable replica of the latest incarnation of the starship Enterprise. Extra work correcting some problems and a lot of time spent on reproducing the complex paint scheme of the studio model can bring this baby to life. All nitpicking aside, I like the Enterprise-E kit. It's easy enough for a first-time modeler to build, and whatever flaws exist are minimal. The ambitious modeler can accept the challenge to create a more accurate model; I admit, much as I'd like a "perfect kit", sometimes I like "solving puzzles", too! Nice job, ERTL. The design of the ship has really grown on me. I liked it in the film, but now with a 3-D model in my hands I can find no "bad angles"...looks impressive and graceful from all views. And, it looks fast even when standing still! Just a little side-note: One reason I'm a little disappointed in the Enterprise E kit is because I also got a test shot of the new ERTL TIE fighter kit (traditional "bowtie" configuration). This kit is fabulous!!! Crisp, *crisp* detail, nicely molded, great fit. I swear that when assmbled and properly painted and weathered it will look just like the studio models. (well, almost. There are just a few, and I mean few, areas that could be improved, mostly undercuts that can be fixed with some plant-on styrene sheet panels to give them the right "edge"). I just wish the Enterprise E was as good...especially since the Trek kits are one of ERTL's gold mines. This is from Jay Chladek: "It may be smaller then what we are used to, but it will still make an adequitely sized model for display. The model lacks the heavy raised panel details of the D model, instead it has a smoother, glossy appearance. The ship does contain loads of detail though. Decals provided contain full markings for the Enterprise E. Included on the sheet are transporter emmitter pads, phaser emmiter warning stripes, and lifeboat hatches. I think AMT took a page from Monogram's limited edition Voyager decal sheet because of the details this sheet has. It may not match the sheer number of decals on the Voyager sheet, but there are some good markings here that can be adapted to other model projects." |
![]()
Star Trek names, characters and all related indicia are the property of Paramount Pictures.
Last updated 6 December 2000. This page copyright 1997-2000, Starship Modeler; review copyright © TrekFX 1997.
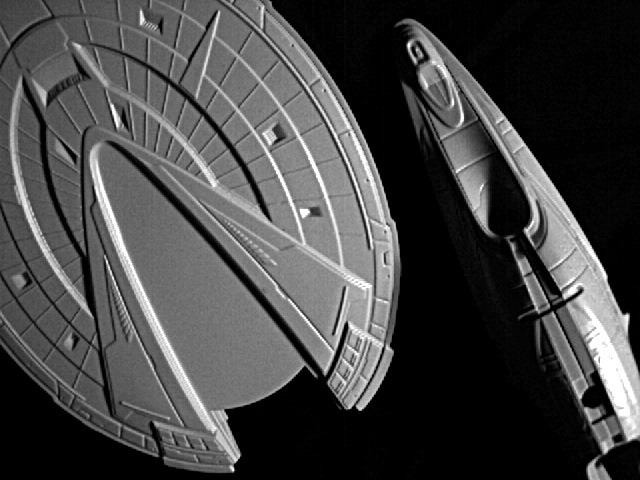
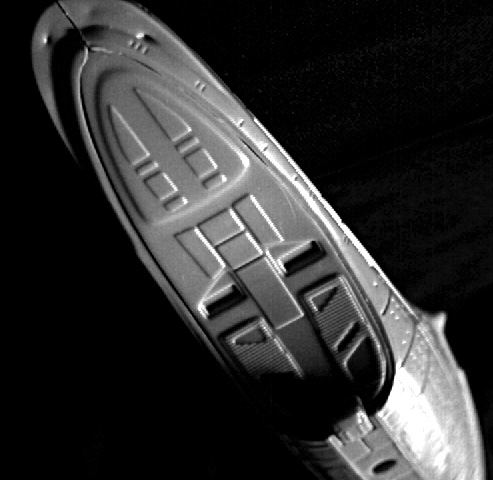
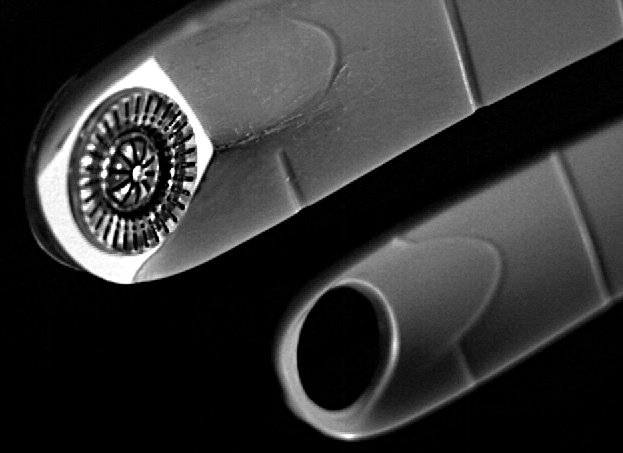
![[View of deflector tunnel]](e_def.gif)