
By Jacques Duquette - images & text © 2002
Locutus, from the Latin loqui ("to speak"), was the Borg mouthpiece derived from the captured Captain Picard. This character was in the two most poular episodes in Trek history, which were the first Trek cliffhanger and spurred some of the biggest speculative debate in between seasons as to how the gallant crew would recover their beloved Captain and what beheld the fate of the Federation. The kit is vinyl, manufactured by Geometric. It is of the highest quality and the sculpting is dead on. However, as many who have seent he episodes know, picard had an attachment "grafted" onto his right arm, but the kit only has a "borgified" hand, which is incorrect. I suspect that either the sculptor did not have access to the pics of the arm, or that Geometric took the easy route in casting up the kit. However, it is only a minor problem and the purist could easily scratchbuild a accurate arm to attach with minimal work. |
![[Front view]](jd_locu-1.JPG) |
|
Construction The kit is pretty standard with six major pieces, one of which has another smaller piece on the end of a overpour, and 48" of vinyl tubing. There is also a piece folded paper with a set of instructions and diagrams. The directions are very good and sufficient for a kit of this low-level of complexity. I did not heat the parts before I trimmed them as I found that it softens the vinyl too much for me to maintain control of my knife. I prefer to shave the vinyl off slowly to retain the ability to have too much left rather than too little. I did frequent test fitting as I went along. The parts have very good marks for what should be cut off, which is a help. I still managed to take a little too much off of one leg, but it was easily fixed with a small spot of superglue. If you are going to light up the "grocery scanner" on the side of his
head, I suggest you plan your attack BEFORE you put him together. I did
not and payed the price for it later (to be honest, I did not intend to
light him up to begin with.) I drilled a hole completely through the
scanner part on his head and also on into the device in the middle of
his back so the fiber-optics would come out inside his torso. I also
cut off most of the bottom of his right foot to see what I was doing
inside, as I was already dealing with a built kit. Remember to make a
exit hole in the proper part of the lower torso to run the cable
through. My light source is located in the box under the figure. It is a 12v |
|
|
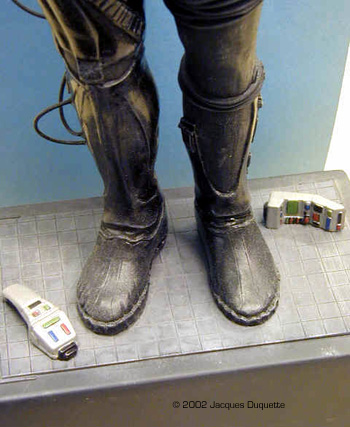
Image: Closer look at his face Image: Closer look at his feet and the base |
Painting Now came the fun part, painting. As a note, I only use acrylics because of my wife's allergies. I started off by airbrushing his body suit/armor flat black using the really good Polly S stuff that is now long gone. Once this had dried for about 1/2 hour, I painted the base flesh coat with Ral Partha Caucasian. I also left this to dry for about 1/2 hour. Then I took Ral Partha Sunburn and did the skin shadows. Here is where it gets different. I had to give Locutus a sort of "walking dead" look, as the character on TV had the pigment in his skin removed. The best I came up with is to go over the skin shadows with a thin pale blue mix. Sorry, I do not have a exact mix to give...it was all by eye. It was a sort of pale blue. By having it thin, I was able to add the blueish tinge of a dead body without it being too much. The caucasian color is also VERY light, so it looked ok. Next I painted the eyes, making sure I added the slight line of pink to the lower part of the eye. This really enhances the look of the eye. Finally, I broke out the chalk and did the heavy shadows. In retrospect, I think that I would not do the shadows as heavy now, as they are too dramatic. Now that the flesh was done, I touched up the edges of the suit and then dry-brushed with varying shades of grey to help bring out the detail. I next glued on all the hoses. These are not at the specified lengths as in the instructions as I thought they should be shorter for a more accurate look. Finally, I glossed the "plastic" armor pieces and used clear flat on the cloth pieces. I prepared to make a base. Finishing Touches Origianally, I set out to do a borg alcove, but with my annual model competition coming up fast, I did not have time to dawdle. I took the bottom half of a plastic box, added some evergreen tiled sheet styrene, and put Locutus on it with superglue. But things still looked a bit sparse. I was messing around with my wife's small collection of Star Trek figures for a sculpt and found that several of the included accessories were WAY too big for the figures, but were about right for Locutus. I painted them up and added them to the base, as though Locutus has startled an away-team and they have beat a hasty retreat. |
|
All in all, it was a quick build and a lot of fun - and it recieved a certificate of merit in the painters division at the 1998 MMSI Chicago Show. Now I just need to dig in a build the rest of Geometric's Star Trek crew! |
|
![]()
This page copyright © 2002 Starship Modeler™. Last updated on 3 October 2002.
![[Left side]](jd_llocu-4.JPG)