
|
More reference images are online at Dan Grumeretz's Star Wars Reference Page. The sections below are divided up by ship type and grouped by alliance. |
Rebel Ships | Imperial Ships | Other Ships | Miscellaneous Items
|
IMPERIAL STAR DESTROYERS | ||

IMAGES: |
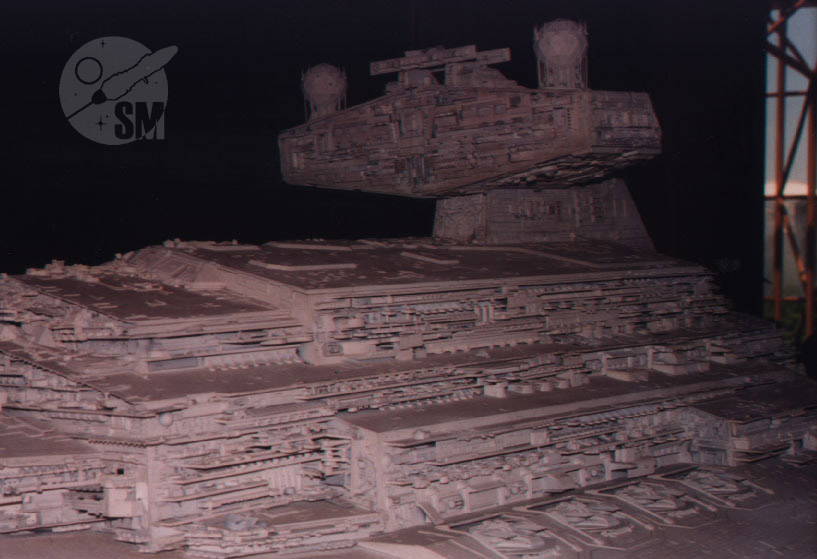
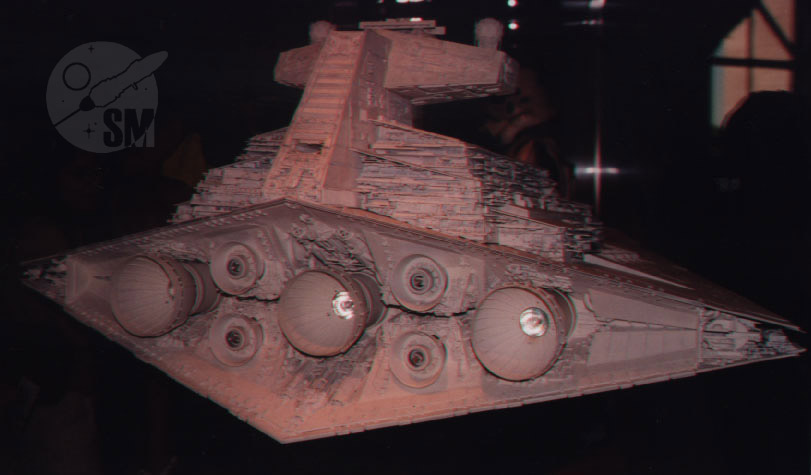
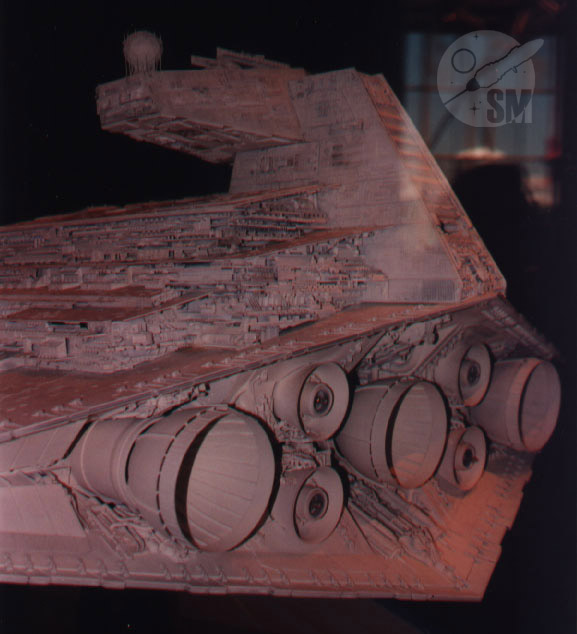
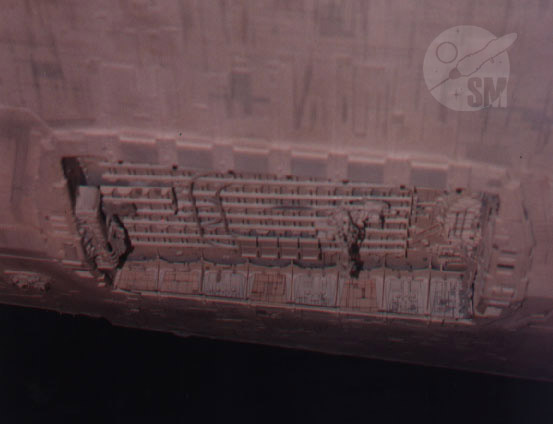
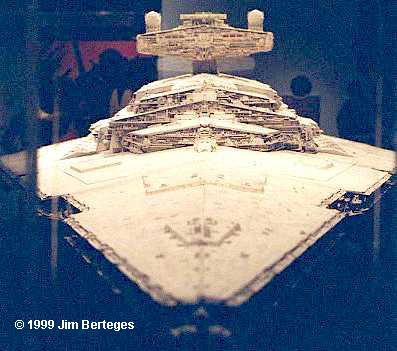
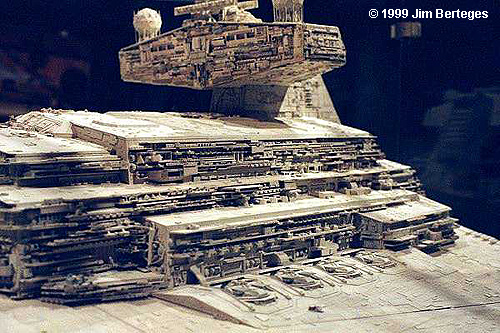
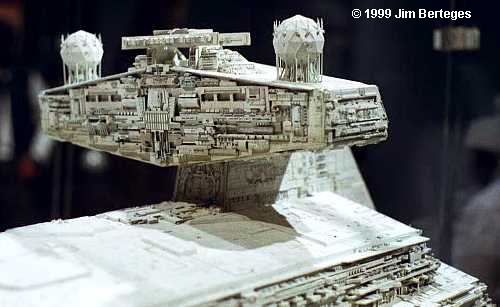
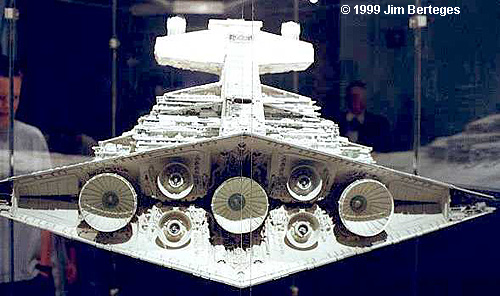
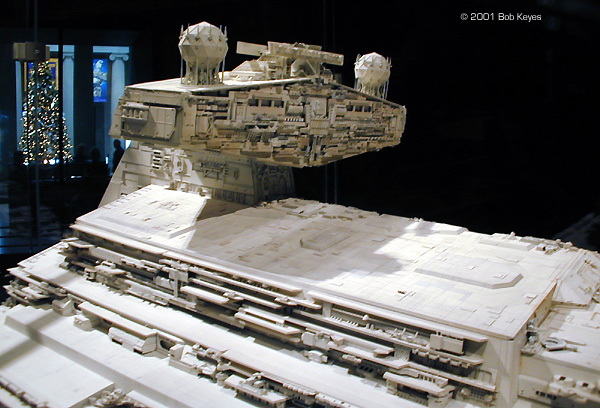
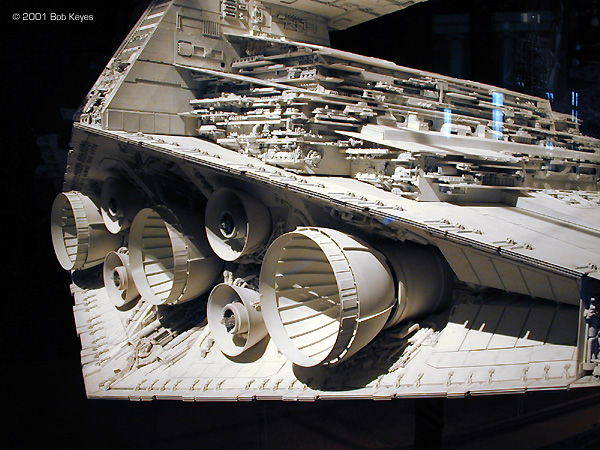
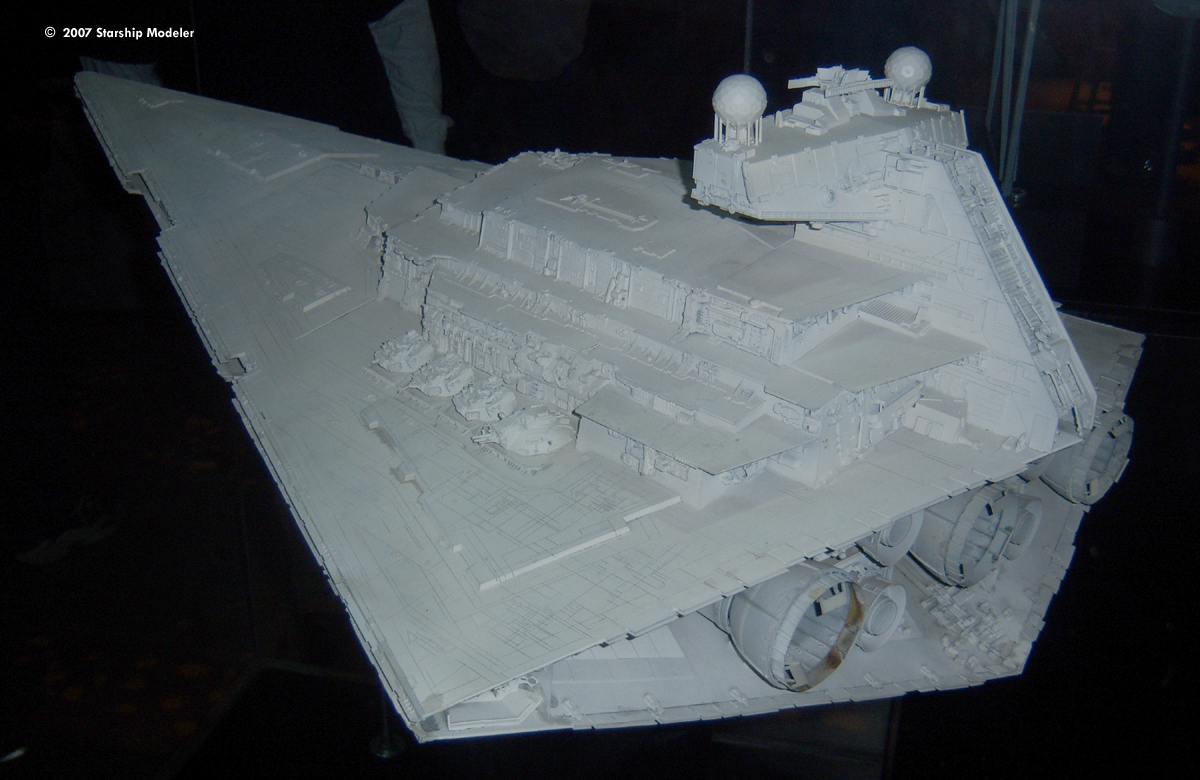
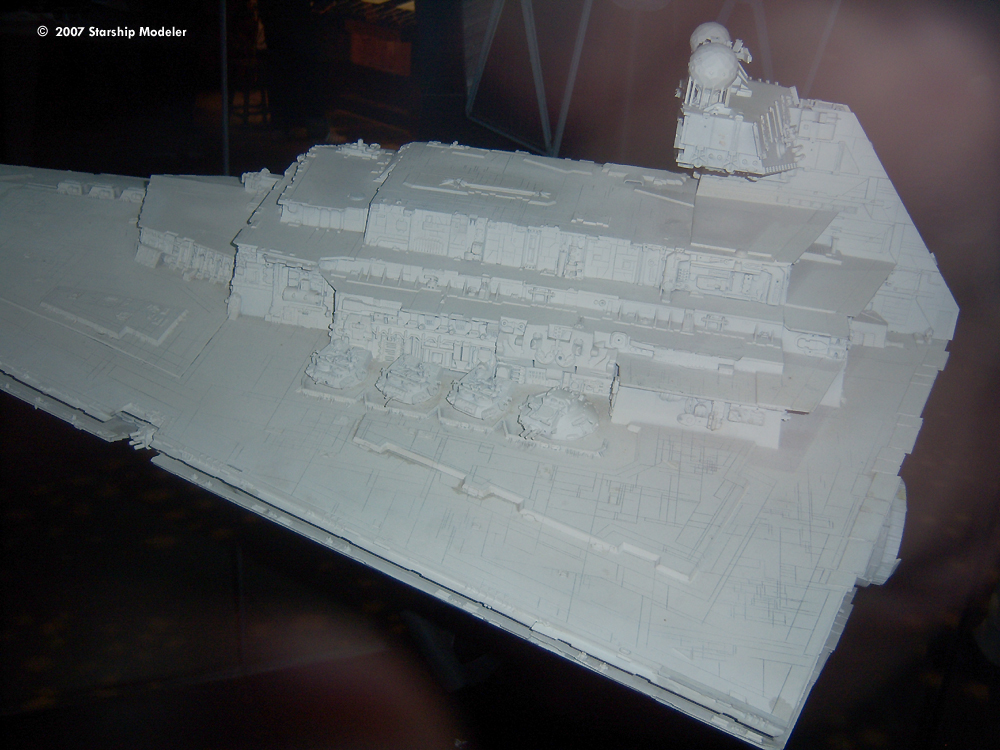
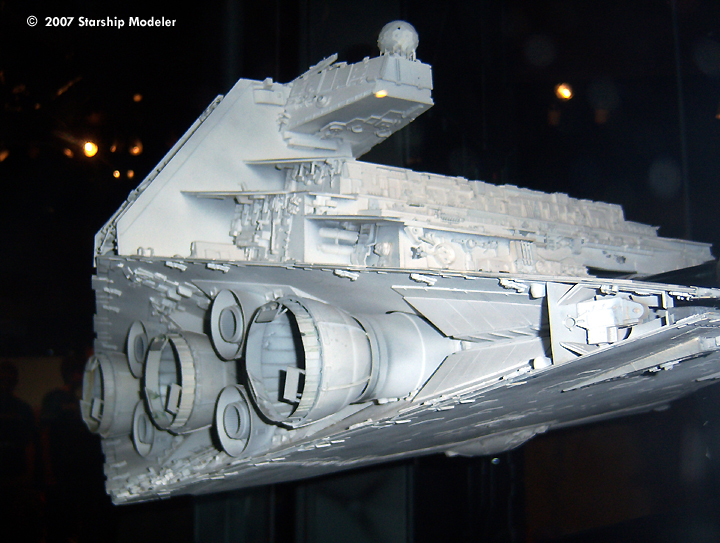
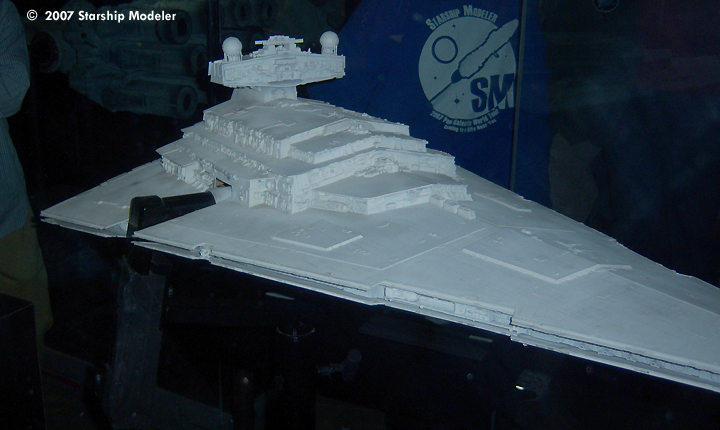
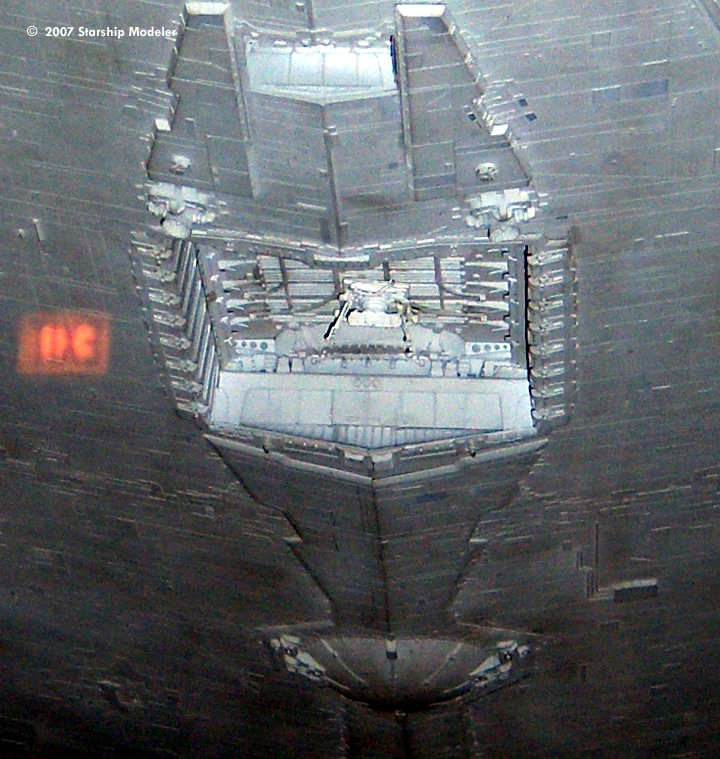
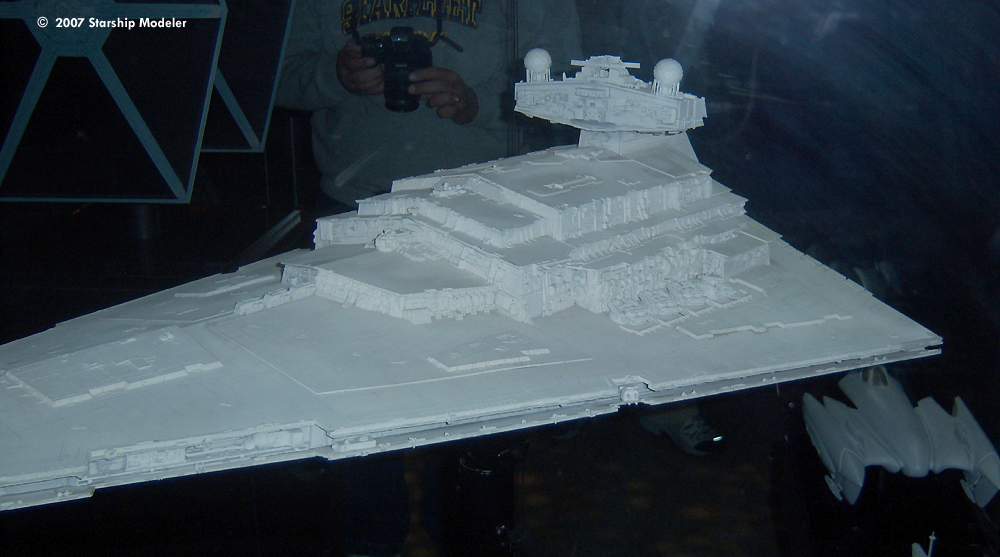
For those of us who were there in '77 when Star Wars opened, the image of the seemingly infinite Star Destroyer flying overhead has a special place. It was our first taste of the grandeur that was to come. The Star Destroyer's design evokes the hard-edged feel of most other Imperial technology, in contrast to the more organic shapes used by the Rebels. It's a simple but attractive design. The exhibit's Star Destroyer model did not diminish the sense of grandure. The beast was about 8-10' long and coated with intricate details. One could easily spend half an hour just staring at this thing, trying to identify kit parts. This particular model was built for 'Empire'; the original filming model was about three feet long and had slightly different proportions. Bob Keyes' photographs are of Star Detroyer "Avenger" from EST and were photographed at the Toledo Museum of Art in December, 2001 | |
|
IMPERIAL TIE FIGHTERS | ||

IMAGES: |
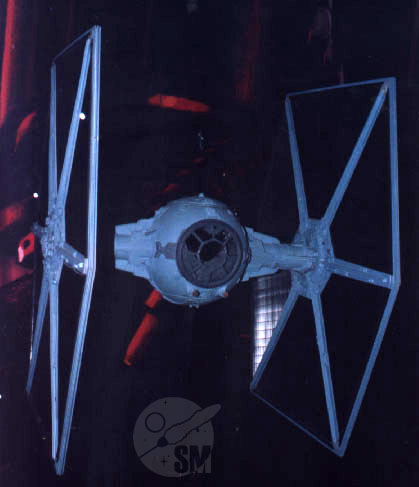
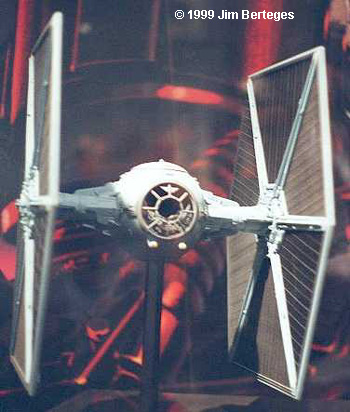
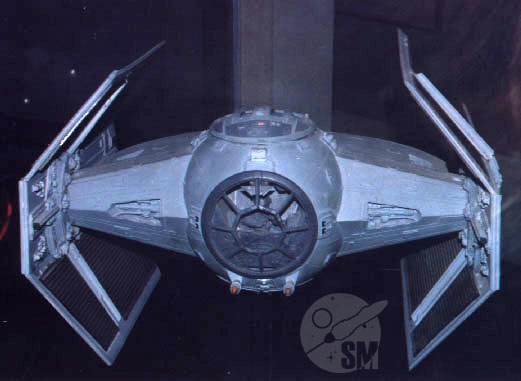
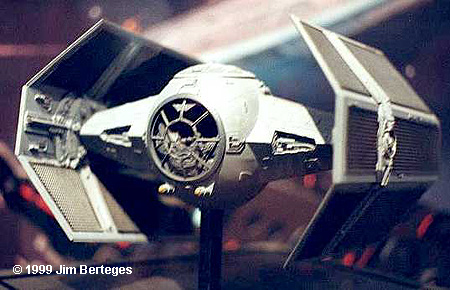
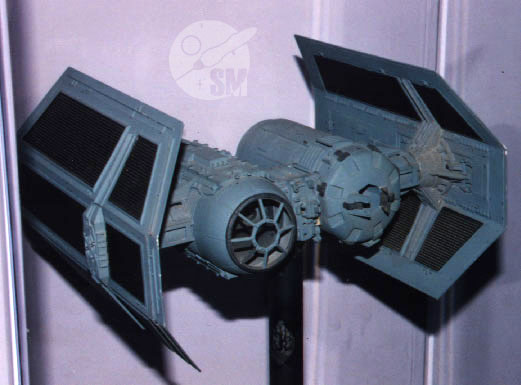
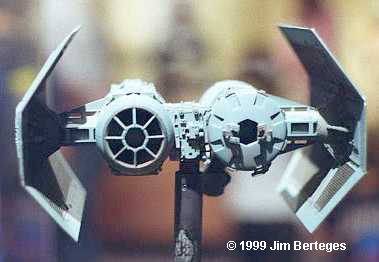
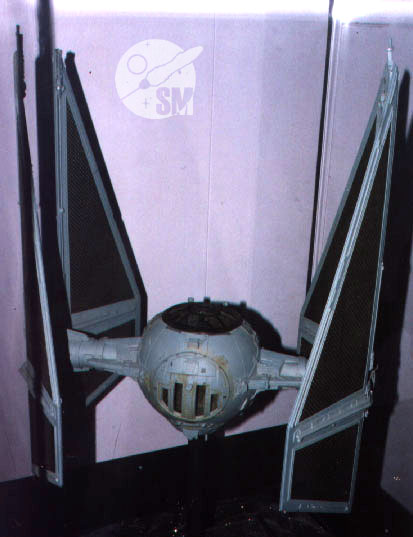
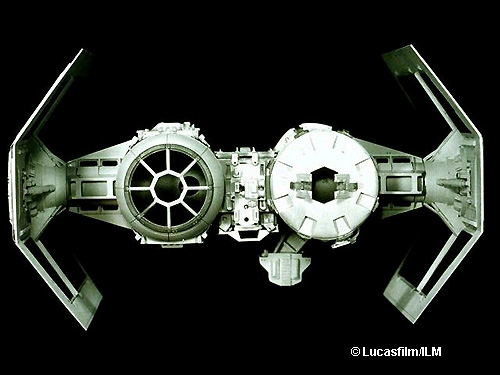
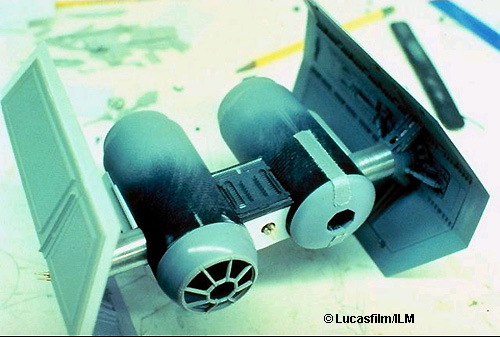
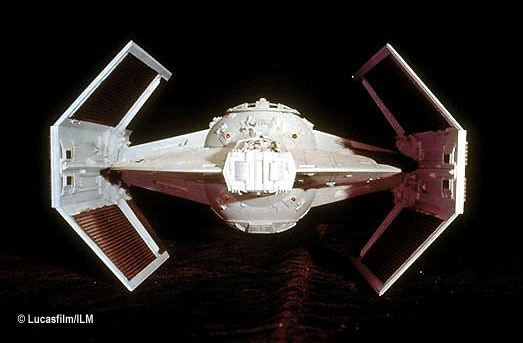
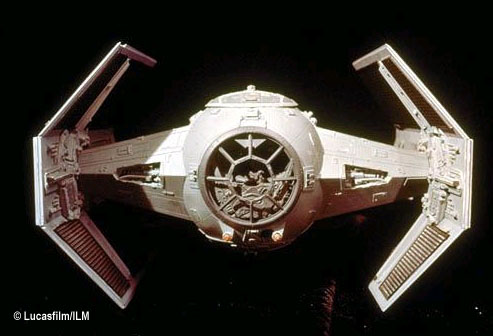
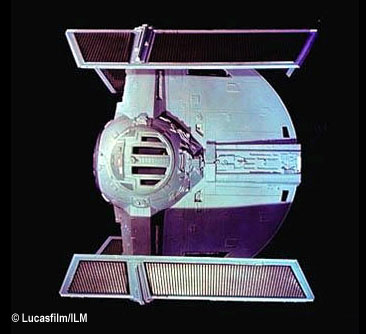
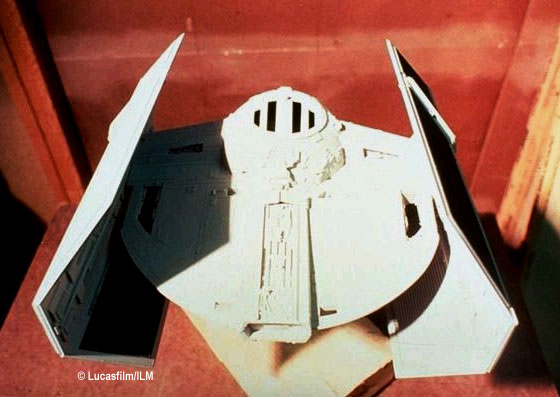
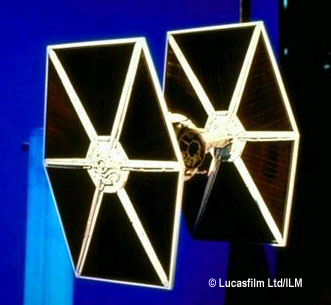
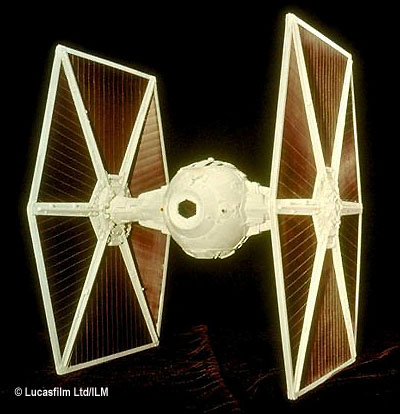
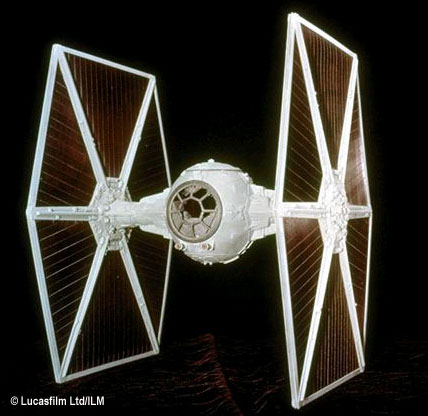
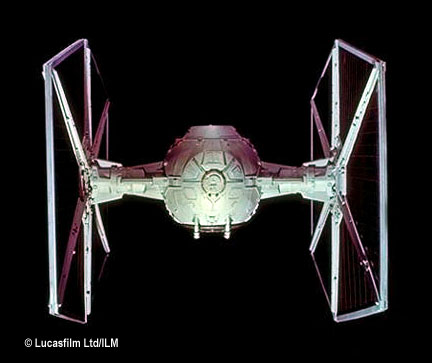
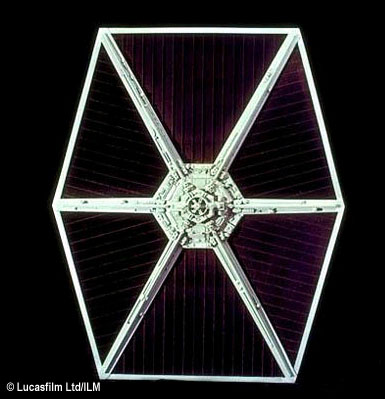
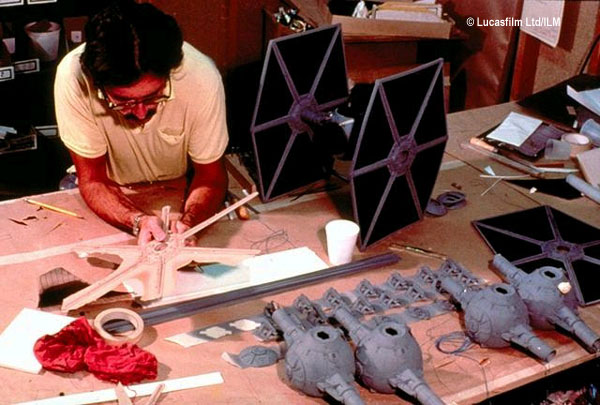
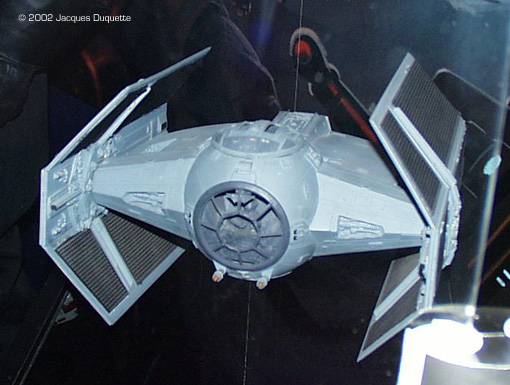
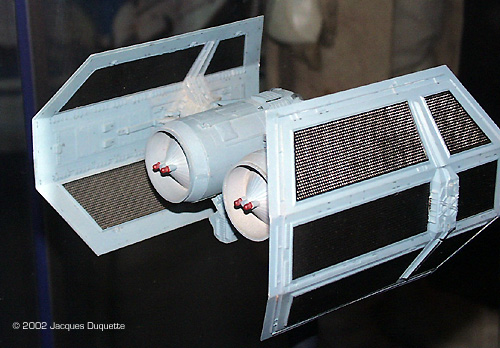
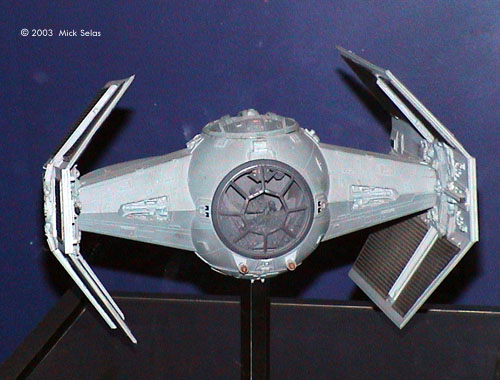
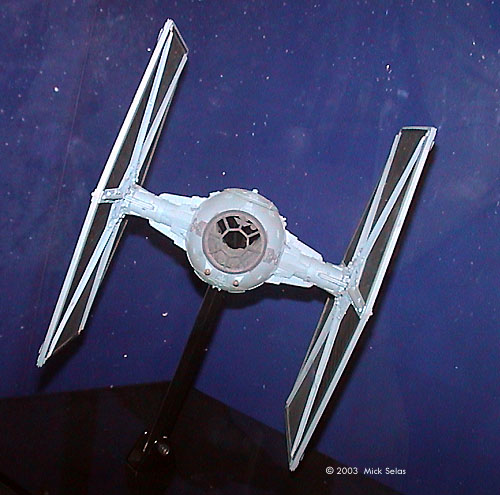
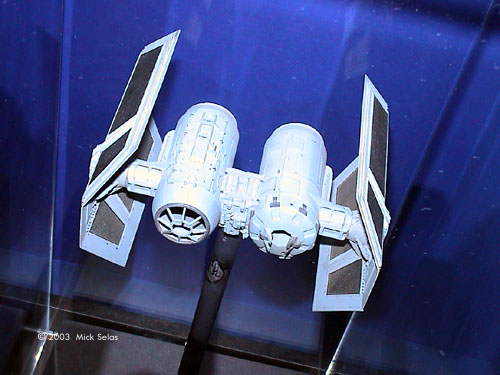
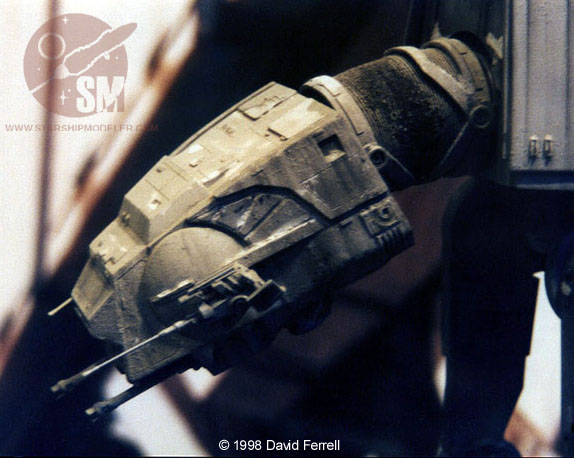
The steed of the Imperial bad guys were the TIE fighters. Like the B-Wing and others, its curious shape violated sensibilities of previous big screen space craft. While the TIE fighter family included four different types of craft, they were all united by their overall configuration: a central body/cockpit with two big "solar panel wings" extending out to the sides. Aside from being truly innovative, this shape helped clearly distinguish the good guys from the bad in the movie series' big dogfight scenes. The backbone of the Imperial star fighter force was undoubtable the standard TIE fighter. Introduced in A New Hope, it made appearances throughout the series. It also set down the guidelines for the design of the rest of the TIE family. The first TIE variant we see on the screen is Darth Vader's personal star fighter. The cinematic requirement for a different TIE design is obvious. Lucas clearly wanted a different fighter for Vader so we could tell him apart on the screen during combat. This variant is generally referred to as the Advanced X-1 design, since the Dark Lord of Sith wouldn't settle for second rate (what Dark Lord would, I ask you?). This ship is damaged at the end of A New Hope and does not appear again in the series. The next variant to appear was the TIE Bomber, seen in The Empire Strikes Back. This is the ship used to try and coax the Millennium Falcon out of its asteroidal hiding place. It makes a few other appearances in the series, in hanger bays and such. This design has also been referred to, at times, as a Boarding TIE. The last TIE variant to appear was the TIE Interceptor of Return of the Jedi. This ship was the sleekest of the family. The basic body was similar to the Standard TIE, but its wings were forward swept and pointed. The cross section of those wings was somewhat similar to Vader's personal TIE, implying a design lineage. Image 21: TIE/Advanced model unpainted, from the top/rear.Image 22: TIE/Advanced model, under construction. Image 23: Standard TIE model against a blue screen. Image 24: Standard TIE, seen from the rear. Note the hexagonal window, with engines flanking. Image 25: Front oblique view of same model. Image 26: Standard TIE, as seen from beneath.... Image 27: ... and from the top. Image 28: Solar panel. Image 29: TIE fighter assembly line. Image 30: Front view, Vader's TIE Image 31: Front/oblique view, TIE/Bomber Image 32: Rear/oblique view, TIE/Bomber Image 33: Vader's TIE/Advanced, front/right view Image 34: Standard TIE, front view Image 35: Top.front view, TIE/Bomber | |
|
LAMBDA CLASS SHUTTLE | ||

IMAGES: |
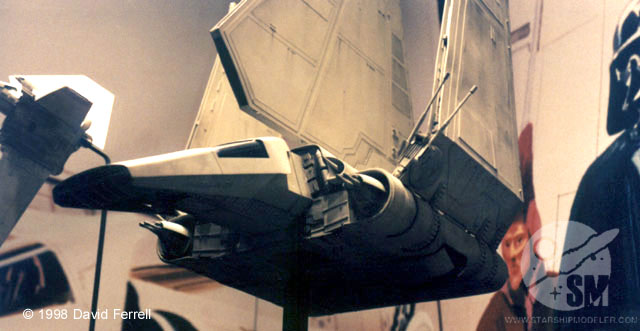
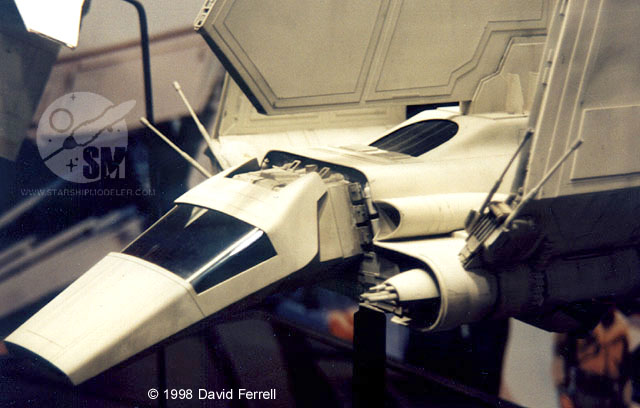
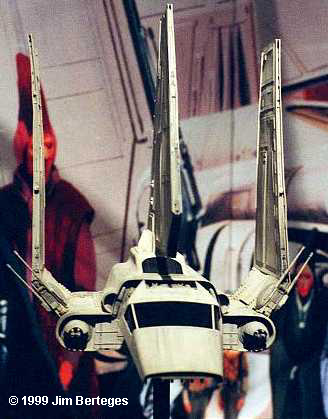
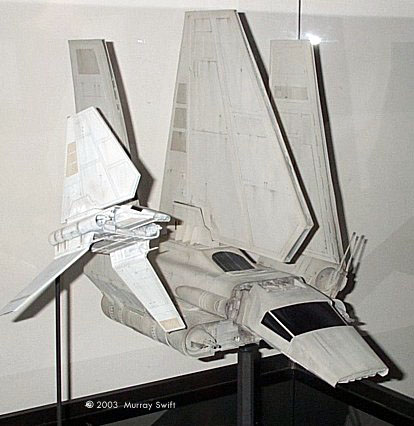
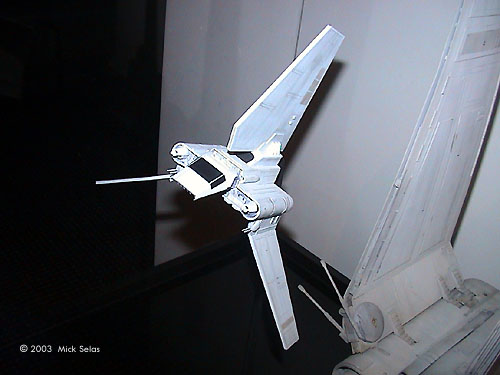
Seen in Return of the Jedi as a stolen Rebel Tyderium and a courier for the Emperor , the Lambda class shuttle is one of the main small Imperial transport crafts. The lines of this model are very smooth and a little out of place with the greeblie-rich textures of the other Imperial craft. The model, as seen at the Smithsonian, was about 16" long. | |
|
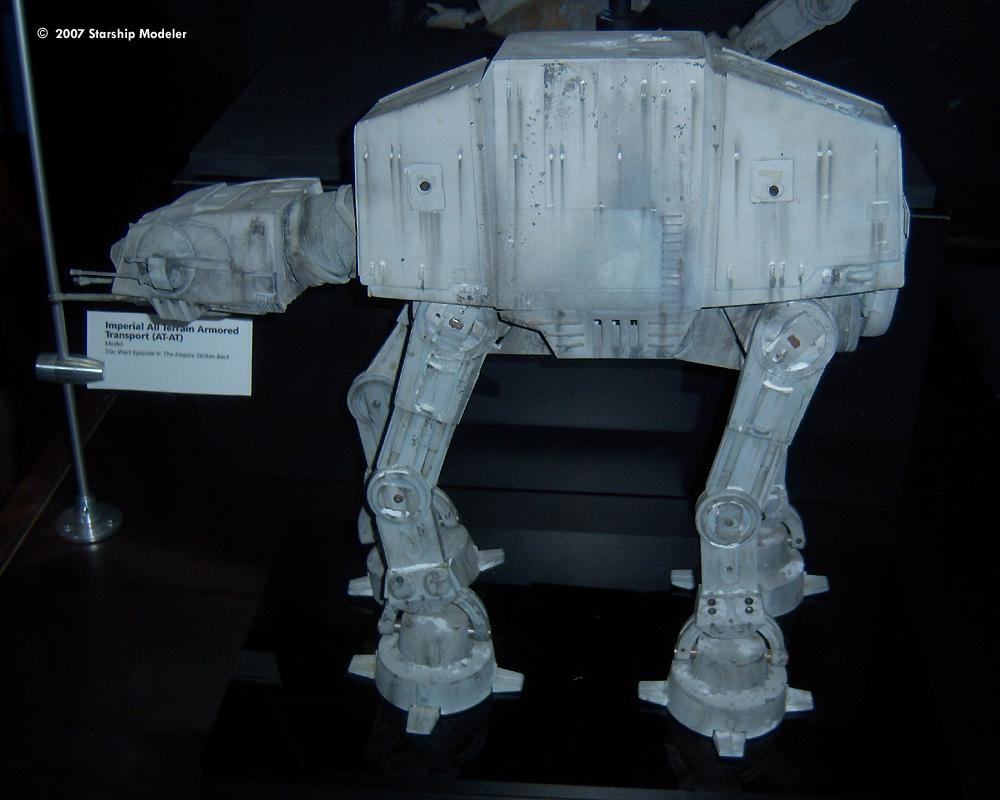
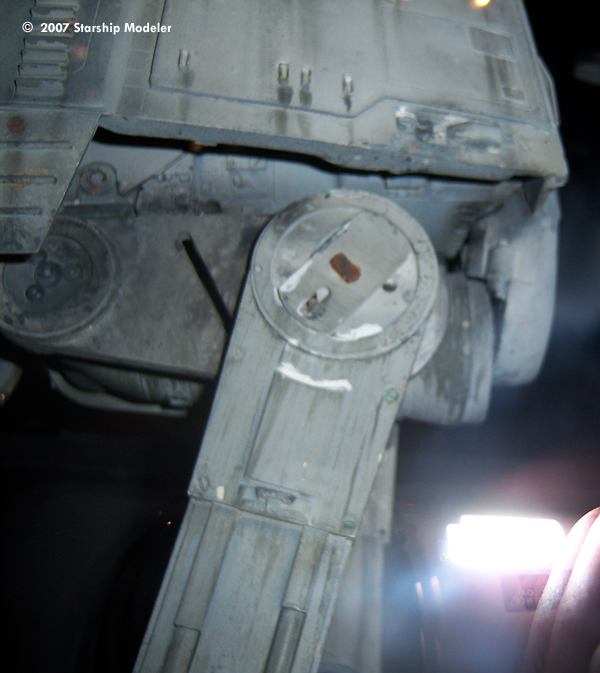
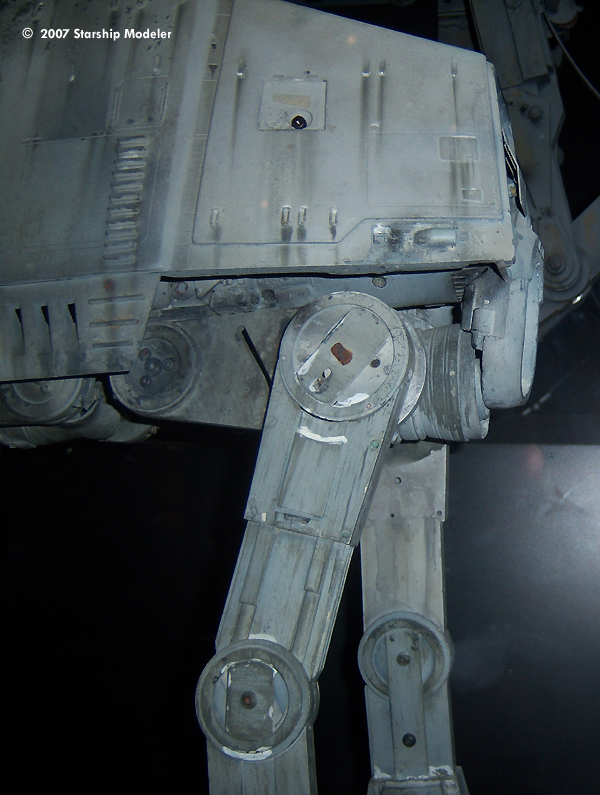
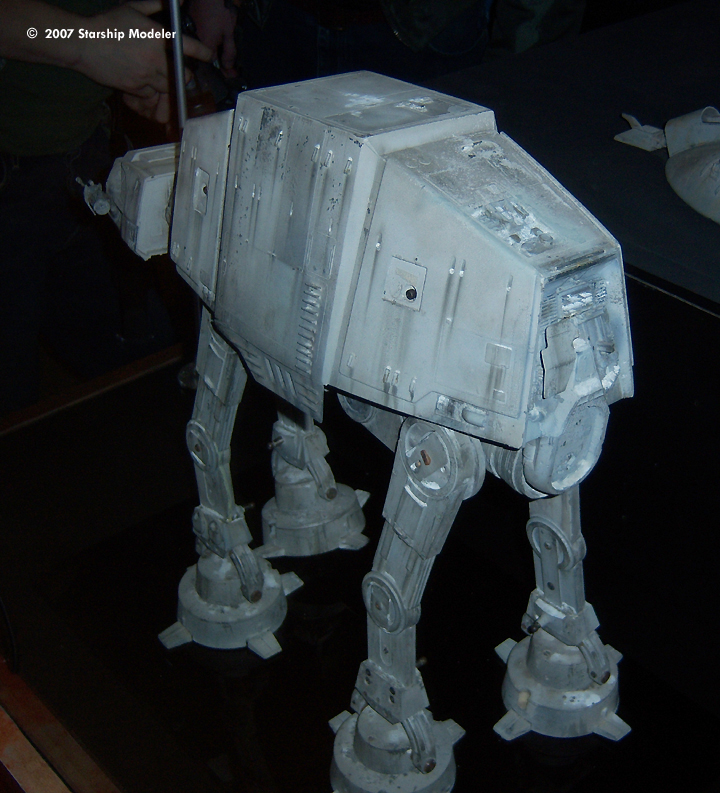
AT-AT | ||

IMAGES: |
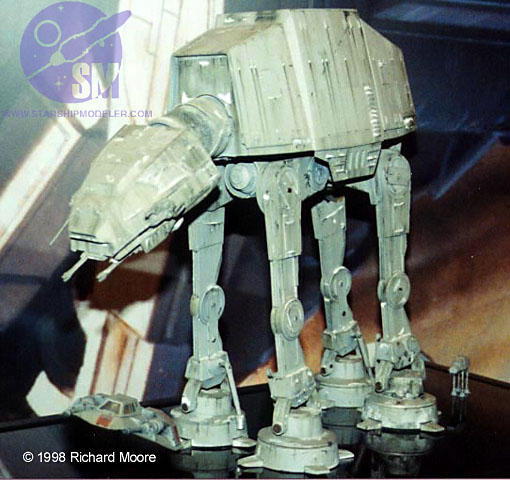
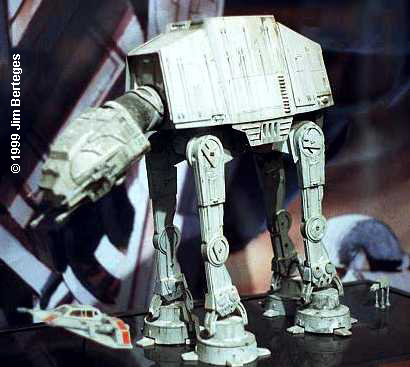
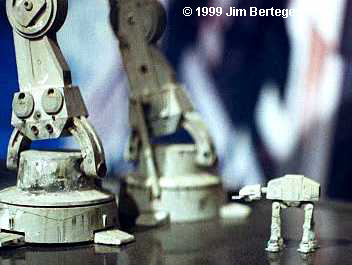
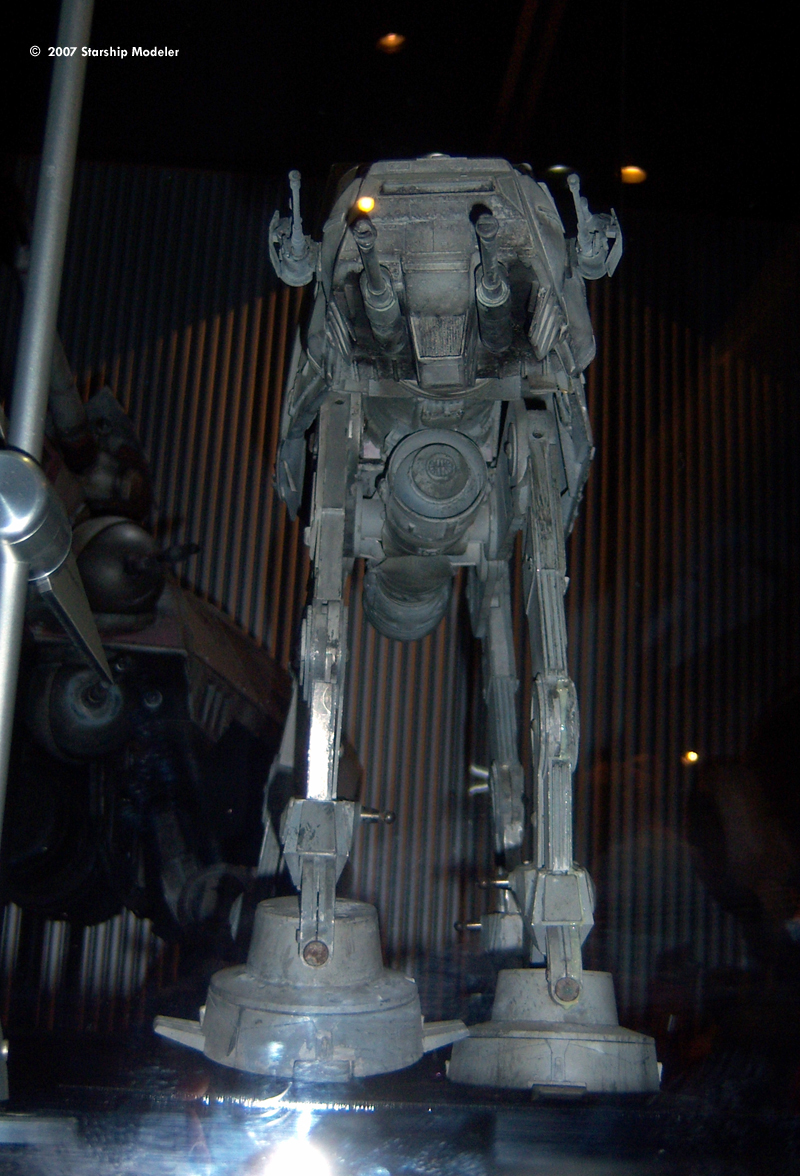
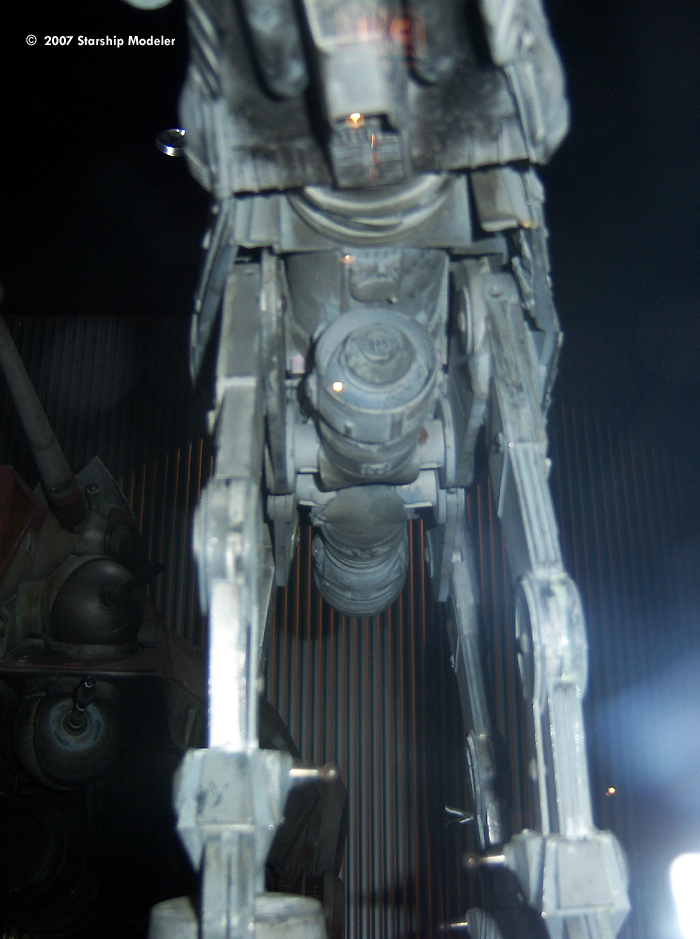
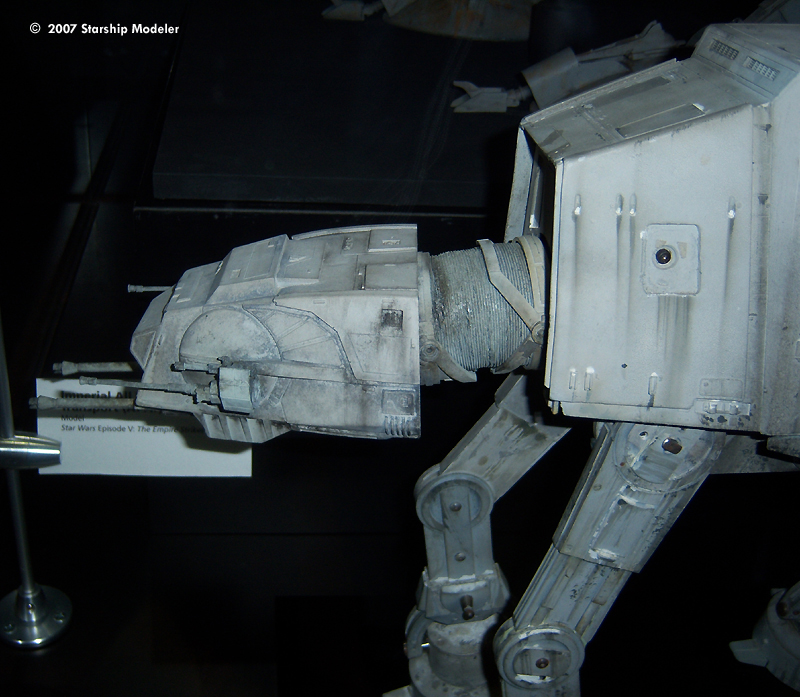
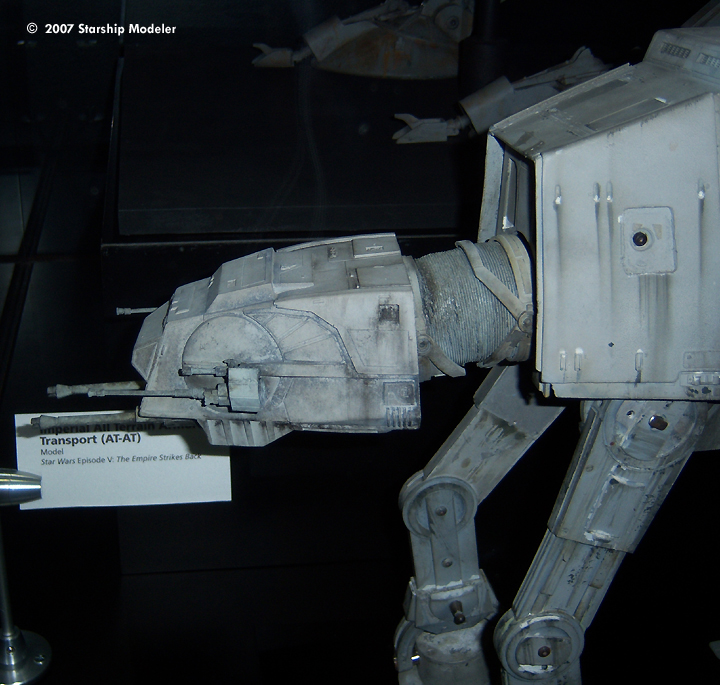
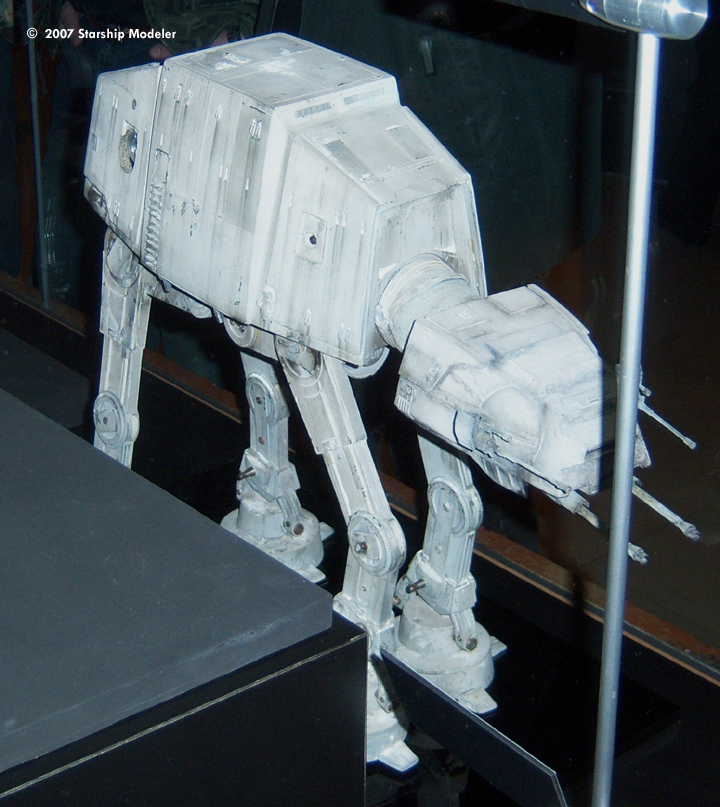
One of the Imperial military's main tools for ground assault is the AT-AT (All Terrain Armored Transport). This four-legged APC is protected by a tremendous layer of armor, making it invulnerable to most forms of man-portable weapons. It's because of this thick layer of armor that the vehicle must rely on legs for transport, as a repulsorlift system to float that kind of weight would add far too much mass.s. In its "head" structure, AT-AT's carry a three-man crew: a commander and two pilots. The head also mounts the vehicle's four blaster cannons. The main body can carry up to forty stormtroopers and a vehicle garage at the rear houses a set of speeder bikes for rapid deployment and recon. AT-AT's were instrumental in the Imperial victory over the Rebels at Hoth. Their heavy armor held off the Rebel defenses long enough for the vehicles to get within blaster cannon range of the Rebel Base's shield generators. | |
|
IMPERIAL PROBE DROID & OTHER SPECIALIZED DROIDS | ||

IMAGES: |
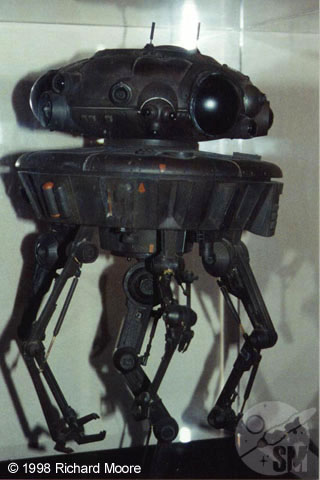
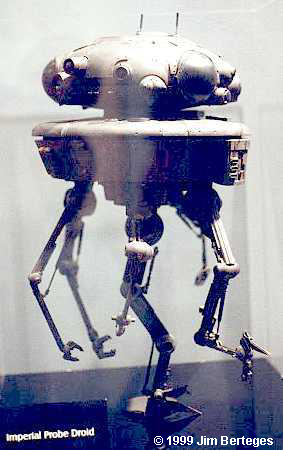
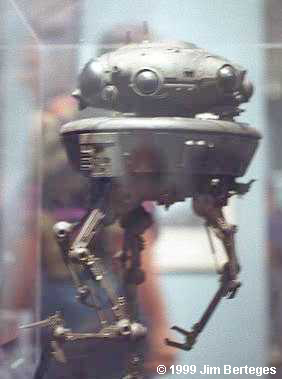
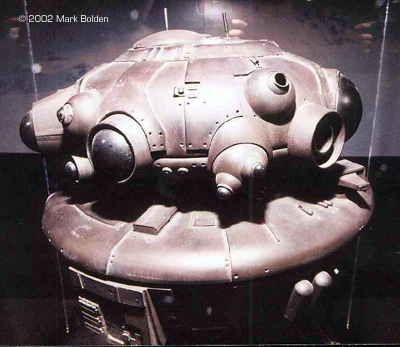
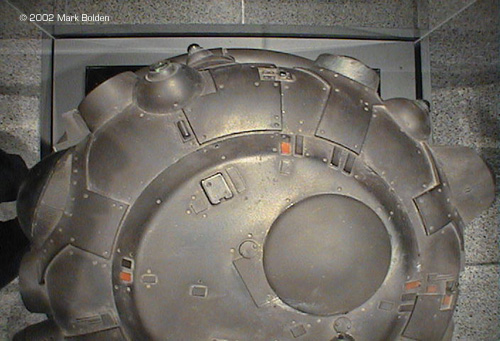
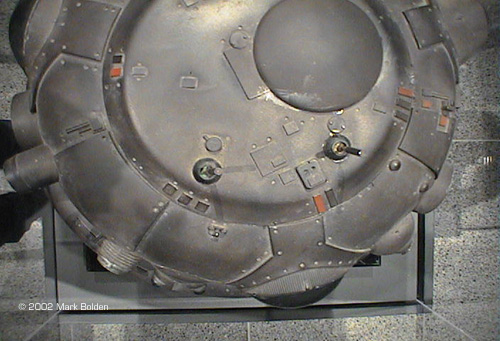
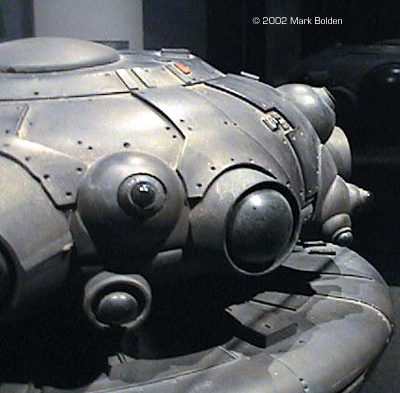
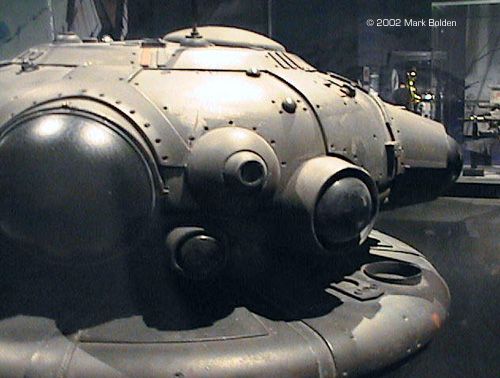
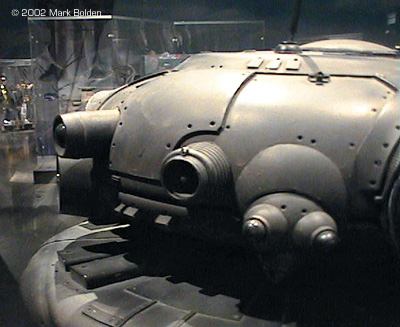
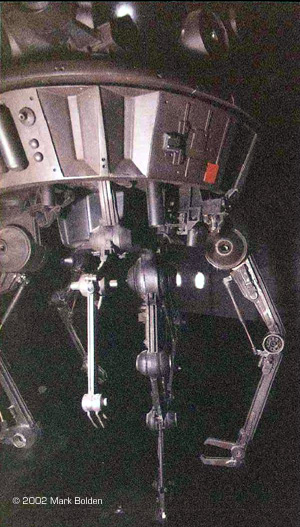
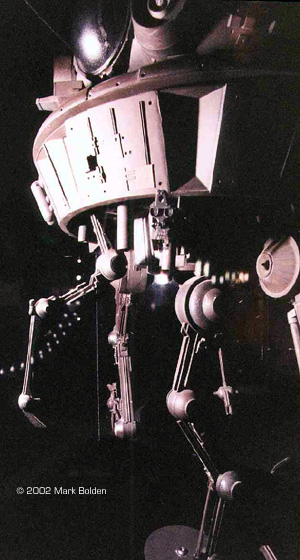
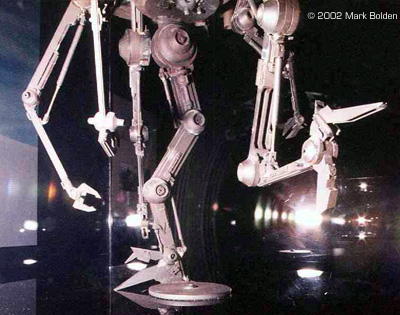
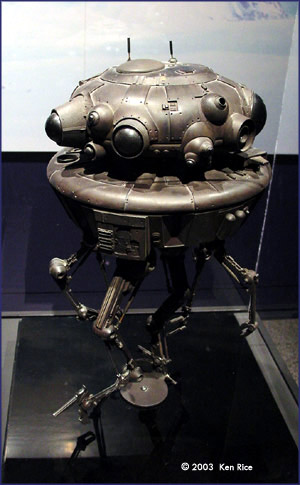
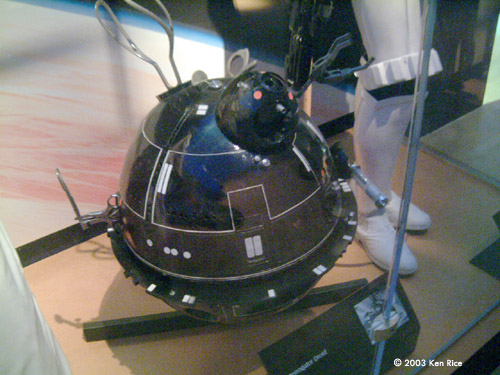
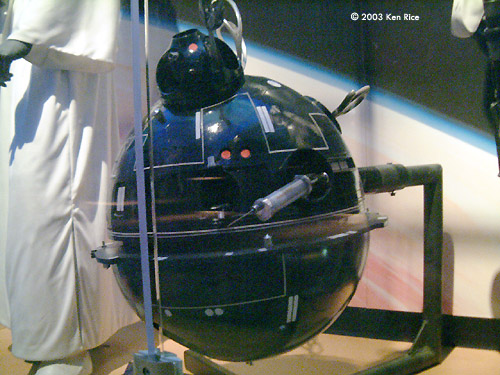
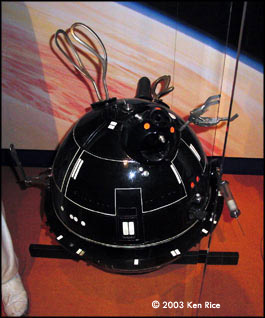
The Imperial Probe Droids are used for long range military reconnaissance. The basic unit is a cluster or sensors and comm gear mounted on a mobile repulsorlift platform. Once a target is located, the Probe Droid can notify its masters via a powerful comm signal. The droid also carries an antipersonnel blaster for defense... Probe Droids are usually delivered to their targets in a powered aeroshell. Once the package gets to a planet, it will drop through the atmosphere without braking. As a result, the approaching droid is perceived as nothing more than a meteorite. The Droid's systems are extremely rugged, being about to withstand the direct impact with the surface, then rise out of its shell to carry out its mission. Mark Bolden's images were taken in Houston with a Hitachi MPEG-1A camera and a regular 35mm with flash. Imperial Interrogation Droid | |
|
IMPERIAL SPEEDER BIKE | ||

IMAGES: |
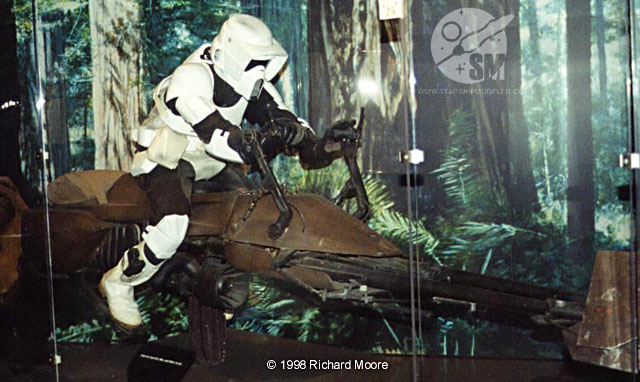
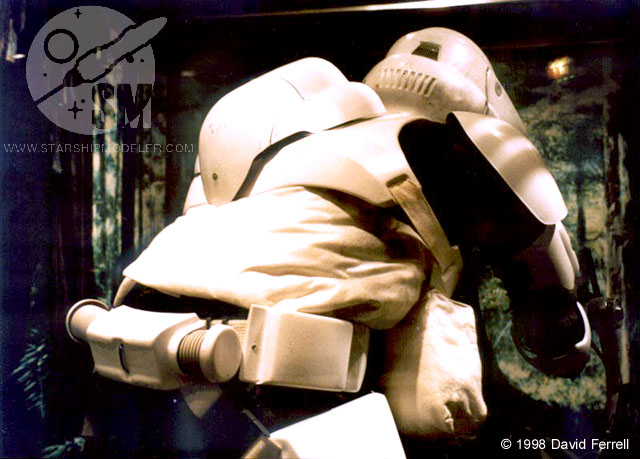
Designed for Imperial scouting missions, these repulsorlift vehicles are often used in conjunction with AT-ATs. This gives the ground formation both strength and high speed recon ability. This wasn't a scale model, but the full sized prop, complete with costumed rider. The lighting in this area of the exhibit was a little poor, so it was hard to get nice shots of this impressive display (David and Richard did a great job, all things considered). | |
|
Star Wars names, characters, images, and all related indicia are © and trademarks of Lucasfilm Limited. This page is not an authorized publication of Lucasfilms Limited and does not intend to infringe on any of their copyrights, trademarks, or publication rights. This page is best viewed by a system carrying the 'Haettenschweiler' font. Please direct comments, questions, corrections, and picked nits to the Starship Modeler staff. Last updated 17 October 2007. This page copyright 1998-2007, Starship Modeler. |