
By Cosi - images & text © 2005
|
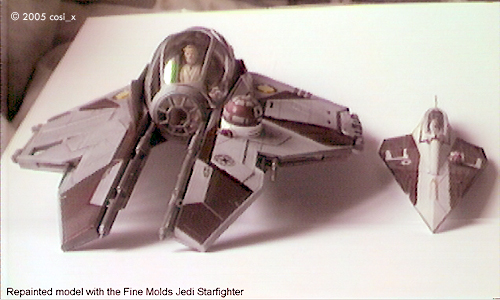
![[Please click to enlarge]](rog_jedi_FinalComposite.jpg) I took time out of the rat race one weekend to chill a little. |
|
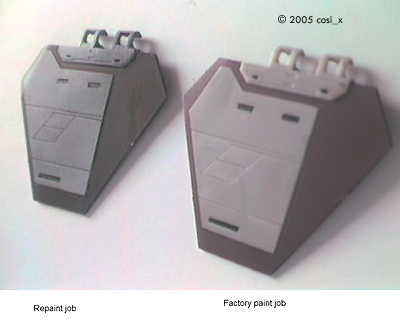
Image: Inner wing panels, repainted Image: This model is far bigger than the Fine Molds' Image: Anakin's and Obi-Wan's fighters are identical, except for paint and pilot. Here's what you get |
In my little sojourn I sadly have not yet come accross Polar's Refit, but instead, I came across a couple of the new Revell kits for EIII. This is the lowdown on Obi Wan's Jedi Starfighter. The Good Stuff:
|
|
The not-so-good:
So, who cares, Revell have done their bit, providing us with a good model, so for my bit, I decided to do my own paint job on it. There is no reference material or paint guide ofcourse with the model. But I took it apart and painted it. I masked off all the insignias and cockpit glass and used my own mix for the white and red panels. I opted for gunmetal for the guns. The solar panels on the box art show a gold mix with metal. It is kind of impossible to discern what the holding area for the wing bits should be color-wise. The Revell paint job is grey, but I went for gunmetal once more. As to those solar panels I decided to make my own. I laid a base coat of gold and then made a quick mesh and used this to paint a darker color ontop of it and this recreates a grid pattern effect. That’s pretty much all, and if you choose to put the effort in, it does make a lot of difference to the finished result. Conclusion For Revell's part I can say it's a success. This is a great model. It’s simple and may just garner interest to a new generation of younger hobbyists who have been as bereft as we have of commercial sci fi kits for the last few years. It’s also tough and of a good scale. Ignore the factory paint job and imagine it as a basic plastic kit job and you'll be away. Parting Thoughts On the Star Wars front, I am vastly disappointed at the design selections of the current Trilogy chosen by their director. I can’t say I feel any excitement at all at any of the ships chosen for screen time in any of the new films. This is the universe that brought us X-Wings and Y-Wings and the Falcon. They were not only cool and believable, they were the reason I got into modeling. This new Jedi Starfighter would probably have amounted to a background ship in the old trilogy and never have garnered center stage. It’s ugly, resembles a bat, and the star and tie fighter mutation is just boring and unimaginative. The evolution hint is hardly subtle. The ships offer nothing to get your teeth into, seem soul less and gutless. It’s interesting to imagine the prospect of what could have been and how this may have impacted the commercial status of the hobby to propel a modeling boom as happened in the late 70’s. But one hopes that if these kits prove successful it may spur the manufacturers to try out more ideas and take more chances and offer other projects to us all. |
|
By Linda Lester - images & text © 2005
Let me start off by saying that I have never built a model in my life. Shocking, yes, I know, but there you have it. My husband, John (OneZero), runs this Starship Modeler web site, and I've just always watched him work on a model from across the kitchen table. Well, technically he's standing over the sink sanding something while I'm sitting at the kitchen table, but that still counts. So when these new Revell Germany Star Wars "easy kits" came out, I thought it was about time that I built my first model. |
![[Please click to enlarge]](rog_jedi_011F.jpg) |
|
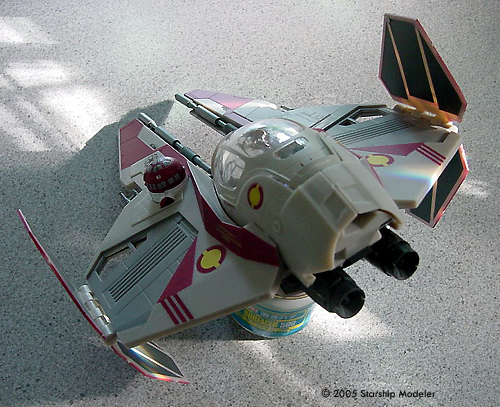
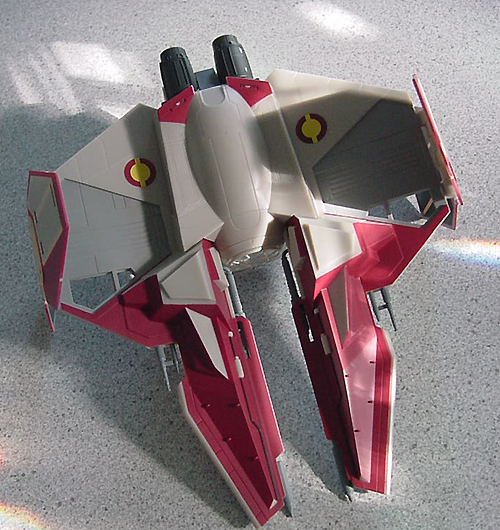
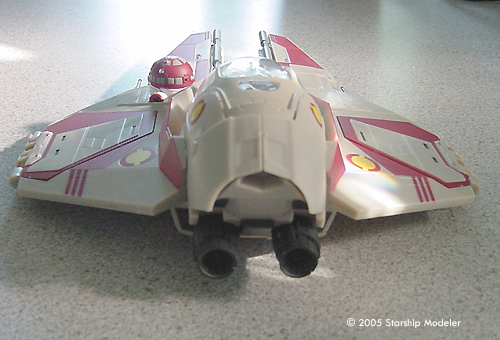
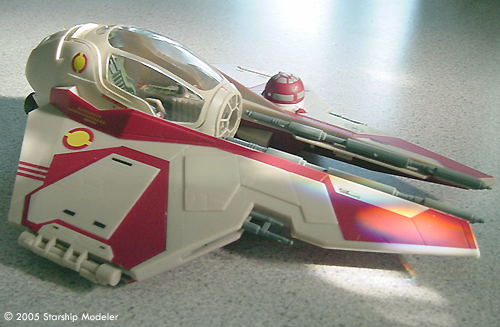
Image: Left/rear view. The fit is pretty good, but as you can see, there are seams that serious modelers will feel they just have to fill Image: Left side, panels closed. My astromech droid could use some TLC. Image: Underneath. The painting is very good, and for the most part the places where the parts attach to the runners are away from painted areas. Image: Obi-Wan kinda looks like a zombie though..... Image: Rear view. The engine nozzles are well detailed Image: Right/front. The notch in front of the canopy is where my sprue nippers slipped. |
I chose (well, actually John chose for me) Obi-Wan’s Jedi Starfighter. Let’s just say that this one went much better than the Batman fiasco of 1997… don’t ask. I actually completed this Starfighter in one night. So while our two-year old sat next to me making Play-Dough snakes, I opened the box and looked inside. I can do this. Building It Armed with only the kit and these simple instructions, “you’ll need these sprue cutters and a sanding stick,” I got to work. First step: read the instructions. Yes, that’s right. I don’t have that Y chromosome, so I read the instructions before taping the pieces together and flying them around the room. The instructions looked simple enough although I later realized that they could be more complete (more on that to come). I took my sprue cutters and got to work. I cut the first pieces off the sprue and gently sanded down the little bump left behind. That’s when I first discovered why this is a “model” and not a toy. I sanded the paint color right off of it. So if I were building this for some reason other than to put it on the Starship Modeler dealer table at Wonderfest as a sample, I would have had to touch up the paint when all finished. That brings me to the deficiency in the instruction sheet: Shouldn’t they list the paint colors somewhere so you know what to use for the touch-ups? It didn’t matter to me because this kit was simply a sample, but I could see how that would be helpful. However, I’m sure there’s already a thread in the Starship Modeler Star Wars forum with details on the paint colors. Isn’t the internet great? The pieces all fit together nicely. Snap, snap, snap. I had two problems: the little R2 unit just didn’t align right and after jamming it in, it looks crooked to me. A more skilled craftsman would have fixed it, but I just shrugged and moved on. My second problem came later when the teeniest part in the kit (#23) broke while I tried to jam it in the hole. After searching the kitchen floor for 17 minutes, I actually found it (John never finds the parts he drops, so I count myself lucky) and super glued it into place. Yes, it’s crooked, but after 3 attempts at getting it to stick, this novice just decided that Obi-Wan would have used the force to control the left throttle (is that what it is?) anyway. Other than that, the pieces all fit well. If I were writing the instruction sheet, I would have changed the order of a few things. Why is the pilot put in the cockpit half way through? Every time I turned the kit over to adjust something, he fell out. Although I suppose if I had glued him in place, that wouldn’t be an issue. I would have not put the wing-flap thingies (#6 & #7) on until the end too. They kept falling off so I added them at the end.. But I do like the fact that they are adjustable and “click” into different positions. I also would have added #27 to #17 in step 11 instead of in step 13 because pieces of the cockpit kept falling off as I tried to get the piece in place. Don’t ask me what those pieces are called, because I have no clue. They are part of the cockpit. Once again, if I had glued it all, that would be irrelevant. |
|
Conclusions All of you “true modelers” will need to fill the seams and repaint it, but all in all, a nice kit. It took me about two hours to assemble, but I was interrupted 27 times with requests for more juice, Elmo TV, and help with making Play-Dough snakes. You could probably get it assembled and ready to fly around the room while you do your best Darth Vader impersonation in about half an hour. I have no idea how long it would take to fill the seams and repaint it, but based on John’s limited time to work on models: six months on the workbench, with maybe eight hours of actual modeling time. I had been reading a few of the threads in the forum about building this kit and I wondered “why are they talking about decals and paint when it’s a pre-painted kit?” And while the paint scheme on the kit looks great, it really needs to be cleaned up and weathered. But the kit itself is a great kit to work with and you won’t be disappointed. Now that I’ve completed my Jedi training, it all becomes clear to me. And may the force be with you. (Sorry, but somebody had to say it.) Editor's Note: A word about costs - Revell Germany's license with LucasFilm does not allow them to sell these kits directly outside of Europe. International shipping being what it is, the cost of the kits can be double (or more) what folks in the EU will pay (for instance, Cosi reports he paid Ł8 (GBP) or about $14 USD/$17 CAN/$18.50 AUD) for his model). And that's on top of the markup a distributor will charge. Be smart - don't pay for more shipping than you have to! |
![]()
This page copyright © 2005 Starship Modeler™.
First posted on 2 August 2005.
Last updated 10 November 2005
![[Please click to enlarge]](rog_jedi_finishedmodel.jpg)
![[Please click to enlarge]](rog_jedi_015F.jpg)
![[Please click to enlarge]](rog_jedi_014F.jpg)
![[Please click to enlarge]](rog_jedi_016F.jpg)