
By Dominic Handl - images & text © 2003
|
![[Click to enlarge]](dh_ssg_Battlepose2.jpg) |
|
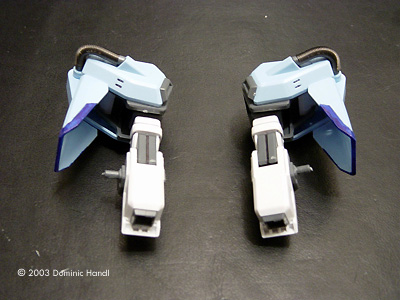
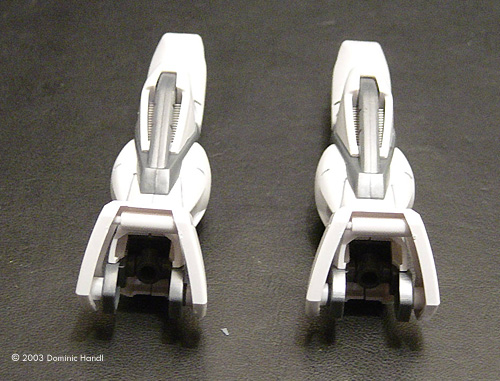
Image: Arm parts Image: Leg parts |
Bandai has recently released the second version of the HG 1/100 scale Strike Gundam: the Sword Striker from Gundam Seed. According to the story, this system is for the Strike Gundam in close combat situations, using mostly a variety of bladed weapons for battle. The Kit The kit is made up of nine sprues of parts, one sprue of poly-caps for the joints, one sheet of foil stickers, and an easy-to-follow fold out assembly guide. The model is made from a high quality injection plastic, having very crisp details throughout. It's a snap-together model. Preparation The first thing I had to do was check to see if there was anything missing or broken. I took every sprue out gently and checked to ensure all the parts were there. The kit was complete. There were no flaws. I was ready to go. Cutting each piece off the sprues and trimming excess flash can be a very tedious process. A Swiss Army knife works well for this type of job. I always had one handy. With the scissors built into the knife, I went in as close as I could and cut the pieces off. Then with the main blade, I scraped off all the little bits of left over flash. Taking a steel file, I sanded each of the pieces smooth, then put them in plastic bags which I had labeled according to each of the sub- assemblies. Painting and Detailing I did all the major painting before assembly. I've noticed how gaudy the color scheme of most of the Gundam models is, making them too showy, not as if the machine is intended for military use. I didn't really like how this thing looked, so I had to change that a bit. The red parts, I painted in a neutral grey color, brushing the paint on by hand. Then later during the assembly, I touched it up where it was necessary. For the details, I took a micron pen and just went over the panel lines. The black color brings out the detail a lot more. Building the Warrior Like every Gundam model, this kit was designed to be done in sub-assemblies. The manner of assembling the main body was like a previous model I made, the Aile Striker Only this part is similar. The other parts are different, especially the shoulder armor and the sword rack that goes on the back. The model as boxed had the shoulder armor only on the left side. I didn't like how that looked, so I decided to put it on both sides. I had an extra kit especially for this purpose. I didn't use the cable parts that came with the kit. Instead, I used a Wave 4.0 A-Spring option part. To install it, I cut the ends off the cable pieces with a pair of sprue cutters. I was going to use the ends so I kept them. Then, I took one A-spring and measured it to the length of the cable pieces. I cut them in four pieces and put the cable ends I cut earlier on each side of the A-Spring. Then I put one end on the front piece of the shoulder armor and put the other end in the corner. I did the same with the back piece. I did the center piece and put it on too. This part houses the sheath for the beam dagger. Along the edges of the armor, I touched up with paint. I did the forearms at this point, thinking I might as well do the whole arm since I was already doing the shoulders. One arm had claws on it. The other arm had bothclaws and a shield. I assembled the claws, which are a very straightforward assembly I tried the claws after I had assembled them, to see if they worked. They did, and looked neat - and even better with one on each arm. As designed, the claws were made to shot outward, attached to a cable. (or without, if necessary) The hands came together easily. The back cover of the hands made it look like the Gundam had a steel glove, which I thought looked pretty neat. I joined each to the wrist joints on the forearms I assembled earlier. The legs were designed to be assembled by putting the internal parts together first, followed by the outer cover. There were a few pieces to this assembly. I put the ankle armor and the knee armor on. Then I assembled the feet. Each had three pieces. For the ankle joint, I had to put a poly-cap in. I connected that to the legs. I then put the knees together, connected one end to the knee joints on the legs and the other to the knee joints on the thighs. The body had to be done in stages. I did the lower body first. Construction begins with two poly-caps to hold the side skirt armor to the frame. Each of the side skirt armor pieces has a scabbard for the knives this Gundam uses. A side cover opens for the knives to go in. After I did that part, I put the folded knives in their place. This is actually something I thought was a pretty neat feature. Then I put the back piece on. The sub-boosters on the rear skirt armor were painted a steel color. The front piece was actually three pieces: two side pieces which that form the front skirt armor and a center piece that holds the skirt armor in place.Next, I put on the lower back piece. It's a white piece that goes around the lower half. I put the upper half on followed by separate shoulder joint. Then, a collar piece housing the neck joint goes on the top. On the chest and back I put on what looks like roll cages. Finally, I put the backpack together. This part is the rack for sword. I did the head in different way. I first colored the recessed area around the eyes black using a micron pen. Then, I painted the eyes a metallic green color using a paint marker. It's easier for me to use than a small brush and it I was able to put the paint on better. For this model, I painted the face guard using a steel colored paint marker. I thought it would give it a better look. Then I painted the small “V's” that go on the head a metallic grey color. Next up were the weapons. I started with the sword which is pretty long. I connected the blade to the hilt,and then put on the energy arc, which was a clear pink piece that goes in the middle of the blade unit. The beam daggers were very easy to do, being only two halves. On the front, the blade - also a clear pink piece- goes on. It gives the appearance of being ignited. The knives I just painted a metallic grey color and on the edges a shiny silver color. Then, the shield. I already painted the red part grey earlier. The yellow parts, I painted a metallic grey color. It matched pretty well with the neutral grey color on the center part of the shield. Final Assembly Okay. Now to put the whole thing together. I took each of the completed sub-assemblies and put each one together from the feet up. After that I posed it in several ways to see what it can do, running through a few battle poses with each of the different weapons. Then, it was off to stand guard over a shelf. |
|
Conclusion I had fun putting this model together. It was a pretty slick piece of engineering. Most of the time during the assembly, everything went smoothly. A few times, I had problems with the paint - mostly due to my impatience while waiting for the paint to dry. Minor setback. I could have done this kit in three weeks, but I decided to take my time doing it. I got better results that way. This will not be my last Gundam model. This model is suited for both the novice and professional modeler. So, I would recommend this model. |
![]()
This page copyright © 2003 Starship Modeler™. First posted on 22 December 2003.
![[Click to enlarge]](dh_ssg_Battlepose1.jpg)
![[Click to enlarge]](dh_ssg_Battlepose3.jpg)
![[Click to enlarge]](dh_ssg_GundamFrontview.jpg)
![[Click to enlarge]](dh_ssg_GundamClawshot.jpg)
![[Click to enlarge]](dh_ssg_GundamBackview.jpg)
![[Click to enlarge]](dh_ssg_Weaponsandshield.jpg)
![[Click to enlarge]](dh_ssg_Ready.jpg)
![[Click to enlarge]](dh_ssg_Lockedontarget.jpg)