
By Dominic Handl - images & text © 2005
This model is from the Gundam series G-Gundam, which was aired back in 1995. At the time, the only release of the model of this type was in the 1/144 scale. |
 |
|
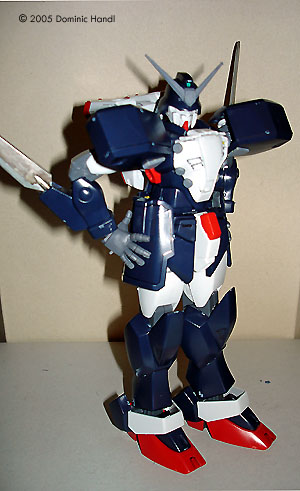
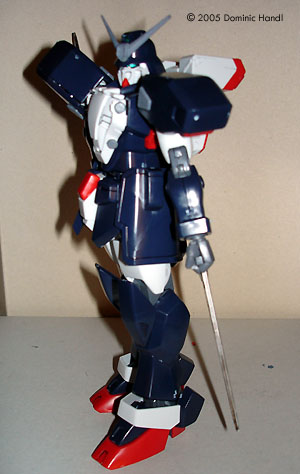
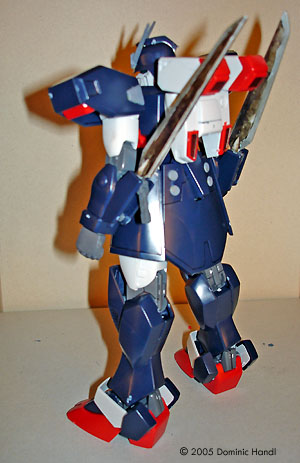
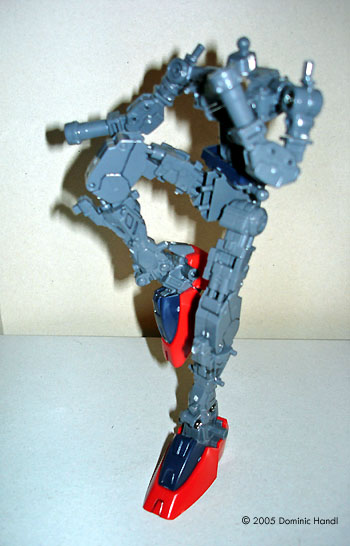
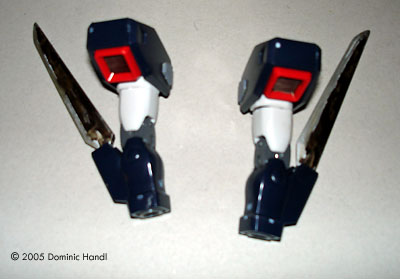
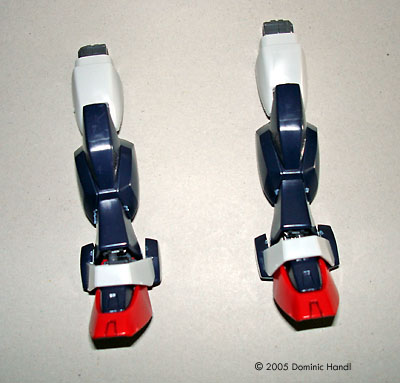
Image: Kick boxing Image: Right/front view Image: Left side Image: Rear view Image: Core lander Image: The frame is very nicly articulated Image: Boot to the head Image: Arm assemblies Image: Legs |
I built it, but I didn't like the lack of detail, being so simple. Too bad it was not a High Grade 1/100 scale model. In 2002, this subject was revived once again as a 1/100 scale Master Grade kit. What tempted me to do a kit like this? I saw the G-Gundam series on T.V. back in the 90s. This was towards the middle of the story line. I saw something move at a high speed. It was a blur at first, then the image cleared. I wondered almost, what could move that fast. I knew it was not any normal type of Gundam. It was called the Gundam Spiegel. This Gundam was owned by the German government. Its pilot was dressed in a suit that was in the colors of the German flag and always had his face behind a mask. His identity was never revealed towards the end of the story. The Kit The box was literally crammed with plastic. Like every kit I made in the past I took every sprue out, laying them carefully on the table and lining each one up. There are:
All the detail really blew my mind. It was unbelievable. There were pieces for what looked like the outer skin and the inner frame. This was definitely going to be a challenge. Painting and Detailing I always paint Gundams before assembling the models. I didn't have to do much here, just paint all the yellow parts in a neutral grey color. The eyes I painted in the usual manner, using a micron pen and going over the recessed area around the eyes and painting it black. I did it about three times to completely cover that part. Then I used a metallic green colored paint marker and painted the raised area of the eyes. Using the pointed end of the marker, I just applied the paint on twice to cover the area evenly. |
|
Once I got that done, I went over the panel lines with my micron pen so the detail will show better. The Spiegel blades, which are the main weapon of the Gundam Spiegel, were painted a steel color over the top half,. Along the edge I used a shiny silver color. I had to be careful on making the lines between the two colors straight and in the middle of the blades. Trimming When I do a Gundam model I cut all the parts from the sprues and place them in labelled Ziploc bags, according to their respective sb-assemblies. This prevents any small pieces from getting lost. I use the scissors on my Swiss army knife to do this. After that, I used the main blade on the Swiss army knife and cleaned the pieces, scraping off any extra flash on them. The pieces were pretty clean. There was barely any flash on them. Building the Soldier The term seemed appropriate for this Gundam, because the shape of its head looked sort of like a German World War 2 soldier's helmet. The model is designed so that you build an inner frame first, almost like a Perfect Grade model. I started off with the legs. I had to do feet first, which were then connected to the legs, which in turn fit on the thighs. Some of these parts are screwed together. When I had the legs frames built I tried the mechanisms, moving the legs. The pistons on knees worked well. As they should.I did the same with the arms. The shoulder join came in three separate pieces with a major amount of detail. I had to screw those pieces together. It was pretty tricky to do.I put the elbow joints together after that. Then put on the elbow cover after I screwed them together. This part was easier to handle, pretty much nuts and bolts. Then I connected that group to the shoulder joints and put on the forearms with the sockets on the wrists. The joint movement is pretty good on this part too. The arms move almost in the manner of a human arm. The main body is made up of the lower and torso parts. All I had to do was connect the legs to the lower body by a ball to the sockets on the hip joints. Once that was done, I assembled the torso. First I had to screw the lower half together, after which I snapped the lower body on. At this point te whole thing sort of looks like a “U” shape with a big cavity in the middle. I put the upper part on and the collar on with the neck joint, and joined the arms to the shoulder joints.When I had the skeleton done I tested the whole thing, making it do different poses: a high kick, standing on one leg, etc.. That's the fun of putting together something like this. Next up was the core lander, which is basically a small hover type craft. This part is where the cockpit of the Gundam is. It joins from the back. The pilot then wears what is called a fighting suit which, when plugged into the mech, allows him to use his whole body to control the machine.The assembly was very straight forward. I did all the major parts and put the whole thing together. It was easy to do. I tried transforming the craft to cockpit mode and back. I worked well. Every part moved smoothly. The head was also straightforward assembly. I put the lower parts of the face together and then put the helmet on. I touched up the “V” and put it on the head. Lastly, it was time to put the outer covering on. I had to take the whole thing apart again to do this, so each piece of the cover can fit on properly. I started off with the legs, going from the ankle armor then working my way up to the thighs, lower bodyand the arms. The forearms I covered and attached the Spiegel blades to. Next came the shoulder armorThen I put the body covering on, and the core lander in the back. I finally put the head on. When it was finished I took a moment to see what this thing can do. So I put it in different poses, mostly battle poses using its blade. In the end I displayed the mech with its arms crossed on my shelf. Conclusion This is the best Master Grade model I've made. It can pass for a perfect grade model, having really good joint movement. I thought it was neat that it could stand with its arms crossed, or do a kick standing on one leg. It won't be the last one I build. I do recommend this kit. |
![]()
This page copyright © 2005 Starship Modeler™. First posted on 24 August 2005.
