
By Dominic Handl - images & text © 2003
|
![[Click to enlarge]](dh_free_attack.jpg) |
|
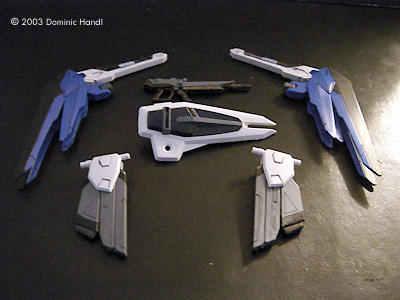
Image: Completed shield and weapons |
I have always liked watching the Gundam show on TV. Just wait about 5 minutes and something is bound to happen. There's a lot of action: seeing an enemy Zaku sliced by a Federation Mobile Suit's beam saber or blasted by a beam rifle; or four colonies taken out by a single beam discharge from the Gundam Wing Zero's buster rifle, in the Gundam Wing series. Gundam Seed is the latest series in the Gundam universe, with a fast-growing popularity. The Freedom Gundam is one of the newest models, from the Gundam Seed series. "Freedom": a good name for a Mobile Suit. Its design looked pretty neat, something like the Double X Gundam model back in the late 90's or Gundam F-91 parts put together to make this new design. It caught my eye and I just couldn't resist. This is my second Gundam Seed model and my first 1/144 scale model. The model has the same format and detail as the High Grade Universal Century (HGUC) line of models. Inside the box with the nice artwork are four sprues of parts, all molded in their appropriate color, plus one sprue of poly-caps for the joints. There is a sheet of foil stickers for the markings, plus instructions and paint guide in a small booklet. I once thought that a model this size was too small to handle. That part is not always true. With a lot of time and a good amount of work, even a model of this size can be made to look real. I opened the box and laid each sprue gently on the table and lined them up. Looking closely at every piece, I just shocked me to see how much detail can be on a kit of this size. Amazing, eh? Well, that's Bandai's standard of quality. All the pieces were accounted for and no flaws found. I was ready to go. Painting and Detailing I like to paint the pieces while they are still on the sprue. This kit is already molded in color and can be assembled as it is, straight from the box, if you like. But I'd like to make this model as real as possible. It would take a lot of touching up and detailing to do that, but that is all part of the fun. At this point I only detailed the major parts. I painted more during the assembly. My idea was to make the model look more like it was used for military operations. I did not use the sticker sheet because it makes it look too toy-like. All that red color makes it too showy. This Gundam was designed for battle so my intention was to make it look like it was used only for that purpose. First, I went over the panel line details with the fine tipped pen, then wiping off all the excess ink that got on to the surface of the model. This accentuates the detail. I had to do touch-ups on the tips of the plasma cannons. I painted these a steel/burned iron color. I painted the part of the top of the shoulder armor where the red foil decal was supposed to go a neutral grey color. Then I turned to the beam cannons. One part of the barrel was already molded in sort of a dark blue color so instead of red stripes, I changed that to a neutral grey color. The center, red part of the shield I changed to a medium blue color. Building First I took everything off the sprues with the scissors on my Swiss army knife, going close to the pieces and cutting them off. Then I used a hobby knife to scrape any remaining stubs on the on the pieces. Then with a metal file, I sanded each piece smooth, after which I wiped off any dust with a wet paper towel. To make things easier, I then put each piece in Ziploc bags and labeled them according to each sub-assembly ( Legs, Arms. etc. ). |
|
This kit was designed, like very Gundam model produced that I have built over the years, to be built in sub-assemblies. It makes touching up work where needed a lot easier. I just did my usual routine on building a Gundam kit: start from the feet and work my way up. The Feet- Each foot has four piece. A poly-cap goes in to the lower part of the feet for the ankle joints. I put that in and put the bottom piece on. Then I put the top piece on the that goes on the front end of the feet. I touched up the last details where it necessary and put the completed assemblies aside. The Legs- These have to be done in two stages. First I did the thighs, which had eight parts all together (four to a side). I put the two poly-caps (one each for the hip and knee joints) and closed up the thighs. Then I put the knees on. After that came the calves, with four pieces for each one. I put the poly-caps in their places, one for the knee joint on top and one on the bottom to hold the ankle armor in place. After joining up all the pieces I added the knee guards and ankle armor and did some final paint touch-ups.The Lower Body- This section has 12 pieces all together. Assembly started with two poly-caps which which hold the side skirt armor. I put the two large pieces together and then the front skirt armor. The center piece that holds the armor in place came next, followed by a piece I painted earlier that goes on top of the center section Then I had to do the side skirt armor. This holds the beam cannon and the beam saber. First I had to do the front and center part of the beam cannon which is made of had four pieces and a poly-cap in the middle for the folding mechanism. I put those together. Then I put each in their places on the side armor. I put the back end of the beam cannons, closed up the two pieces, and then I added the sabers. I then affixed these assemblies to both sides of the lower body. Lastly, I touched up the tips of the beam cannon barrels with a burned iron/steel color paint marker, with the inside painted flat black. The Main Body- This part has eight pieces to it. and has to be done in two sections. First I did the lower half. It was a straightforward assembly with only one poly cap to connect it to the lower body. Next, I assembled only half of the upper part. I put the intake grills in and the neck joint, then closed it. I did some final detailing and touch up work on the front part of the main body, I painting that part neutral grey instead of using the red foil sticker that came with the kit. It looked much better that way. The Arms- There are about 12 pieces to these. This assembly was pretty much straightforward. One poly-cap goes into the biceps and connects to the shoulder joints. After this part was done, I put the shoulder armor on. The forearms had two poly-caps, one each for the wrist joints and the elbow joints. Before connecting the biceps to the elbows, I had to put a cover over the elbow joint. The Wings- These are comprised of six pieces, including the beam cannons housed within. The plasma cannons go on the large outer part of the wings. Then the other pieces go on. After putting the whole thing together, I tried moving the wings in the manner for which they were designe. Looking at them fully spread I thought they definitely looked like the reflector panels for the satellite cannon on the Double X Gundam. Then I closed the wings and moved the beam cannons in the deployed position. Everything worked so those parts were put aside. The Head- This part contains about six pieces. The eyes were a little tricky because of their small size. The part below the eyes I painted a grey color using a paint marker. Then, with a micron pen, I painted the recessed area around the eyes black. Then the eyes were very carefully painted a metallic green color. After this the head was put together and set aside. Final Assembly Now I was ready to put the whole thing together. I set the feet on the table and connected the legs to each. Then I connected lower body to the thighs. I put on the upper body, then connected the arms to the shoulder joints and the wings to the back. Finally, I put on the head. I then played with it a little to see what it can do before placing it on display. Conclusion Even being a 1/144 scale kit, it was a very well made kit with fine detail. It's a slick piece of engineering which shows the Bandai quality, like every model made by the company. Normally I can do a model of this size in a short time but I decided to take a full month and do a good job with it. I must say, the assembly of this model went smoothly and I really enjoyed putting this kit together. Even if I'm serious with the hobby, I still had fun. This won't be the last 1/144 kit I will do. I would recommend this model to anyone who is a fan of Gundam. |
![]()
This page copyright © 2003 Starship Modeler™. First posted on 21 October on 2003.
![[Click to enlarge]](dh_free_FrontView.jpg)
![[]](dh_free_Backview.jpg)
![[Lotsa parts]](dh_free_Lotofparts.jpg)
![[Sub assemblies]](dh_free_Subassemblies.jpg)
![[Click to enlarge]](dh_free_Lockedontarget.jpg)