
|
By Dave Windham - images & text © 1999
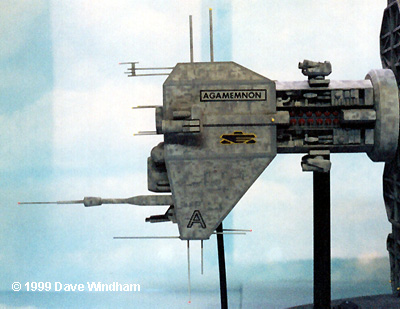
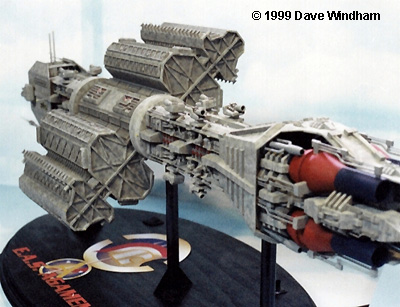
"Give me ramming speed!" Who can forget those words, as Capt. Sheridan sends the Omega Class Destroyer Agamemnon on a collision course for the last remaining defense platform during the battle to retake Earth from the hands of President Clarke. Sent chills down my spine, I can tell you. Ever since the episode 'Severed Dreams' I've been plagued with an overwhelming desire for one of those ships. So, I built one. |
![[In motion]](td_omega1.jpg) |
|
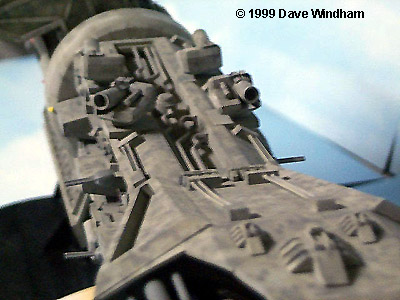
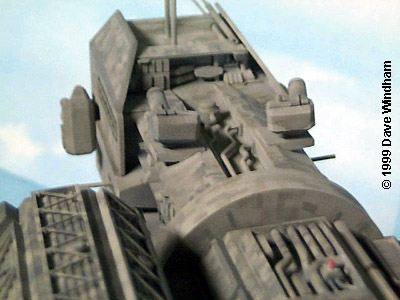
Image 7: The bow section. |
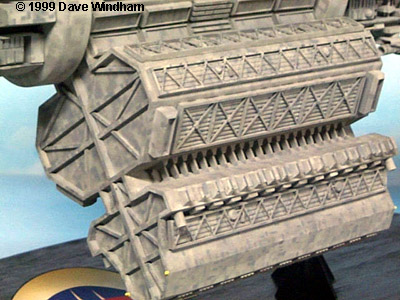
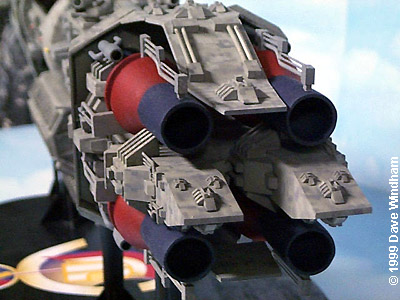
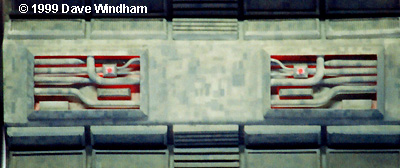
At the beginning of my almost 3 year ordeal to make this monster, 'Severed Dreams' was the only reference material I had. I started with a copy of the show, a pencil, a ruler, and a lot of graph paper and came up with around a dozen diagrams that I could use to start construction. As more episodes featuring the ship came out, I'd check my accuracy, make changes and so forth. Then, I got internet access and my whole world changed. I looked up every picture I could on the internet (which led me to Starship Modeler by way of Terry Miesle's AOG review) and made changes accordingly. After I had everything I thought I needed, Mark Dickson comes along with a great deal of off assistance and inspiration. ConstructionThe model was built in 4 sections. The front, the rotating center, the rear, and the engines. Some of the process can be seen 'On the Bench.' With the exception of the engines, the main structures were built using sheets of Evergreen plastic of various sizes to make the basic box shapes. For the side detailing on the front and rear sections, I built troughs with plastic sheets and filled them in with assorted plastic tubes and cast resin parts. This was my first project utilizing cast parts and was quite a learning experience. I used Alumilite for the casting material. The very front of the ship is made the same way, using cast parts for the round tubes and the ovalish things in the middle. The assortment of cannons were made by casting a 'tray' and a filler piece which could be placed in either side of the tray since the gun barrels alternate sides according to their placement. Detailing was done with plastic tubes. I mounted the 'trays' on a round base with a hole drilled in it and then stuck them on a snug fitting peg so they can be rotated at will. The rotating sections were built in 3 parts: 2 identical outer pieces mounted onto a center piece. The outer pieces were made with relatively thin sheets to bring the weight down, whereas the center piece walls were nice and thick for support. The long detail sections were trays made of plastic and very thin (.25mm) strips for the zig-zaging details. The other details were made from cast resin shapes and thin strips of plastic (Over 400 pieces, if memory serves). The sections in the center were done with plastic tubes of various sizes. The engines were a nightmare. I used a friend's lathe to make a master shape out of wood. I then made a mold of half of the master so I could use a brass tube to make the engines hollow. After I cast one half I had a nice hollow piece that looked like it was made of wood. So then I used a lot of putty and sanding to make a new master so that my ship wouldn't look like it had 4 trees poking out of its butt. I decided to make 2 molds this time and added some of the details towards the base of the engines. Once I had them all cast, glued together and cleaned up, I mounted them on to more cast parts attached to the main support structure. Detailing, again, was done with lots of cast parts and tubes. PaintingNow, how to paint it and not screw the whole thing up. In my first 'On the Bench' installment almost a year ago, I asked for painting suggestions. My thanks to all those who contributed. Using various suggestions, here's what I came up with. I painted all the sections light gull gray. Then I made a few dozen copies of a paneling detail picture like the one found in Starship Modeler's Babylon 5 reference section, scaling it down to an appropriate size. Next I made stencils by cutting out random sections, using the details in the picture as a vague reference. Holding these against the sides of the ship, I airbrushed 3 additional shades of gray (light sea gray, navy aggressor gray, and dark gull gray) in random locations, working from lightest to darkest. With all of the recessed detail on the ship, the paneling didn't come out as clear and sharp as I would have liked, but overall I was very pleased with the way it turned out. The name crest and EA logo were made from thin sheets of plastic and dry transfer letters. |
![[Side View]](td_OmegaSide.jpg) Lights! Action! Lights! Action!
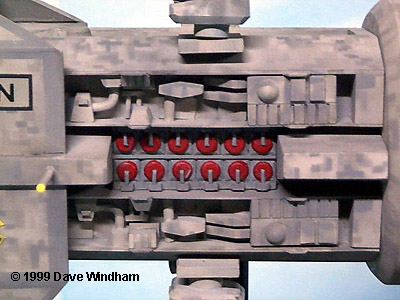
Two questions plagued me throughout the construction. Can I light the thing and can I make the center section rotate? After many headaches, I was able to do both. For the lights on the ends of the antennae I resorted to using florescent paint. An acceptable cop-out in my opinion since I have yet to see .5 to 1mm LEDs and fiber optics weren't going to work for me. The lighting I did manage to do is in the hangar bay and the rotating section. For the back wall of the hangar and the big tubular sections in the middle I used a very thin sheet of plastic and painted the inside of it with clear red. Then I used some lamps from a fiber optic kit and mounted them inside. Somewhat hard to see from the pictures, but it turned out well. To get the center section to rotate I went through various plans. My first was to mount a motor in side the front section and gear it down from thousands of RPMs to around 3 RPMs. That plan went all to hell. Then I found a motor from Allcorp that was already at 3 RPM's (turned out to be the motor for a microwave turntable). It, however, was too big to fit inside the front section. I mounted it in the base with a metal rod running up the front support. I stuck a screw gear on the end of this, and a toothed gear on the end of a rod coming from the center section (both gears were obtained from the silly things you can buy that rotate when you hold down a button). I mounted everything on the base, flipped the switch, and ...nothing happened. I decided to bag it and just settle for rotating it by hand. In my frustration, I went to ShopKo to see if there were any new Star Wars toys that I needed. While there, I happened to look in the Lego section and found exactly what I needed in a Technic kit: 2 gears that sit at right angles to each other. I rushed home and pulled the ship apart and went to work. And work it did, although it's not a perfectly smooth rotation and sometimes it hangs up, but it worked. Here is a diagram of the lighting and motor part. So after almost 3 years of hard work and procrastination, I was finally finished. She came out to just under 32 inches long. Many thanks to Mark Dickson and every one else who offered suggestions. This is to be the first of 'Sheridan's Commands' that I plan to do. |
![]()
This page copyright © 1997-9 Starship Modeler™. Last updated on 12 January 2000.
![[Rear View]](td_omega2.jpg)
![[Rear Guns]](td_omega3.jpg)
![[Front View]](td_omega4.jpg)
![[Front Oblique]](td_omega5.jpg)
![[Behid the bow section]](td_omega6.jpg)