
|
By Marcus Sampaio - images & text © 2000
|
|
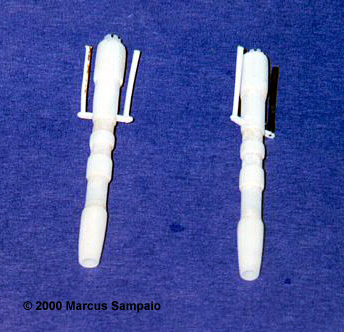
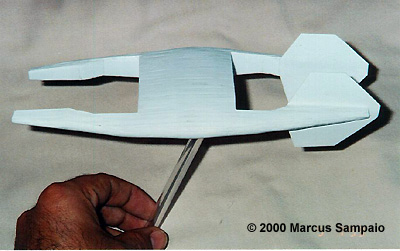
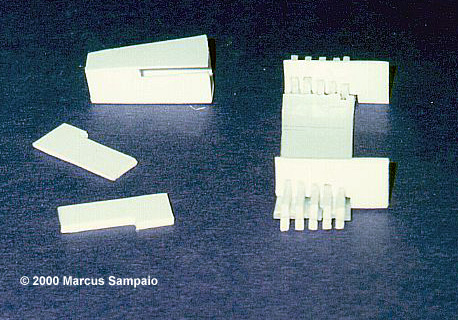
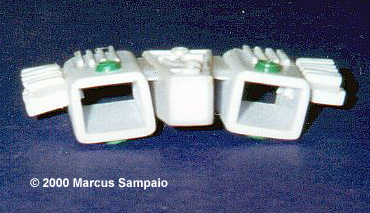
CONSTRUCTION PIX Image: Templates for the bulkheads. Image: Laying out the frame of the ship. Image: Building up the cockpit tub. Image: Completed cockpit, with G'Kar. Image: Cannons before installation. Image: The completed hull. Image: Engine building blocks. Image: Engine assembly. Image: Engines, from the top.
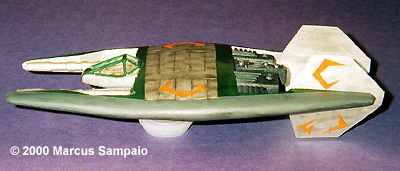
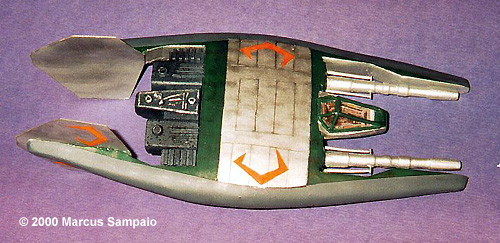
Image: Underside of completed model. Image: Port side view. Image: Top view. Image: Side view, with base.
|
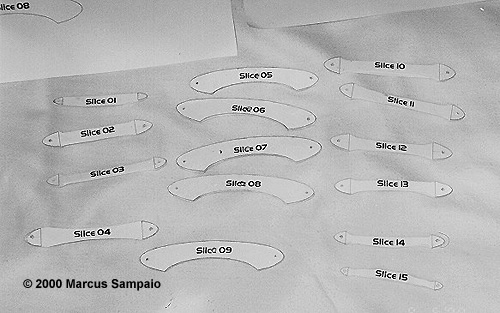
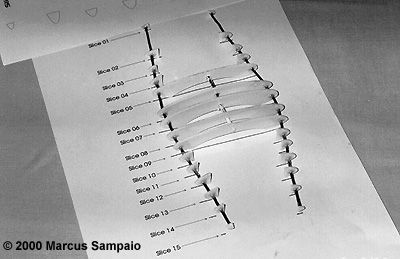
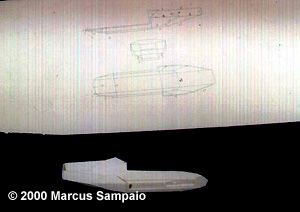
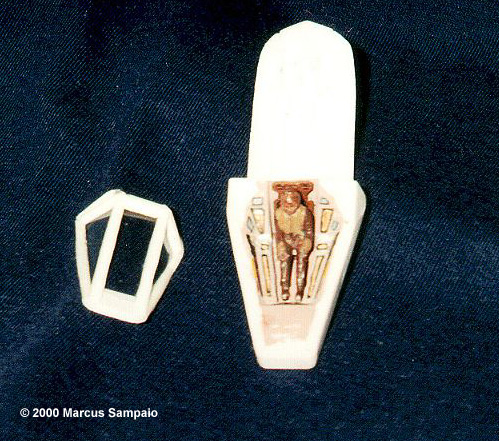
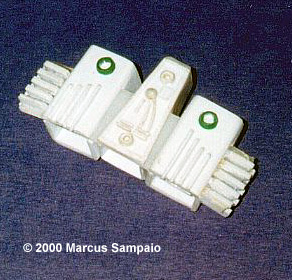
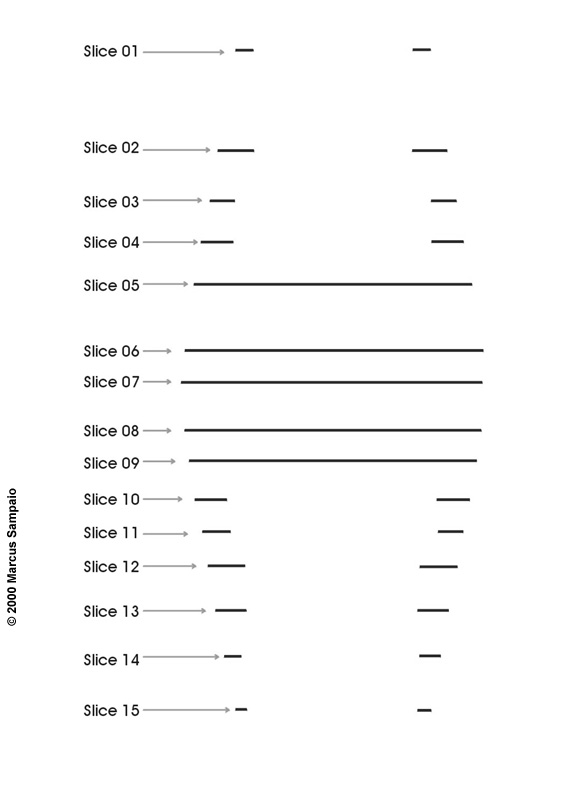
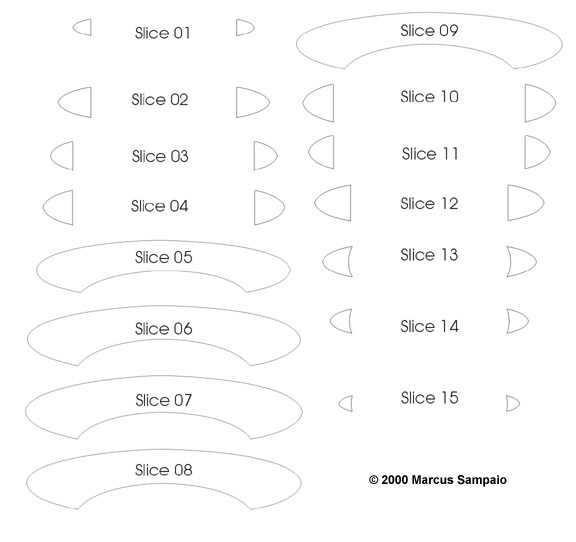
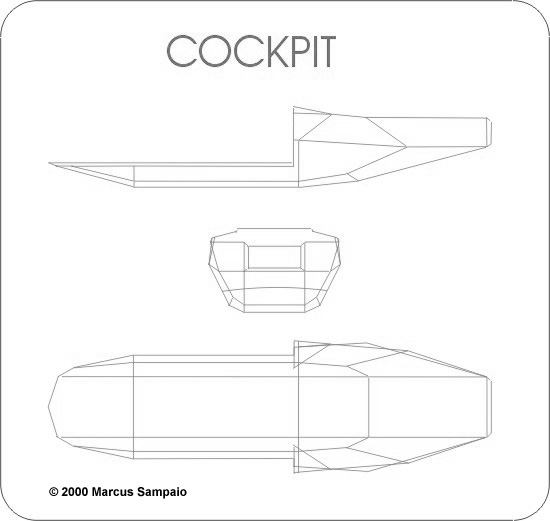
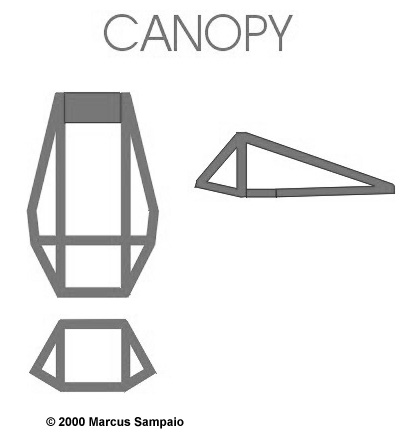
In this diversity of non-geometric shapes, the fighters had always fascinated me. But two of them made me dream to a diferent dimension. With the lack of the production of other kits from this TV show, I decided to take the risk of building them from scratch. After making my first kit this way, the Centauri Sentris fighter for the Starship Modeler's contest, I also decided to build the Narn fighter. Both are in 1:72 scale (the same as the Revell Starfury kit). The first problem it was to find the references. I currently work with CGI, and I found many models of Babylon 5's ships on the internet. One of them was the model of Narn fighter modeled by Mark Kane. This model is a little different from the original of the series, but much prettier. When I started work on this project this was the only source of reference available of this fighter. Later on when I received my "Babylon 5 Security Manual", I perceived the difference between these models, in fact a model close to the original only appeared a few days ago on the web. The next step was to bring the 3D model for 1:72 scale, in accordance with the size of the ship found in the site Babylon 5 Manual Technical, and to render, in scale, all the ship's views as reference. Well, with these references in hand, we move to the next step: how to reproduce this shape. I decided to assemble the ship through the process normally used in wooden boats, which is to build in a central structure (backbone) and use thin plastic strips to re-cover this skeleton (the process is known as "strip planking" in nautical environment). Using the 3D software again, I sliced the hull in 15 traverse cuts and printed them. I made a sandwich with 3 0.5 mm styrene sheets to form a thicker structure of 1.5 mm. Using the top view as template, I tied the pieces with a piece of rigid thread. When the "keel" dried I built the tail completely. I cut a sheet of 0,5 mm in agreement with the diagram, and bent it to get the piece slightly curved. With the head and tail ready, I set up the cockpit and the weapons. For the cannon mounts I cut in half a small plastic cylinder (it can also be done with a plastic syringe) and I sanded until that had the appropriate height. The extremities were made of EPOXY (A+B), and in the front part it was made a hole (before the epoxy completely to set up) where later the cannon barrels were fit. The cockpit was a challenge. The assembly was made as if it was a jigsaw puzzle in 3D. I cut several plates and carefully glued them together to make the tub, observing the angle that each one formed with the adjacent ones. Later these were reinforced internally with more ribbons of plastic. After the exterior was ready I started the internal part, detailing the cockpit. I made a G'Kar figure from a pilot of an airplane in scale 1:72. The cocpit painting was done using the Season 1 episode " Chrysalis " as a guide. The canopy details were made of stretched sprue, and the canopy itself from transparent plastic (another jigsaw puzzle 3D). After all this is dry, I sanded and polished soften the curvature of the plates of the cockpit. As it was not possible to find styrene tubes in my area, I used tubes of rigid plastic (that same that comes with ballons sold at shops here) for the cannons, which were coincidentally of the exact diameter I needed. The side supports were made of stretched sprue. With the cockpit and weapons done, I turned to the assembly of the engines. I returned to the computer, where I separated each engines element and reproduced it in all views. I then cut plastic shapes and built in agreement with the final template. After the basic form was complete I applied polystyrene automotive filler, commonly known as POLI filler, found easily at auto paint stores. This I let cure for some days, after which I sanded until the surface was very smooth. After that I applied a first coat of light gray to look for imperfections, which were then covered with putty. I had to sand and putty several times to get a surface as smooth as glass. |
|
I scribed the panel lines of the hull then started the painting. The base coat was silver, followed by a glossy green and then Euro I Gray. The weathering process had two stages. First I applied a wash of flat black in the panel lines, and after I tested the technique that will be used for the weathering of my Starfuries. The technique is usually used with pastel chalk, only that in the place of the chalk I used powdered graphite (the same used in car windows). I placed some powder on a scrap paper and I painted with a soft brush on the ship, using the same paper as mask to create a soft smear trailing off from a sharply defined line. The final result was excellent, since the graphite gave an slightly glossy effect. The Narn insignia were masked and painted with opaque orange. After everything was completely dry I applied a glossy coat to the whole model. The engines were painted separately. For the final painting I used Anthracite Grey Metallic, later I created the organic aspect with an old technique learned in my childhood: I wet the bristles of an old toothbrush in flat black then I passed my finger through them to sprinkle the paint over the motor. The effect was really very good. Then I applied a light drybrush of silver to highlight raised detail. Final small details were then added, such as the one that seems to be a dissipator in the tail, and the hinges of the canopy. These I painted with HUMBROL bronze. I used a die-cast car stand in 1:18 scale, and as the stem I used an old tube of plastic. The B5 and Narn Republic logos were made on my computer and printed on an adhesive paper. That's all folks. This fighter was a true school for me, but in spite of difficult turns, I learned it is possible to make almost everything from scratch. Anyone who wants copies of my blueprints (in Corel Draw 8.0), please ask me and I will send by e-mail. Marcus Sampaio |
![]()
This page copyright © 2000 Starship Modeler™. Last updated on 2 May 2000.
 Babylon 5 was one the best TV shows to appear in Brazil since Battlestar Galactica in the 80's. The way as the subjects were treated really made it unique; I'd say that it took me to a real future. But the most amazing (for us modelers) were the ship's shapes. Most of them look like animals.
![[Click for larger view]](ms_narn_Photo21.jpg)
![[Front view]](ms_narn_Photo17.jpg)
![[Again]](ms_narn_Photo18.jpg)
![[With base]](ms_narn_Photo20.jpg)