
By Vince Hoffmann - images & text © 2004
|
![[Click to enlarge]](vh_orion_done_1.jpg) Space planes were always part of the 1960's plan for future access to space. The 'Moon Race' with Russia forced NASA to set aside early development of space planes in favor of disposable (and relatively simpler) rockets. |
|
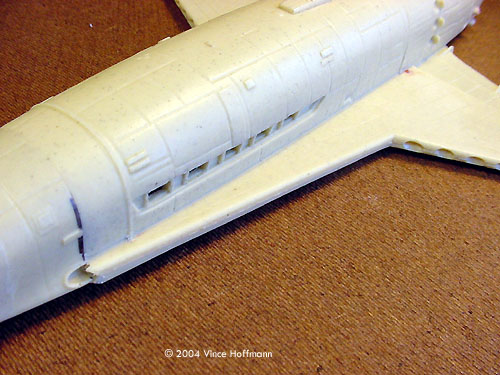
Image: Tiny bubbles ..... Image: Over-zealous sanding resulted in mismatch between center and aft fuselage pieces Image: Shims to the rescue Image: The tailbone's connected to the .... center bone .... Image: The wing bone's connected to ... them other bones... Image: Other side Image: Filled Image: Just a dab does the intake Image: Aerials Image: Post-shading the panels with a bit of grey Image: Oil wash applied Image: Oil wash cleaned up |
The Orion space plane, seen in the second scene of 2001: A Space Odyssey, has a very brief, but dramatic appearance, and has left deep impressions and a strong urge in many futurists (sci-fi and fictional alike) for development of inexpensive and easy access to space.
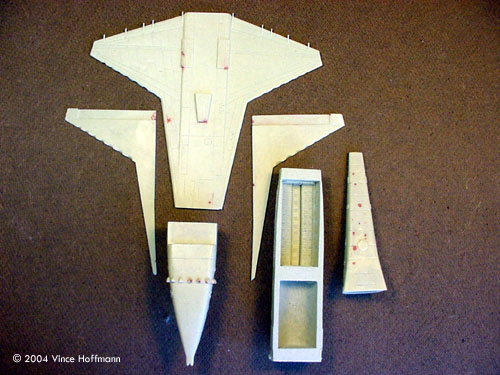
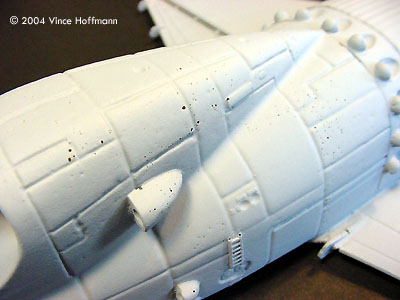
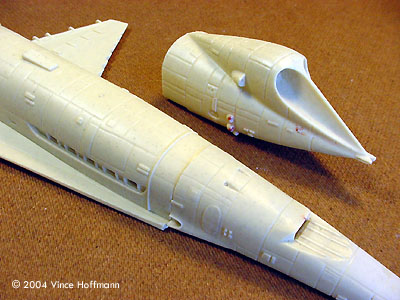
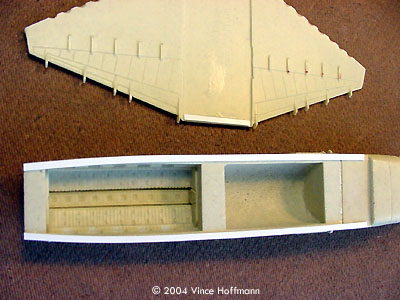
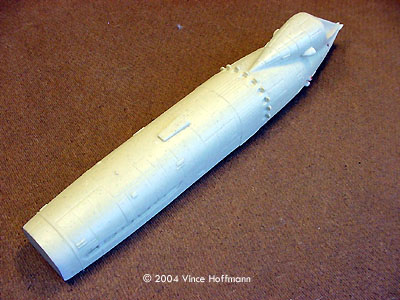
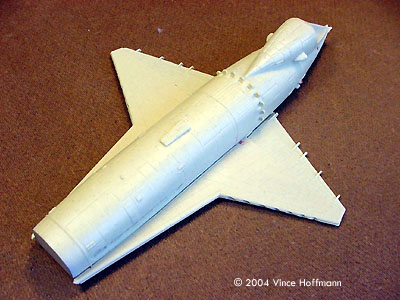
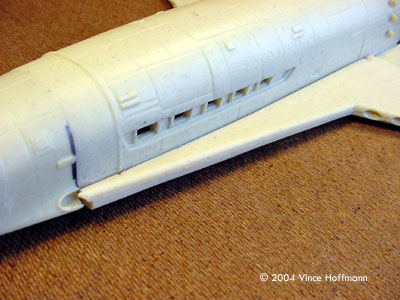
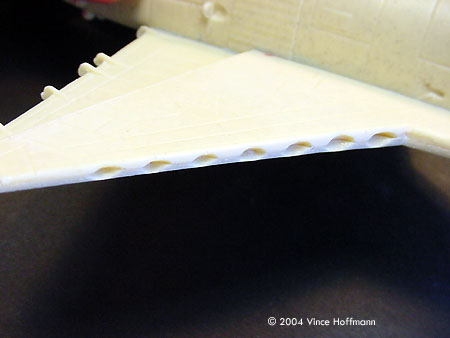
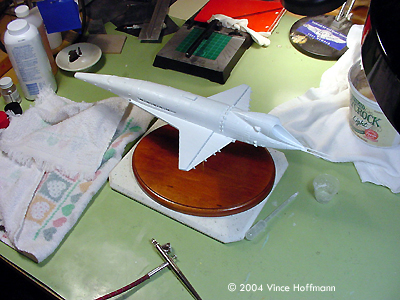
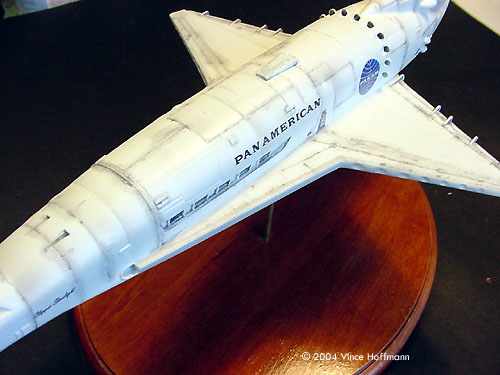
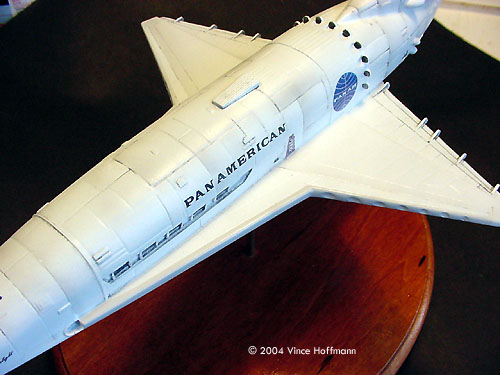
The Kit Measuring 17� long (sans aerials) and 9� from wingtip to wingtip, this is an impressive model and a guaranteed head-turner in any display case. I received a pre-production kit from Stargazer Models UK as a sample-build kit, complete with all major assemblies except for the interior finish pieces (cockpit bulkheads & passenger seats). This was not a problem as the kit builds up perfectly without the interior detailing. Cleanup and Assembly All of the parts came still attached to the pour stubs. A quick run through the band saw relieved most of these parts of their cumbersome burden. Afterward, each surface was cleaned up on the bench top belt sander for nice, square edges. Although a razor saw will cut the stubs off equally well, the band saw is much easier. Minor Problems As with most resin kits, there are trials and tribulations. Many tiny bubbles plagued the surface detail of my kit and had to be patched with putty. Slight surface inconsistencies were solved using sandable filler automotive primer, sanding the problem areas between coats made for a smooth, even finished surface. Test fitting all of the parts together showed very few problems and a very clean profile over the compound curves of the fuselage. Fuselage Assembly After removing the pour stubs and cleaning up all of the pieces, I dry fitted all of the parts together and realized that I had removed too much material from the bottom of the center fuselage. This was a big problem because this would affect the fit of both the forward and rear fuselage parts. I carefully measured the differences between the parts, and made thin plastic shims which were glued to the bottom of the center fuselage, and the rear part of the wing. This was the perfect solution as the shims were hidden by the wing when completely assembled. Center and rear fuselages were glued together first using CA, then the wing was attached and squared. The front, center portion of the wing (which forms the bottom of the center fuselage) previously left long, and was now trimmed flush. Next, the forward fuselage was attached, as well as the upper halves of each wing. Pins were not needed for the fuselage assembly as there was ample surface area for the glue to adhere to. Putty Aside from the previously filled surface bubbles, there were some obvious gaps between the fuselage and wings. This is an easy fix using epoxy putty pressed into the gap, and leveled with a small metal straight edge. This left a perfect fillet which did not require any more work. The forward �intakes� needed some cleanup with the hobby knife. A spot of putty in each and sanded smooth finished them up nicely. The leading edge of the wings required considerable sanding, with each of the 7 dimples requiring a little bit of putty in each to smooth the insides. I had the most trouble here as none of the dimples seemed to align very well. The joints between the three fuselage parts fit so perfectly, putty was not required. A couple coats of sandable primer (described later) erased any hint of part separation lines. At this time, the tail aerials are made from thinned wood toothpicks (supplied) and attached to the tail. Painting Prior to painting, the model was mounted on a finished wood oval base with a brass tube permanently glued into the base and also into the bottom of the model, and a matching telescoping brass rod used as a stand. During painting, the model is handled using the brass rod, and replaced into the base to dry. Step 1: Priming the model. After all putty work was done, and all finish sanding was complete, the model was washed in grease cutting cleaner. My favorite resin cleaner is Formula 409 because the spray bottle is convenient, and the cleaner does not leave residue like soap can. After the model was completely dry, Duplicolor automotive sandable primer was sprayed over the entire surface. A few missed seams and surface inconsistencies were found and filled. Then the model was shot with a second coat of primer where the touch-ups occurred. Step 2: Painting, and decaling. The gray primer makes a very good, smooth base coat. On top of the primer, gloss acrylic white paint was applied in 4 thin, consecutive coats. A series of medium gray panels were airbrushed using Post-It notes as masks. Panel highlights were applied along the scribed lines. Once the various panels were painted, the various intakes and ports were painted flat black. At this time, the decals were applied. Since the gloss paint makes a very smooth surface, no additional surface preparation was required to make the decals adhere properly. Step 3: Sealing the paint. Once again using my airbrush, a clear gloss lacquer was sprayed over the entire model. Every detail and surface was covered. This acted as a barrier between the paint and decals below, and the oil wash to come. I allowed 24 hours for the gloss lacquer to cure completely. |
|
Step 4: Applying the wash. An oil wash was prepared using artist oil paint 'burnt umber' and paint thinner. It is very important to use only paint thinner or mineral spirits, and nothing stronger (Testors airbrush thinner is too strong) and don't even consider using lacquer thinner, this will easily dissolve your barrier coat. The wash was strained to remove any un-dissolved lumps of paint. A small pointed brush was then used to apply the wash to all details, scribed lines and any other detailing that deserves a little shadow. The wash was left to cure for 3 days, or until completely dried. Step 5: Removing the wash. After the oil wash was dry to the touch, a lint-free rag was lightly dampened with thinner and used to remove the excess. Working in small areas, the rag was wiped perpendicular to scribe lines and details. To remove more wash, the rag was wiped parallel to the detailing. Paper towels should never be used to apply or remove a wash as the fibers in the paper will pull apart and stick to the model, and the roughness of the paper will scratch the painted surface. Step 6: Drybrushing. After the model had several more days to dry, it was ready for drybrushing. Once again, artist oil paint was used. White paint was mixed with a small amount of black to create a very light grey color, which was then applied using a large, soft round brush. Highlights were applied to most of the raised detail and used to lighten areas of the paint which turned out too dark. Oil paints make for excellent drybrushing because their drying time is greatly extended, allowing you to work the paint into very soft highlights on the model's surface. Step 7: Finishing. After the drybrushed paint had several days to dry, the entire model was sprayed with a thin coat of clear matte acrylic and mounted on the permanent oak wood display stand. Conclusion This is an undisputedly infamous subject which I very much enjoyed building and painting, and it looks very impressive in my display case to boot. Aside from my over-eagerness with the sander, construction was very simple, so I consider this an excellent model for intermediate resin kit builders who wish to expand their collection, and excellent for advanced builders who feel a good dose of lighting is appropriate to show off the excellent and very detailed interior spaces. |
![]()
This page copyright © 2004 Starship Modeler™. First posted on 7 September 2004.
![[Click to enlarge]](vh_orion_done.jpg)
![[Click to enlarge]](vh_orion_parts_top.jpg)
![[Click to enlarge]](vh_orion_assembled.jpg)
![[Click to enlarge]](vh_orion_done_2.jpg)
![[Click to enlarge]](vh_orion_done_3.jpg)
![[Click to enlarge]](vh_orion_done_4.jpg)