
By John Lester - images & text © 2004
|
![[Click to enlarge]](va_rombop-002F.jpg) |
|
Image: Parts Image: Upper side, bridge area Image: Starboard side Image: Head on Image: Underneath Image: Under the starboard side |
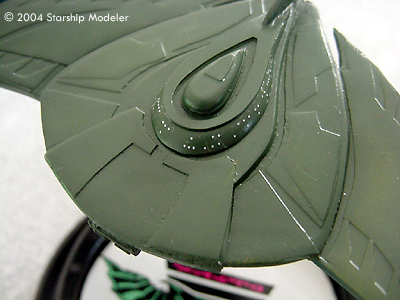
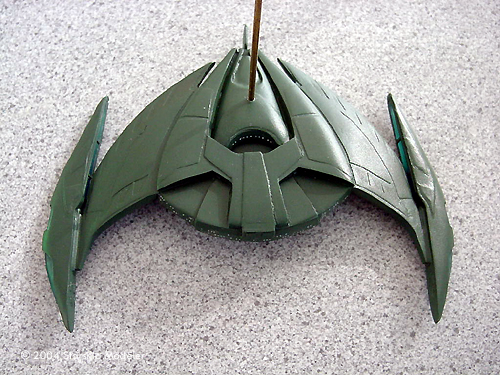
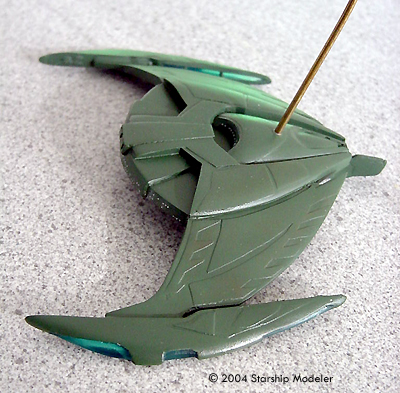
I have to admit I've not been following Star Trek: Enterprise, so I don't know much about the ships involved with the show. I'll leave the debate about whether they "fit" into the established timeline of the franchise to others, and just say that of the ones I've seen, I like the Romulan Bird of Prey the most. It just looks bad to the bone. VA Miniatures' 1/2500 scale kit captures that look nicely. What You Get Four resin pieces and a small sheet of decals are packed in a utilitarian plastic baggie, which is stapled to a printed card backing. You can get the kit with all opaque white resin pieces, or with the warp and impulse engine pieces cast in green-tinted clear resin. (The review sample came with the tinted parts). One side of the card contains a boilerplate decal usage guide; the other a hand-drawn sketch of where the decals go. There are no assembly instructions but none are really necessary. Decals are ALPS-printed by JTGraphics, and like all that company's products they are crisply rendered, perfectly registered and thinner than my wallet the day before payday. The scale is stated as 1/2500; I have no idea if that is correct so I'll give the model the benefit of the doubt. |
|
The model is maybe 3" long and 4" wide when built (76mm x 102mm). Compared to the 1/2500 NX-01's I've seen, it appears huge - but I'm not convinced those models are accurately scaled either. And the Romulans do seem to have a size complex (just look at the TNG-era Warbird)....
Building the Wee Beastie As with any resin kit, I started by cleaning up the parts. First I slathered on a good covering of Scrubbing Bubbles (a spray-on bathroom cleanser), let them scrub for a few minutes, then used an old toothbrush to scrub them off. Rinse, pat dry, and they're then ready for any surface prep needed. There was a small amout of flash and a bit of mold seam on all the parts, but that was taken care of with a few swipes with a sanding stick. More problematic was the surface "texture". Detail on the model consists of raised panels scabbed on to the basic hull shape, for the most part. They seem to .... undulate is the only word I come up with. There appear to be some "hills and valleys" in the basic shape, almost like sink marks on a plastic kit (but not as pronounced as on most plastic kits) which the panel detail hugs quite faithfully. It's not really obvious until you look closely. I used Mr Surfacer 500 applied with a toothpick to fill in depressions. After that had cured, a new fine-grit sanding stick leveled the detail out - most of it, anyway. I ended up sanding off some small portions of the raised detail toward each wingtip. Assembly is a no-brainer: Glue the appropriate warp nacelle to the appropriate side, glue the other, then add the tiny impulse engine piece to the rear. Before I broke out the superglue, I masked off the parts of the engines that should "glow", using liquid latex on the curved areas and masking tape on the straight/flat ones. I didn't feel it necessary to pin the parts. I did, however, drill a small hole for a wire stand. Painting and Finishing I primed the model with whatever light grey enamel was handy - Testors' Model Master Something-or Other, I think. When that had cured, I sprayed the entire thing a Gunze Medium Green acrylic (which exact shade, I didn't make note of ). Gunze paints generally dry glossy, but I always apply a coat of clear gloss over them anyway - I've had decals and setting solutions react with uncoated paint before. Decals went on without a hitch. The placement guide may be unsophisticated, but it's quite clear. The decals themselves went on easily enough and did not require any setting solutions. When the decals had dried overnight, I wiped the model down with damp paper towel, dried it off with a dust mitt, and sprayed a clear flat coat to seal everything in and kill the shine. The base is a take-out coffe cup lid painted gloss black. I cut a styrene disk to fit the center part, painted that silver, and adorned it with a Romulan emblem from one of J-BOT's excellend decal sheets. Conclusions Despite a few flaws, I'm happy with the way this model turned out. It's simple enough for just about anyone to build and paint, and will look quite fearsome towering over a puny Federation ship. It took me all of three days to finish (and I build at a glacial pace), making it an excellent weekender. Recommended for all skill levels. Many thanks to VA Miniatures for providing the review sample. Manufacturers and retailers, interested in getting your wares reviewed and publicized on a site averaging 3500+ readers a day? Contact us! |
![]()
This page copyright © 2004 Starship Modeler™. First posted on 29 December 2004.
![[Click to enlarge]](va_rombop-004F.jpg)