
|
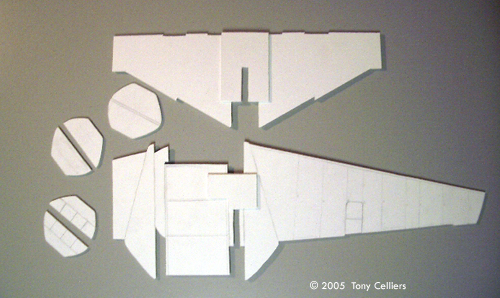
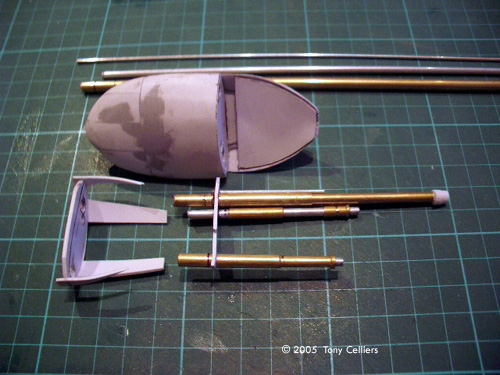
By Tony Celliers - images & text © 2005 This is a scratch built B-wing model that I completed in November, 2004. It took me 150 hours and is a completly scratch built. Base Construction I started off making a basic shape that fitted into one another for the wing configuration. This was used as a construction platform. I used 3mm PVC plastic which I found thick and strong enough to accommodate the full weight of the complete model. I used the same method as model aircraft builders use for aircraft wings. I then bent the plastic to accommodate the shape of the wings. This proved particularly difficult as my plastic was a bit thick to just bend and I had no heat gun at the time. I resorted to using a pliers and a lot of sanding to get the shape. The thickness and shape proved to be excellent for structural strength. |
![[Click to enlarge]](tc_bwing_D.jpg) |
|
Image: Basic wing structure Image: Wing and hull skeleton Image: Building up the main hull Image: Scribing the inside face helps curve the outer 'skin' Image: The center section will sit here Image: Building up the frame for the horizontal 'wings' Image: Wings under a coat of primer Image: Fits nicely Image: The rear part was built up using the 'plank on bulkhead' method Image: The blank for the front part sanded and ready for molding Image: Bottom and top halves Image: Chin guns Image: Chin guns in place Image: Assemblies for the front half of the cockpit pod Image: Canopy is tinted so you can't see in Image: The middle ring Image: The bottle in place Image: Cockpit/center section assemblies Image: Mounting lugs to attach the cockpit to the main hull Image: Center ring attached Image: Scabbed-on and engraved detail Image: Solder used to detail Image: More scabbed-on detail Image: The detail looks great when painted Image: Bottom hull detail Image: Blasters Image: In place Image: Wing-mounted blasters Image: Thrusters being cloned Image: Torpedo pod masters Image: Thrusters, intakes and blasters ready to be installed |
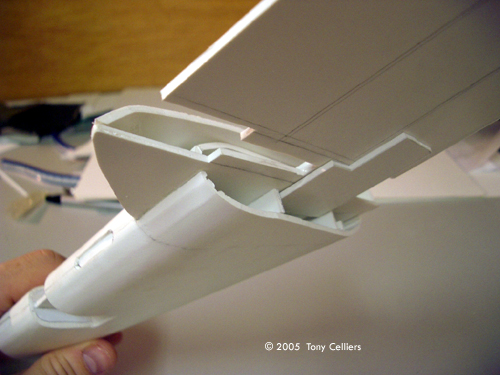
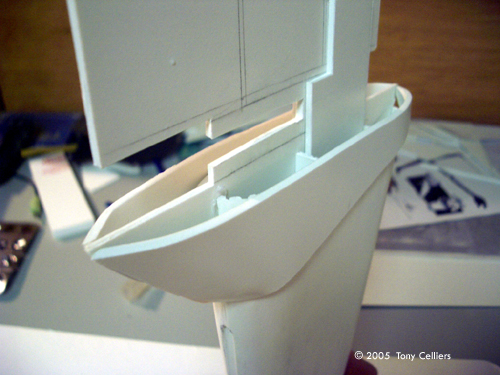
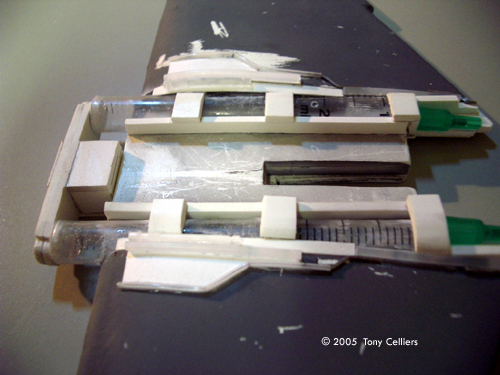
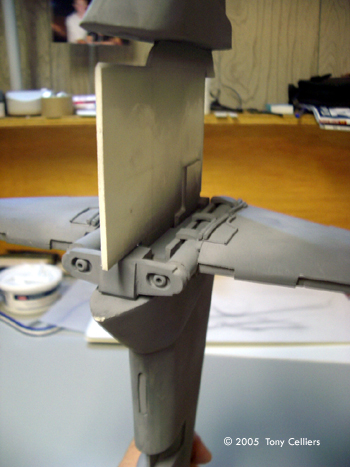
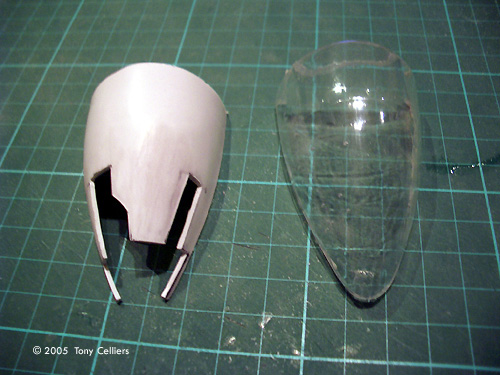
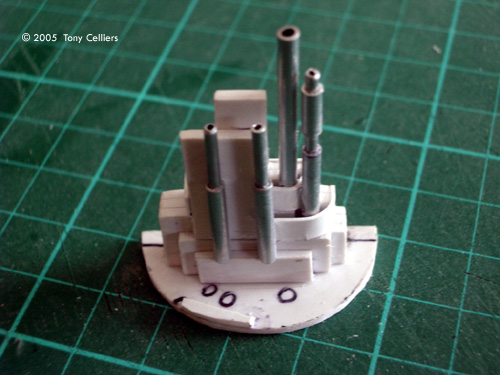
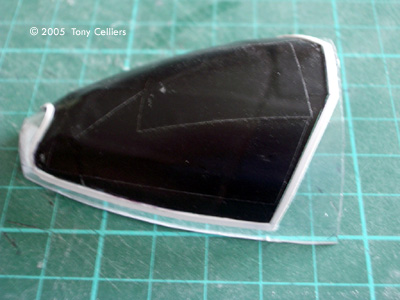
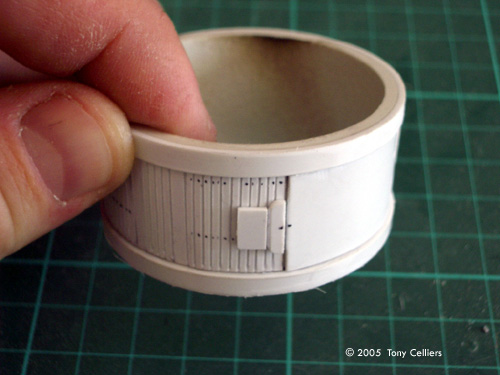
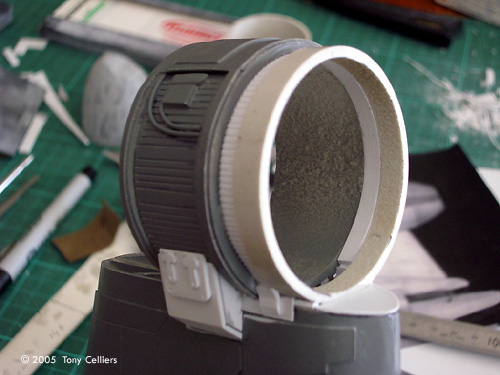
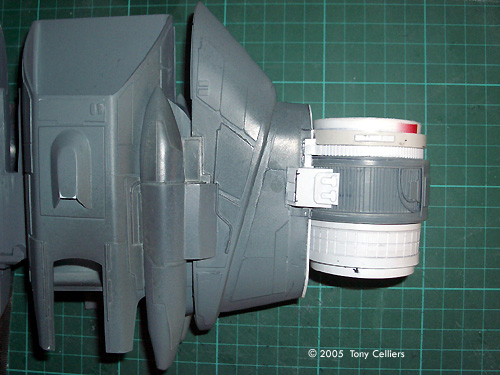
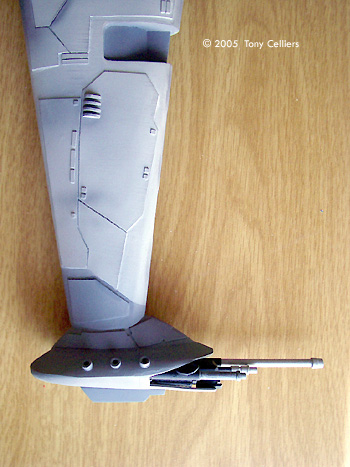
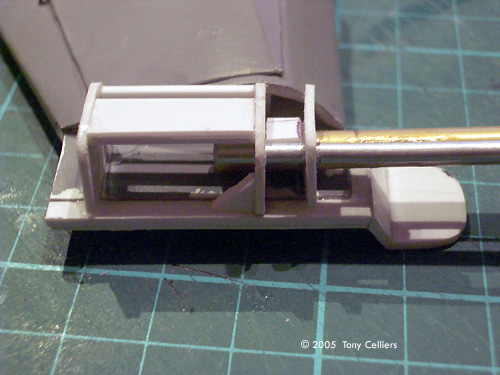
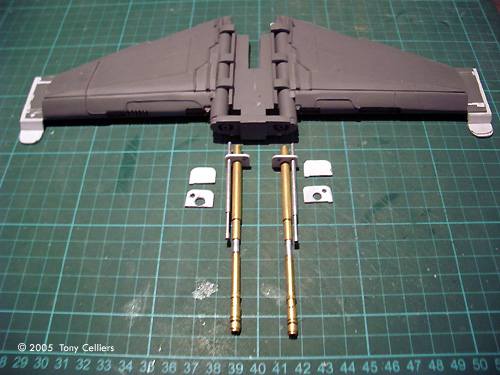
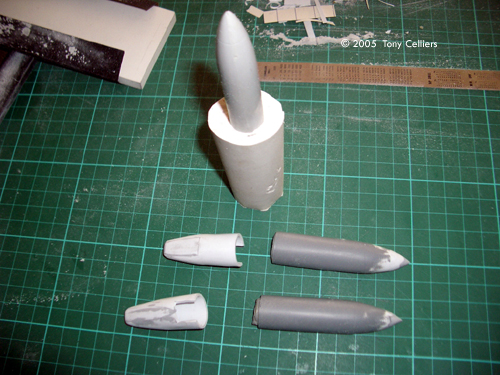
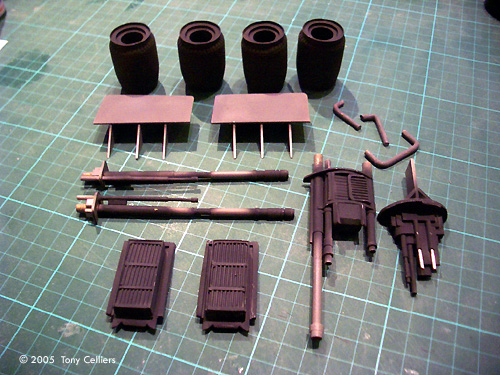
Wing Construction The wing was made in the same way as the large single wing. This wing does not fold up like in the movie but is fixed in place. I used 2ml syringes for the rounded effect and styrene and 1mm soldering iron for the detail. The wing unfortunately is not as detailed as it should be and is not an accurate representation of the original. This is due to not having enough visual reference at the time of construction. I would like to fix this detail problem but unfortunately have no time due to other model building commitments. Cockpit and Ring Construction The whole cockpit section was a challenge to build because of the shape. The back section was made by gluing strips of 2mm styrene around a pre-made shape and sanding them down. The round section was a bottle of cream that fit snugly into the ring (I wanted the cockpit to rotate). The bottle was reinforced to prevent collapse. The ring was a hard piece of plumbing pipe that my wife found for me. This was cut with an angle grinder into the different thicknesses needed. I made one half of the front end of the cockpit and vacuum formed this twice, once in 2mm styrene for the bottom and once in clear 2mm Perspex plastic sheeting. This was then sanded to shape, painted and glued onto a thin strip of plumbing pipe. This front section clips over the protruding end of the bottle so that the whole top section can come apart. The inner cockpit section and laser cannons can be removed should the need arise. I glued thin strips of 1.5mm styrene that I scribed a lot of lines into around the tube and bottle sections. I added detail using strips of soldering wire. Paneling and Detail All the paneling was made from 0.4mm styrene. It was bent into shape by hand for rounded areas. All the smaller parts, Thrusters, tubing, intakes and laser cannons were painted before application. The paint used was Tamiya acrylic neutral and sky gray as well as flat black and matte white. I used Humbrol model filler for all unwanted gaps. Weapon Construction All of the blasters were made from different thickness aluminum and copper tubing. These were cut to the correct length, sanded and glued together. They are also removable and simply pull out of the gun wells, for transportation purposes. Thruster and Torpedo Launcher The rear thrusters were one of the easier things on this model to construct. I made a master from the end of a broom handle. I lopped off the end of the stick stick, used a belt sander to get the shape and glued the exhaust detailing on (0.4 mm styrene strips). I then molded it with silicone and made the 4 thrusters with liquid plastic that is a 50/50 mix. This was sanded, painted and once the final paint work was complete I glued and screwed them onto the main body. The torpedo launchers were made in much the same way as the thrusters. I used a model aircraft fuel tank as a master for the main sections, but the back sections had to be made individually because of their shape and glued together. These were then sanded down on one side to fit snugly onto the main body. |
![]()
This page copyright © 2005 Starship Modeler™. First posted on 28 July 2005.
![[Please clisk to enlarge]](tc_bwing_a.jpg)
![[Please clisk to enlarge]](tc_bwing_2004-06-0202.jpg)
![[Please clisk to enlarge]](tc_bwing_b.jpg)
![[Please clisk to enlarge]](tc_bwing_c.jpg)
![[Please clisk to enlarge]](tc_bwing_E.jpg)