
|
By Rafael Mateo - images & text © 1999
(Note: These ratings are for the stock ERTL kit only). |
This kit spent about five years sleeping in the closet, waiting for the moment I would choose it for my next project. |
|
|
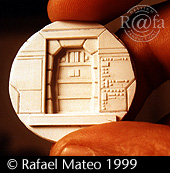
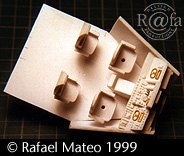
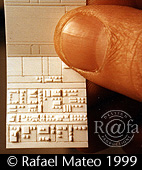
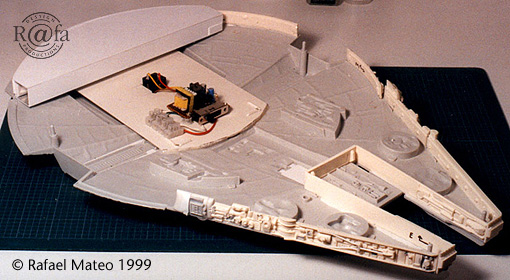
The two main hull parts are well molded and detailed but the same could not be said about the side panels, cockpit and other parts. I spent the bulk of effort on this kit correcting the side panels, cockpit, escape pods, engine grill and super-detailing the upper main hull. First: The side panels The side panels are poor detailed and really out of scale. The model seems the Kenner toy if we use these parts - it looks "fat". We can choose two options to correct this: we can scratch built them or we can buy the "side panels set" from Falcon Kits. I chose to buy Jack's side panel set for this model. The "side panels set" are good resin parts that accurately replicate the look of the studio model. I found only one little problem: I needed plenty of patience and putty fill in dozens of very little air bubbles. Really, that is not too much work to get a great change in the quality of the model. Second: The Cockpit I used the Chewie and the unknown figures, but I did not use any of the kit parts in the cockpit. This is the poorest cockpit you can imagine (a clear part for the back wall and door, and a floor with only two seats, without any kind of detail or instruments). Instead, I made my own cockpit parts with sheet styrene from "Evergreen", as follows:
All that work was hard and long but it was worth it! |
|
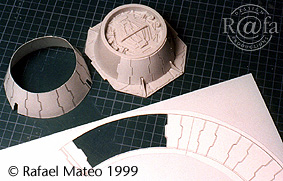
Third: Escape pods. The kit's escape pods did not have any details on the outside which looked poor and bare in contrast with the main hull. I added these details using sheet styrene. Fourth: Engine grille
Fifth: Super-detailing the upper main hull The kit's rear part of the upper main hull does have not a great details. However, we can change it using selected parts from other model kits, trying to match the look of the IL&M models. I also detailed the upper outside of the cockpit towards the ship's center. Sixth: Painting the Millennium Falcon It is really important to get good photos from the original models. There are many good books we can use for this. I used Tamiya acrylic paints and artist oils and: |
![[Top]](rm_falc8.jpg) |
|
|
I made the display stand from a piece of pine wood. It Includes the switch, batteries and the cable runnin inside to the model. It is connected with a jack on the belly of the ship.
More model photos and info (including templates for engine grill and pod panels) -only in spanish, sorry- can be seen here |
Please note that the opinions expressed in this article are those of the reviewer.
Read other reader's reviews of this kit ![]() Submit your own review of this kit.
Submit your own review of this kit.
![]()
Go back up | Star Wars Ships | Starship Modeler Home | Site Map | Feedback
This page copyright © 1997-9 Starship Modeler™. Last updated on 6 April 2001 (text) - 15 November 2015 (formatting).
![[Click for larger view]](rm_falc1.jpg)
![[Top]](rm_falc2.jpg)
![[Port side]](rm_falc3.jpg)
![[Bottom]](rm_falc5.jpg)
![[Completed cockpit]](rm_falcon7.jpg)
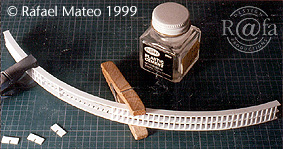
![[Rear]](rm_falc6.jpg) The AMT/ERTL kit offers two clear parts for the engines. But what's on the inside? Fortunately, with the new images added on the "SW Special Edition" we can take a look at the engines and we can (at last!) see what it's supposed to look like. I made the engine grille
The AMT/ERTL kit offers two clear parts for the engines. But what's on the inside? Fortunately, with the new images added on the "SW Special Edition" we can take a look at the engines and we can (at last!) see what it's supposed to look like. I made the engine grille ![[Right side]](rm_falc_right.jpg) The Millennium Falcon is the most popular starship from Star Wars. Is really a "must have" model for all the Sci-Fi fans and it looks great - especially when taking the work seriously and always trying to match the IL&M models.
The Millennium Falcon is the most popular starship from Star Wars. Is really a "must have" model for all the Sci-Fi fans and it looks great - especially when taking the work seriously and always trying to match the IL&M models.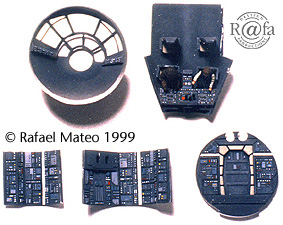