
|
![[Please click to enlarge]](ratat_0087_left.jpg) |
|
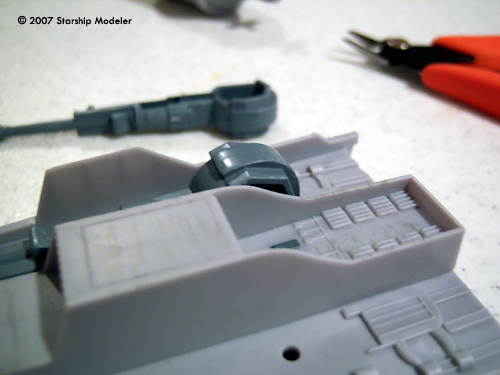
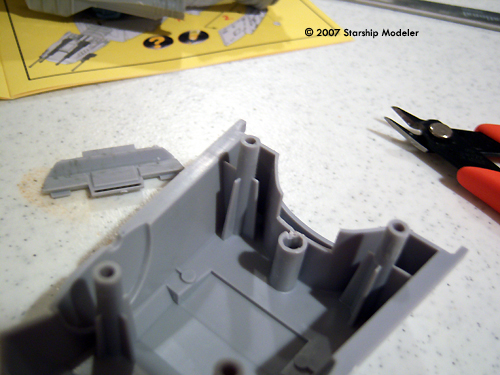
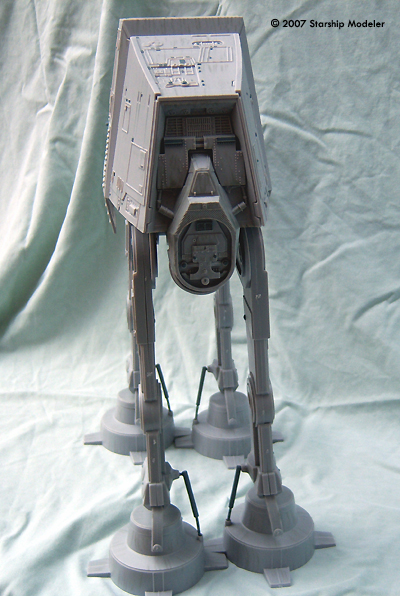
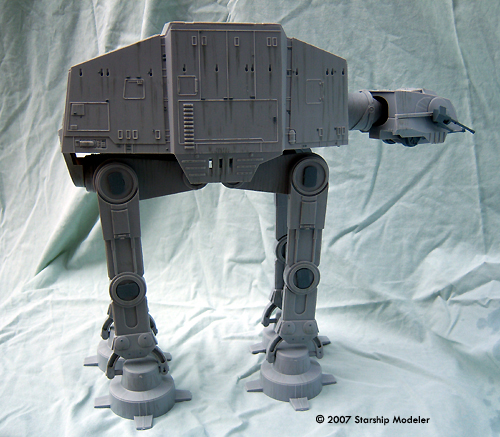
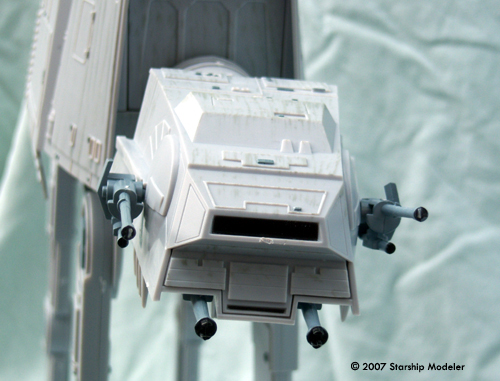
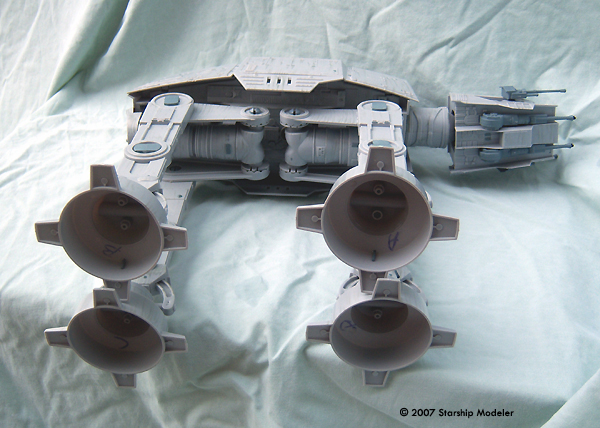
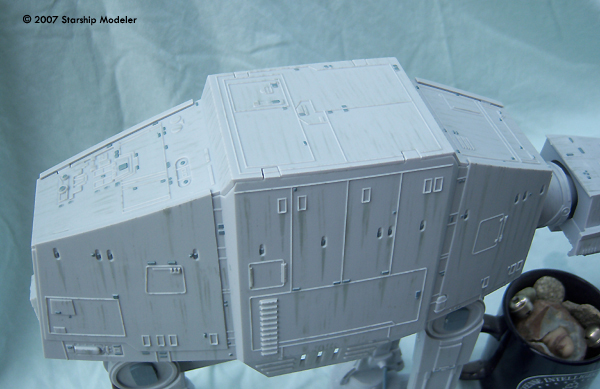
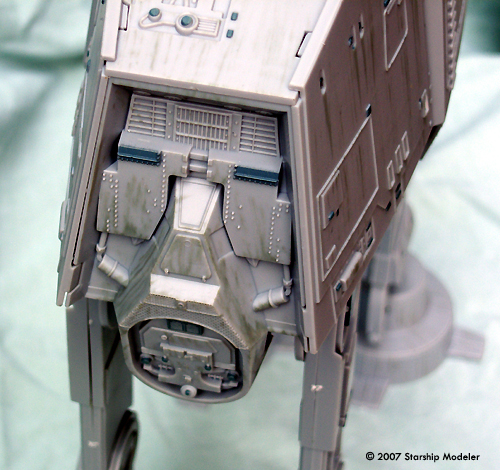
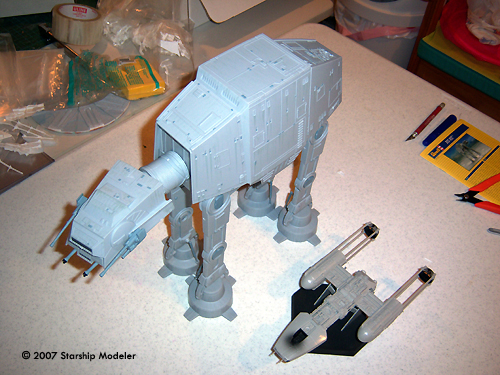
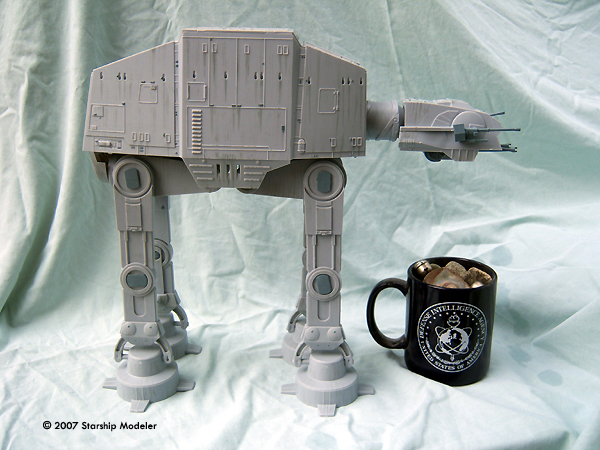
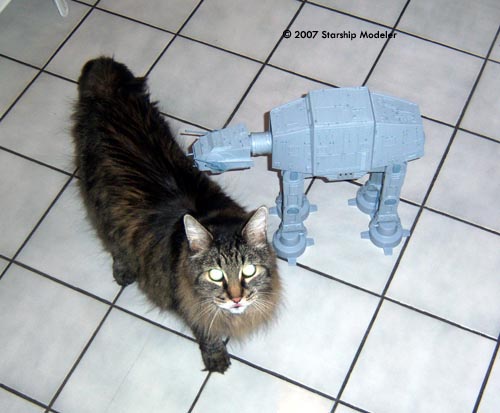
Image: Parts Image: Most of the hollow part is hidden Image: Parts, overall, are a very tight fit Image: The only molding flaws I found were sink marks on the yokes Image: Rear view Image: Right side Image: Head shot. Yes, I know I got the guns upside down. Image: Right/front Image: No matter how you assemble them the secondary cannon are off-axis Image: Underneath Image: Back Image: Rear detail Image: Size comparison with FM Y-Wing Image: Mugshot Image: It's Lord Vader's turn on the computer, missy.... Image: Is that all you got? |
We've been waiting a long time for a decent, affordable scale model of the All Terrain Armored Transport that debuted in The Empire Strikes Back. Revell have just released a new kit of this sci-fi icon. Is the wait over? Short answer: maybe. Long answer: What You Get The Revell AT-AT EasyKit comes in a box that's much too big (and the subject of some frustration on my part. Like with the Fairey Fulmar from MPM, the box is so big that parts get rattled around and break off the sprues because there is too much empty space in there. Add to that the box is an odd size, already "oversized" according to the new postal rates, so shipping is half again or even twice what it needs to be for the weight. The parts could easily fit in a 1 cubic foot shipping container, but instead, I have to use a 2.5 ft cu to fit the manufacturer's stupid box. But I digress). Inside are 6 sealed baggies containing 65 parts on four sprues - the sides and top/bottom are in separate, sprue-less bags). The parts are well molded, with no mis-matched halves, few visible mold seams, no flash on parts, no overly large sprue attchments - in short, what we expect from the late 20th Century. Detail is mainly raised bits, including "panel lines" (seams between armor plates); it's rendered crisply enough as not to cause complaint. Detail overall is somewhat simplified when compared to the studio models. In particular, the secondary guns are logs compared with the "real' things (but that's a dead easy fix). Some spots that should be recessed are simple engraved panels, especially around the "head". The main guns are "hollow" - in that they look like an open, gun-shaped box with the open end butting up against the underside of the head (no doubt for ease of molding). All the cannon are solid, and could benefit from their muzzles being hollowed out. Also, there's some sink marks on the foot "yokes", but that's the only place I found those flaws. The kit is engineered such that you can set the pose of the legs into pretty much any form you want, from standing at attention to line dancing to collapsed and ready for a snow speeder to finish off. However, the neck moves side to side, but not up and down, so you can't (easily) replicate the scene from ESB where one falls on its face, butt hanging in the air. The kit is pre-painted and pre-weathered. Out of the box, the effect is not bad. The painting is lightly applied over the bare plastic which gives the model it's base color. It's not nearly as grungy as what you see on screen spanking the Hoth defenders, but hey - maybe they washed the machines after the battle and this the result. Regardless, a light coat of primer will not round off the raised bits unacceptably. Accuracy Is it accurate? Now there's a good question. I'd answer: "mostly". The porportions overall seem right, and almost all of the details are captured - especially the raised ones. There are a couple gigs I caught straight off. From minor to not-really-minor: The main body and feet have raised strips for "panel" detail. On the main body, it should be engraved, to represent the gaps between slabs of armor. Not a big deal, except that the raised detail disappears across a couple of "tabs" on the top of the beast, so that you'd have to add some strip to make it a continuous thing if you decided to go with "weld seam" and be done with it. |
|
On the feet, the raised bits are completely spurious. There should be a diagonal pattern around the circumference, and no raised lines on the "toes". This, at least, is very easy fix with a scribing tool and a couple inches of label tape - almost trivial, except that no fix is ever trivial for me (I always find a way to screw up that kind of thing). As with previous plastic versions of the machine, the rear-end of the model is just a "stamped" piece protecting the rear drive unit. From the pictures of the studio model it looks as if the inner face of the end cap should be different - at least filled in, as on the SMT/Blue Moon kit. Now for the biggie: the head. Revell has a pronounced bar running back from the "ear" position, as does the MPC kit but no other version of the subject I can find. I don't know what Revell used for reference - presumably it's what LucasFilm gave them - but I can find no picture of a studio model that shows this feature. And you can't fix this easily, without destroying the detail around the "ear". It can be done - I'd suggest epoxy putty and sign vinyl - but the effort will be non-trivial. Personally, I'd just as soon wave my magic wand and declare this an AT-AT-b, product of the government yards on Trantor Prime (and so using a different set of plans) and call it a win. You know, kinda like there are a gazillion variations of Me-109 and no one but the truly "dedicated" can tell the differences (wooden tail? Really? That's evident from the pictures?) Update: As is always the case, no sooner had I written the above than I received an image of one of the studio filming models that shows that Revell is correct to place that bar behind the "ear", but it's much too long. The shape of the head at the rear is also wrong; the rear edge should drop straight from top to bottom, instead of taking that jog further aft at the bottom. And the area at the top rear delineated by scribing should actually be "beefier" - like hat scabbed on, not an engraved line. At least the secondary cannon barrel, which on the original came from a Tamiya PAK 40 kit, is actually close to correct. Live and learn..... Assembly and Finish The good news is that this is a kit that wants to be built. Everything fits together near perfectly - and stays that way. The fit is so darn good that getting parts apart again requires serious effort - so don't do what I did, and forget to add the neck in Step 4, or put the secondary guns on upside down (as I did - just look at the pictures!) Except for part 9 in Step 4 - OK, glue will help keep that sucker in place. Seam lines fall in areas - for the most part - where they will not be obvious, the exception being the model's back. Of course, gluing and putty will make for a better model - but honestly, even without glue there's not a lot of room for putty. You really do need to sand off all the attachment stubs after snipping the parts from the sprues though - any extra WILL interfere with the fit. But on the plus side - no rubber-bands are needed….. When it came to the feet, I used a magic marker to label the inside of the each part (part 29 a-d) with the corresponding letter A-D. Then I made sure to assemble all the A parts with A's, B's with B's, and so on (*steps 10-13). I'm not sure it's necessary, but I didn't encounter fit problems, so it must have worked out. The feet are hollow, which is not so much a problem if all four are planted on the ground. If your display envisions the soles being visible, you'll need to do some work. Good news - you can fill all four with plaster of paris, resin, clay, or epoxy putty and keep the model from being easily tipped over. We're not done with the feet. The little articulating rods (parts 32 a-d) are a loose fit and fall out easily. They are not overly convincing as to being functional on the completed model either. You'd be better off to scratch build something in their place. It's not clear from the instructions, but the outward faces of the pins that keep the legs together (parts 25 and 27) should be vertical - up and down when viewed from the side. (Yeah, I did not get that right either). The inner faces need to be covered up; luckily, it's an easy thing to punch out some disks from spare plastic to cover the holes. Verdict In short: this kit does not suck. Longer form: This kit is a good base on which to build the Ultimate AT-AT. It's close enough to a True Modeling Scale (depending on whose measurements you put your stock in - my money is on 1/72) that you can readily display it with all your other models and not shunt it off to the oddball shelf - not that it would consent to stay there, given its size. Yes, it needs work. I haven't met a kit that doesn't, however. The major drawback to this model when it was first introduced was its price. However, it is now available from Revell (USA) in the US, making it much less expensive for North American buyers than when it was only available from Revell Germany. Regardless, you get what you pay for … and in this case, you get a decent model. It's up to you to decide whether the cost can be borne. Many thanks to wallet for providing the review samples. Manufacturers and retailers, interested in getting your wares reviewed and publicized on a site averaging 3500+ readers a day? Contact us! |
|
![]()
This page copyright © 2007 Starship Modeler™. First posted on 2 October 2007. Last updated on 26 March 2009.
![[Boxart]](ratat_box_0066.jpg)
![[Please click to enlarge]](ratat_0097_above.jpg)
![[Please click to enlarge]](ratat_0092_feet.jpg)