
By Jim James - images & text © 2005
|
![[Click to enlarge]](jj_slave_01-frontright.jpg) |
|
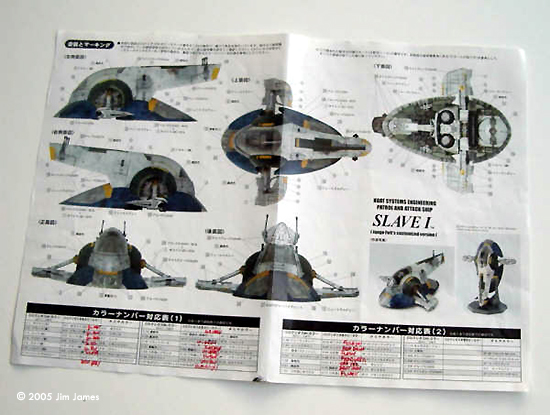
Image: Paint chart Image: Skirt, top view Image: Underneath Image: Brass stand inserted
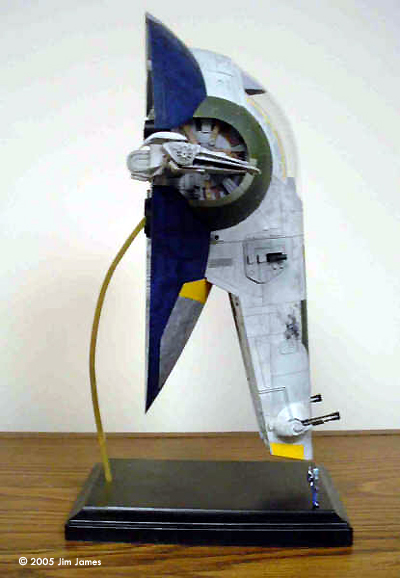
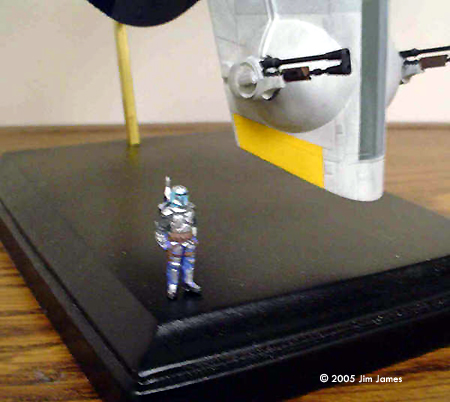
Image: Starboard side Image: Jango figure lends a sense of scale |
This is one of the nicest model kits I’ve ever built and suffers from only one challenge in that the instructions are in Japanese. Building in Modules It makes sense to build the model in separate modules – the cockpit, the fuselage, the skirt, the wings, the wing inserts and the underside. There are also several smaller modules that should be assembled separately – the gravimetric mine, the scanning disk (?), the rear guns and the engines, for example. These parts will be added during assembly but are easier to build and paint separately. Painting If you’re using Gunze Sangyo, all you need is the English conversion chart from HobbyLink Japan (look for a link in the body of the review). If you’re using Tamiya paints, you can probably make do with the kit instructions. If you’re limited to Testors and Humbrol paints, start by downloading the chart from HLJ, then get the paint translation charts from IPMS Stockholm's website. This will help you find color equivalent in Testors, Humbrol, etc. Even though you can work out color equivalents, you still can’t translate the painting tips scattered throughout the instructions and which generally relate the shades of weathering. However, if you study the weathered areas on the instructions, you can usually find numbers for two colors – one is applied over the other. To keep it simple, keep two things in mind: The color equivalents are pretty straight forward but questions have been raised on the following: Weathering The secret to making this model look really cool is weathering. Use the color photos that come with the kit to establish the unweathered color scheme and paint accordingly. You need to start with a clean ship. Don’t assume that weathering will cover sloppy painting. Mask to create clean and sharp color demarcation lines. Note which areas are not heavily weathered (the yellow decaled areas for example). I used a sharp pencil to bring out the recessed panel lines. Weathering techniques are usually up to individual preferences. For this project I used washes with diluted India ink (mainly for the recessed detail in the cockpit and on the underside), black pastels (general dirt and streaks) and weathering in color as suggested by the instructions (darker gray over gray, for example) stippled on with a lightly loaded, stiff brush. Paint and weather the main modules before final assembly and don’t over do it. Too much weathering makes your model look more like a model. Seams and Putty There’s not a lot of puttying required on this model since
|
|
The one that’s the most
obvious is the center joint along the main fuselage top. You’ll need a
little putty and light sanding to make sure it’s hidden.
Tips Final Assembly The sub-assemblies go together very easily and very logically although I would suggest leaving the canopy until last to reduce glue mishaps. I used a bead of Testors canopy glue to secure it. Display The Fine Molds stand is pretty nice but a little clunky. I puttied in a piece of square brass tube on part E 14 so that I could mount the model on a wooden base. I didn’t use any of the FineMolds base (including the name plate and name plate decal). However, I did place the standing Jango Fett figure in the corner of the base. Makes a nice instant scale reference. Conclusions I feel guilty not adding lots of tips and hints but apart from matching colors, this is one of those kits that builds itself. It’s really hard to mess it up. If you’re a Star Wars modeler, this is the one to have . . . and it can make a nice diorama partner for the Jedi Starfighter. |
![]()
This page copyright © 2005 Starship Modeler™. First posted on 28 March 2005.
![[Click to enlarge]](jj_slave_02-box.jpg)
![[Cockpit interior]](jj_slave_07-cockpitinterior.jpg)
![[Click to enlarge]](jj_slave_10-upperstarboard.jpg)
![[Click to enlarge]](jj_slave_11-rearright.jpg)