
By Joe Jimenez - images & text © 2006
|
![[Please click to enlarge]](jj_bwing_00_completedfront.jpg) |
|
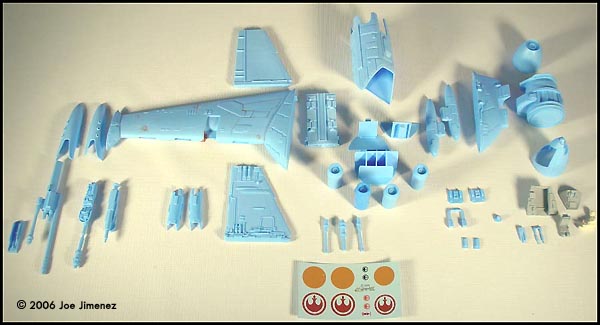
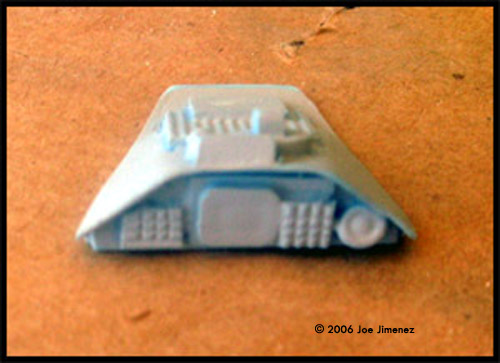
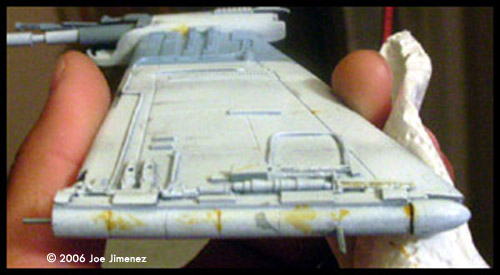
Image: What you get (minus the vacuformed clear canopies) Image: Updated parts (as compared to the original version) Image: A little putty work Image: Added panels throughout the ship Image: Wire details Image: Adding detail to the main wing Image: Rebuilding the main cannon Image: Drilled out resin details Image: Underneath Image: Other side Image: Drilling out fastner details Image: Detailing the engines
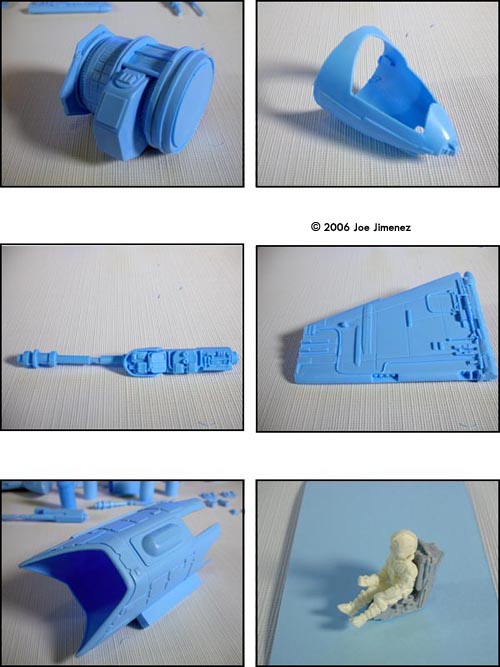
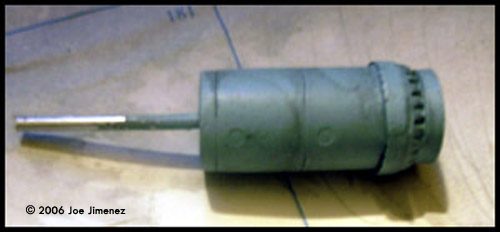
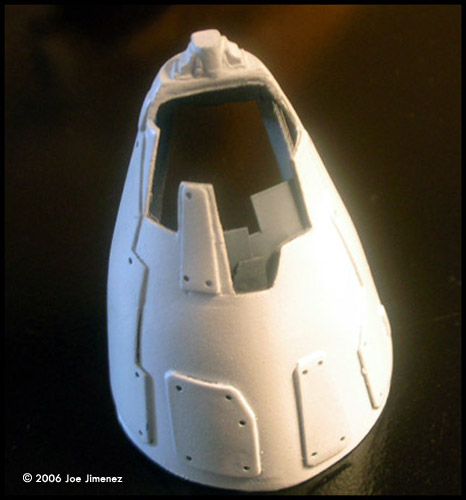
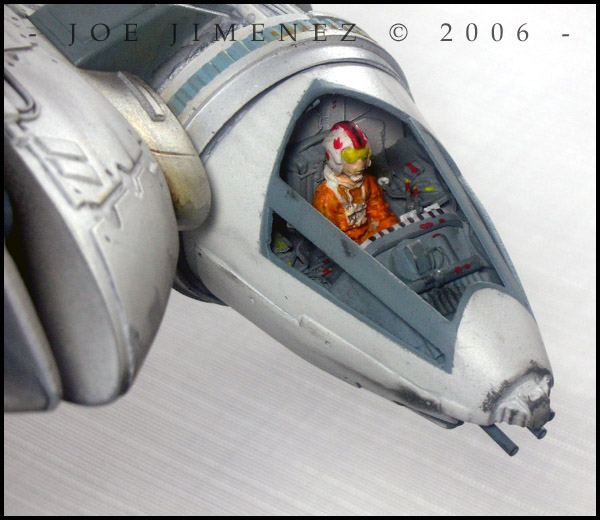
Image: New chin guns made from tubing Image: Stock instrument panel Image: Stock interior Image: Adding details to the interior Image: Instrument panel after detailing Image: Details on the back cockpit wall Image: Painted cockpit Image: Painted sub-assemblies Image: Lots and lots of squares! Image: Thrusters were "pinned" for strength Image: So were the S-foils Image: New panels added to the cockpit exterior Image: From behind Image: Cockpit with a pilot from my spares box Image: Another look Image: cockpit front Image: Engine block Image: Details Image: Upper S-foil Image: Lower S-foil Image: From underneath Image: Completed main cannon pod Image: Another look Image: The business end |
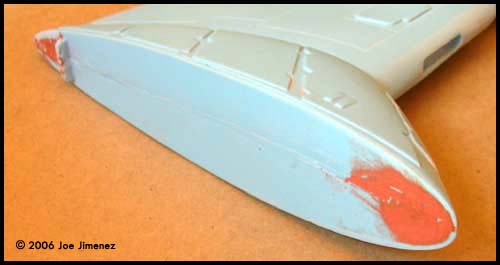
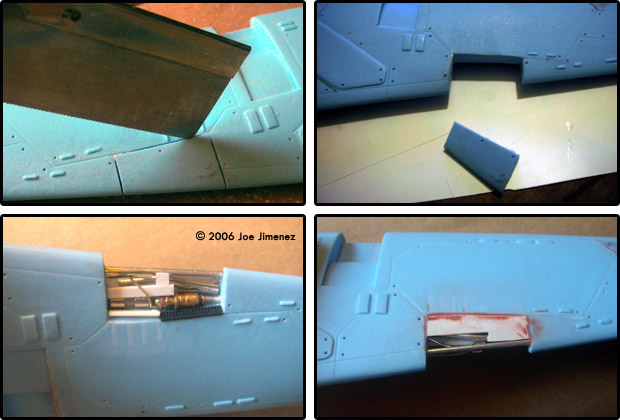
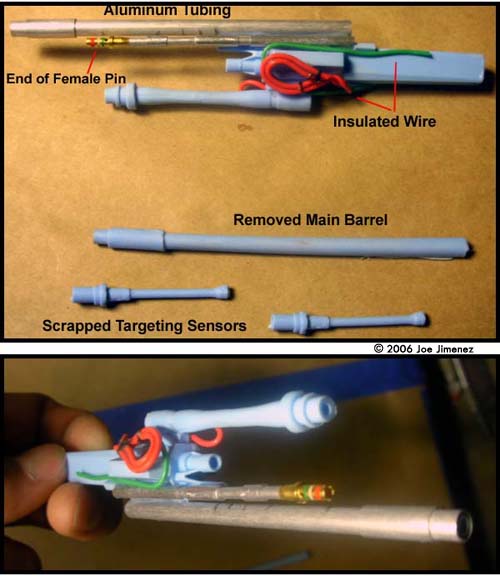
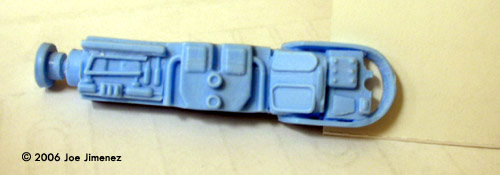
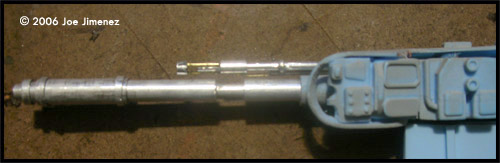
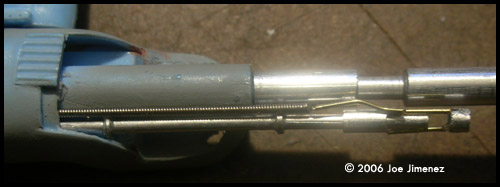
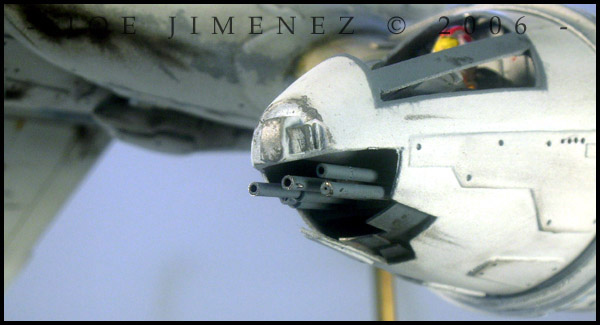
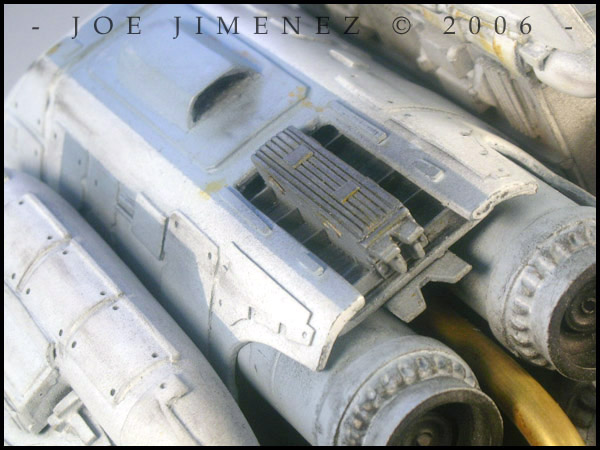
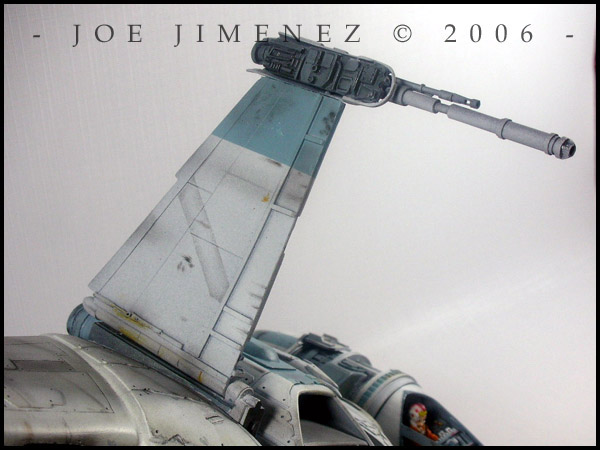
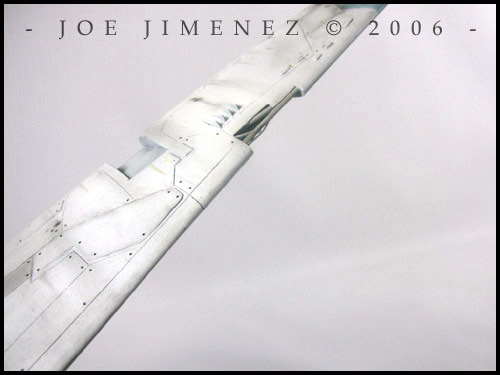
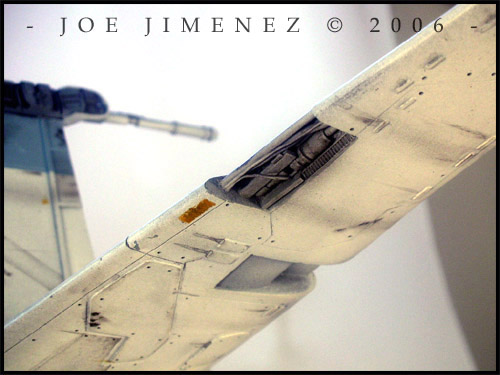
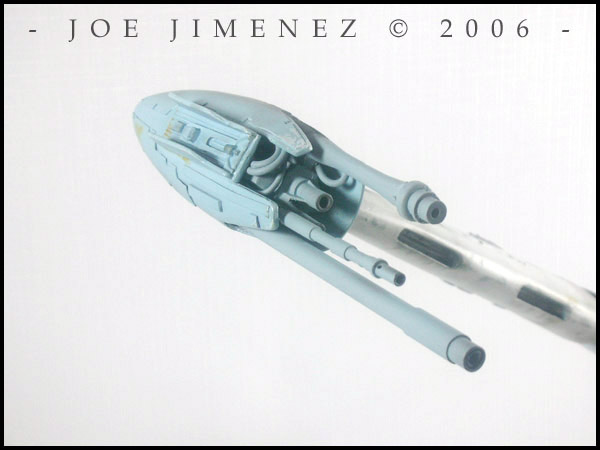
The B-Wing has to be the wackiest but coolest looking starship of the entire Star Wars saga. A kit that is practically ignored by big kit companies, prayers were answered when the now defunct garage kit maker SMT released their B-Wing, mastered by the very talented Alfred Wong, around 2001. This put the aging AMT version to shame in that it was 16 inches long and featured better, more accurate detail. Well, unfortunately, production of the SMT B's ceased and people once again began to pray. This time around, Blue Moon comes to the rescue with an updated version of Mr. Wong's fighter helping to satisfy the child inside us all. Packaging My copy came to me double boxed and packed with plenty of foam peanuts. I was a bit concerned when I noticed that most of the parts in my kit came in one big zip lock bag. Some parts were broken but luckily they were parts that I would modify anyway, such as one of the s-foil barrels (Based on Joe's feedback, all production kits are now packaged differently in order to minimize breakage during shipping- Ed.). The pilot, seat and decals were bagged separately. The canopy was sent separately later on since at the time I received the kit, those parts were still being produced.Changes If you think this kit is a rehash of the old SMT version you're in for some pleasant surprises. Some things have been reworked including the main wing which is now one solid piece instead of two half parts. Another example, the gyro collar (center piece in the cockpit assembly), now sports two rows of scribed squares to simulate the detail of the studio models instead of just straight lines. The four engine thrusters also got a facelift. The turkey feathers once present in the SMT piece are gone and replaced with a slotted ring. Accuracy The basic shape is accurate. Most details are not. The inaccuracies worth noting are the extra long main wing gun pod, gyro collar, and various panel placements. The gun pod is actually a little longer when compared to the film miniature reference I was looking at. As for panels, the engine housing shows the best examples of inaccurate or missing details. The cockpit collar looks good and is well built. It's only after looking at studio model references that you see slight differences. Additionally, the scribed panel lines and cockpit could be considered a bit inaccurate but honestly, they look good as is. On the flip side, some of the smaller inaccurate greeblie details actually compliment the kit, and in some cases, they look better than the studio model's. Is there room for improvements? Yes, but I seriously doubt this kit would be frowned upon if built completely out-of-box. The decals did not match the studio model I was using for reference, which is the B-Wing without the orange circle markings. If you are building the version with the circle markings, those decals provided are spot on. The rest of the decals, such as the rebel insignia, are well made but unfortunately, I had no use for them on my kit. Molding Quality Blue Moon has done a fine job casting this kit. I found only two tiny air bubbles on the ship which would not have been seen even if I hadn't filled them. The resin is an absolute dream to work with "weakened" only by its ability to sand so well, you may accidentally sand down to far. The resin is tinted baby blue which makes flaws a little easier to spot and eliminates the need to primer parts so often. A few parts such as the s-foils and rear dome located of the gyro-cockpit assembly had a bit of an orange peel texture but fine sandpaper quickly resolved this. One thing your build could benefit from is a new pilot. The kit supplied pilot served it purpose for me but the detail is a little dull especially in the face and some air bubbles were present. Panel lines did need to be cleaned-up a bit but that's normal in just about any good resin kit. You'll find the normal mold lines but these are easy to fill and sand. The main wing had some areas in the mold line that needed some extra attention but nothing serious. There was hardly any flash on my copy except in nooks and crannies which was removed with a sharp X-Acto blade. Very minor work had to be done to assist in the fitting of some smaller parts such as the gun pod halves. The fit of the main fuselage pieces, however, is just about dead on. Construction I started construction with the gun pod which received added panels cut from sheet styrene (‘for sale' signs) and new gun barrels made mostly from aluminum tubing. I also replicated the cables in the gun pod with regular insulated wire. The main wing received four new winglets which were also cut from thin styrene and the exposed section seen on one of the filming models. A chunk of resin was cut out and the space filled with bits and pieces making sure this area looked as close to my reference as possible. Drilling rivet holes is one simple modification that greatly improves this kit! I took a 1/32” Dremel drill bit in a pin vise and went to town! Aluminum tubing was once again used to improve the s-foil guns. I also scratch-built the smaller barrel and some detail at the base of the guns. The separate gun housing cover needed some Aves Sculpt to cover the seams after assembling to the gun base. My pin vise was used again to drill out some extra resin on the gun base. After painting the s-foils, I went ahead and inserted pins to aid in assembling them to the fuselage. The engine housing received some panels and I also detailed the aft block pieces by scribing lines and adding styrene bits, model railroad details and modified tank tracks. The thrusters were installed by inserting pieces of tubing to the ends which were then installed into the assembled aft block piece after drilling holes through it. This helped by allowing the engines to protrude out a little more. I also modified the vents on the top and bottom of the engine housing. They come rounded and closed off at both ends so I took my hobby saw and Dremel to open the rear end. I pinned both sides of the fuselage by running threaded rod through a piece of balsa wood that was snuggly inserted into the hollow engine housing, an idea I borrowed from a SMT B-Wing build-up by another modeler. This insures that the engine housing, if mounting other than straight up, will not warp overtime due to the weight of the solid resin main wing. Panels were also added to the fuel tanks (aka missile pods). I added wire detail to the shorter piece of fuselage adjacent to the gyro-cockpit collar. Here, I also inaccurately simulated some detail on the gyro collar when I used large patterned styrene sheet to fill an area near the front that was missing detail. I was still pretty satisfied with the result. I scribed panel lines into the aft cone piece of the cockpit assembly using the back edge of a X-Acto knife and Dymo tape. A lot if time was spent cutting up and shaping 40 little squares to be added onto the existing scribed squares on the gyro collar which, by the way, looked a lot better afterwards. As mentioned before, I had not yet received the vacuum-formed canopy when I was putting the cockpit together so I scratch-built the two beams. I added a lot of detail to the cockpit to help make it look like the movie models. The pilot and seat had to be filed down a bit for a better fit. I did not add decals since I have not yet acquired markings similar to those used on the ILM models. I mounted my B-Wing with bent brass rod and a painted wooden base. 5-minute epoxy was used to hold the pose I chose to display it in. |
|
Painting & Weathering I started by laying down Plasticote gray primer followed by a black base and then flat white. The blue-gray and darker gray areas on the model were custom mixes. Before weathering I applied a coat of Future. I usually do this before washes but surprisingly I really only used a wash on the undersides of the s-foil guns where all the detail is. I applied some wash into panel lines near heavily worn areas, but as far as I could tell, the studio B-Wing I was modeling mine after didn't really have washed panel lines. Pastels and masking were used to simulate worn panels. For streaks and burn marks I used a product I picked up at the SSM table at Wonderfest, Tamiya's Weathering Master Set B (I mainly used Smoke). I was really surprised with the results! To further highlight the burn marks, I delicately dabbed moistened ground black chalk pastel with the tip of a fine brush onto the already made burn marks. I'd then take a paper towel and oh so gently pat the wet ground pastel to soften things up a bit. Add some gray pastel to the surrounding area to blend everything together and you are in business! Oils were also used for smaller streaks. For rust, I found that the same color I used for the pilot, Floquil Orange, looked a lot like the one used for rust on the movie models. I would apply a fairly heavy application with a fine brush and then either pat down with a paper towel or streak with a cotton swab. This would take away most of the color so that it gave a stained appearance. Steel wool was used during weathering to soften and blend things. Finally, a flat clear was applied to seal all the work I'd done Overall As with most garage kits, building this model might be a little difficult for the beginners but will bring lots of enjoyment for the more experienced modeler. You get plenty of resin for the money and the updated details make it worth the buy. There are a some inaccuracies with this model but a nice result can still be achieved with a little work and patience. There is no stand but I feel it is better without. Given the many posing possibilities with this subject, modelers can distinguish their kit from the rest by mounting differently. History has shown that production of nice models like this can suddenly cease. I recommend not missing out on this chance to own one and fill that void in your sci-model collection. Stop reading this and go order one now! |
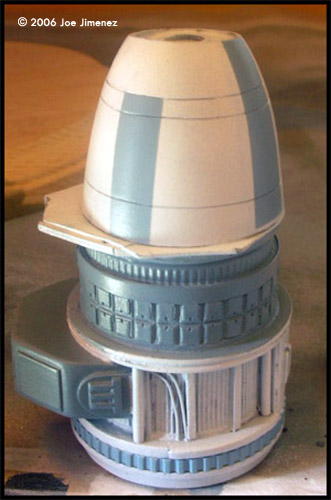
![]()
This page copyright © 2006 Starship Modeler™. First posted on 19 December 2006.
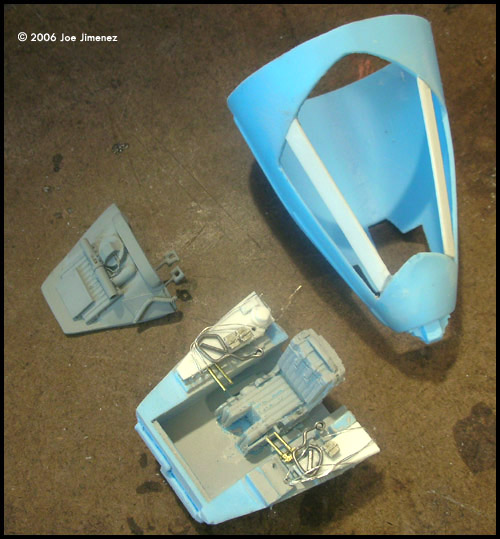
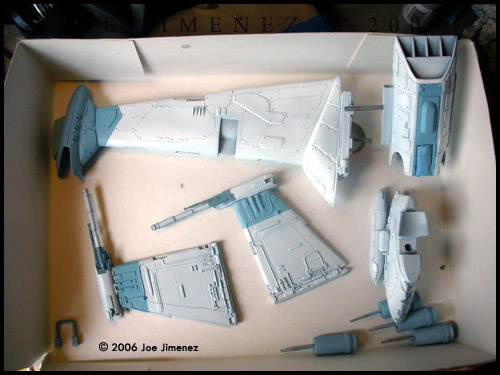
![[Please click to enlarge]](jj_bwing_05_Added_Panels_And_Bits.jpg)
![[Please click to enlarge]](jj_bwing_10_New_S-Foil_Guns.jpg)
![[Incorrect_But_Satisfying_Detail]](jj_bwing_15_Incorrect_But_Satisfying_Detail_lil.jpg)
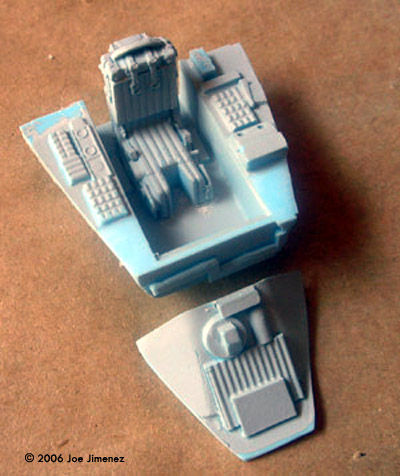
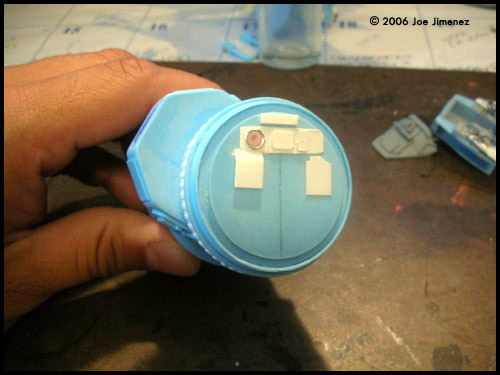
![[Please click to enlarge]](jj_bwing_23_Completed_Unassembled_Cockpit.jpg)
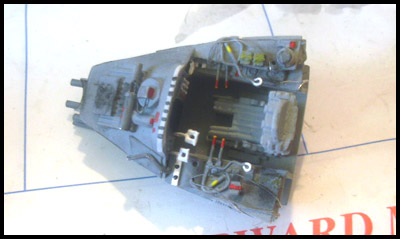
![[Please click to enlarge]](jj_bwing_30_flview.jpg)
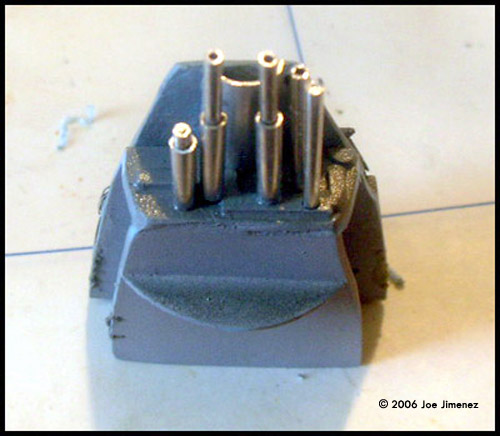
![[Please click to enlarge]](jj_bwing_40_Chin_Guns.jpg)