
By Carlos Zangrando - images & text © 2003
|
![[Click to enlarge]](cz_XWing01.jpg) Once there was a barely know filmmaker called "Lucas" or something, who got the idea of borrowing the best from the space opera, specially E. E. Doc Smith "Lensman" and "The Lord Tedric" series (just read "Lord Tedric: The Black Knight of the Iron Sphere" and you'll actually imagine entire Star Wars scenes and characters, including Vader, Han Solo, Chewbacca and the Death Star!), mix with equal amounts of WWII movie heroism, hire a bunch of teen film students with a lot of imagination, and created what became almost a religion on it's own: STAR WARS! |
|
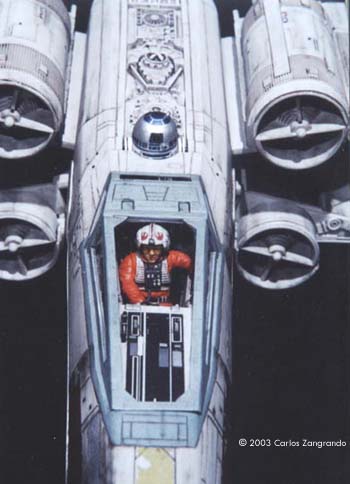
Image: A closer look at the pilot |
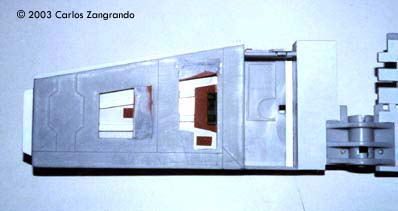
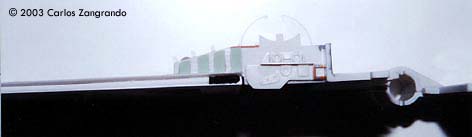
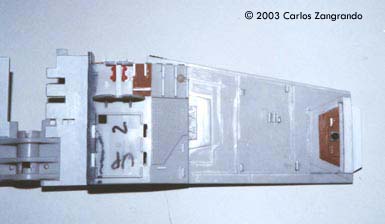
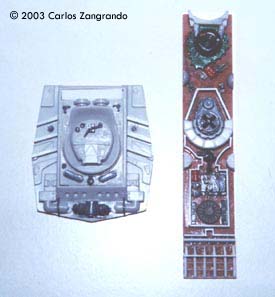
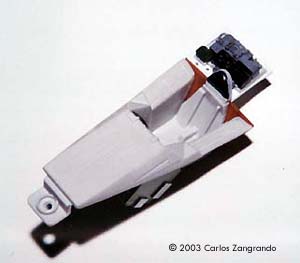
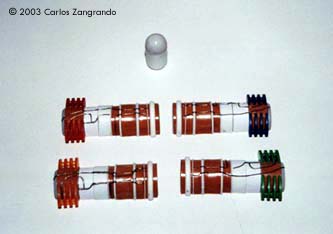
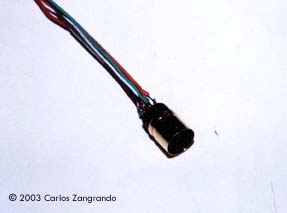
One of the most interesting aspects of the STAR WARS movies is the starship designs. Most came from the magic pen of master Ralph MacQuarrie. The Incom Corporation T-65 Fighter, or X- Wing fighter, has become one of my favorites. Just after the releasing of the movie, MPC got the rights and released a model of the X-Wing, in 1/48 scale. It's a fairly good model, and up to the best model standards of the time. In the 90's, ERTL announced the release of a "special edition" X-Wing model, in their ProShop line. With much anticipation, I ordered mine as soon as it was released and ... what a disappointment. Yes, the model has interesting features, such as a voice chip with original lines of the movie, and two motors and gears for the wings and cockpit canopy. But the detail is POOR... I mean, REALLY POOR. Even the shape of the fuselage is wrong! It seems to me that, in order to cut the costs, they hired a poorly skilled craftsman to make the patterns for the molds, or simply didn't care too much about it. Even the old MPC 1/48 version, despite all faults, is much better detailed. Well.... Since I spent a lot of money on the thing, I really had to do something with it. So I decided to scratch as much as I can, in order to get a better and large version of one of my favourite spacecrafts of all time. I decided to do the famous RED 5, to represent the famous Death Star trench sequence. Assembly and Modifications First, I re-scribed the entire fuselage, glued some plastic ships for the box cover details, and cut away the detail section behind R2-D2 station. I cut the nose cone detail from the upper fuselage piece, and glued to the bottom fuselage. Then the fuselage bottom was re-scribed, and some bits of styrene sheet glued. I filled and sanded the diamond shaped support hole and also extended the back of the fuselage a little. Here you see the main connector (female) which will connect the model to the base, so the model can be removed for play... errr... "transportation". That strange "six wires" coming out of the starboard are secondary power connections, which will become hidden beneath the "wing" (never trust only one power connection! ).Here you see the interior of the bottom fuselage, with all wires running through it. I've reworked the nose cone, and rebuilt the "sensor window" and the photon torpedo launcher. I then reworked the bottom of the wings, sanding all the wrong detail, and reshaping the wing openings to a more correct profile. The back of the wings were also rebuilt, according the details from the actual filming miniatures. The trench was made using an U shaped styrene strip. The upper side of the wings were severely reworked next. I sanded away most of the detail, re-scribed and made new detail from sheet styrene. The laser cannons were rebuilt, using styrene tubes, and new detail cut from styrene sheets. The alignment was assured using a steel rod running all through the center of the tubes and model kit part. Next I made a new detail part for the deflector shield and hyperdrive generators, behind R2's position. It was made with styrene sheet and lots of bits from my spare box. The back detail was also reworked. I also made a new cockpit canopy from sheet styrene. Only the back of the original piece was used. Surprisingly, the cockpit is fairly good. I rebuilt the computer (?) behind the seat. Note that a trench was left in order to allow the canopy opening mechanism. I also reworked the seta (?) and the headrest. The pilot figure is very good, but represents a well known photo of Luke when he crashes at Dagobah, in "The Empire Strikes Back". The uniform is the same, but if you want to build a Star Wars version, you must paint the gloves black. I then made a black box from styrene, with a clear plastic end. It became become the main cockpit display, with lighted instruments. The main engines parts are ridiculously wrong! I had to build new ones from scratch. The only kit parts I've used are the engine nozzles, which were drilled out and thinned from inside. The engines were painted black to avoid light leaks. New engine "intakes" were built as well using sheet styrene. New engine details, which will be used at the inner part of the wings, were built from styrene sheet, strips and half-rounds strips. The four cooling sleeves at the sides were cut from a cheap plastic pencil sharpener I found at the supermarket. Here you can also see my R2-D2 unit. I cut the dome from the kit supplied part, sanded all detail and glued it to a styrene tube. R2's arms were attached later. My last modification was the male connector, which will be permanently fixed at the base support. It's a six pin computer monitor gold connector. Paint and Decals I painted the model using acrylic paints, and carefully weathered it to approach the Star Wars "look". I printed my own decals, using my old and reliable Citizen 600C dry-printer. The decals were scanned from the Finemolds decal sheet, and resized to properly fit the ERTL model. It's a 100% improvement over the horrible original ERTL decals! I still have all scans. Anyone interested, please feel free to PM me (Arthur Pendragon on the Discussion Forum), and I'll send a copy. Display I've used the original base, but made a new support, which doubles as a electrical connector. I really believe that the base must be simple and elegant, in order to do not drive away attention from the model. Electronics and Wiring Surprisingly, all the electronic gizmos work pretty well. The base-mounted chip has some cool features, including Vader's voice ("I have you now! " and "Don't make me destroy you"- which is a line from TESB, not SW), Luke's voice ("Red Five Standing by..." and "I'm Luke Skywalker"), and some other sounds. The lights and motors also worked OK. Electronic novices may need some help to install the electronics, but I found the task fairly straightforward. Final Words It took me four months to finish this model... the result was worth all the time and work put on it. The anal modeler may want to scratch the fuselage too, but, if you want to do so, I recommend you save your money for the Captain Cardboard X-Wing. Again, with some work and imagination, you can make an X-Wing model you can be proud of! Now, I have a good X-Wing model. So.... Where I put my Star Wars soundtrack CD ? |
![]()
This page copyright © 2003 Starship Modeler™. Posted on 18 July 2003. Last updated on 21 July 2003.
![[Click to enlarge]](cz_XWing02.jpg)
![[Click to enlarge]](cz_XWing03.jpg)
![[Click to enlarge]](cz_XWing05.jpg)
![[Click to enlarge]](cz_XWing06.jpg)
![[Click to enlarge]](cz_XWing07.jpg)
![[Click to enlarge]](cz_XWing08.jpg)
![[Click to enlarge]](cz_XWing09.jpg)
![[Click to enlarge]](cz_XWing10.jpg)
![[Click to enlarge]](cz_XWing11.jpg)
![[Click to enlarge]](cz_XWing12.jpg)
![[Click to enlarge]](cz_XWingFlight1.jpg)
![[Click to enlarge]](cz_XWingFlight2.jpg)
![[Click to enlarge]](cz_XWingFlight3.jpg)
![[Click to enlarge]](cz_XWingFlight4.jpg)