
By Marcelo Conforto - images & text © 2005
|
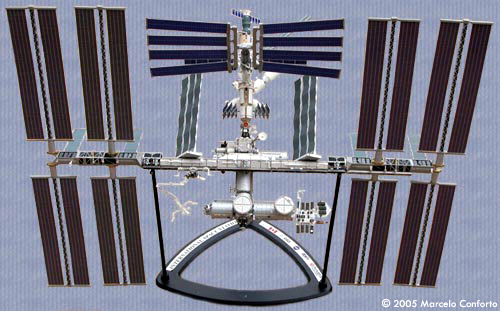
![[Click to enlarge]](mc_iss_Beauty-Shot.jpg) First of all, let me explain the title of this article. Since the beginning of ISS project there were so many budget cuts, module cancellations, core complete and so forth, that I doubt that there will be ever an accurate model of the existing ISS. I thought a shame to let go some of the wonderful pieces of this kit, so I decided to build it entirely. Cracking fingers, here is my tale... |
|
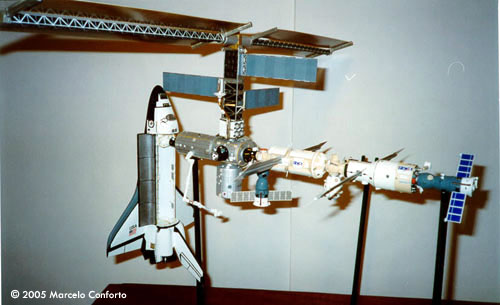
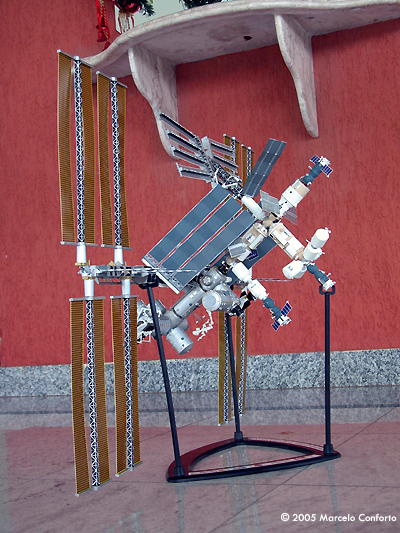
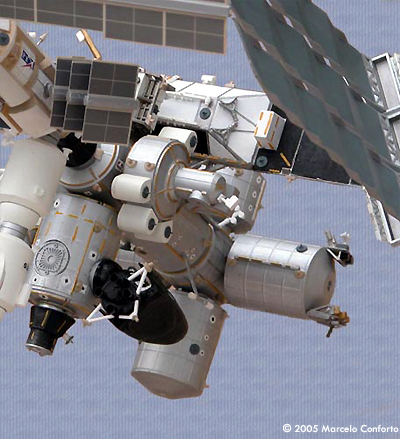
Image: ... and below. Image: Previous configuration - first modules Image: Slowly growing Image: The result is a BIG model, even in 1/144 scale Image: Japanese lab Image: Quest airlock Image: Russian section Image: My scratchbuilt CRV Image: Service module details Image: SPP and mast Image: Truss Image: Truss details Image: Z1 module and truss |
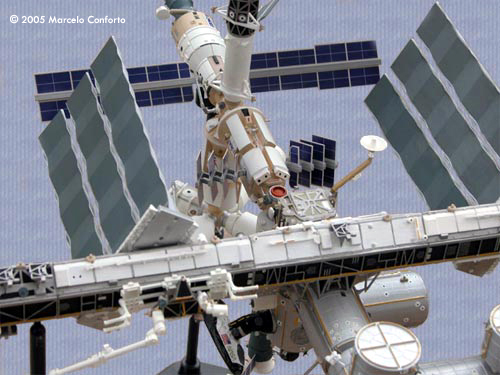
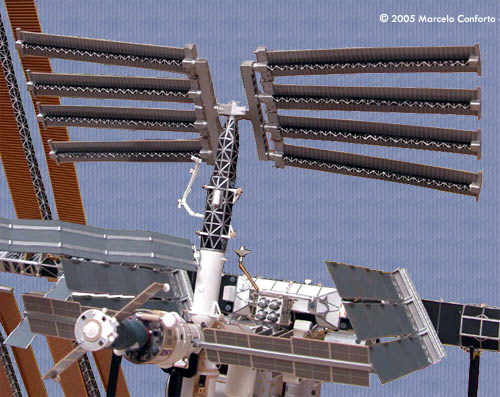
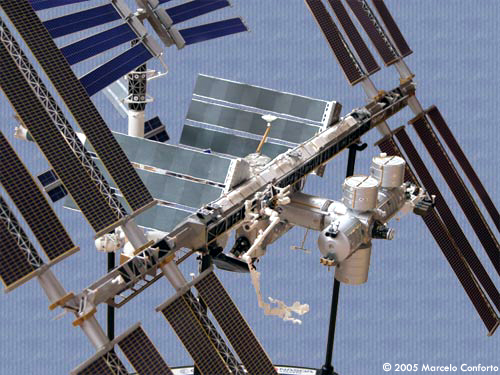
When Intermountain Railway released the ISS kit I was thinking about getting it, but when it was reviewed by Ken Smith here on Starship Modeler, I thought, “That's it, I'm ordering it right now!!” I strongly recommend you read his review. When the kit arrived, I was pleasantly surprised, and everything that Ken said in his article could be verified. However, I disagree with him in one point: the parts fit. I think that's excellent. It's so tight that it's difficult to do a dry fitting test. Once you start to snap some parts, be prepared to commit the glue, or you can be in serious trouble trying to disassemble it. I broke two of those square pegs trying to un-snap parts, but I quickly learned my lesson. After gluing, some modules had the seam barely visible. I painted everything first, then assembled the model. Painting As stated before, if you want a realistic looking ISS you have to paint everything. Check out the difference between what IMRCo says it's the complete model and mine. Which one looks better, eh? I don't have an airbrush, so everything in my model is hand painted. At the time (1998), Glenn Johnson from Realspace Models didn't had the new texturized modules that he is offering now, so I thought about at least indicating some texture in the modules. This is how I did it. For the Russian modules, especially the Soyuz/Progress spacecrafts that have that uneven thermal insulation, I used a little thick paint applied with a hard brush. When the paint dried, it got a little “crumbled” and I was satisfied with the results. I used the following paints for these parts: Tamiya Flat White (XF-2) and Gunze Sand Yellow (H79). The Soyuz and Progress are a painting nightmare because depending on the picture's illumination; it can vary from a dark gray to a medium green. This color I got mixing Testors Teal (GP00570), Tamiya Flat Green (XF-5) and Tamiya Flat White (XF-2). But it took me several attempts until I was happy with the color. The American cylindrical modules were a different thing. I opted to paint them flat aluminum making the streaks, plates and seams in chrome silver, to bring some contrast. Depending on the light angle, it shows a hint of the layered metal skin. For these modules, I used Tamiya Flat Aluminum (XF-16) and Tamiya Chrome Silver (X-11). For the vision targets (the white round and square marks with black dots), I used Tamiya Flat White (XF-2) and Tamiya Flat Black (XF-1). On the placement of these vision targets, I used as many pictures of the actual hardware I could get for references, but on the modules that aren't in orbit (and some will never be) I took some “creative liberties” and used the existing modules as reference. For instance, Node 2 and Node 3 where painted the same way as Node 1 (Unity), but I assume that there will be differences on the real modules. The same way the HAB module (cancelled) was mirrored to the Lab (Destiny). There's a big question regarding the truss. When Revell's kit came out, several people praised “Wow, a hollow truss!!” If you can see the pictures of the actual hardware in orbit, the truss is covered with white thermal blankets, making it to appear solid. I like the way IMRCo engineered the truss parts. To get the uneven effect of the thermal blankets, I followed the same technique used in the Russian modules. I used Tamiya Flat White (XF-2) for the blankets, Tamiya Flat White (XF-1) for the parts intended to appear hollow, Tamiya Titanium Silver (X-32) was used in the metallic parts and Tamiya Gun Metal (X-10) on the batteries. The Solar arrays support struts were done with Tamiya Gold Leaf (X-12). The radiators were painted in Tamiya Neutral Grey (XF-53) with the metallic structures on the sides in Tamiya Flat Aluminum (XF-16). All over the station, I used Tamiya Flat Yellow (XF-3) for the handrails and Tamiya Flat Red (XF-7) for minor markings (especially on Russian modules). |
|
Assembly I intended to build my kit as the construction progressed in orbit and I quickly noticed that this kit engineering is so superb that it allows you to do exactly that. It's not like the Revell station that you have to build it whole. The square pegs/holes fixation system is strong enough to support the modules and since the kit is hollow, it is surprisingly light. Unfortunately I didn't take too many pictures in the previous configurations, but you can see what I'm talking about. If you intend to build this model in the same rhythm NASA does, I direct your attention to some parts:
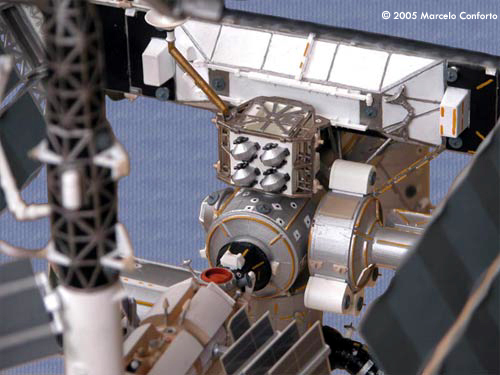
If you intend to build the whole station, simply follow the instructions and there shouldn't be any problem. Finishing Touches For some time, there was a detailing kit available for beefing up the ISS kit. It is discontinued from IMRCo as of April 2004. Those who think about acquiring it, you better hurry. Several small parts, mostly trunnions, grapple fixtures, pins, antennas, thrusters and others compose the detailing kit. However, there is a serious drawback in this kit. There's no instructions whatsoever on the placement of these parts. The only reference available is IMRCo site where they put some pictures of the station modules. These pictures' quality is not so good, so I was for a long time, installing these parts on the kit according to my references and what I was able to discern. I discussed this matter with Vince Hoffman and he was kind enough to send me his collection of reference photos (3 CDs), but he was in the same boat that yours truly. Then, recently, my white knight appeared! Don Edberg from Dynamic Modeling compiled a PDF file that is available for download in his site that NUMBERS each one of the detailing kit parts and SHOWS the their placement using the exact pictures from IMRCo site! For my great happiness, I noticed that I missed very little from everything, but this is a good help that nobody should ignore. Again, I took some “creative liberties” in dressing up those modules that will never be flown (the Russian research labs, mainly), adding some external tanks, antennas and greeblies to make them look less than plain cylinders. I also applied some AEB (Brazilian Space Agency) decals to some of these modules as if they were supplied by Brazil (it doesn't pay taxes dreaming of it...). For a special finishing touch, I scratchbuilt a Crew Return Vehicle out of balsa wood, cardboard and some bits and greeblies from the detailing kit for the deorbit module. The adapter and access tunnel was also built from detailing kit unused parts. Speaking about decals, the kit comes already decaled, but once you decide to paint it, you will lose all the preapplied markings. No big deal, since they're very different from the actual markings. I used several spares I had from (always him!) Jim Botaitis at JBOT Decals and some spares that were kindly supplied by Kevin (kdd) Drake. The Photo Session Once I finished the station, it was time to take pictures of it. Since it's a big and extremely fragile model, I decided to photograph it in the stand. I had no big space available in my apartment, so I decided to go down and take the pictures in my building's playgrounds. What a frightening experience that was! The wind blowing on the big solar panels rocked the model so hard that, for a moment, I thought that my beloved station would go the way of Mir! But the support hung on tight and I was able to finish the pictures in time. I must thank my good friend Carlos César Bezerra for lending me his digital Nikon 5700 Coolpix camera. The result is what you see! Conclusion Although the bent solar panels still hurt my modeler's feelings, I'm very happy with the outcome of this kit. It sure represents what the ISS should be if there weren't so many budget questions to be solved. It stays proudly in the center section of my models shelf. I'm also re-working the docked space shuttle with Cutting Edge's decals, but this is another looong story. |
![]()
This page copyright © 2005 Starship Modeler™. First posted on 8 March 2005.
![[Click to enlarge]](mc_iss_Overall-Right-Underside.jpg)
![[Click to enlarge]](mc_iss_Coming-Up-on-Docking.jpg)
![[Click to enlarge]](mc_iss_Hab-and-Brazilian-Module.jpg)
![[Click to enlarge]](mc_iss_Lower-FGB.jpg)