
By John Lester - images & text © 2010
|
![[Please click to enlarge]](pre_moe_viper_boxtop.jpg) I was lucky enough to get my paws on a test shot of the forthcoming Moebius Viper Mk2 from the "re-imagined" Battlestar Galactica. |
|
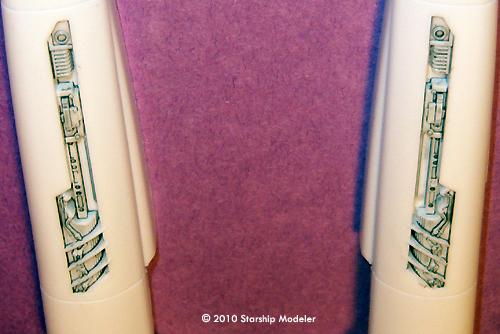
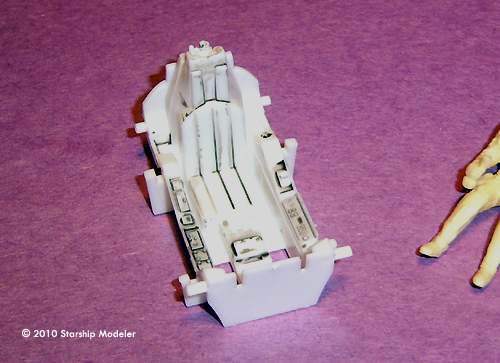
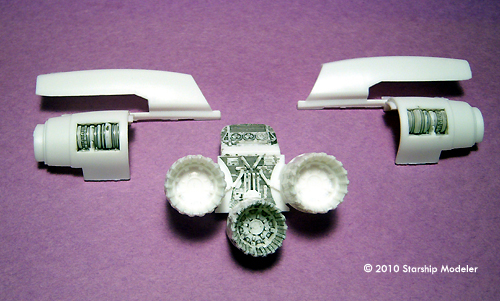
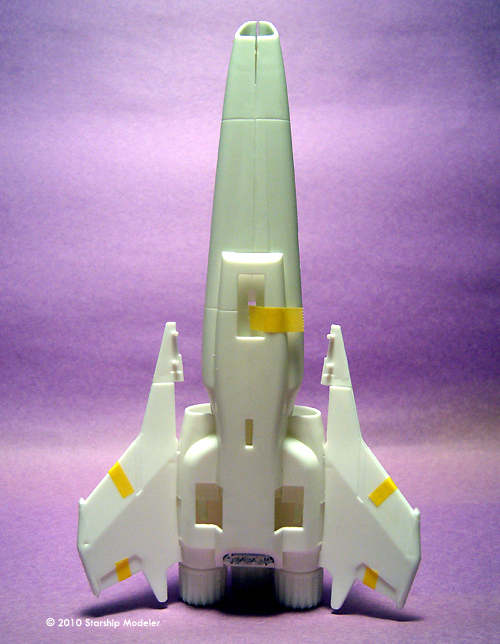
Image: The bottom of the box can be used as a backdrop for the model Image: Decals Image: Fuselage halves Image: Sensor detail Image: Cockpit tub Image: Pilot - his right arm will be different in the production kit. Image: Engine detail Image: Underneath Image: Rear view Image: Engine exhaust & rear deck detail Image: Pieces interlock as you build Image: The model is surpisingly robust eithout glue. Image: One area lacking detail is the intake behind the pilot's head. The seam there maybe tough to fill as well. |
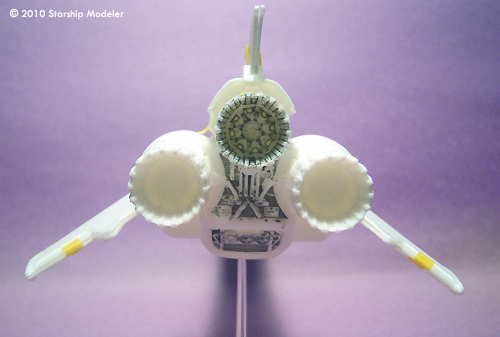
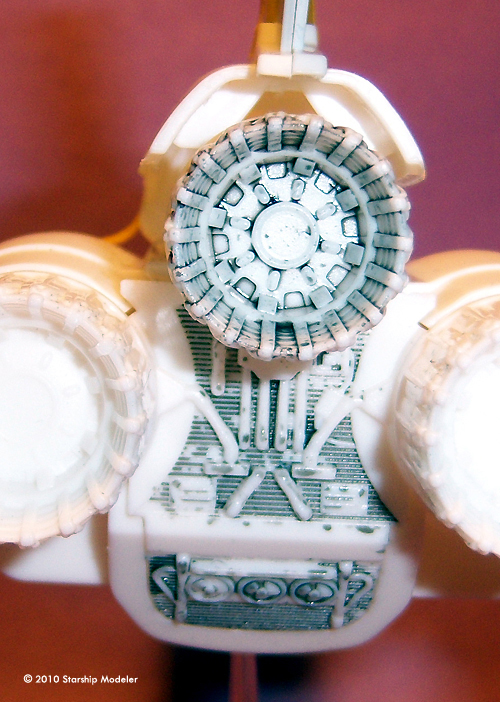
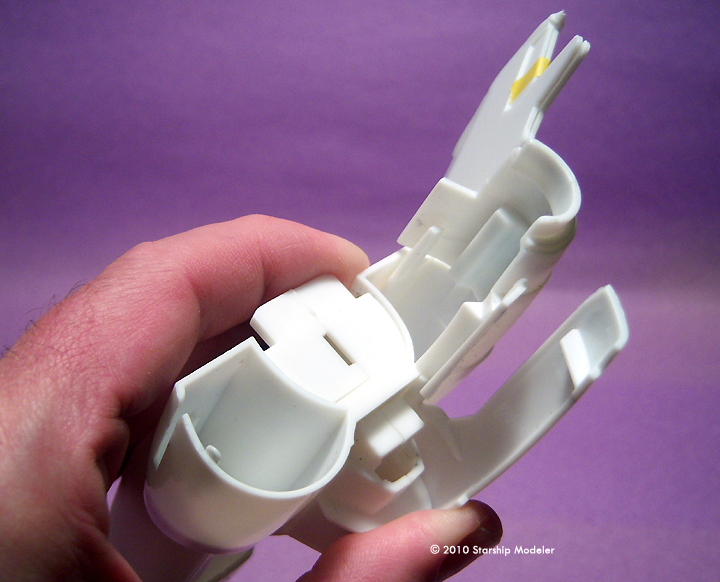
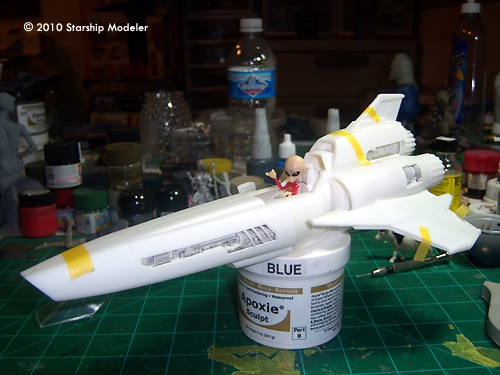
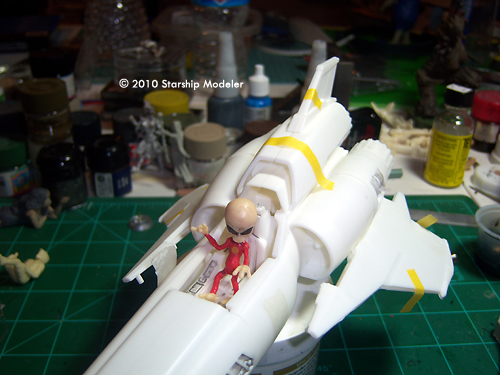
Regardless of your feelings on Starbuck as a chick or 'filmed-in-shaky-cam', I think we can all agree that the Viper Mk2 is a worthy successor to the old school Viper from the first iteration of BSG. But how does Moebius' kit stack up? What You Get Bear in mind that this is a test shot and not the completed product, so details may change. The kit is comprised of 52 injection molded styrene parts plus one in resin (the pilot figure). Four of the plastic parts are clear: canopy, DRADIS screen, and 2-part stand. Decals and instructions will round out the package. The sample I have is pretty slick, even after a good bath in strong cleanser; paint doesn't want to stick yet. I expect that from a test shot - it just means I need to scrub some more - and it explains why the ink/Future wash I did to highlight details didn't quite cover all the details. Just FYI. Detail appears to be pretty good. It's really sharp throughout. Panel lines are a bit deep, but they look that way on the TV screen, and they're not rounded or soft (i.e., not Matchbox). I have pretty much all the resin kits of this fighter in all scales it's been offered, and none have all this detail (FM's big model is pretty close, though) - not that I would expect them to, as this kit was made from the CGI files used in the series and the resin kits.... were not. What I find most impressive is the engineering of the model. Just about every piece is designed to lock into place. That's kind of a double-edged sword: you have to build the model in a certain, specific sequence, and you pretty much have to paint everything before you commit to glue. On the plus side, you really can't put it together wrong unless you make a conscious - and sustained - effort to do so. You start (of course) with the interior bits, chief among them being the cockpit. This is a multi-piece affair: tub with seat, sidewalls, back wall, instrument panel with separate, clear DRADIS screen, stick and pilot. The resin pilot is very nicely sculpted and cast. If you want to use him you will need to chop off part of the plastic joystick as the top is molded in his hand. The example in my kit also needs his arm bent for the stick to be in the proper position, but I'm told that will be fixed for the production release. |
|
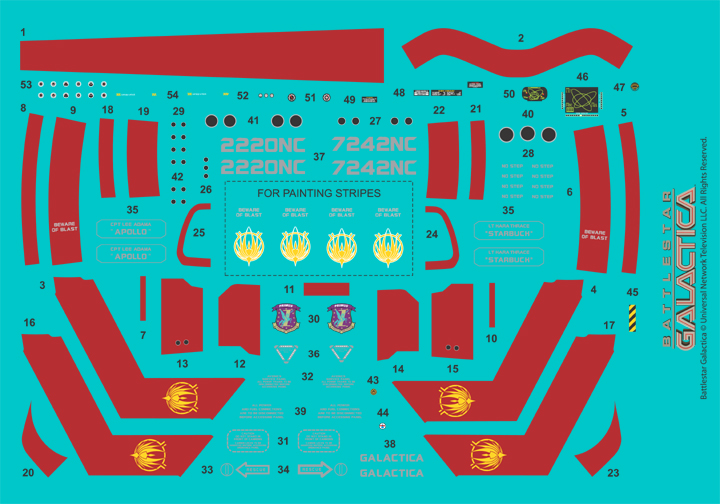
The kit may be built with gear up or down. The (provisional) instructions make reference to separate parts to show the landing gear bay doors opened or closed. The sample I have did not have the closed gear bay door parts. The undercarriage parts themselves are nicely detailed though there is no detail in the gear bays. There's an opportunity for scratch builders (especially since it was never shown on screen, so nothing you do in there can be “wrong”). After you trap the cockpit and nose intake parts between the fuselage halves, and affix the bottom fuselage plate, it's time to assemble the wings and engines. The instructions lay out how to do this. Everything slides together in such a fashion that the parts are mutually reinforcing. I'd suggest you paint the inner structure of the top engine before assembly - it will be hard to do so later. Same with the rear plate (afterburners and rear deck). The decals provide markings for two ships: Apollo's and Starbuck's. Decals include stripes, RCS thrusters (I'll drill these out on my model though), cockpit instruments and pilot uniform patches. You also get separate wing and exhaust markings to use if you decide to paint the stripes (AztekDummy is coming out with a vinyl mask set to help you do just that). If there's a fault with the instructions it's that the diagrams and photos are too small - but that may be an artifact of the pre-production sample I have. Otherwise, they are pretty comprehensive. Drawings and pictures of the kit walk you through assembly. A paint chart keyed to Testors' brand paints gives you colors. They look to be accurate enough. Conclusions If this pre-production piece I have is any indication, Moebius have a real winner in this kit. Detail is good. Fit is good. I'd like more options for pilot markings but the aftermarket will have those by the time I'm ready for decals. I may well end up with more of these kits than I have Starfuries --- if only just to recreate the scene where they launch from Colonial Movers on the ceiling of my man cave .... Highly recommended - I can't wait! |
![]()
This page copyright © 2010 Starship Modeler™. First posted on 19 January 2010.
![[Please click to enlarge]](pre_moe_viper_parts.jpg)
![[Please click to enlarge]](pre_moe_viper_hero.jpg)