|
By Terry Miesle - images & text © 2009
This is a simple technique to make conversion parts or revised kit parts. It's also a good way to make revisions without damaging the kit parts until you're ready to mount them or reproduce a kit part you may have lost or want to use elsewhere. It is less messy than making molds and resin casting, and the resulting parts are potentially stronger than resin casts. In this article I will show how I use the existing model to make a mold and then create a new canopy for an aircraft. The materials I will use are 2-part RTV rubber putty, epoxy putty, thinner for the epoxy putty, ink, Dymo label tape, sanding sticks, hobby knives and saws, and assorted other tools. In the Anime series Stratos 4 several 1960s-era supersonic aircraft are refitted to deliver large missiles designed to intercept meteors heading to earth. These are meteors which make it past orbital defenses. Nevermind the practicality or other aspects of the story, the planes are cool. The experimental strike aircraft designed and built by BAC was meant to strike fast and low into heavily defended territory, similar to the F-111's mission. While only one of the three prototype aircraft flew, it provided valuable information and experience to Britain's aircraft industry, became a favorite of British aviation enthusiasts and one of those classic "what if" aircraft. The TSR-2 in Stratos-4 has a few external modifications, notably a revised single canopy (instead of the real aircraft's two canopies) and an NF-104 style rocket motor in the tail. Both needed revised kit parts to convert the Airfix 1/48 scale TSR-2 kit. I volunteered to make the revised canopy. |
|
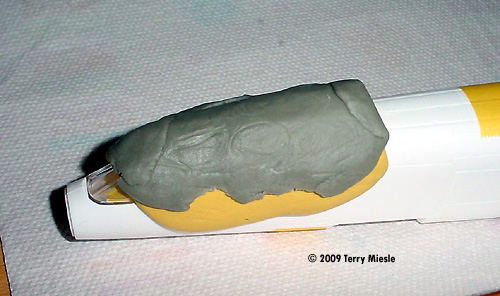
Image: Another look |
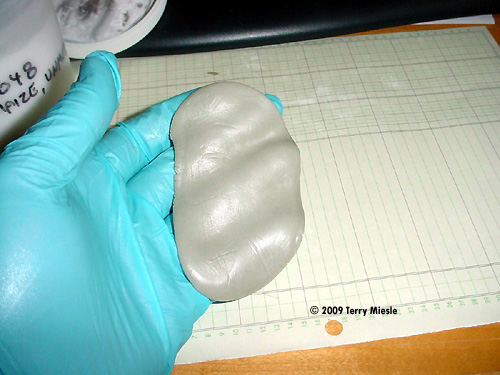
Step 1: Surface mold. Two-part room-temperature-cured silicon mold material (Amazing Mold Putty in my case) is placed over the kit's canopy, held in place with tape from the inside. This material is readily available at craft stores ( I bought mine at Michael's) and is mixed in equal parts, to be spread over a surface or have a part pressed into it. Atop that I placed a bit of Aves epoxy putty to provide extra strength. The result should be rigid enough to resist warping once it's removed from the model. |
|
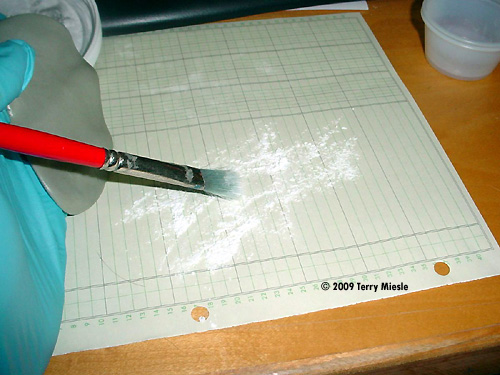
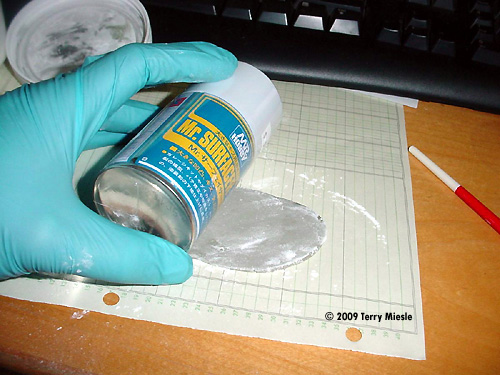
Image: Spreading the corn starch Image: After mixing, the epoxy putty is rolled out using a spray can. Image: The resulting sheet of putty. Image: I trimmed the sheet with a steel ruler. Image: The sheet packed into the mold. |
Step 2: Replacement Blank. Epoxy putty (I used Aves Apoxie) is spread in a sheet roughly 1-2mm thick. This should be thick enough to resist tearing and easily pushed into the mold. Corn starch on paper is an effective lubricant for rolling the putty thin like a pie crust. Cut the sheet to size, and press it into the mold. |
|
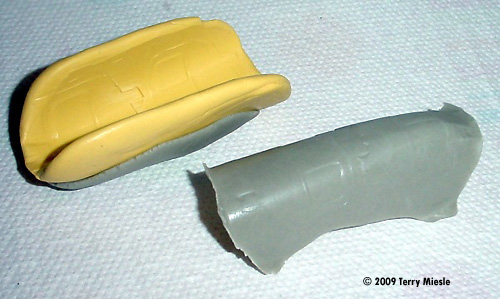
Image: The first (test) piece was too thin. |
Step 3: Blank Preparation. Once cured, the blank can be removed and inspected. The first mold I made had some problems, so I made a second. While that was curing I did make a test blank so I could evaluate how well the epoxy would work. I discovered my first epoxy sheet was probably a little too thin. |
|
Image: ... and for to scribing off the pillars on the plastic model. |
Step 4: Canopy Plug. Once I had a blank I liked, I needed to cut it to size and cut the central support away from the kit. Dymo label tape is a valuable tool which can help you scribe and cut accurate lines. Cutting the part is a little tricky, and I had to repair the hinge parts as well as build back some material when I cut too far. Thinning the putty with Aves' own thinner or alcohol is handy for this. |
|
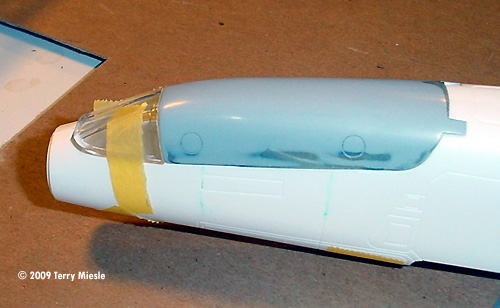
Image: After sanding, the filled-in areas are clearly visible. Image: The finished master in place on the model. |
Step 5: Finishing the Canopy Plug. The silicon mold will retain the surface details from the kit. As the new canopy is a single piece with two small porthole windows per side, I needed to create a smooth surface. I tinted some Aves putty with blue India ink to provide contrast. This way I could sand down to a smooth transition and exactly fill the recessed areas. Once happy with that, I scribed the circular porthole windows using a circle template. You can buy these photo-etched templates available from Hasegawa or Verlinden. You can also use plastic drafting templates or punch a hole in the label tape. After this scribing, I primed the part with Gunze-Sangyo's Mr. Surfacer 1000 and worked the surface until I was happy. |
|
|
Neil Prentice and I brought our shared efforts together at a local club meeting to show the group. I did a little more finishing work on the parts and sent them to Starship Modeler for casting as a conversion kit. |
![]()
This page copyright © 2009 Starship Modeler™. First posted on 5 August 2009.
![[Please click to enbiggen]](tm_canopy_01_canopyblank_mold.jpg)
![[Apoxy in a cup]](tm_canopy_02_AvesApoxieincup.jpg)
![[In the mold]](tm_canopy_08_Canopy_blankinmold.jpg)
![[Please click to enlarge]](tm_canopy_010_Scribing_guide.jpg)
![[Please click to enlarge]](tm_canopy_012_Filler_Spread.jpg)
![[Please click to enlarge]](tm_canopy_015_MS_progress2.jpg)