
By Erin Lantz - images & text © 2006
|
Looking to create a dirty ship? Wanna rust out that fuel tank in your diorama? Need some battle damage on your Gundam? Well collect some money in PayPal or break out your credit card, these are the items to have! |
|
Image: Marker tip comparison
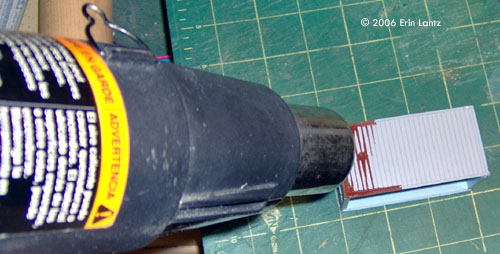
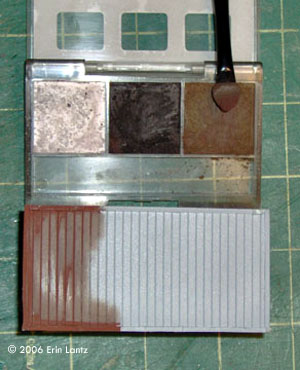
Image: Random rust-colored paint applied Image: Heat gun used to speed the curing time Image: Tamiya 'Rust' pigment added Image: Next comes some 'Soot' .... Image: ... then some 'Sand' .... Image: ... then some 'Snow'. Image: Just the pastels at this point.
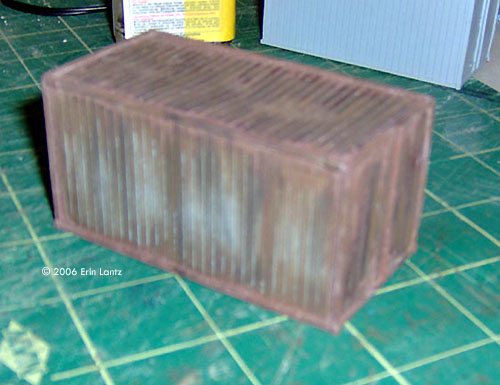
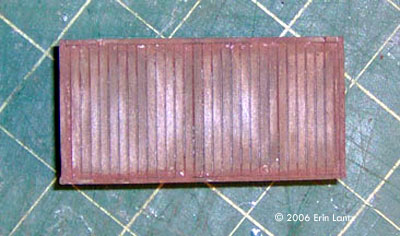
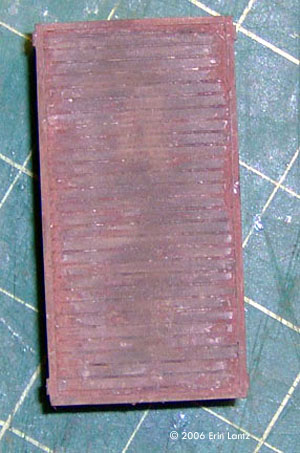
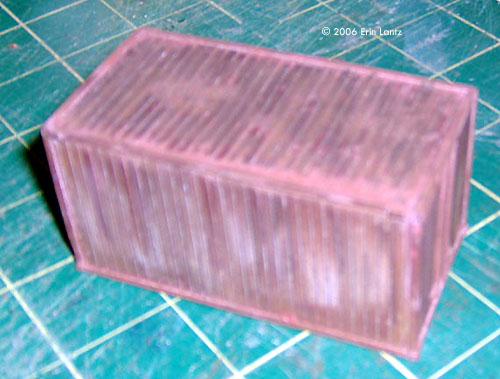
Image: Looking pretty distressed Image: Different colored paint 'chips' are the final touch Image: Side view Image: Top view Image: One battered box |
Tamiya's new Weathering Master pastel compacts and Gunze's Gundam Weathering Marker set are great products on their own, but combined they become a powerhouse of weathering and distressing. Tamiya Weathering Master Pastels The Tamiya Weathering Master pastels come in little plastic compacts. Inside you'll find three different color pastels, the combination of which will depend on which set you bought. The two I bought from the SM Store contain Sand, Light Sand, and Mud in set 'A' and Snow, Soot, and Rust in Set 'B'. Both sets contain an application tool that has a sponge “eyeshadow” type applicator on one end and a brush on the other. The pastel cakes are not what I expected. The cakes have a creamy consistency to them, but they crumble and turn to dust much like normal pastels. They aren't like normal pastels in that they don't require sandpaper to turn them to dust, they're no where near that hard. They feel as if they took acrylic paint and dried it but not completely. The end result is a cake that stays in the small compact, but when rubbed with the applicator creates a fine dust/powder that can be blended onto most any surface. In my experimenting with them I found that they obviously stick better to flat surfaces, but also stick well on glossy surfaces. Glossy surfaces make blending easier, flat surfaces allow for easier buildup for darker weathering. Gunze's Gundam Weathering Marker The Gunze Gundam Weathering Markers are a totally different beast than the Tamiya product. What you get is a plastic packet that contains six paint markers. The markers are filled with water based paint. The exact color names are not listed (they might be, but I can't read Japanese), but the marker codes are on each marker. I call the colors the following; Mud, Sand, Black, Burnt Steel, Bare Scratched Steel (looks chrome-ish), and Rust. The Bare Scratched marker is very bright when applied, and is the only marker in the set that has a small tip and has thicker paint that doesn't run easily. It's not as small as Gunze's fine tipped panel lining markers, but is smaller than the wider tips of their standard paint markers. The markers take some getting used to, but once you get the hang of them they're actually pretty fun to use. Make sure you have some paper towels, q-tips, and some water or alcohol handy before starting, the paint is quite runny and can be difficult to control. Luckily it's water based and comes off VERY easily, even after it dries. This allows for blending with q-tips or brushes. A damp brush run over the surface between two different dried colors will pull the two together with little effort. A damp q-tip (cotton bud) can also be used to blend/apply the paints. The paint in all but the Bare Scratched Steel marker is very thin and runs easily into cracks and recesses, making washes a breeze. I use a heat gun to dry them quickly on resin, but most folks will want to use a hairdryer set on low or just let them dry on their own, heat guns/hairdryers on high and styrene don't mix! Once they're dry all that's needed to clean the raised surface is a wipe with a damp towel or q-tip, leaving you with a beautiful wash. The tips of the markers are plastic nubs that have minute cuts in them. They don't wear out easily like other other brands I've used that have felt tips, in fact, they're quite difficult to damage at all in normal use. If you push too hard, they will scratch underlying paint off of your model, especially resin. The paint flows out of the markers when you push the nub down on a hard surface, and believe me, it comes out fast! If you're not careful you could have paint all over the place, you have to push up and down quickly once the paint starts to fill the tip up. Pushing the tip all the way in will cause it to flow out like a faucet! In most cases I find myself draining a little of the marker's contents into a tin and using a brush to apply the paint, it's just easier to control this way. If the paints were available in bottles, I'd probably buy them that way instead, but the markers do come in handy when doing large surfaces. Using Them Together The fun starts when we combine the two products. Start out by painting your kit/part in its final colors. Seal it with your favorite clear coating (I suggest an enamel like Testors) and let it dry completely. Next, determine how distressed you want the piece to be. For simple dust and dirt as in a desert scene, use the sand and mud markers to do a wash into the crevices of the parts, let I dry, then do some touch ups and dirtying with the Tamiya sand or mud powders. |
|
For rusted out or very distressed parts, use the rust marker to apply a thick layer of rust wherever you feel it should be. Pay close attention to deep recesses, especially at corners and at tops and bottoms of flat surfaces. Create streaks where water would flow down the part at the same places over and over, this is where the rust would likely start growing first. Let the paint dry, then break out the powders. Use the eyeshadow sponge to apply rust around the edges of the marker rust, blending it in along the edges and letting the powder carry the color down the surface. The marker ink and the powders will blend together somewhat with some rubbing, and it looks great once they do! Once you have it the way you want it, give it a few swipes with the brush to even it up. Next use the eyeshadow sponge to apply a little soot here and there in streaks, and daub a little black around the bottom edges and into the middle of the rusted areas to give it depth. Again, once you like it wipe it a little with the brush to remove excess powder and to blend it in. At this point I usually will add some burnt metal spots with the marker, followed by a little more marker rust around the spots. Let them dry, then come back in with some lighter colored powders and hit the high spots as if you were drybrushing. Blend with the brush end and step back and look at the part. Keep going if you think it needs more, stop if you like it! Some like rusted out hulks, others like a little dust. Weathering is a personal preference technique, so deciding when it's done is your decision. Once you're done and like what you've created, you have a decision to make. Coat or no coat. The powders obviously will readily grab and hold fingerprints if left uncoated, and the marker paint will run like ink if it gets wet. Both will transfer onto your fingers, and to the next thing you touch. I tested the powders and markers with Testors flat clear spray and while the powders showed no running or change in appearance, the markers turned whitish or foggy. I suspect that this is because of the markers being water based and my guess is that an acrylic flat would work better with them. I suggest that if you will be placing the finished item on a base and never touching it again, don't coat it. Both products look best with no clear coating over them. If the model will be held or reposed over and over (such as a Gundam), clear coating will be necessary to avoid ruining the finished weathering products. One final word: messy! These things are messy, especially the powders. Despite my best efforts, the powder ended up on me, the floor, the table, everywhere. It washed up with plain water and a little soap, though, so I doubt it would stain most surfaces. The paint markers are also water soluble, but I would avoid getting it on wood or porous materials as it will probably be difficult to remove. Conclusion So, place those orders with the SM store and start rusting your models! These products are top notch, easy to use, and great value for the money! Highly recommended! |
![]()
This page copyright © 2006 Starship Modeler™. First posted on 13 March 2006.
![[Tamiya sets]](el_wxset_01_TamiyaWeatheringMaster.jpg)
![[Gunze Markers]](el_wxset_02_GunzePaintMarkers.jpg)
![[Starting point]](el_wxset_03_BaseGray.jpg)
![[Rust marker used as a base]](el_wxset_04_RustMarker.jpg)
![[Done]](el_wxset_12_Finished1.jpg)