
By Tom O'Malley - images & text © 2004
|
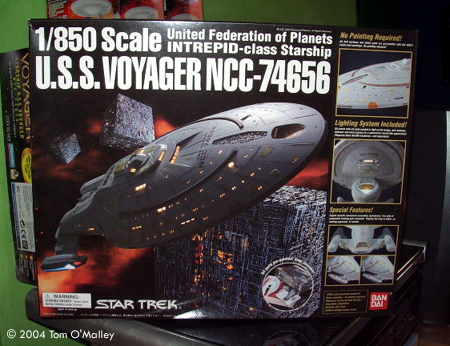
 The Bandai Voyager box is much larger than the other 4 models they have made, 1701, 1701-A, NX-01 and 1701-E. It has the same sort of picture and grandiose claims on the packaging, but when opening the model, you find they are not exagerations. |
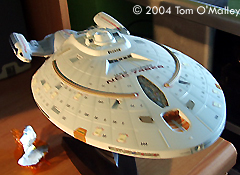
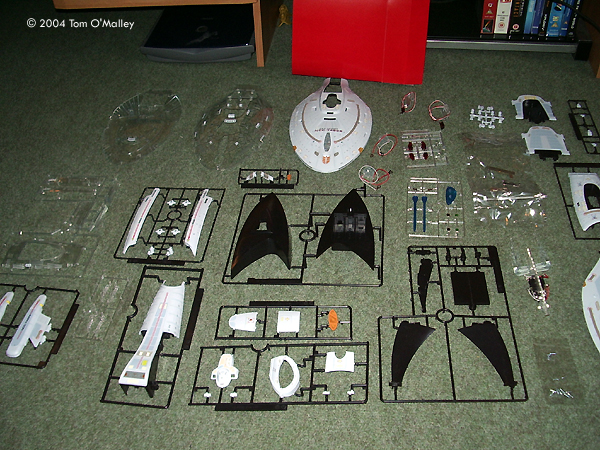
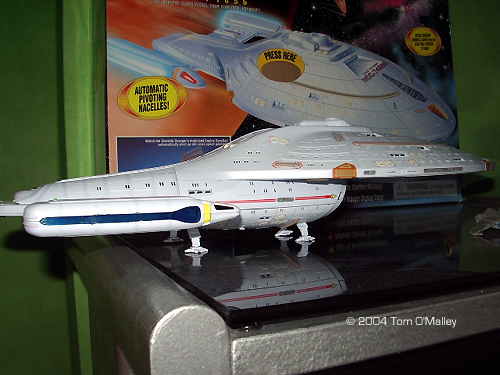
| Image: Box Image: What you get Image: Top view Image: Under the saucer Image: Left/rear view, nacelles up Image: Landed Image: Gawker's view Image: Underneath the engineering hull Image: Under the fantail Image: Saucer lights Image: Nacelle wiring Image: With the Revell-Monogram models Image: With the Playmates version Image: With the fleet |
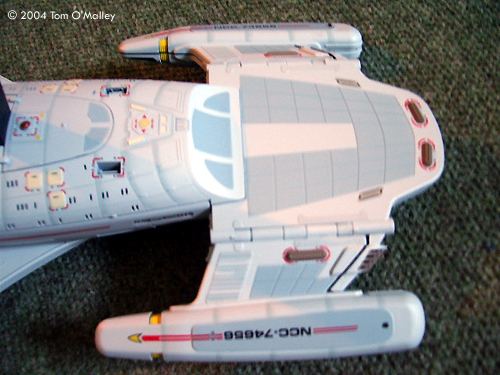
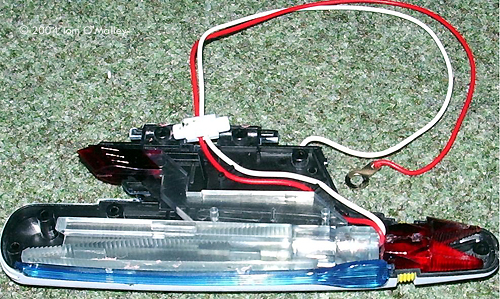
What You Get The instructions provided with the kit are similar to the other Bandai kits: an illustrated list of what you should have in box and build up instructions. These instructions, for the most part are very good, clear, detailed and the use of photographs of the real model help along the way. However, some bits are still a little vague; one example would the be the installation of the metal contacts inside the display stand. A text explanation as well as pictures as the build-up proceeded would have been helpful. The Bandai Voyager took approximately a day to build, on and off. Without stopping, but without haste, a reasonable build time is 4 hours. The build-up is harder than the 1701-E, but I cannot comment on the 1701's and NX-01 as I have only built the E before this one. You get pretty much the standard, all the bits inside the box on black and clear frames, pre-painted and detailed. In order to avoid losing bits, I kept everything on the frames until needed. When inspecting the pieces for defects, the impression I got was at first disappointing. Bandai excels at making their models highly detailed and accurate, but this Voyager looked less than that, in fact quite plain. No hull patterns except some colour shading to represent panel lines more deeply, and a general lack of those hundreds of tiny details we have come to expect. As the build-up came along, however, my opinion changed. The final look of the model is better in this simple colouring scheme, less busy and more like it did on screen, and when now standing it by the 1701-E, it makes the E look quite tacky. Building The first pieces to be built are the nacelles and pylons. The instructions are very good here, illustrating clearly what to do. There are several bits, the upper and lower nacelle housing, 2 formation lights, the blue warp coil, the busard collectors which are in 2 pieces, the main bulb, attached to the red part of the impulse engine and several colourless pieces that spread the light. A new addition to make life easier are little runners on the insides of the nacelles, that clip and keep the wires in the right place, making assembly less fiddly. These also turn up on other areas of wiring later. It is important to continually check the bulbs using a battery all the way through, and a word of warning, be gentle with the wires as they have small metal loops on that are important later. Pulling them can cause these to break, as mine did. I had to improvise, which is never a good thing to have to do. Ensure fresh batteries are in place, and test everything, including the main centre piece that comes in the 'lighting kit' box. This centre piece is a great advantage over the other kits for the builder as it means that he does not have to wire up the centre, and make mistakes that can result in faults. The main problems I had with the nacelles was getting the top and bottom to meet fully. There was a little gap left visible as a black line once built. The next step was to put on the impulse exhausts. These were an awful fit, and did not go on well at all. Even after much sanding a large and visible gap remains. It would have been better to mould them into the nacelle's housing. The aft parts of the ship are then built around the nacelles. They are designed to move up and down. This is achieved by a mechanism inside the body that is simple to assemble and is very good, giving a very stiff joint on the nacelles, so they stay in the position they are put in without flopping back down. They also cannot go down the wrong way, so will never be lower than horizontal. The next part that is recommended built is the display and battery pack base. I did not have to bother as I simply removed the stand from my 1701-E and used that, as the stands are identical from model to model. If you have built Bandai Star Trek kits before you shouldn’t have a problem, and I recommend leaving the stand until last and using a stand you know works to test the ship. That way, you have the reassurance that if it does not light, it is definately the model, not the stand. This saves time if you have to track down a problem. Once you know the model works on your old stand, you can build the new one. If this is your first Bandai kit, and therefore haven’t got a stand other than the new one, you will just have to build it and hope it works. When it comes to the stand, there isn’t much that can go wrong, just make sure contacts touch, that they don’t touch unless the button is in ‘on’ position, and that the screws are in properly. Otherwise you will find it hard to unscrew the battery cover as the inside bolt keeps moving - you will understand this when you see the section in the instructions. |
|
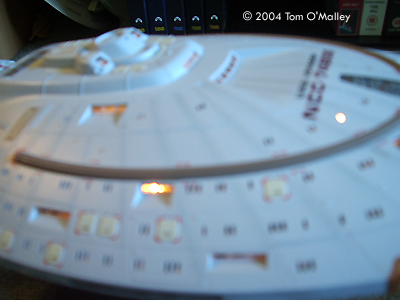
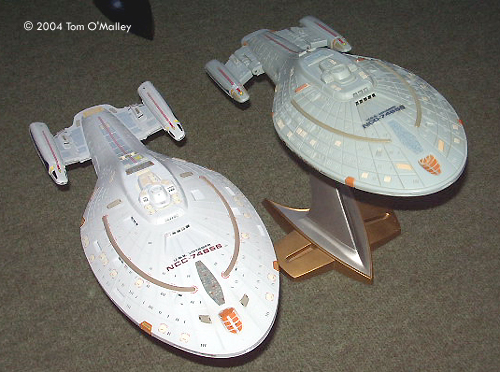
Back to the ship itself. The instructions, after the stand, continue the build-up into the saucer. Not much to say really. The two halves are separate, each with a clear duplicate that sits inside the opaque outer piece to spread light to the windows. This piece fits in perfectly, although several small connectors have to be put into the upper saucer to do it, but only an intellectual dud would have a problem with that. One disadvantage with this kit is that the saucer does not come pre-wired as others did, but it is easy to wire. The bulbs simply clip into place and the wires are fed down through the neck to the secondary hull. Lights are installed into the bottom half of the saucer. Although this looks complex, it is surprisingly simple. The instructions are very helpful. Remember to be delicate with the wires, especially the metal loops at the ends. The next step it simply to attach the halves of the saucer together. This is an immense fit, very easy and tight, no gaps and a professional look to the overall saucer. Bandai need commending for their superb workmanship in getting the saucer’s fitting so perfect. The next step is the push the back section onto the ship. It is a single piece that covers the whole top of the neck and the top of the secondary hull to the shuttle bay, and the fitting is excellent on this also. Be careful not to get the wires caught - I pulled them back out of the way while the piece was pushed in. Again, an excellent fit, and this is the piece when you see the ship is coming together. The Hard Parts The next part is the hardest of the whole ship: the installation of the centre lighting piece. Here I must admit that fitting was not excellent. The process starts by fitting a few small pieces to the centre. These include 2 small black pieces, 4 transparent light carriers and 2 pieces of the hull, also with a piece of the colourless plastic in each of them. Fitting of these is easy - the illustration in the manual says it all. The next part is the hard bit. This whole centre assembly has to be screwed in, the nacelle assembly put on at the same time and screwed, and all the pieces have to meet up and connect together. That is harder than it sounds, and the manual does not much help here. It is one of those ‘it looks so easy’ situations where it isn’t easy at all, and it just refuses to go in. Do not lose your patience, or you will end up snapping something. If it will not go in, (obviously some will go in, it depends, every build up is different) I suggest reversing the instructions and removing the neck and secondary hull piece just attached to the saucer and clipping the neck and centre piece together first, and then trying to put the whole lot into the saucer. Take note of how the pieces go together, and the best ways in which to put it in, applying pressure only in the needed places and gently. It took perseverance for me, but it did go in. Screw it down to keep it in place, as the instructions direct. The next part was even harder for me, bringing together all the wires. As you can see by the manual page, all the metal hooks on the ends of the wires, that’s 2 red and 2 white from the both the nacelles and the saucer all have to be screwed into the centre piece that is connected to the power. I could not do this, it was too hard, the screws just would not screw, and so two reasonable solutions presented themselves to me. The first would be to apply a little solder to the whole thing to connect all the wires and conduct the power, or the second was to simply screw it in as far as possible and see if it worked, which it did, so I didn’t bother soldering. As you can imagine, a general mess, but it worked and that does me. The smart thing is to apply a little solder, but I don’t even have a soldering iron, so it was too much effort for me, but it is quiet possible mine will stop working in the future, and I may have to solder. Once all the wires are secured, ensure you test all the bulbs light up, and give the whole thing a good shake and if the lights don’t flicker, they are well enough secured. The remaining bits, underside of secondary and saucer and any other little bits you missed out are applied and the fit is excellent in all instances. The landing gear is very cool. I have left the holes in the underside of mine so I can put the legs in whenever I want, and although they say it wont sit on the legs without adding weight to the back, mine does, so yours may too. Conclusions Overall, I am happy with how this turned out. The only noticeable gaps are in the dreadful impulse exhausts and at the back of the secondary hull by the nacelle pylons, but these are minor and result in little to no light leakage. The lights on this model are much better than 1701-E’s. Every window is lit, and most are equally bright, unlike the E that had most dull and some obscenely bright. The deflector could be brighter, as could the impulse engines, but the nacelles are just right. The lights get 9/10 for me, with the E getting around 7/10. It is also bigger than the E, not length wise, but Voyager’s overall size is larger. It is a nice middle between Monogram’s two models, the 1/1400 and the larger one. The overall length is around 16”. It is practically the exact same size as the Playmates Voyager. The price of this kit is currently around 75 USD and 50 GBP. I think it is worth the money to those who can afford it as it is a beautiful kit that will please any Voyager fan. It is substantial, accurate and marvellous to look at when lit. Overall this is Bandai’s best kit yet, despite the problems and is a fine addition to their line and to any Star Trek model collection. |
![]()
This page copyright © 2004 Starship Modeler™. First posted on 31 December 2004.
![[Click to enlarge]](to_bandaiv_beutyshotrear.jpg)
![[Click to enlarge]](to_bandaiv_nacellelights.jpg)
![[Click to enlarge]](to_bandaiv_lightsinternal.jpg)
![[Click to enlarge]](to_bandaiv_1701-Ecomparison.jpg)
![[Click to enlarge]](to_bandaiv_Rear.jpg)