
|
By Scott Scariot - images & text © 2003
The Starfleet Technical Manual gave us a view of the Star Trek universe that we never saw in the episodes of Star Trek, including several types of starships. While digging through my parts box, I came across an old Classic Enterprise. Most of the parts were there and I started to wonder what I could do with it. Then I thought that I would convert the ship into a Ptolemy Class Tug. I choose the Tug because I thought it was a unique design and I have never seen a built-up model of the ship. |
![[Click to enlarge]](ss_ptol_022S.JPG) |
|
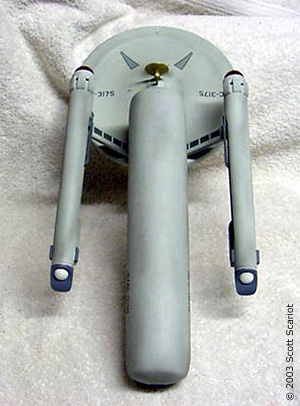
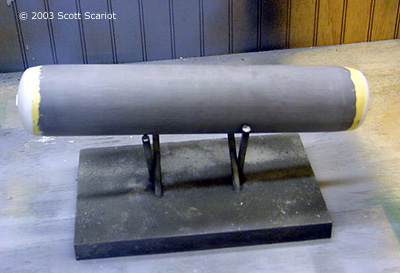
Image: Underneath |
My goal was to build a model that matched the schematics in the Starfleet Technical Manual as closely as possible.
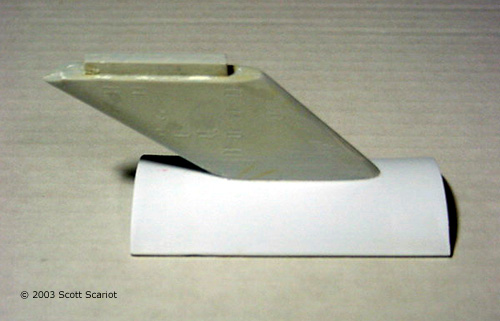
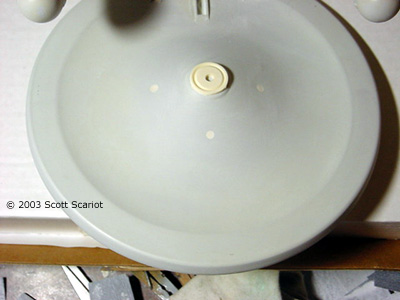
The Tug To prepare the model, I stripped the old paint and decals off using Easy-off. I then scrubbed the model parts and set them aside. During this process, I lost one of the reactor control loops that attach to the inside of the Warp Nacelles. I asked around and several people recommended the resin add-on parts by Accurate Parts available from Federation Models. I ordered just about every part they make. I also ordered Sci-Fi Spaceship Miniatures Cargo Container. Once the resin add-on parts and the Cargo Container arrived, I began construction. First, I sanded the parts lightly to remove any remaining paint. I sanded down the joints to remove the old glue. With the parts now cleaned up, I began to remove the inaccurate kit details. I sanded the raised grid off the top, and sanded the inaccurate details off the bottom of the saucer. Then I cut the four Flux Chillers off the ends of the Nacelles. I cut the old bridge off the kit. I also cut the Dorsal off the Secondary hull. With the Ertl parts modified, I began assembly. I filled the holes on the Warp Nacelles with putty and set them aside. I glued the new bridge into the hole on the top of the saucer. Looking at the picture in the Starfleet Technical Manual (STM) I noticed a raised area on the hull behind decks 2-3 that ran to the detail piece on the rear of the saucer. I cut out a rectangular piece of .04 thousandths sheet styrene and glued it in place. I now began wondering how to make the tow pad. I took some .06 thousandths sheet styrene cut it to size and heated it in my oven. I then molded the plastic over the cargo pod kit. I let the plastic cool a little and then I soaked the piece in cold water so that it would hold the curve. I had to reheat the plastic a few times so that I could get the tow pad shaped correctly. I was surprised that this technique worked so well, and that I did not melt the plastic beyond recognition. I glued the two halves of the dorsal together and glued the tow pad onto the bottom of the dorsal. I filled the seams and set the dorsal aside. The Navigational Deflector was an interesting challenge. There is some conjecture as to the shape of this structure. The STM shows a spire type of structure ending in a globe with the Deflector attached to the globe. I bought a Navigational Deflector and a planetary sensor array from Accurate Parts for the top of the structure, and the dish for the bottom. Now I needed the spire to connect the two parts. I cut a piece of sprue about 1 ½" long and sanded it down into to point. Now I needed the globe for the end of the spire. For this, I bought some beads at a craft store. I glued a bead to the end of the spire. I glued the Navigational Deflector onto the bead. Then I sanded down the planetary sensor array so that there was no dome on it, marked off the center and drilled a hole into it. I attached the thus modified Planetary Sensor Array to the bottom of the saucer. I left the deflector off until after painting. Next, I glued the two halves of the Warp Nacelles together. Filled the seams and set them aside. Once the putty was dry, I sanded down the seams. I glued the new Flux Chillers onto the Nacelles. I also drilled new holes for the Intercooler Units. I glued styrene strips into the Pylons to give them extra strength and support. |
|
I ran into a problem at this point. There are no bottom views of this ship available. I turned to the Starship Modeler Discussion forum where I got a lot of great advice. Andy Henshaw sent me some great views of the bottom of a project he is working on, as well as some views of the shuttle bays. I measured out the placement of the Pylons on the bottom of the ship and drilled holes into the bottom of the Saucer for the Pylons. I tested the fit and they worked pretty well. I did not glue the Nacelles to the hull yet. I glued the two halves of the Saucer together. Once the glue set, I filled the seam that ran around the edge. I bought an accurate Impulse Deck to replace the inaccurate one that came with the kit. I had some problems getting this part flush with the ship. It took some sanding and a lot of putty to get the part flush. With the Impulse Deck in place, I sanded down all the seams on the saucer. With assembly of the saucer complete, I glued the right Warp Pylon and nacelle into the Saucer with CA glue. I then sprayed on a little accelerator. Once the glue on the right side had set, I moved on to the left pylon and did the same thing. I was surprised at how the well the two pylons attached to the saucer. There were a few gaps around the attachment point. I poured epoxy into those gaps as filler and to strengthen the joint. I sanded all the seams around the pylons once the putty and epoxy had cured. I glued the Bussard Collectors to the front of the nacelles, and filled and sanded the seams. Then I glued the end caps on to each nacelle. Since the schematics did not show the ridges that came molded on the Ertl end caps I sanded them off.
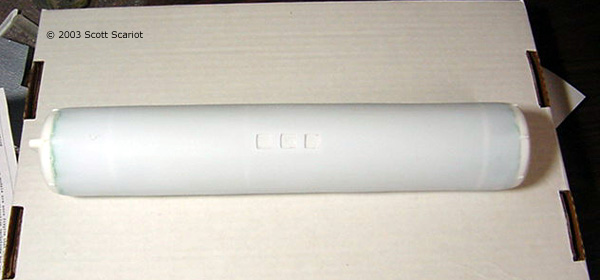
I glued them to the nacelle before I glued the nacelles to the ship. I glued the Flux Constrictors to the underside of each nacelle, starting with the centerpiece and working outward. Then I glued the Reactor control loops onto each nacelle. Finally, I glued the Intercooler Units in place. I filled and sanded all of the seams on the detail parts and the Nacelles were completed. To finish assembly of the Tug I glued the Dorsal and the tow pad onto the bottom of the saucer. Some major seams needed filled. Once the putty had cured, I sanded down the seams. With the Tug complete, I moved onto the Cargo Container. Cargo Container To build my Cargo Container I bought SFSM’s Cargo Container kit. I have built a few of SFSM’s models before and thought that this one would be pretty simple to assemble. I built the kit as a Starliner. I thought the Starliner would make the model a little different. However I ran into so much trouble trying to get the seams filled and hidden that I abandoned the Starliner and decided to build a standard Cargo Container. I used a piece of 2 inch PVC piping, to make the body of the container. I used the two Cargo Container end caps that came with SFSM’s kit, and glued them onto the pipe and filled the gaps with putty. After it set I sanded it down. I had the Cargo Container built in two days. Painting Painting began on both the Tug and the Cargo Container with a coat of primer. The primer showed some areas on the Cargo Container that still needed attention. These were mostly minor seams around the end caps. I filled these and sanded them down. The Tug was airbrushed with three coats of Light Gray. I painted the Nacelle end caps, Flux Chillers and Reactor Control Loops Gray. I painted the bubbles on the end caps and the bridge dome White. The Intercooler units were painted Light Gull Gray. The Impulse Engines and Phaser Banks were painted Gunmetal. The trough in between the Bussard Collectors and the nacelle was painted Black. The Navigational Deflector was painted with a metallic Brass. For the Bussard Collectors I tried a different technique that was recommended to me by a friend. I painted each Bussard Collector silver. Then I painted thinned Tamiya clear red over the silver, building up the color slowly. This gave each Bussard Collector some depth, it also made the Collectors appear as if they were a clear styrene part instead of being opaque. Once the Bussard collectors were painted I glued the Navigational Deflector into place. The Cargo Container was also airbrushed with three coats of Light Gray. The only details on the Container are the attachment points on the bow and the stern. I painted each one Gray. Detailing With the painting done I moved on to detailing the model. I had removed the inaccurate grid that was on the top of the saucer. I drew in a new grid pattern using a pencil, compass and ruler. It took me a few tries to get the grid laid out correctly. I also added a grid to the bottom of the saucer. I also added navigational lights and Phaser Banks with styrene bits. The Navigational Lights were painted red, green and white. I airbrushed a few coat of gloss coat onto the model and set it aside to set. Decals For decals I turned to JTGraphics. The decal sheet retails for $20.00 and includes everything needed to make the model truly accurate. The window decals replace the inaccurate ones molded on the kit. I had the decals customized so I could christen the ship U.S.S. Tionesta, after a town in Northwestern Pa where I spent a lot of time as a kid at my family’s cabin. The decals, as always, went on easily and gave the model the right look I think. I gave the decals a day to set. After the decals set I airbrushed a few coats of a clear flat coat onto the model. Finishing To finish the model I glued the Cargo Container onto the tow pad and the Navigational Deflector onto the bottom of the saucer. I airbrushed a few light coats of Euro 1 Gray onto the model to dirty it up a bit. I don’t think these ships were maintained in pristine condition. I made a stand for the model out of a wooden plaque and dowel rods. I made a custom dedication plaque, and found a Starfleet Transport Command logo on-line I laminated both of these and attached them to the base. I then applied two coats of polyurethane to the base. I started this project thinking that it would be a cheap alternative to buying a new kit. Boy, was I wrong. All totaled, the project cost me about $77.00. Most of that cost was in the Cargo Container kit and the decal sheet. I started the project in late September and it took me about five months to complete. The project was challenging but enjoyable. I am extremely happy with the way the model turned out, because this was my first major kitbash project. With Polar Lights’ new Constitution Class kit on the way I’m sure it won’t be my last. Paints Used
# Metallic all other paints Testors |
![]()
This page copyright © 2003 Starship Modeler™. Last updated on 12 March 2003.
![[Click to enlarge]](ss_ptol_020S.JPG)
![[Click to enlarge]](ss_ptol_021S.JPG)
![[Click to enlarge]](ss_ptol_024S.JPG)
![[Click to enlarge]](ss_ptol_025S.JPG)
![[Click to enlarge]](ss_ptol_026S.JPG)
![[Click to enlarge]](ss_ptol_028S.JPG)