
By Rob Schmitt - images & text © 2008
|
![[Please click to enlarge]](rs_daed_Finished.jpg) |
|
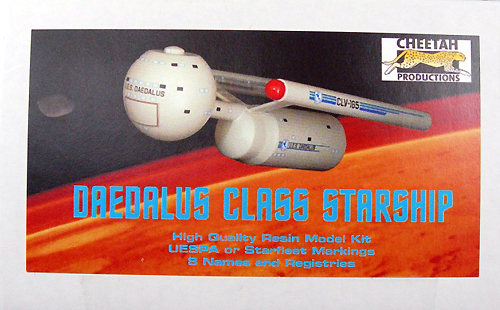
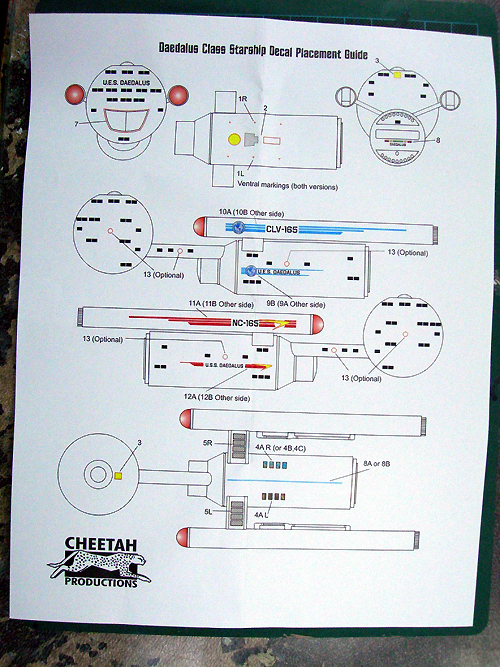
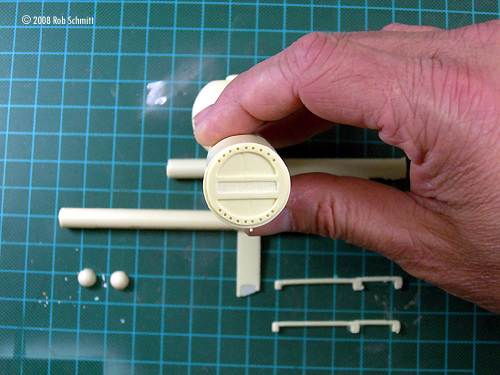
Image: Lovely boxart Image: Instruction sheet Image: Nacelle alignment sheet Image: Decals were clear and crisp Image: Color decal placement guide Image: Clean castings Image: Base with custom decal Image: Right side
|
According to the Star Trek Encyclopedia, Daedalus Class starships were first designed in 2156 and adopted by the newly formed United Federation of Planets in 2161. They were initially built as exploration vehicles and spent nearly forty years surveying the Federation's expanding territory and charting large areas of unknown space. Because of its successful history and proven features, the basic design became the standard for Federation starships well into the 24th century. The Daedalus Class vessels were eventually retired from service in 2196. What You Get The kit comes nicely packaged in a sturdy box with artwork and the parts are secured in a Ziploc bag surrounded by small packing peanuts. This attention to detail ensured none of the parts were damaged during shipping. A black and white set of instructions and a color decal placement guide (nice touch) as well as the decal sheet are also included. There are seven main resin pieces; primary and secondary hulls as one piece, two warp nacelles with pylons, two Bussard domes and two intercoolers for the inboard warp grills. Another nice touch is the inclusion of an optional set of phaser banks for those who want to fortify their vessel. The resin pieces were cleanly cast by Masterpiece Models and only had a touch of flash. While there were some pin holes in the primary and secondary hulls, these were quickly fixed with some CA and sandpaper. Detail is crisp and consists mainly of windows and warp grills. The kit can be built in two scales: 1/1000 or 1/650. For 1/1000 you will need to paint the windows and for 1/650 you use the window decals. I decided to go with the 1/1000 scale and painted the windows. The two-page instruction sheet is pretty straight forward and gives you tips on assembly and painting. As mentioned before, a color decal placement guide is also included. Two sets of decals give you the option to build either the standard Federation version or the more obscure United Earth Space Probe Agency (UESPA) version. Eight different registry names (Archon, Eagle, Enterprise, Essex, Daedalus, Horizon, Icarus and Independence) and hull numbers for both versions allow you greater flexibility. There are plenty of black and white windows to cover the entire ship. Another nice touch are the optional color windows representing the Botanical Gardens. I chose the UESPA configuration; UES Horizon. Assembly and Finish With just seven main pieces, the kit went together fairly quickly after cleanup. Depending on where you place the pylons, the kit's overall length is between 6.5” and 6.75”. You have the choice of either installing them on the secondary hull or on the dorsal connector. I chose to place them on the secondary hull and the molded indentation guides came in handy. The pylons have guide pins cast in resin for easy attachment. I decided to beef up the structural integrity and drilled out the guide pins and added metal pins. Although the alignment diagram helps place the nacelles in the correct orientation, I wasn't paying attention and mine ended up with a slight cant that I didn't notice until after I had secured them into place. Note to Self: check alignment before applying CA! |
|
After priming and sanding, I gave it a light coat of gloss white. Initially I was planning on putting raised rings on the nacelles, dorsal and secondary hull, but I decided to paint them instead. I pre-shaded the panel lines according to the Daedalus diagrams found online with flat black and after a couple of coat of light ghost grey, I was finished! The decals went down extremely well on the nacelles and secondary hull, but the cargo doors on the primary hull didn't align with the curve of the sphere and gives it a slight “smile”. Cheetah Productions is aware of the issue and looking into modifying the decal. I attached the model to a circular base I had lying around. I printed out an UESPA image and placed it on the base. A couple of coats of clear and I was done! ![[Please click to enlarge]](rs_daed_Right.jpg) Conclusions Overall, I'm extremely satisfied with this model. It's obvious that Cheetah Productions put a lot of thought into this kit and it shows in the results. With all the options and possibilities this kit offers, you may have to get several to fill out your fleet! Many thanks to Cheetah Productions for providing the review sample. Manufacturers and retailers, interested in getting your wares reviewed and publicized on a site averaging 3500+ readers a day? Contact us! |
![]()
This page copyright © 2008 Starship Modeler™. First posted on 9 July 2008.
![[Please click to enlarge]](rs_daed_parts.jpg)
![[Please click to enlarge]](rs_daed_Front.jpg)
![[Please click to enlarge]](rs_daed_Back.jpg)
![[Please click to enlarge]](rs_daed_Left.jpg)