
By John Lester - images & text © 2000
|
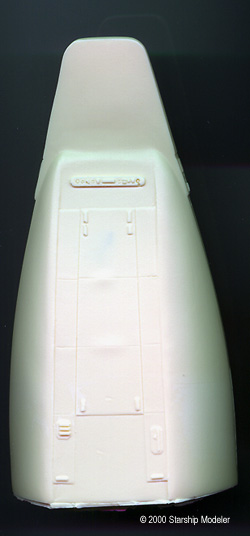
![[What you should end up with]](pre_rr_speed_money.jpg) Resin Ranger's offerings are positive steps in filling the yawning gap left by other manufacturers of Trek ships - the shuttle craft that are used so heavily in all the various series. Following the success of their first issue, the Galilleo from ST:TOS, RR's latest effort is a 1:48 scale Type 9 shuttle, as used in ST:Voyager®. I've been looking forward to this kit since Marc announced it at Wonderfest 2000. |
|
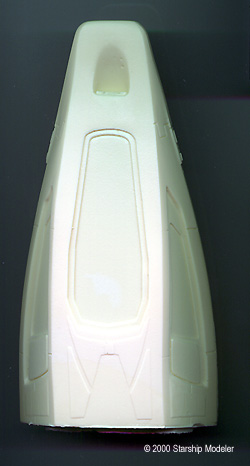
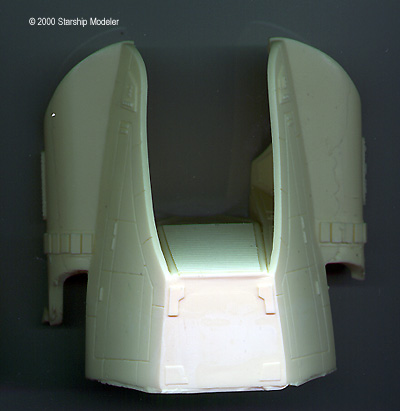
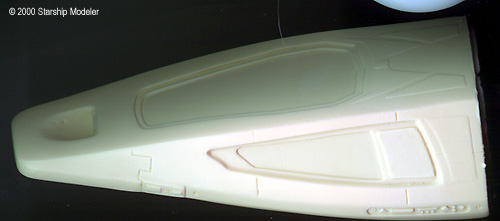
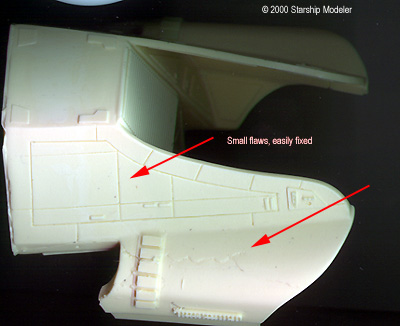
Image: Forward piece, top Image: Aft piece, top side Image: Forward piece, port side Image: Aft piece, port side
Image: Aft piece, bottom side Image: Forward piece, bottom side Image: Warp nacelles
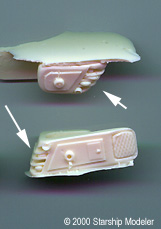
Image: The bubbles in the impulse grilles will be hard to remove.
|
What You Get
Inside the ziploc bag are seven resin pieces, a basic instruction sheet, and decals. The resin is fairly hard, with some minor surface pitting in spots and mold marks in others (primarily the "wings"). It's also very slippery (no doubt from mold release agent) so make sure you clean all parts with a mild cleanser before doing anything else. The ship is broken down into two hull pieces (fore and aft), two warp nacelles, a detail piece that straddles the two hull halves on top, and two impulse engine grilles. Casting blocks are rather large, and will require a bit of elbow grease to remove. The mating surface between the two hull parts is flat, and can be cleaned up expeditiously with a belt sander; the blocks on the warp nacelles will require careful filing and sanding to get the correct shape. Fortunately, there's no surface detail in this area to worry about preserving. Perhaps the most difficult area to clean up, at least on my sample, is the inset detail on the impulse grilles. All of these insets have resin bubbles, and they'll require careful attention with neddle files to remove. Nothing hard, just tedious. Despite these glitches, the casting is a definite improvement over their previous release. The forward hull piece is hollow, but this is more to reduce weight and resin usage, I think, than to provide an opportunity for adding an interior. The walls are thick enough that thinning them down sufficiently will be a real pain, perhaps as much as scratchbuilding a cockpit. The rear half is solid resin. Waterslide decals, produced by JT Graphics and printed with an ALPS printer, are provided to make one of USS Voyager's complement of shuttles. They are sharp, perfectly registered, and appear sufficiently opaque. One page of text is provided as instructions. This is the weakest area of the kit, unfortunately. While sufficient for assembling the pieces, there are no painting or marking guides provided. Two pictures of the completed prototype came with my kit, but they are too fuzzy to be of much help. Assembly & FinishPutting this together is almost a no-brainer, except for the three detail pieces. The triangular piece should go atop the joined hill halves, and the impulse engines on the rear of the wings. If you have access Sci-Fi and Fantasy Models magazine issue #36 from 1999, it contains a detailed article by Rick Sternbach on this very craft. There's a picture of some weird looking doll on the cover and an inset photo of the type 9 shuttle. Try Sci-Fi Matters or Monsters In Motion if you want to buy a copy. As far as painting goes, Mr. Sternbach is also the definitive source. According to him: "Didn't use FS#s on the Speedboat. The body is a warm tan, the window insets are a darker burnt sienna. The sensors are a dk. blue-gray with copper and cobalt blue accents." (Thanks to Michael Smith for forwarding that info on to me.) ConclusionsOverall, I think this is a good kit, definitely one that can be built in a weekend by all but the most novice of modelers. Painting and markings may be a bit of a challenge for the .... most obsessive ...., but if you operate as I do under the "close enough is good enough" philosophy, you'll find a way. Recommended. Many thanks to Resin Ranger for providing the review sample. Manufacturers and retailers, interested in getting your wares reviewed and publicized on a site averaging 2000+ readers a day? Contact us! |
![]()
This page copyright © 2000 Starship Modeler™. Last updated on 14 December 2000.
![[Tops]](pre_rr_speed_tops_lil.JPG)
![[Bottoms]](pre_rr_speed_bots_lil.JPG)
![[Detail parts]](pre_rr_speed_bits_lil.JPG)
![[Click to enlarge]](pre_rr_speed_decal_lil.JPG)