
|
By Arthur Pendragon - images & text © 2006
|
"Computer commence recording... Captain Kirk.... These messages will detail my attempt... to build a model of the USS Enterprise...." Star Trek needs no introduction. If you don´t know what it is, you got lost somewhere at the Internet and ended up at the wrong place... Get off while you can ! But if you know what it means, you will also know that there´s a starship named USS Enterprise, which carried a bunch of heroes from system to system, every week. I´ve always loved the USS Enterprise, since her first incarnation at the original TV series... but when I saw the redesigned Enterprise in Star Trek - The Motion Picture back in 1979, I was simply blown awa! She was beautiful! More than we ever dreamed possible! |
|
Back then, I even tried to make a model out of paper, but those were the days before VCRs and the Internet, and all I had was a bunch of blurry photos from some magazine articles and my memories of the film. In the 80´s I was able to get some models from AMT, and then some reissues from ERTL. I built one, which went reasonably good, and can be found here. But with the advent of the Internet , lots and lots of new information and materials became available... treasures we never thought ever to exist, like photos of the original filming miniature, from every angle. Then, I realized that the AMT/ERTL model had a lot of SERIOUS mistakes, and that I need to built another model, this time with all the corrections needed. |
|
|
So, now you´ll see the results. I got an original AMT USS Enterprise model at the middle 80´s. The first issue of this model had smooth surfaces, with no detail whatsoever, except for the deflector grid lines. That´s why these are called “smoothies”. Soon after the release of Star Trek II - The Wrath of Khan, a new “retooled” model was released, with all wrong surface detail and wood grain. I refuse to make comments about it. |
|
|
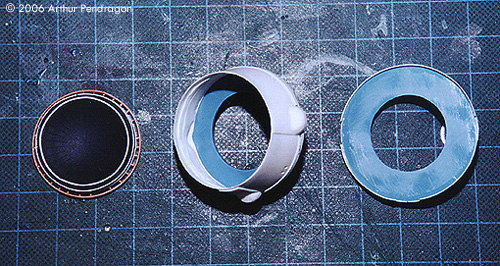
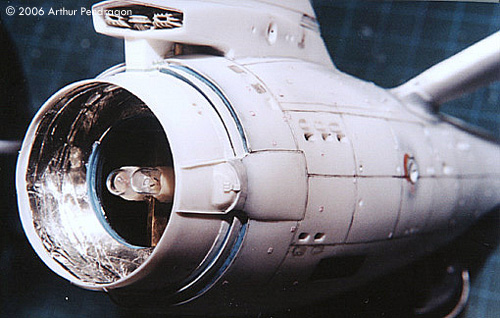
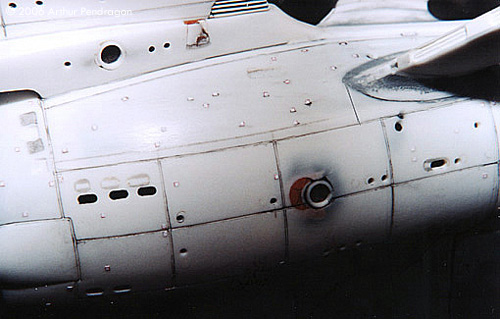
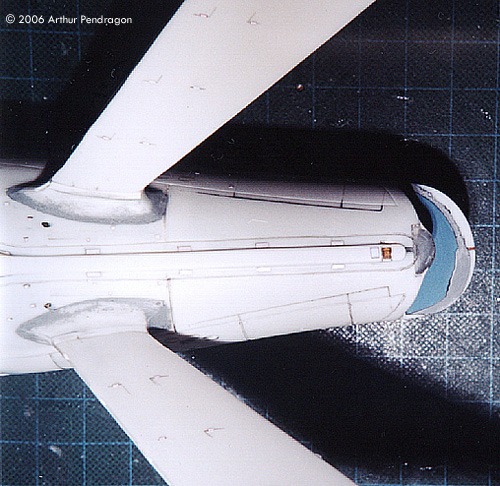
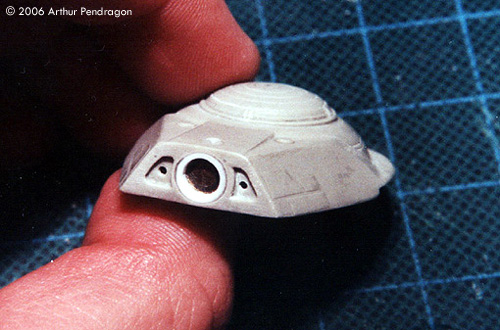
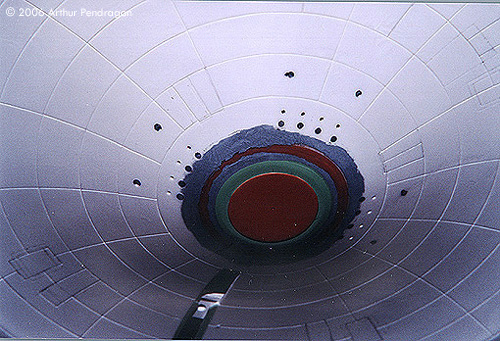
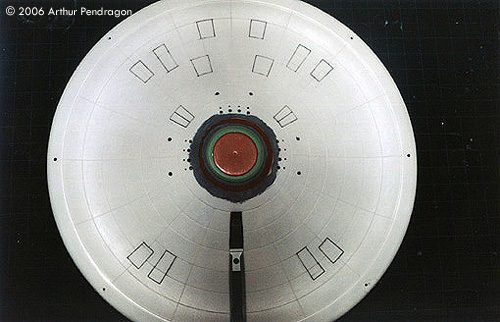
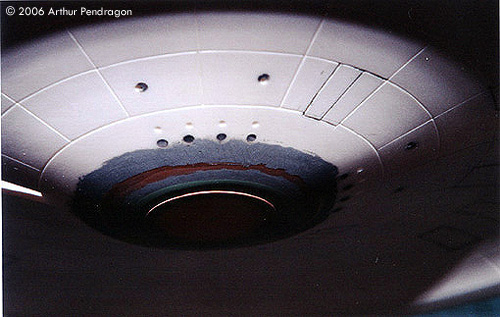
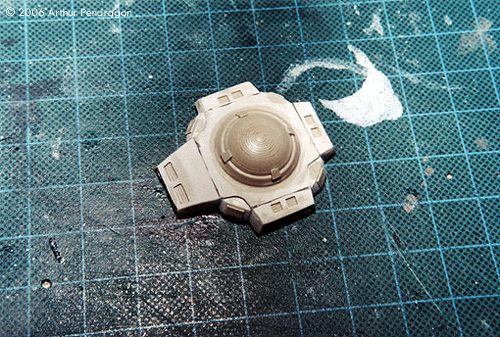
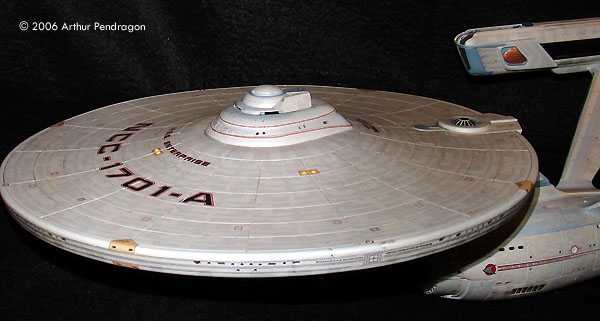
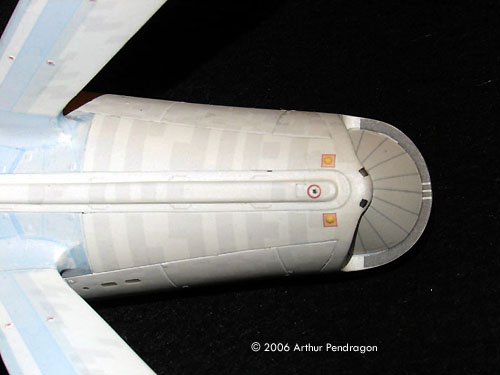
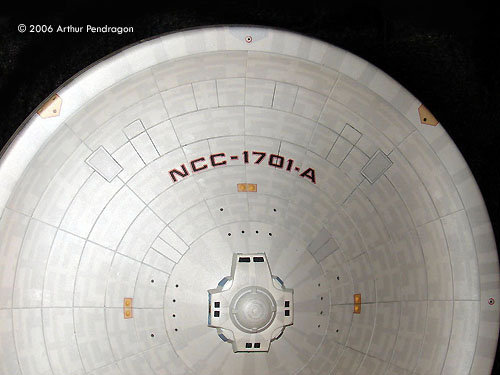
I decided to built the NCC-1701 A version, which appeared at the end of ST-IV, The Voyage Home, mostly because there was a lot of photos of the filming model around the Internet. Every deflector line of the secondary hull was filled with putty, and new ones scribed. Every viewport was also filled, and new ones, properly sized (1.3 mm diameter) were drilled. New docking ports were also made from plastic tubes, and properly sized (4 mm diameter - MMI set # 1848 used). Image: New docking ports Image: Rescribed deflector grid lines. Image: Some viewports were different at port side of the NCC-1701 A version. Here is a view of this side A new navigational deflector housing was made, with correct detail. DLM blue resin deflector and photon torpedo detail set were used. Image: Here are the parts. Image: Here they are in place. |
|
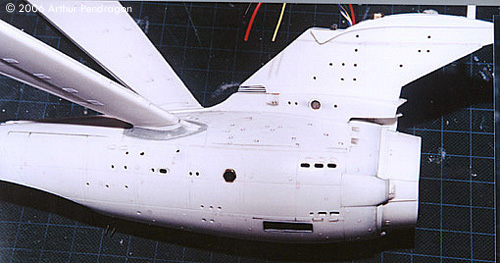
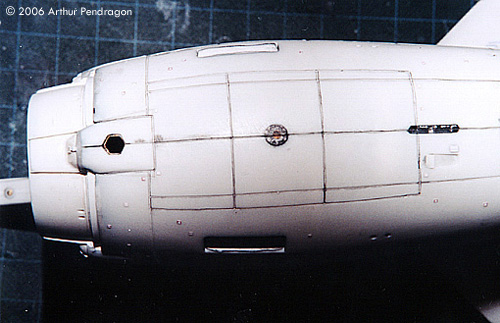
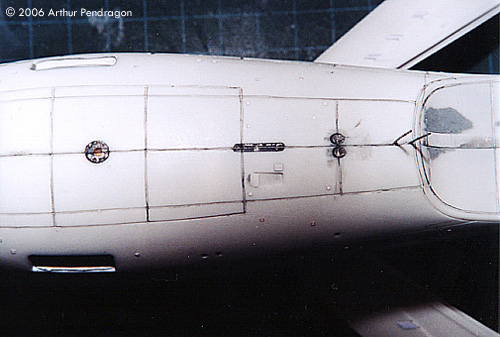
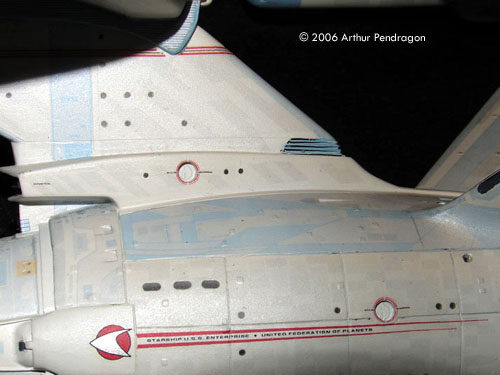
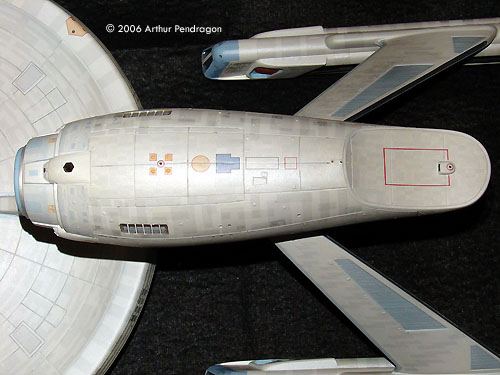
Lots of small squares exists all over the secondary hull. These were positioned using reference photos. A new strongback detail was also made. Image: Squares, forward ... Image: ... and aft ... Image: ... and above. |
|
|
|
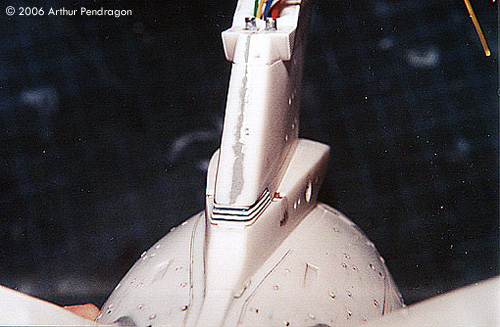
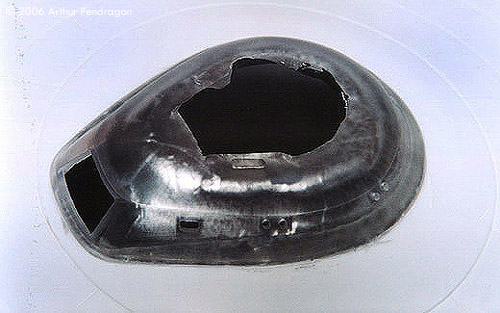
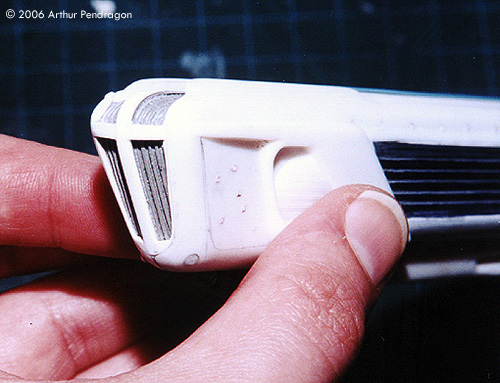
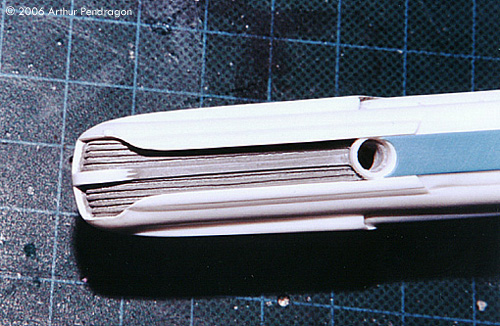
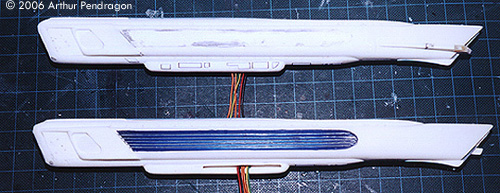
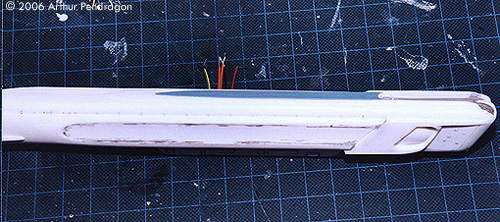
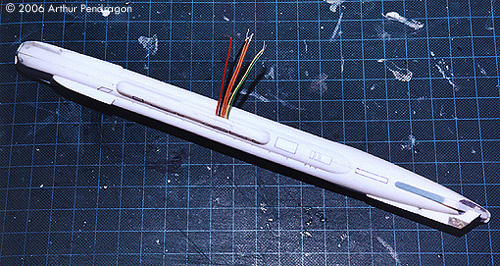
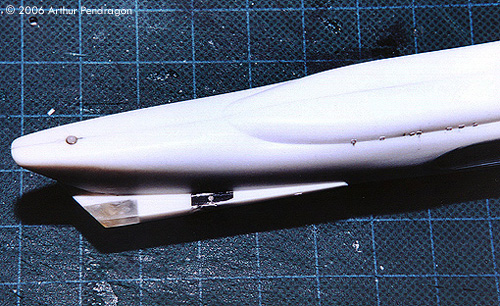
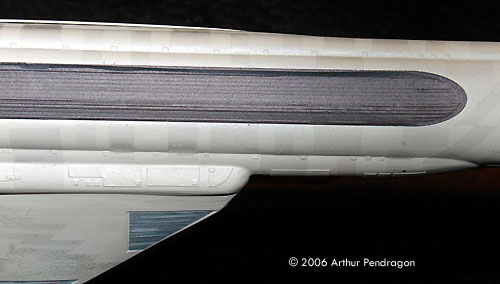
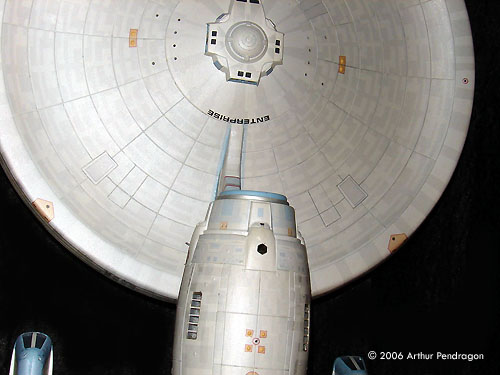
A new shuttlebay was fashioned. (left) One of the main differences between the refit and the NCC-1701-A version are the new deflector grid lines at the belly of the secondary hull. These had to be scribed. Image: New gridlines Image: ... amidships ... Image: ... and aft. Image: The connecting dorsal of the model is too narrow. It was separated from the photon torpedo launcher and widened with a 1 mm styrene bar. New ribbed detail was made for the torpedo exaust. The bridge module is a DLM part, reworked in details, as you can see in these photos. Image: Overall. Image: From behind. |
|
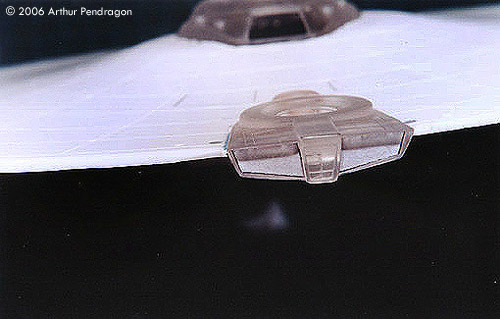
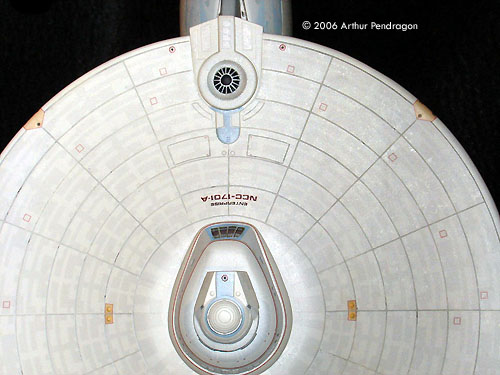
The bottom of the main saucer is too flat. It was deepened in about 2 mm and new viewports drilled out. The retangular landing pads and Workbee bays were also scribed. Image: Building out the saucer. Image: Scribing the pads and bay doors. Image: Both. Image: The planetary sensor is a DLM part, slightly modified. |
|
|
|
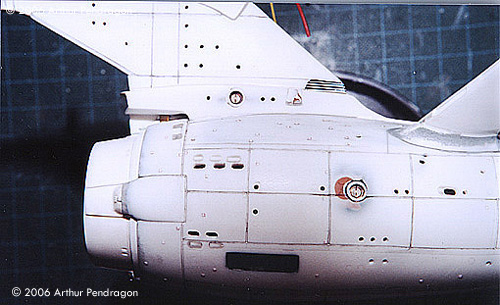
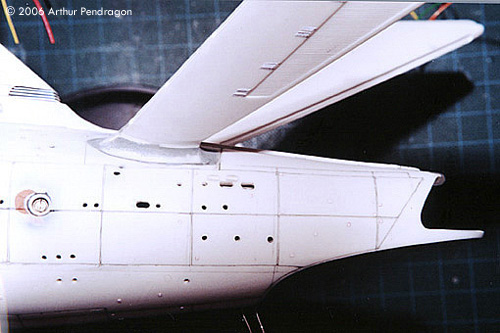
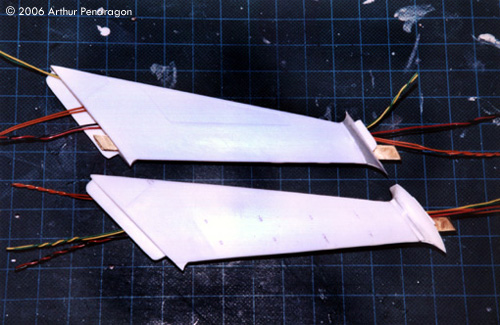
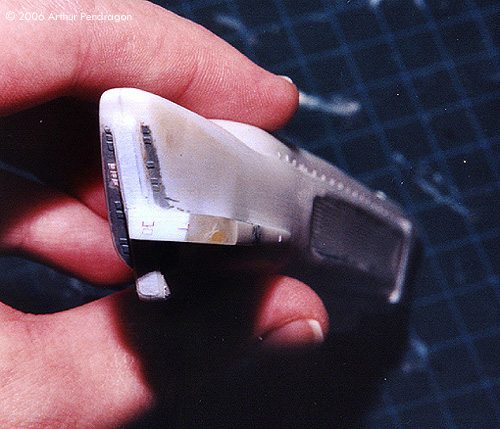
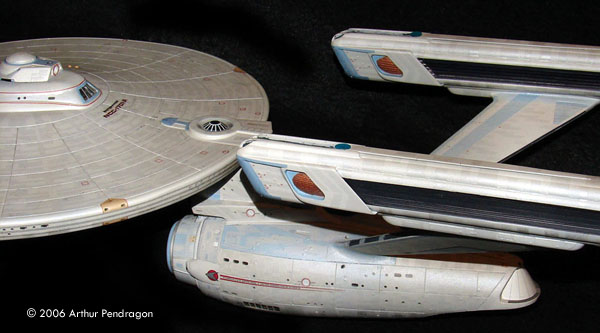
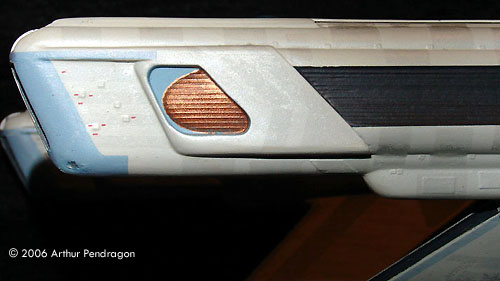
The upper decks of the main saucer is also a DLM resin part, with the dinner lounge interior as seen in ST-VI. I´ve also used my main impulse engine replacement part and saucer rim viewports, also available from DLM. Image: New upper deck piece. Image: Upper saucer mods. Image: From behind. Image: The hangar interior was also redesigned. The shuttle is an old Thomas Models resin aftermarket. Image: Here you can see the retooled warp pylons. Note the strenghtening brass bars. The pylons were widened in 1mm more. The base of the pylons was resculpted. The warp engines were also detailed with lots of small details all over. The molded in warp grilles were cut out and new ones, surgically removed from the ERTL USS Reliant model, were glued in place. A blue resin insert was also glued, from DLM products. |
|
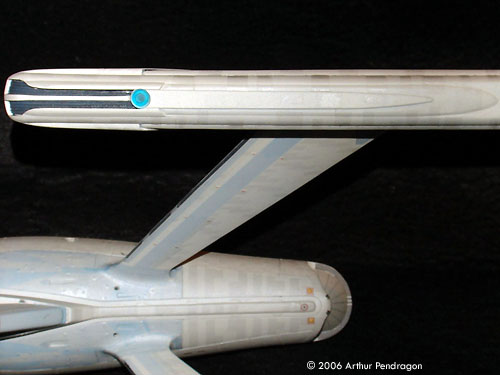
The forward hydrogen collector is also a DLM part, retooled. Image: Front view Image: Top view. Image: Warp nacelles, side by side. Missed details were added to the bottom and top of the warp engines next. At the rear of the nacelles, I replaced the reaction control thrusters (with an yellow LED encapsulated in clear resin) and the warp ID light (white surface mount LED). Image: LEDs in place Image: Sanding and shaping complete. Many other small changes and corrections were made: all molded phaser “blobs” were sanded off, and replaced with properly sized and shaped new ones. Thomas Models' resin botanical garden was used. Ribbed detail was glued to the interconnecting dorsal. The molded in navigation lights were also sanded away, and some repositioned to proper places.... Enought already! Paint and Decals I painted the model using acrylic paints. I´ve used pearlescent white for the base color. Unfortunately, I lost all photos taken during the painting phase. The “aztec” was achieved with my own designed decals. Also, lots of detail markings, including the engine blue area were designed and printed by myself. You can find most of these decals as a free downloadable file. The NCC-1701 and Enterprise markings, and some others came from a mix of Thomas Models and JT Graphics decal sheets. Display I've ordered a heavy acrylic base, and designed a sticker label, which I also printed. I still believe that the base must be simple and elegant, in order to do not drive away attention from the model. |
|
|
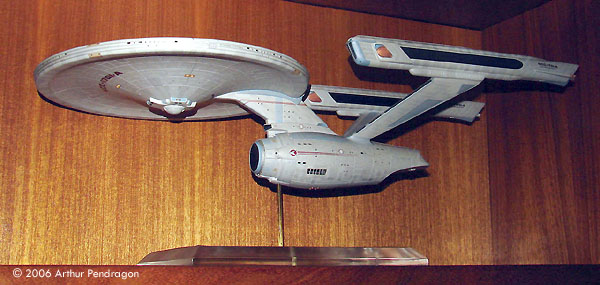
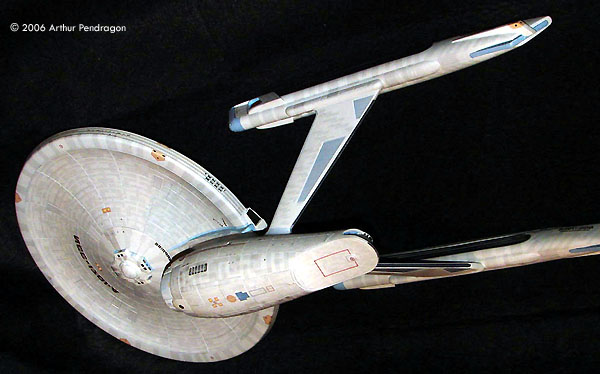
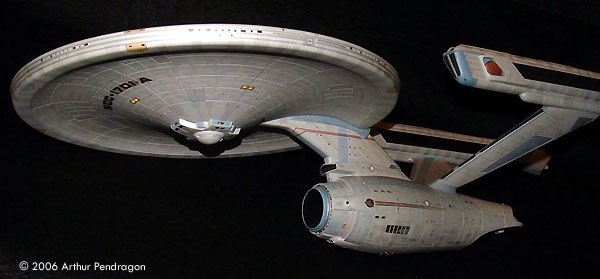
Completed Model |
|
|
More Images- |
Image: Front/left view Image: Left/rear Image: Upper saucer Image: Over the left shoulder Image: Top view |
|
Image: Rear of saucer Image: Impulse crystal Image: Between the pylons Image: Closer Image: Above the hangar bay |
Image: Under the front of the saucer Image: Amidships Image: Deflector |
Image: Stern Image: Warp nacelle front ... Image: ... middle .. Image: ... and back Image: Under the saucer Image: Further aft Image: Bottom of the secondary hull |
|
Final Words It took me 12 months to finish this model, during 2004 and 2005... in the meantime, Polar Lights announced and released their 1/350 Refit model, which we all know and love. Anyway, I was satisfied with the result. Again, with some work and imagination, you can make an Enterprise out of the old AMT/ERTL model you can be proud of! |
Please note that the opinions expressed in this article are those of the reviewer.
Read other reader's reviews of this kit ![]() Submit your own review of this kit
Submit your own review of this kit
![]()
Go back up | Star Trek: Enterprises | Starship Modeler Home | Site Map | Feedback
This page copyright © 2006-16 Starship Modeler™. First posted on 25 October 2006. Last updated 7 April 2016.
![[New Neck]](cz_ertl_refit_001.jpg)
![[New Shuttlebay]](cz_ertl_refit_009.jpg)
![[New Impulse Deck]](cz_ertl_refit_025.jpg)
![[Please click to enlarge]](cz_ertl_refit_31.jpg)
![[Please click to enlarge]](cz_ertl_refit_04.jpg)
![[Please click to enlarge]](cz_ertl_refit_08.jpg)
![[Please click to enlarge]](cz_ertl_refit_14.jpg)
![[Please click to enlarge]](cz_ertl_refit_23.jpg)
![[Please click to enlarge]](cz_ertl_refit_24.jpg)
![[Please click to enlarge]](cz_ertl_refit_33.jpg)