
By Allen B. Ury - images & text © 2004
|
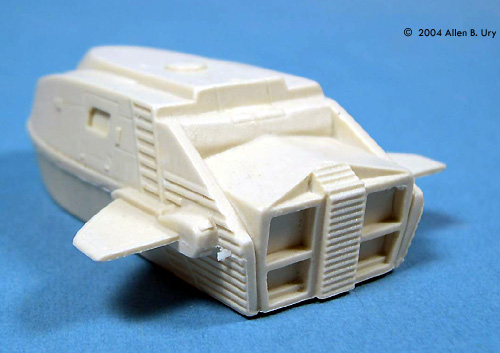
![[Click to enlarge]](au_nx01pod_Main1.jpg) UPN's current "Star Trek: Enterprise" (Formerly just "Enterprise," but they weren't fooling anybody) was controversial from the word "go." |
|
Image: Left/rear view Image: Instructions
|
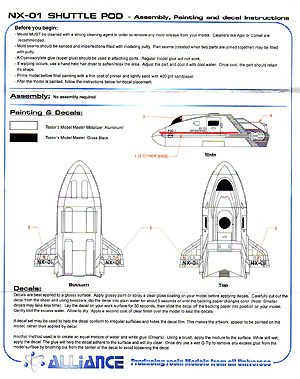
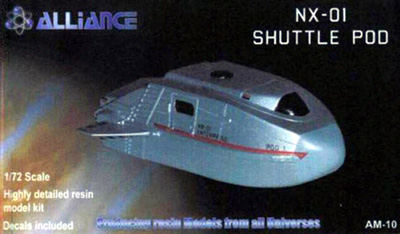
The producers' design choices elicited mostly negative reviews before the first episode even aired, with most of the fans' ire being directed at the clearly Akira-inspired architecture of NX-01 itself. But while I agree that the “Ennex” is a less-than-awesome design, I was personally even less impressed with the show's “Shuttle Pods.” To me, the stubby bullet-shaped ships with their flipper-like tail fins looked like they were pulled directly from the warehouse storing props from the old “Logan's Run” TV series of the 1970s. “Enterprise” was supposed to represent the transition stage between the brass-tacks World of Today and the nearly magical world of Roddenberry “Star Trek” where virtually all problems could be solved with technology. Yet these pods, with their proportionately massive crew compartments, tiny engines and ridiculously small airfoils were already part of the technology-as-magic age. In short, they were cheap and unconvincing. Which doesn't mean I didn't want a model of one. With modern sci-fi kits being released with increasing rarity, I was quite excited when Alliance Models came out with this all-resin kit of the “Enterprise” Shuttle Pod. The good news is, in 1/72 scale, it can be displayed next to the 1/72 DS9 Runabout from AMT/Ertl to demonstrate just how small the thing is. The bad news is, in 1/72 scale, the model is so small (3¼ inches) that it can literally sit in the palm of your hand. Not a lot of room for detailing here. I would have preferred 1/48 scale or even 1/32. But then no one asked me. What You Get In fact, the Alliance kit isn't so much a “kit” as it is a one-piece resin sculpture that just requires a little cleanup and paint to make presentable. The model is crisply detailed from the (few) panel lines to the corrugation around the engine compartment. Whoever sculpted the master is to be commended. The copy I received was virtually free of bubbles and pinholes and had just a little flash around the centerline that was easily sanded away. There were a few surface irregularities around the body, but these too were quickly sanded smooth. The “Instruction Sheet” is simply a painting and decal placement guide. It is virtually unnecessary as all the guidance you really need can be gleaned from the box photo. How I “Built” It After sanding down the flash and few surface irregularities, I sprayed the model with sandable auto primer (from my nearby Pep Boys) and let dry. The primer revealed a few more irregularities that I quickly sanded away, then reprimed. I then sprayed the entire model with Testors Stainless Steel Metalizer. (Alliance recommends Aluminum, but I thought that would be too light and reflective.) When it had dried, I sprayed the craft with Metalizer Sealer and let dry overnight. The next step was to mask off everything but the nose area, which I then sprayed with Testors Intermediate Blue. I then gave all the detailing a light black “wash” with Flat Gray Enamel. When the wash was cleaned up, which brought the panel lines out nicely, I hand-detailed the cockpit “dome,” door “windows” and engine section depressions with flat black enamel. I hand-painted the engines with flat red enamel. |
|
Decals Next came the decals. I have used ALPS decals. They're thin, fragile, love to fold up on themselves and they mock me whenever I try to work with them. I started by trying to lay down one of the long red “stripes” along the centerline and nearly met with disaster when the decal started to fold up on itself. Fortunately, I was able to dunk it back into the water in time to save it, after which I oh-so-carefully cut the strip into three pieces that I laid down separately. I used this same strategy with the second stripe. The smaller “NX-01” decals were slightly easier to work with. But not that much easier. When all the decals were in place and dry, I sealed the whole model with Future floor polish. And that was it. The whole project was finished in less than three days. Conclusion For $30, the NX-01 Shuttle Pod is a decent value. Not a lot of “build” here, but the finished model doesn't take much to look good and is a must for the Star Trek completist. |
![]()
This page copyright © 2004 Starship Modeler™. First posted on 8 August 2004.
![[Click to enlarge]](au_nx01pod_WhatYouGet.jpg)
![[Click to enlarge]](au_nx01pod_unfinished_Side.jpg)
![[Front view]](au_nx01pod_HighFront1.jpg)
![[Click to enlarge]](au_nx01pod_RearAngle1.jpg)
![[Click to enlarge]](au_nx01pod_RightFrontAngle1.jpg)