
By Aaron ōCaptain Bobö DeAngelis - images & text © 2004
|
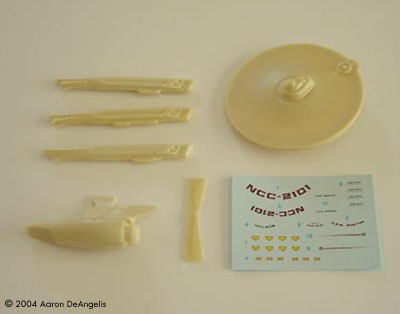
![[Finished]](ad_dread_Finished6.jpg) After almost getting lost in a sea of packing peanuts I found the little bag in the USPS box. Included in the sharp packaging was six pieces of resin in varying sizes and a sheet of decals. The resin was nicely cast, and glossy with mold release. |
|
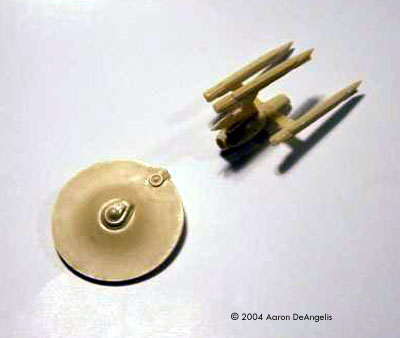
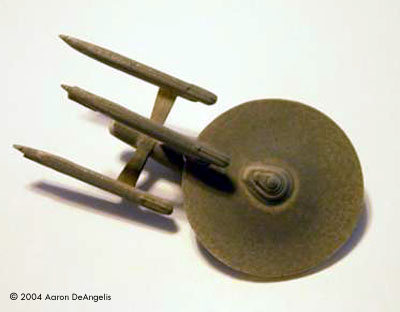
Image: Partially assembled Image: Primed and ready
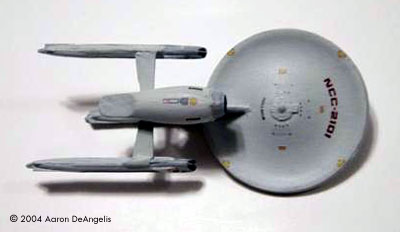
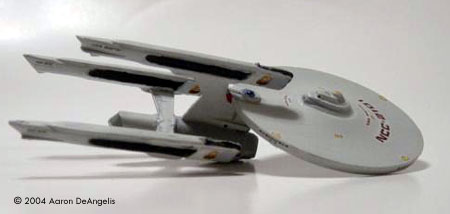
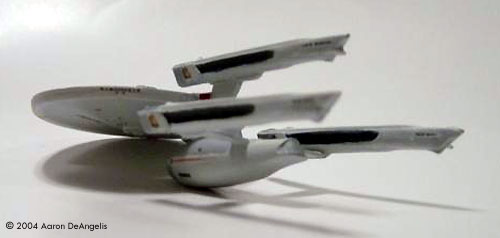
Image: Underneath Image: Starboard side perspective Image: Left/rear view |
I knew I held in my hands the powerhouse of my 1:2500 scale fleet: a dreadnought. A ship designed with no small weapons, only large bore guns made to destroy other capital ships (I've got an evil grin on my face againģ )
What You Get The primary hull and secondary hull are from the Ertl kit, but with the thick gridlines sanded off, and slightly modified. There is a new bridge (with engraved docking ports) on the saucer, and a larger neck to accommodate nacelle #3 off of the engineering hull. IÆm a wee bit frustrated that the secondary hull isnÆt extended like it is supposed to be. Cutting the hull apart and adding an eighth inch spacer wouldnÆt take more than 20 minutes, and would make the kit even more desirable for the purists out there. The pylons are the Ertl pylons turned so they are 180░ (making the ōplasma exhaust portsō or whatever you want to call them, point in the wrong direction) and trimmed so the nacelles point forward. The nacelles are casts from the Ertl kit as well, and the centerline nacelle is two Ertl outer nacelle halves glued together, giving it the cool ōfinsö on both sides. Instructions The instructions with the kit are dorsal, port and ventral views of the ship (the schematics are of the ship with extended engineering hull, I might add,) with arrows pointing to decal locations. On the reverse of the sheet is basic notes about construction, including how to prep the model for assembly and to make sure everything is aligned before you glue it (I probably should have read that one over again... Oops.) After that there is three steps that tell which parts to glue together. Clean Up The parts were covered in mold release, I think they went in a swim in the stuff before being packaged (joke.) After being soaked in soapy water for a few hours and dried, I started sanding away at the rough spots, specifically the seam along the bottom of the engineering hull and flash along the saucer edge. Assembly I glued all of the ship together except the saucer, so it wouldnÆt inhibit primer from getting to the inner part of the nacelles. After a light coat of primer, I put the saucer on the neck, and started puttying any gaps, namely the neck and pylons. Another dusting of primer covered up the Bondo putty (my new best friend) and it was ready for paint. Paint As with all my movie era starships, I painted it Model Master light gray. The top of the engineering hull was painted light ghost gray, as were the nacelle fronts and shuttle bay doors. The bridge dome was painted Sand, the impulse engines Insignia red, and the impulse core Ford/GM engine blue. If anyone has been following my reviews, youÆve probably noted by now I use the same colors on every starship (ha!) But this time I tried something new! I painted the deflector copper first, then added a coat of Ford/GM engine blue, giving it a reflective look. Decals The decals for this kit were superb in every way but one; there were no windows! I contacted a discussion board member (cojoker) who sent me a set of decals so I could call this model complete! The decals of his are the saucer windows, recreation deck windows, portholes on the bottom saucer half, and colored panels on the bottom of the engineering hull, the rest are supplied with the kit. I would have put the windows he sent me on the engineering hull, but I had already put the pennants on, which I didnÆt really want covered up by panel lines. So I made up a back story that this was one of the few dreadnoughts converted from refit Constitutions, and were filled to the brim with machinery in the engineering hull, preventing crew quarters from being installed there. The windows were just filled with duratanium armor plating and painted over, while the smaller crew of 226 moved into the saucer. Only one name is included on the decal sheet, the USS Boston, NCC-2101. The RCS packages and phaser points are well done.Last Word Despite the disappointment of the stunted engineering hull, the ship looks powerful sitting next to my frigates and cruisers on the shelf. IÆve always wanted a Federation dreadnought, and now I have one to fly around the room chasing off Klingons, (err, I meant to ōdisplay proudly.ö ) |
![]()
This page copyright © 2004 Starship Modeler™. First posted on 20 May 2004.
![[Package]](ad_dread_Package.jpg)
![[Click to enlarge]](ad_dread_Puttied.jpg)
![[Finished]](ad_dread_Finished1.jpg)
![[Finished]](ad_dread_Finished2.jpg)
![[Finished]](ad_dread_Finished3.jpg)
![[Click to enlarge]](ad_dread_Finished4.jpg)