Assembly:
Assembly is straightforward. Don't put the whole thing together in one sitting;
build the "bridge", "neck", and "main hull/body" sub-assemblies, sand, detail, and paint
them, then put them together. This way makes handling the model a whole lot
easier!
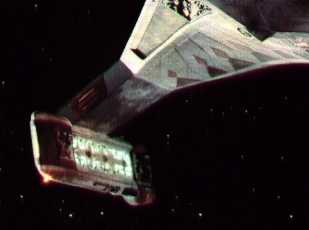
Bridge Sub-Assembly The jagged molded "face" of the bridge is incorrect
and must be sanded or filed smooth. I used 60-grit sandpaper backed by a
emory board to rough the face smooth, then progressively finer grits (down to
320-grit wet/dry) to make it smooth. Then, using the box photos as a guide,
I marked the location of the portholes and drilled them to a depth of 1/16"
with a pin vise (because it's easier to control than a motor-tool). The boxtop
photo also shows what looks like a searchlight atop the bridge "dome"; this
can be made from scrap sprue if you don't have an old ship kit to pilfer
from.
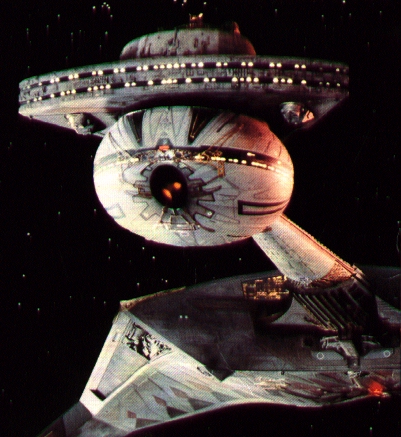
Neck Sub-Assembly The
top view photo on the box, as well as other
photos I've found, show detailing inside the "channel" between the dorsal
ridge just aft of the joint with the bridge module. I replicated this with a
small rectangle of .010 sheet styrene.
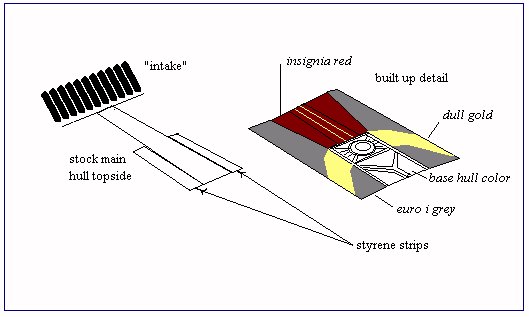
Main Sub-Assembly The most glaring ommission is the detail on the "top"
of the main hull, forward of the impulse engine deck. The kit has a single molded
strip running this length; fashion
two rectangles from sheet styrene and
glue on either side of this ridge, fill the seam and sand smooth. The circular
detail is also cut from sheet styrene, edges sanded, and glued into position.
The molded details along the forward "face" of the main hull were also inaccurate.
Fixing this looked like more than I was willing to handle, so I skipped it. The
bright gold details at the corners can be made from scrap photoetch brass sheets.
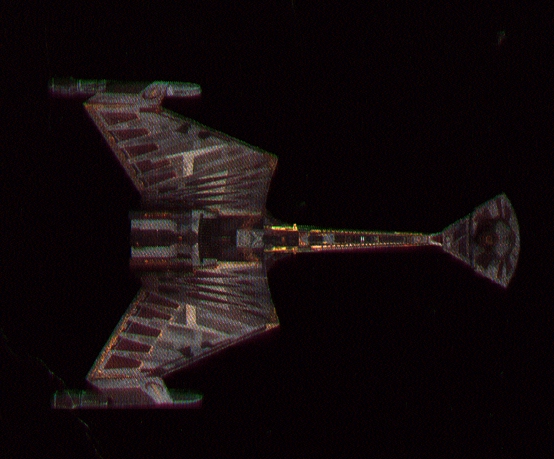
The molded "arrowhead" markings on both the top and bottom surfaces are not
entirely accurate - but I balked at the effort necessary to sand flat and rebuild
these, for very little gain in appearance, so I left them be.
Warp Nacelles The forward edges of the nacelle pylons should have a
small rectangular "box" recessed in. I cleaned out the rough shape with a
motor-tool, then squared the edges with a Squadron adzing tool and a hobby
knife. The outboard sides of each nacelle are lacking detail. This can be
built up with various strips of sheet styrene and snips of telephone wire (and
its insulation). The inboard sides would require a lot more work to make them accurate ...
it can be done by cutting out the part that should be glowing, casting that with clear resin (with
a fine screen embedded to get the grill look), and tinting with Tamiya Clear Green paint.
Lightsheet behind this would probably give the best glow. Though others have suggested
glow-in-the-dark paint and similiar ideas, I think I'll go th lightsheet way when I rebuild this one.
Painting:
Painting this beast was ... well, I rapidly lost my enthusiasm for the
immense amount of masking required for each color. The effort paid off, though,
with a good looking model. Paints I used (all Testors) were:
- FS 36440 - Flat Gull Grey;
- FS 36081 - Euro I Grey;
- FS 36307 - Light Sea Grey
- FS 31136 - Insignia Red;
- FS 37875 - Flat White;
- # 1103 - Gloss Red (Impulse Engine);
- FS 28915 - Flourescent Red;
- # 1144 - Bright Gold;
- # 1177 - Neon Yellow.
I painted the model as subassemblies because they were easier to handle while masking.
After washing and drying off the subassemblies in warm soapy water, I
sprayed a good base coat of flat black, followed by 2 coats of the base
color (Flat Gull Grey).
After allowing this to dry for a solid week, I started with the next
'higher' color (i.e., the color that would be applied over the grey, and later
partially covered by other colors). Also, the instructions don't show this, but there are white 'flashes' on the
inboard side of the top surfaces of the main hull plainly evident on
the boxtop photos.
I covered the model in 2" wide masking tape (after reducing its
'tack' by placing it on a plexiglass sheet and removing it), traced the
desired markings with a .5mm pencil, and cut them out with a sharp no. 11-blade hobby
knife. After letting the white dry for two days, I covered it up with more
tape. I used a paintbrush handle and a toothpick to burnish down the
tape around the engraved details, then cut out the tape around all the
Euro I Grey details. I then repeated the process for the rest of the colors.
The painting instructions were incomplete in several areas - especially
the for the Red. I used the boxtop photos of the studio model as a guide to produce a
more accurate color scheme.
I handpainted all the Bright Gold details. Because my hands are not
always steady, i first scribed around the edge of the details by lightly
pressing the blade of my knife along the color separation line. The paint
then flowed along the line, filling it in and making a sharp demarcation.
The bridge module required much the same treatment. I carefully masked off
the dark grey stripes along the face, then painted them Euro I Grey.
I then applied Neon Yellow to the portholes with the tip of a toothpick.
The Insignia Red details were edged with my knife and hand painted.
All in all, painting took almost a month - mainly because I quickly grew bored
with the tedium of masking and kept putting the model aside; I probably
accumulated no more than 20 hours on this step. It really paid off in the end, though.

![[ST:IV Klingon Cruiser]](vi_kling.gif)