 |
|
|
|
This section contains the reference images of real-world vehicle, equipment and structures of interest to scale modelers as examples of weathering effects. Do you have something you'd like to contribute? Drop us a line! |
|
Vehicles |
|
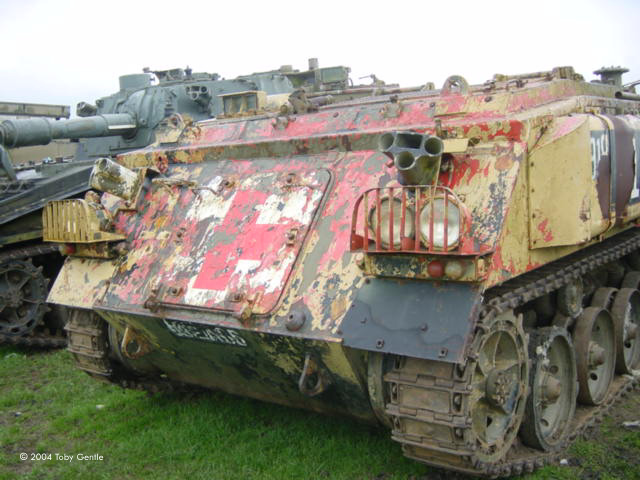
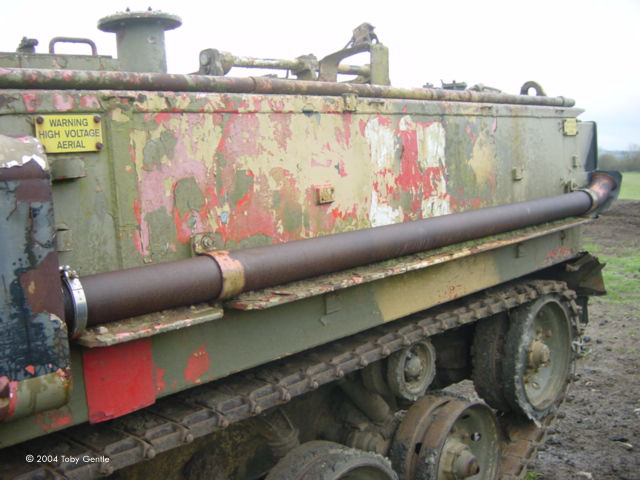
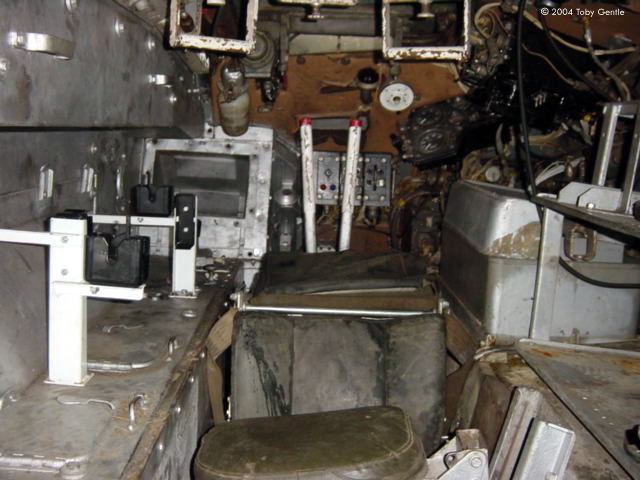
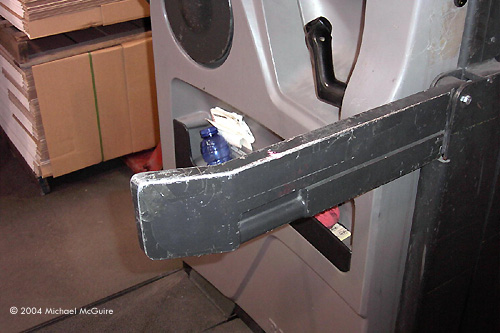
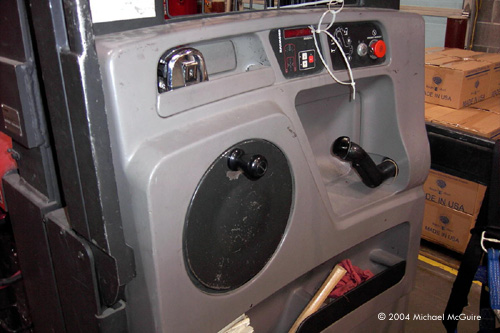
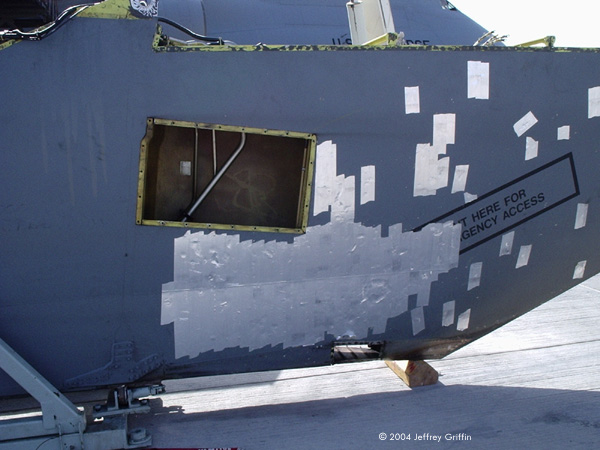
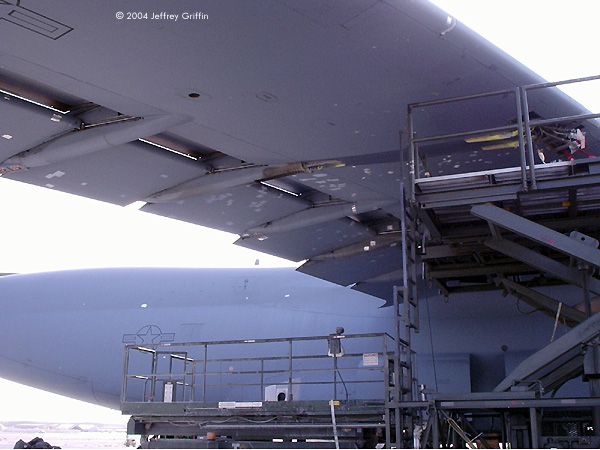
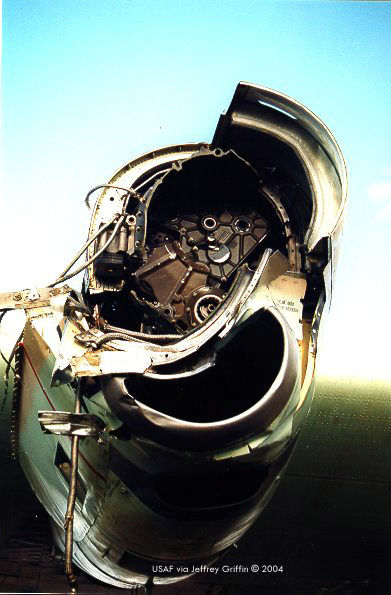
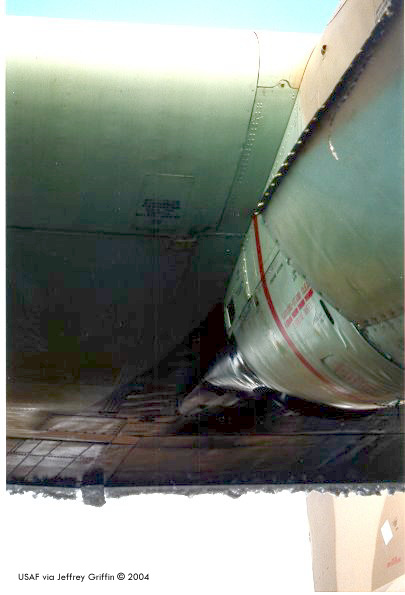
Image: A closer look at the well-worn paint on the vehicle's front. Image: Left side. Image: Passenger compartment seating Image: Another view Image: More of the interior (commander's position?)
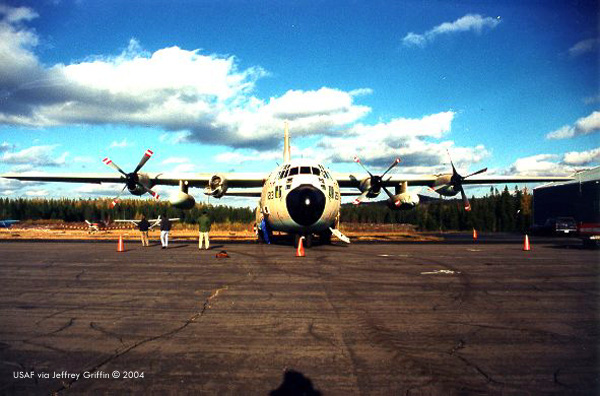
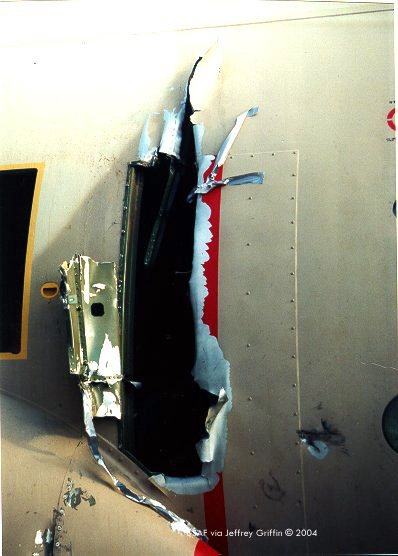
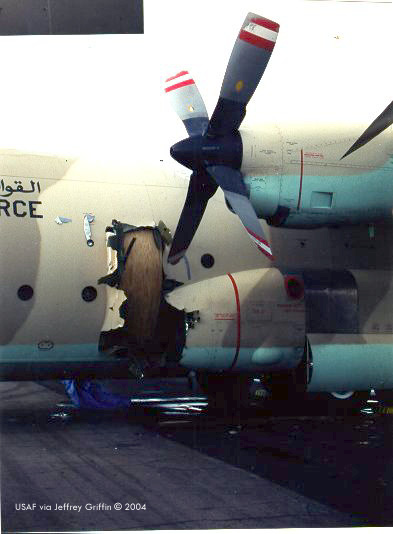
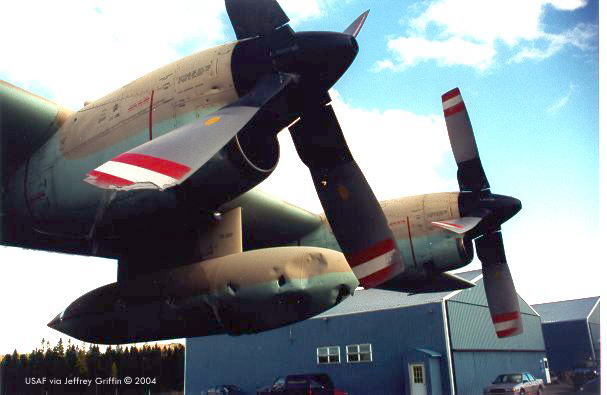
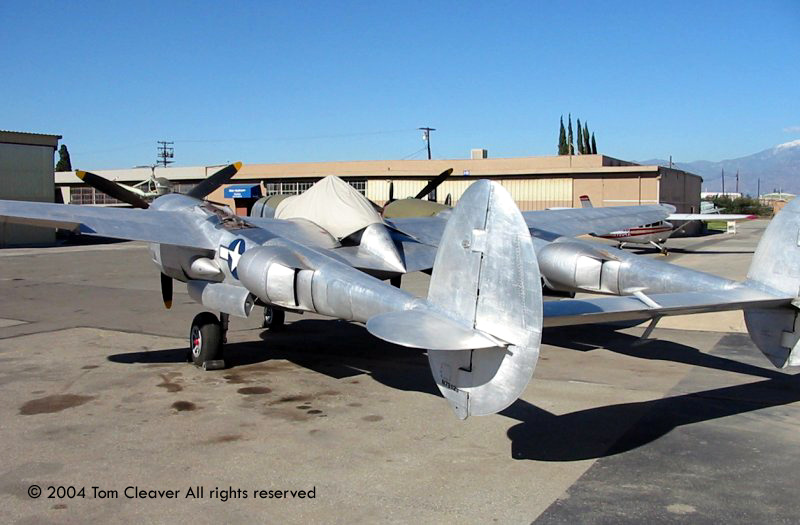
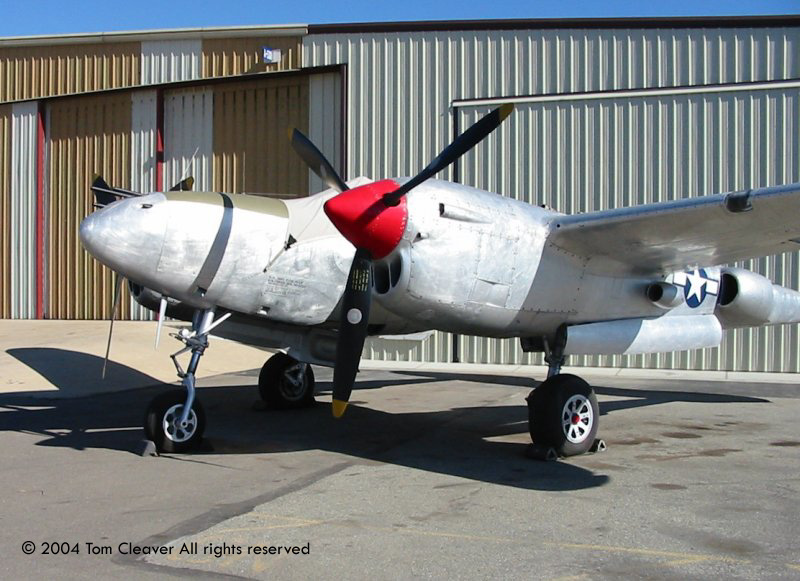
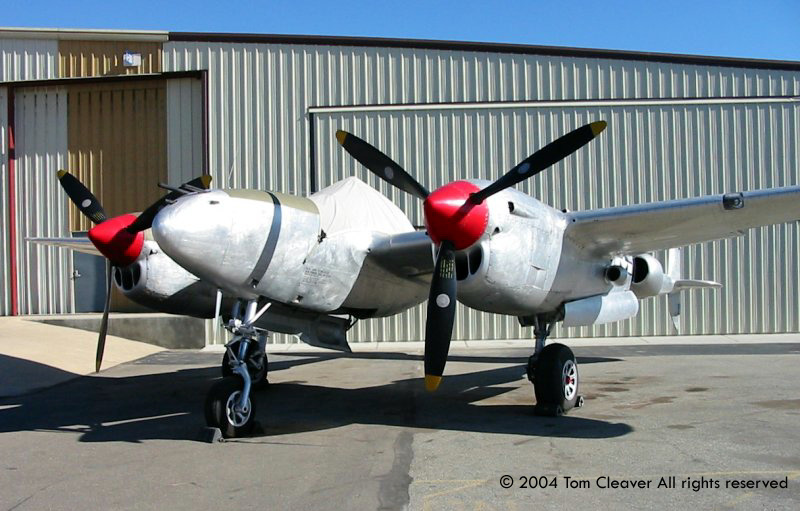
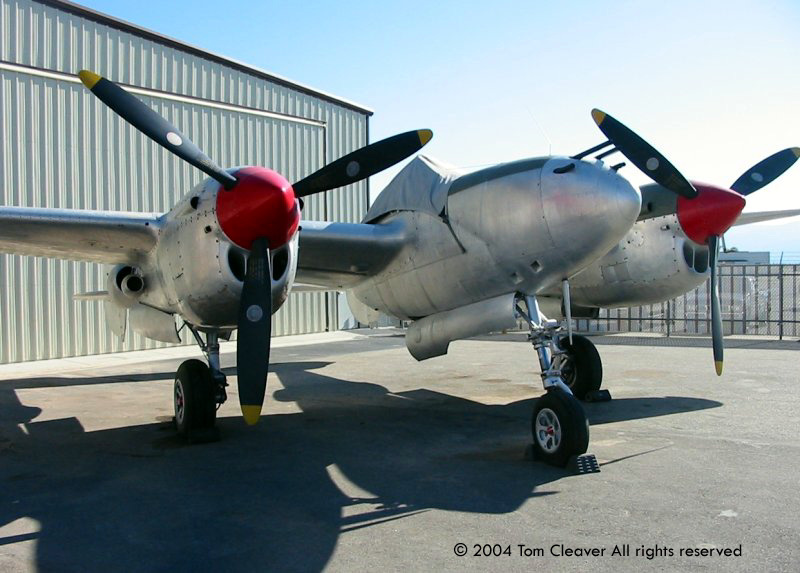
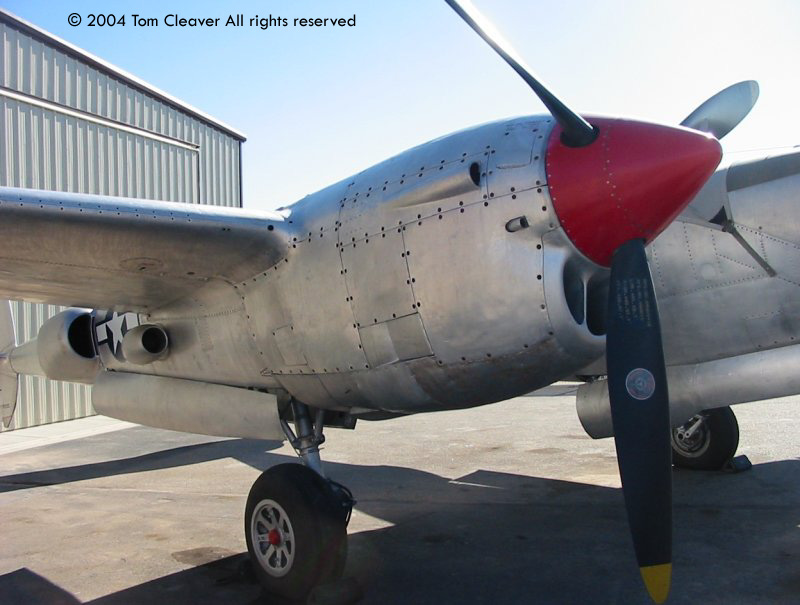
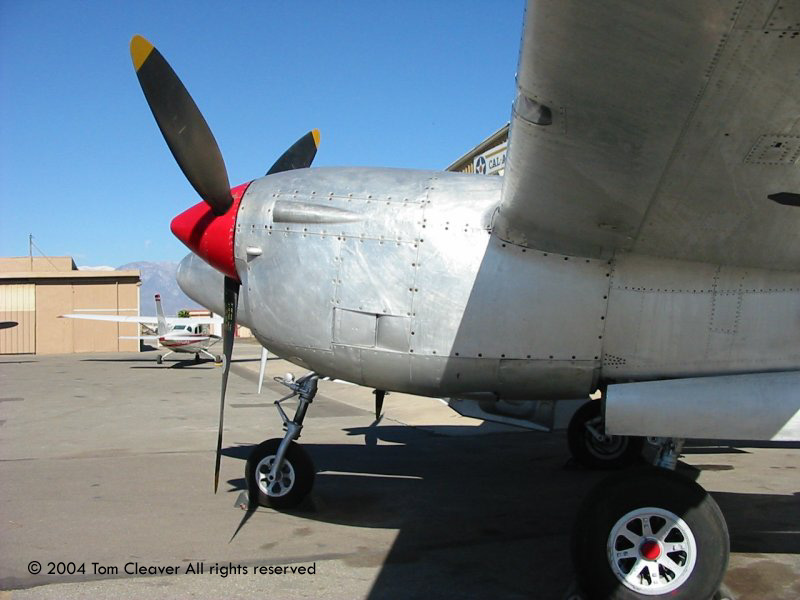
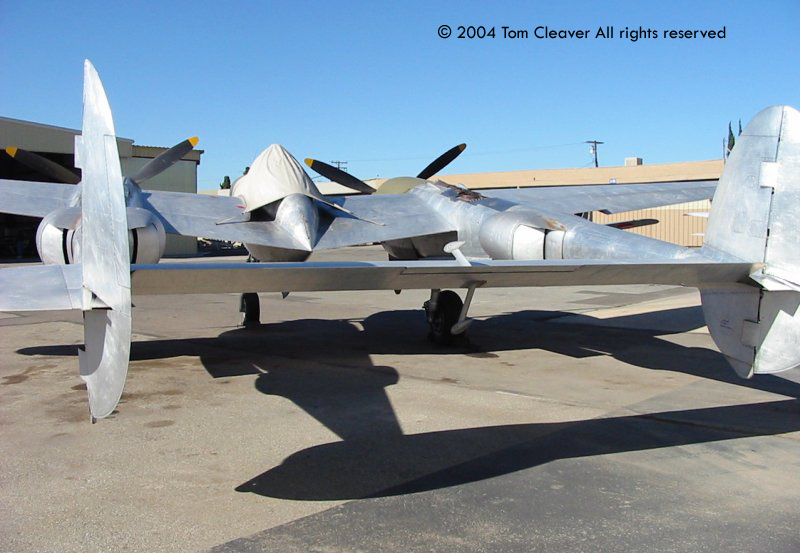
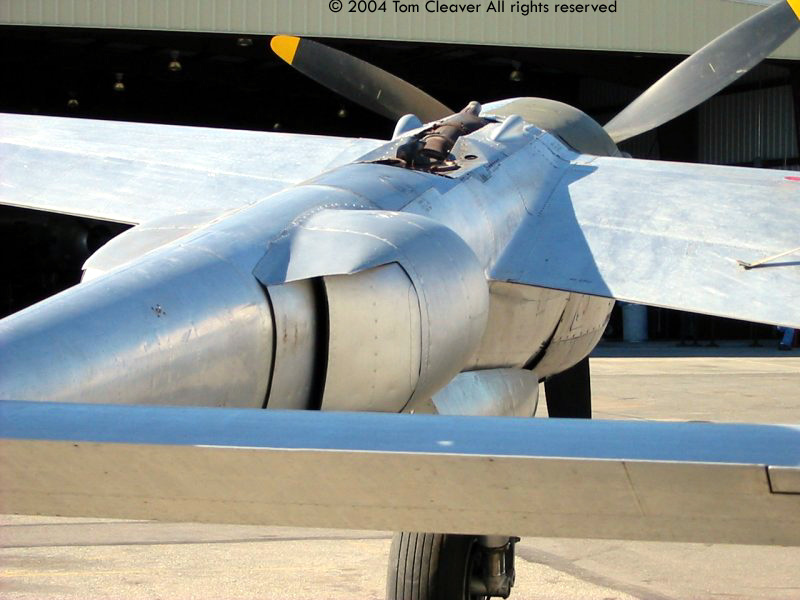
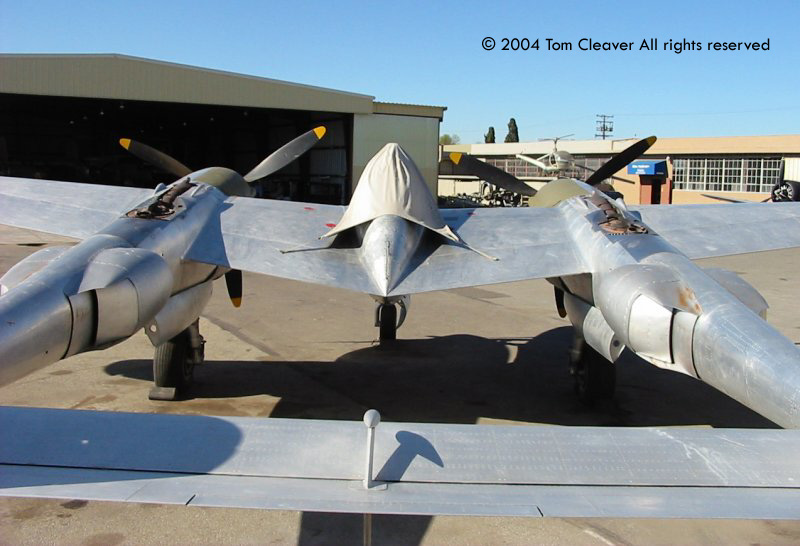
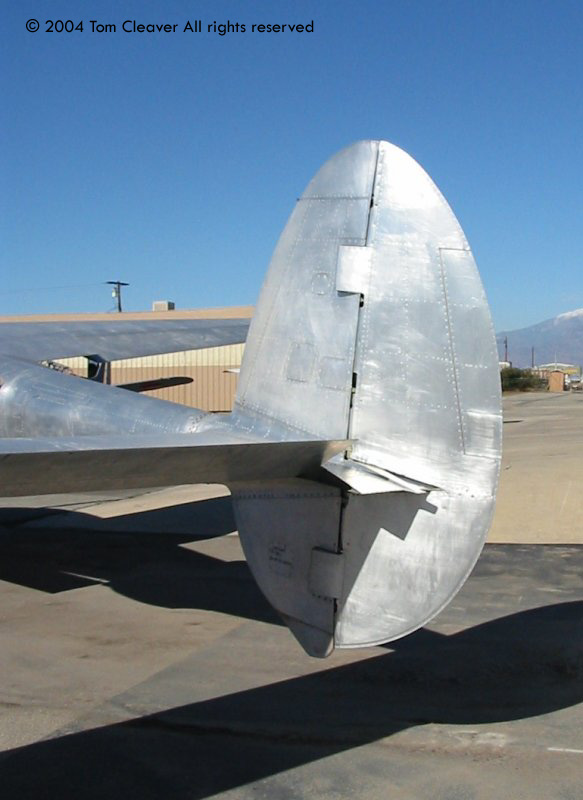
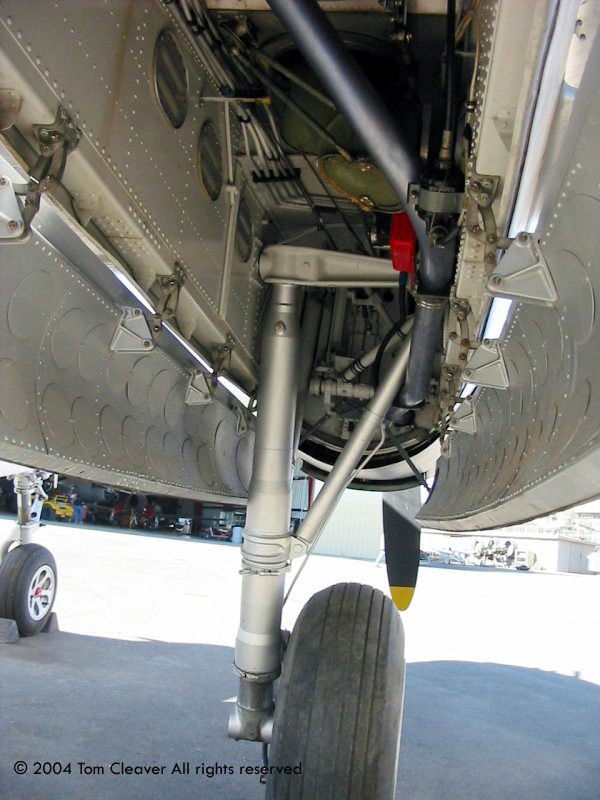
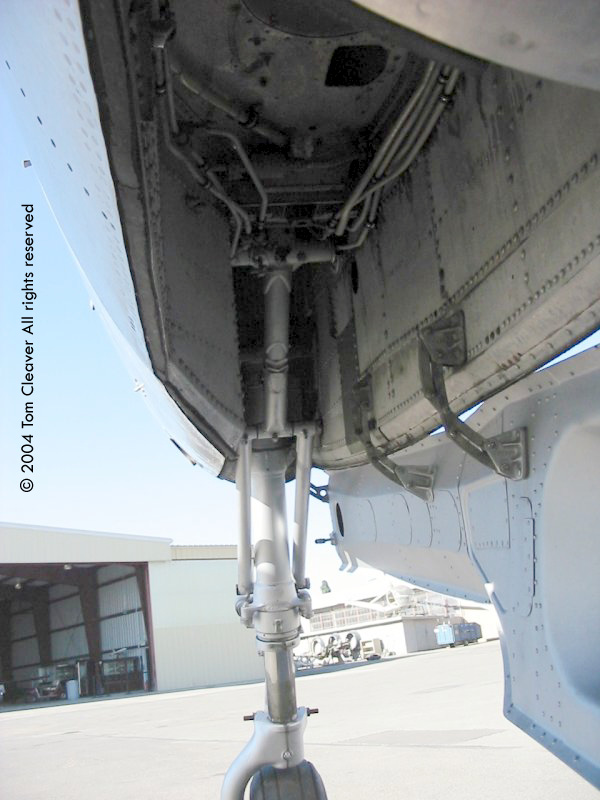
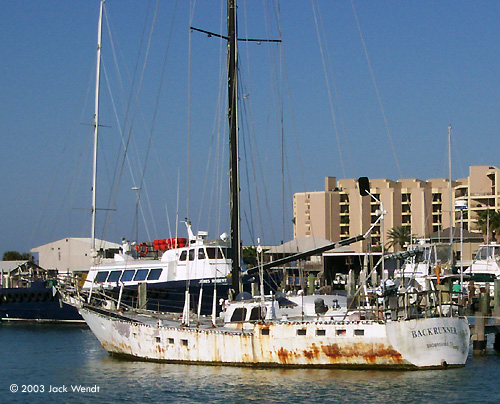
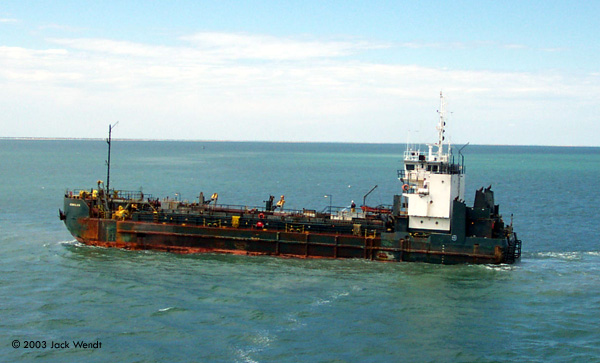
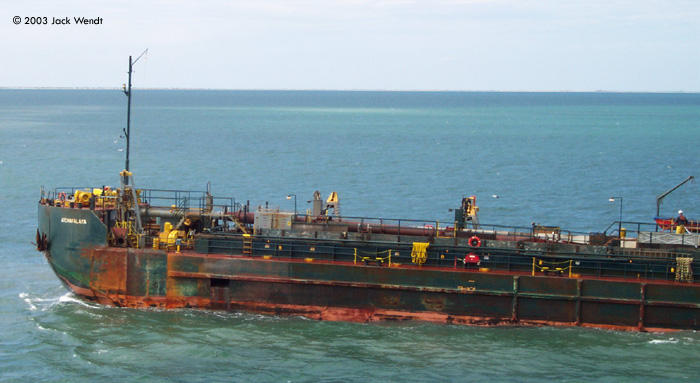
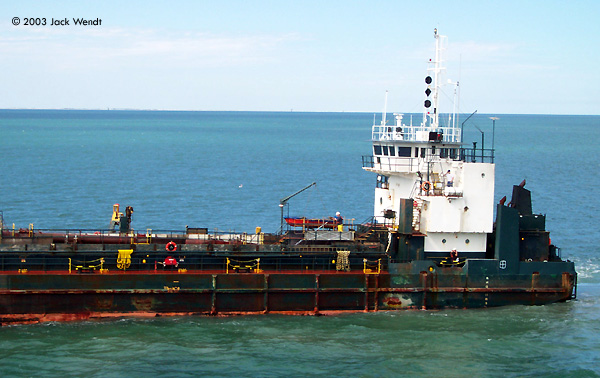
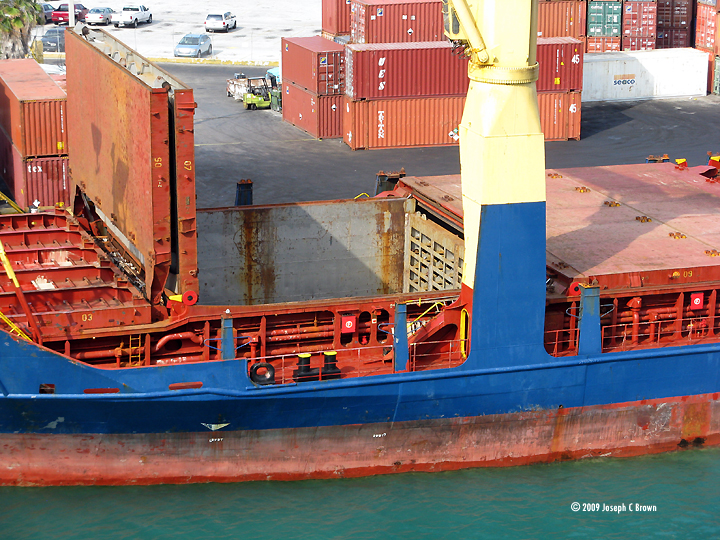
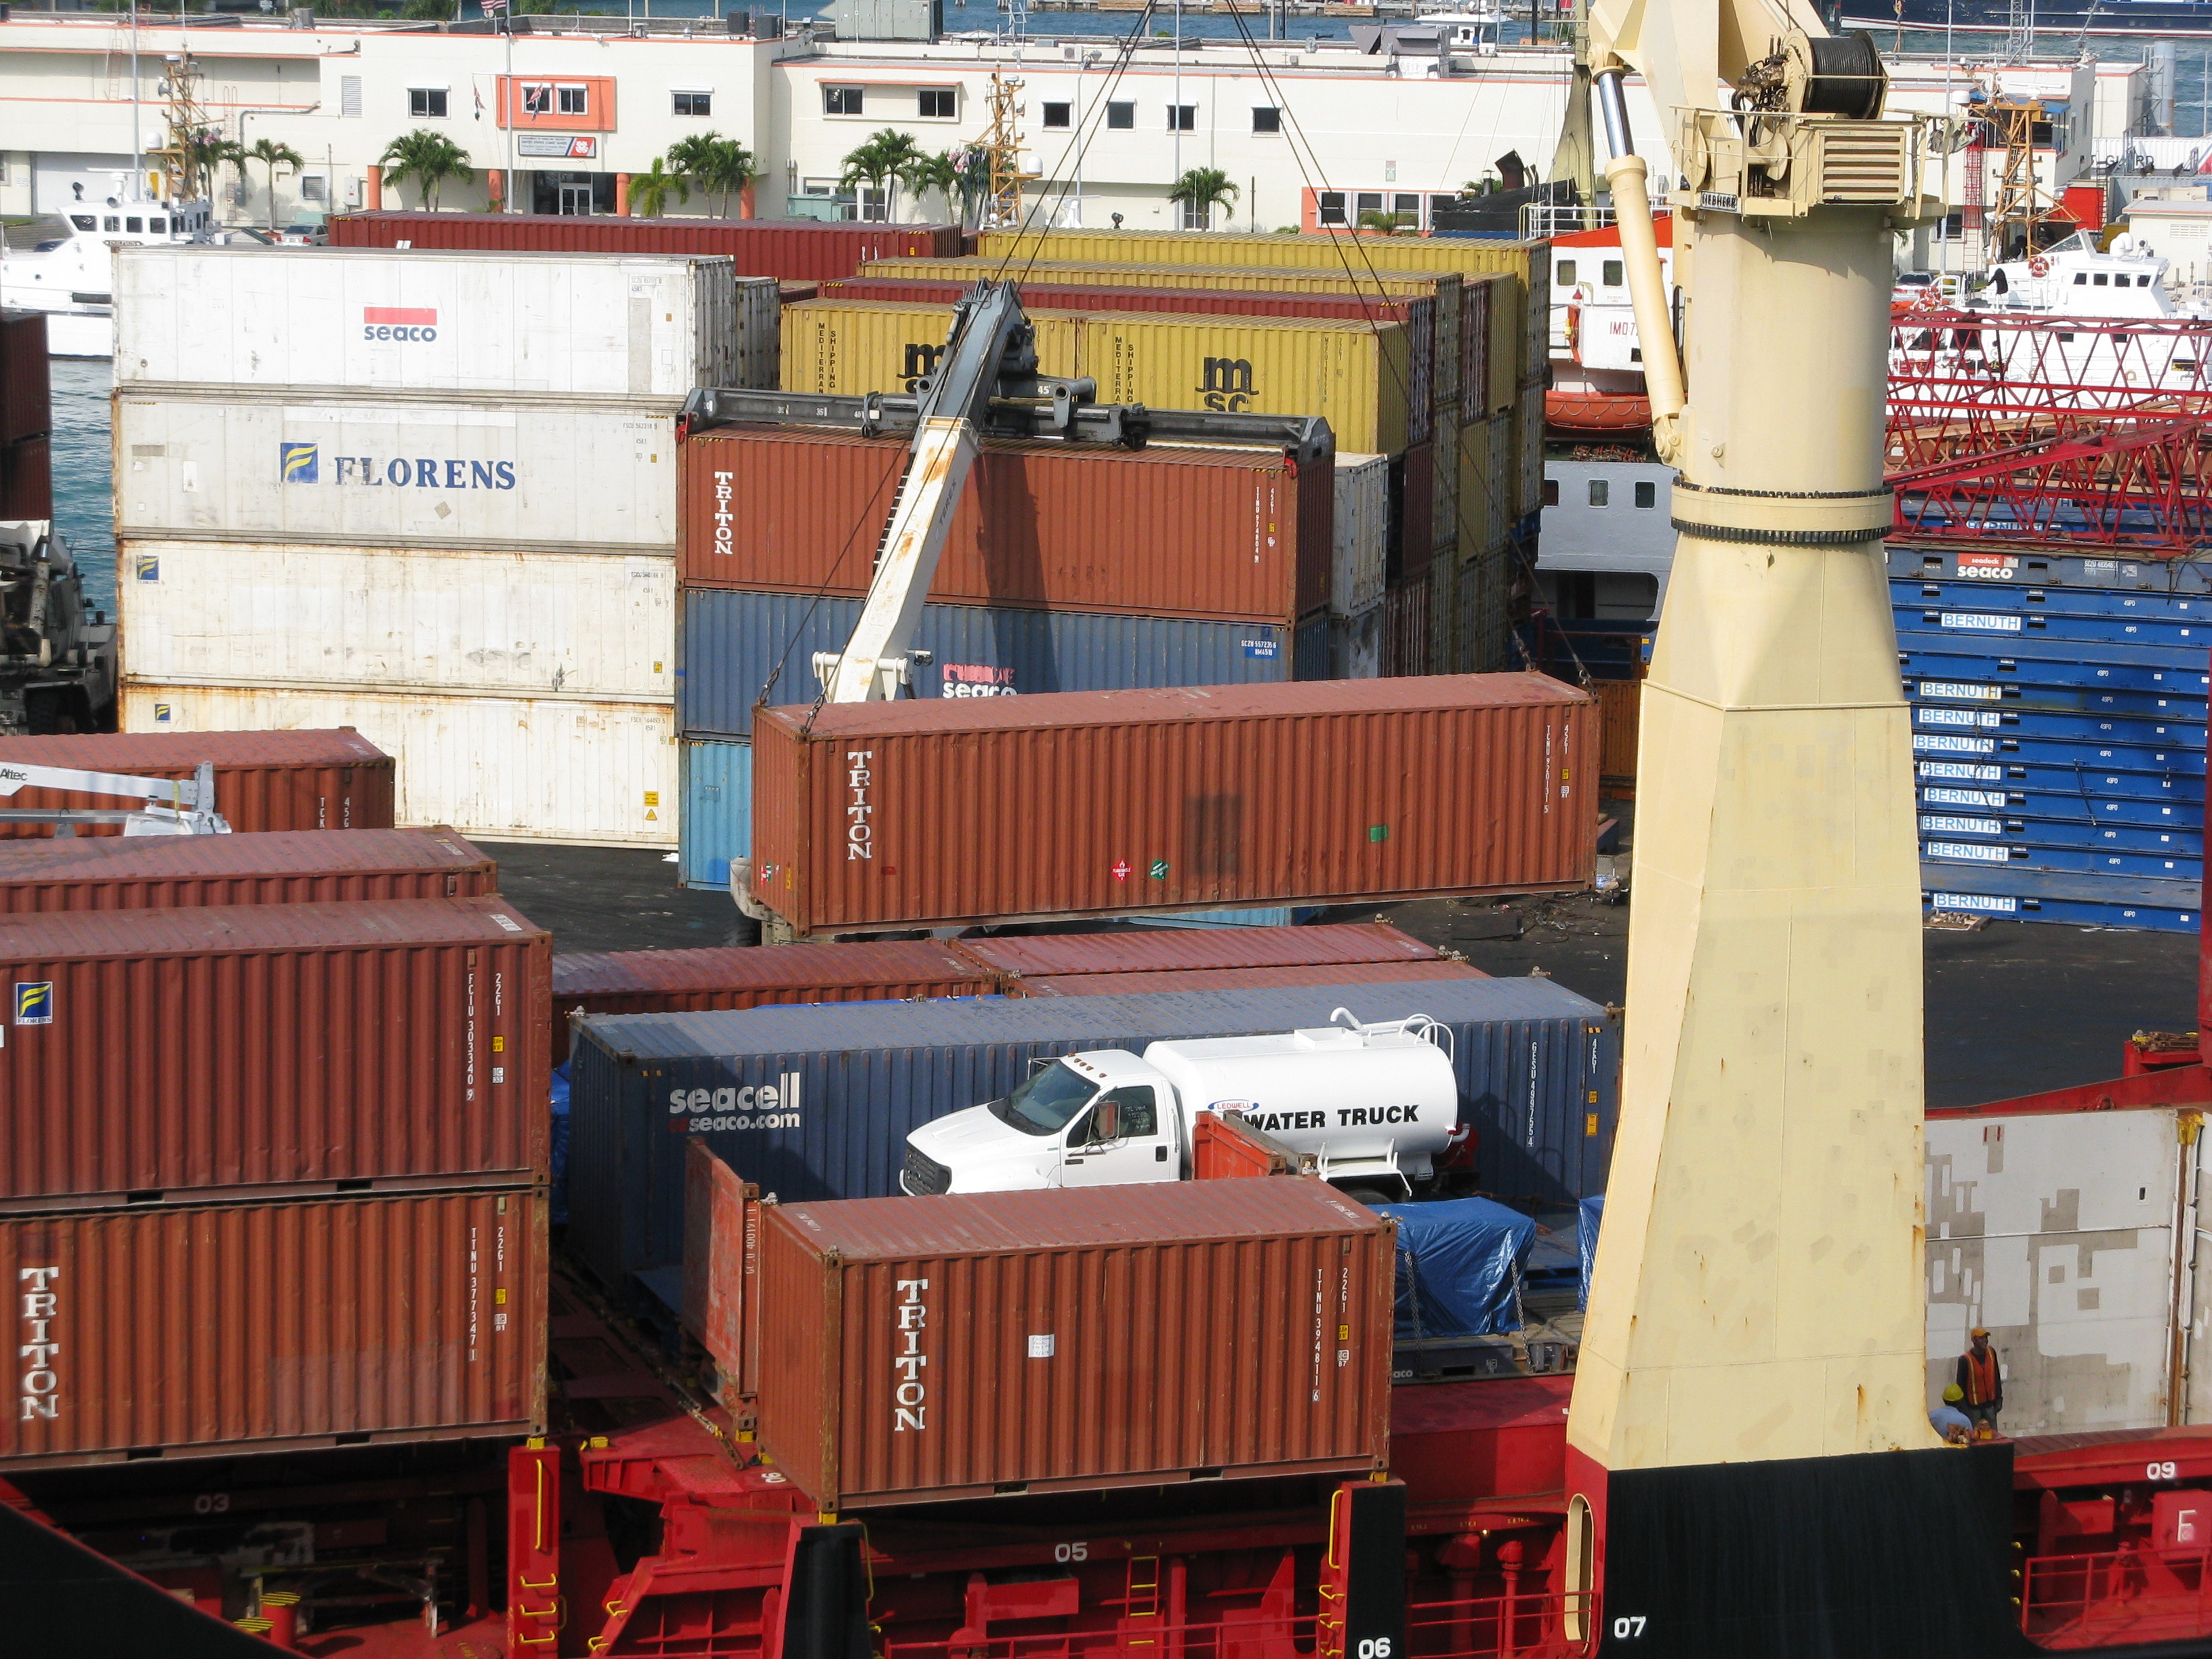
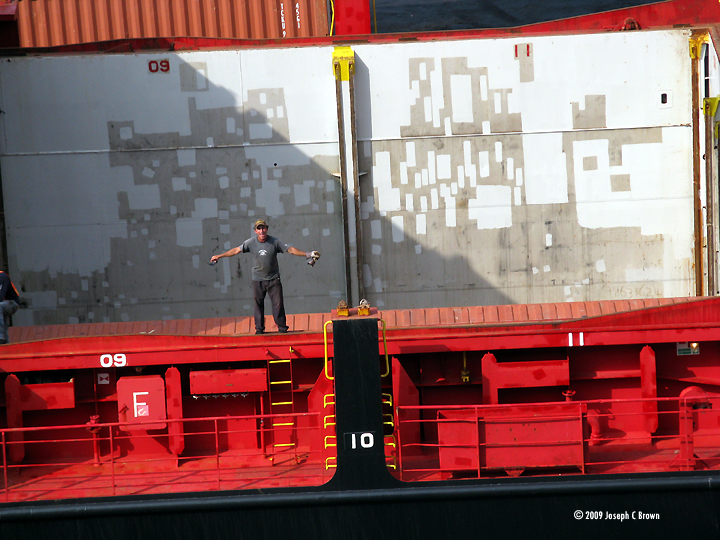
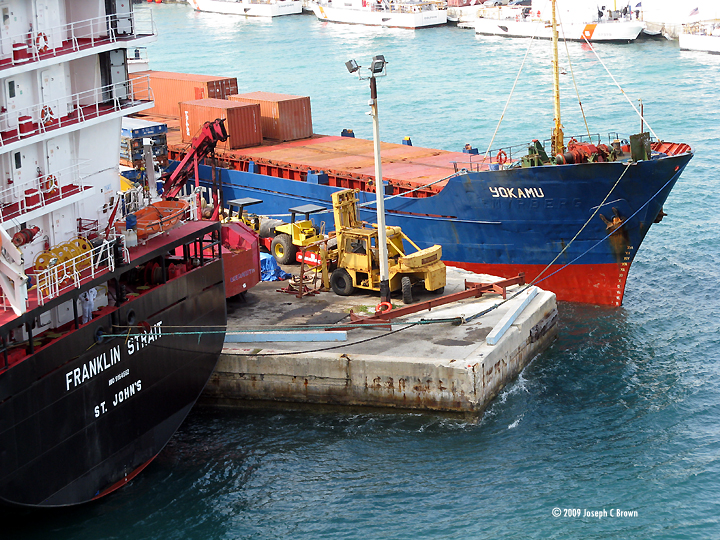
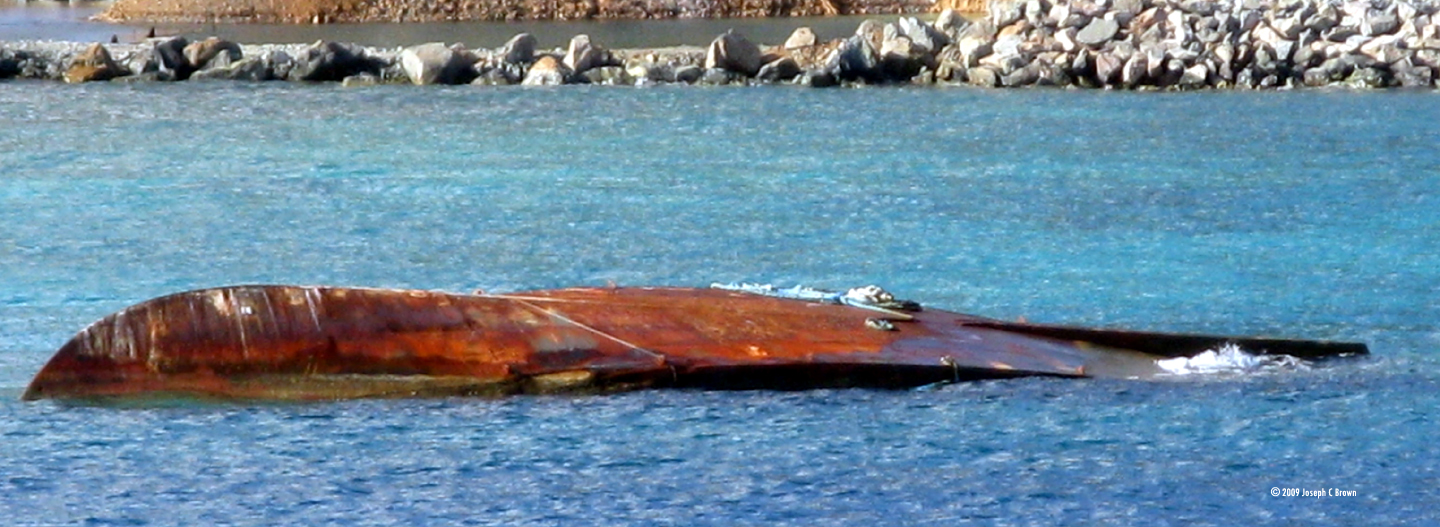
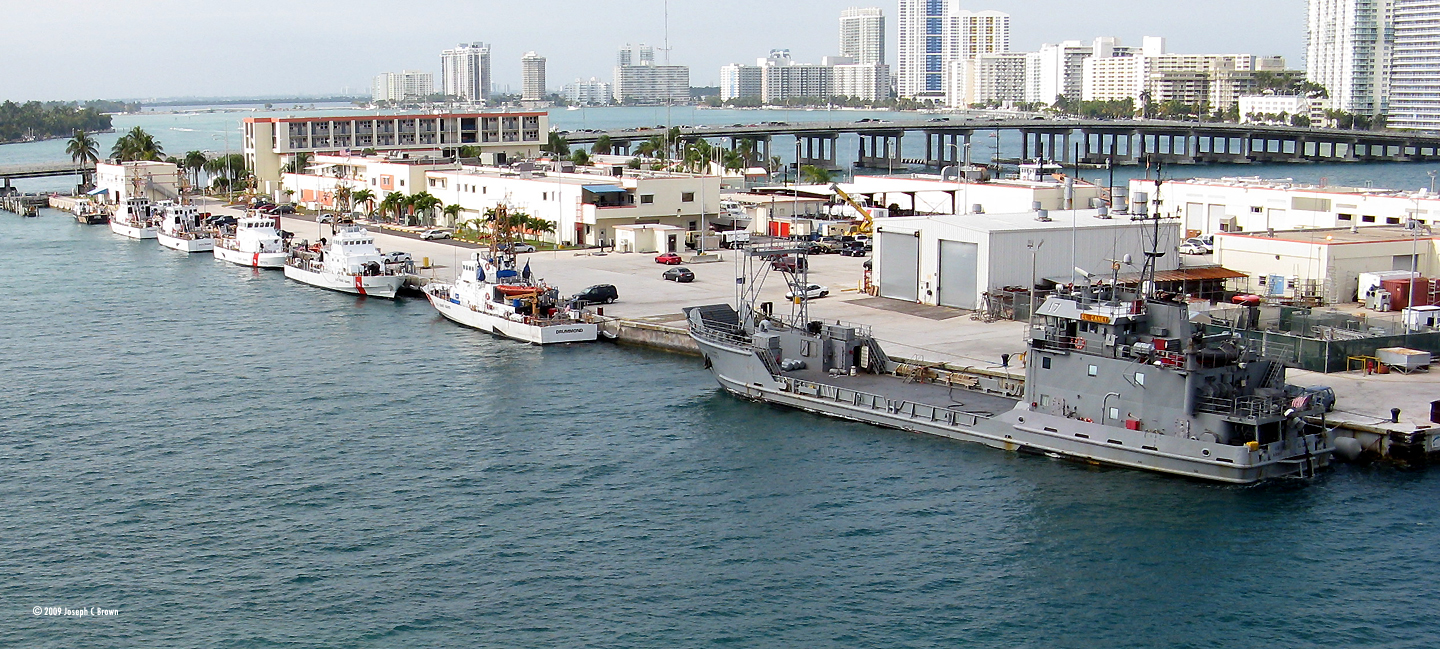
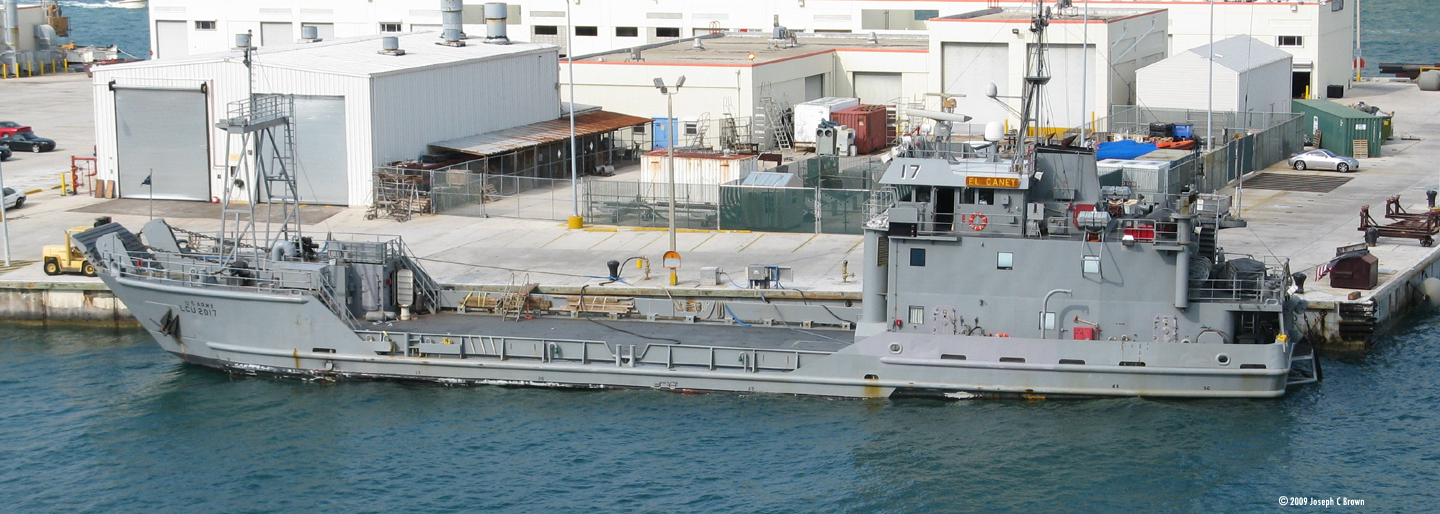
Image: Driver's position, including protective rails. Image: Other side. Good view of wear along an exposed metal edge. Image: Driver's controls Image: Platform where the driver stands. Note the wear to the non-skid surface. Image: The deck over the engine begs for someone to write "wash me" with their finger... Image: Dings and scratches on the "bumper". Image: More ground level damage Battle damage is something modelers like to do, but don't often get to see real-world examples. Thanks to Jeffrey Griffin, we have these shots of a USAF C-5A that was hit by an SA-7 missile. It was hit in the #4 (right outboard) engine, knocking the turbine off-center and initiating automatic shut-down and foam. The C-5 returned to Bagdad where it sat until a field Combat Logistics Support Squadron team could fly in, assess the damage and affect field level repairs of a sort that could limp the aircraft out of the danger zone. A replacement engine and pylon were flown to another location several days in advance and was waiting for the aircraft to arrive. The aircraft arrived without incident and the engine and pylon were both replaced by the same CLSS team. Image: Damaged engine pylon. The silver tape is what's called "silver speed tape" and these guys used it for BDR (Battle Damage Repair) if an aircraft has to get up and out of a hot runway area. Image: Under the wing Image: Another view. The silver tape marks all the places shrapnel hit. Jeffrey also sent in the following pictures of a UAE (United Arab Emirates) C-130 that lost a prop. He was not sure if it was in-flight or not, but it could well have been judging by the damage to the flaps. Image: Front view. Doesn't look so bad from here Image: Starboard side. You can see where the whole assembly came off, and where the prop entered the fuselage. Image: I hope there weren't any passengers in there .... Image: Closer look. Note how the aluminum skin has "peeled" back Image: As always, the "exit wound" is bigger. Image: Damage to the inboard port side engine and fuel pod. Image: Closer look at where the spinner was Image: Underwing damage (fire?) behind the engine nacelle. "Here are a bunch of pictures taken of the natural metal finish P-38L-5-LO out at Chino. Nice sunlight, so you can get a real good idea of what a real airplane in natural metal finish really looks like. Not a lot of markings and artwork to distract your attention on this one. One thing to notice when you look at the shady-side pictures is that there is a difference in tone between differing varieties of aluminum used. Also, while the airplane is nowhere near polished, it is not "dead flat" either. When you look close, there is a very slight "sheen" to it." Image: Port side Image: Left/rear view. Note how the metal skin is not smooth. Image: Port tail fin. Note the scratches and other surface "flaws" Image: Left/front Image: More front than left Image: Right/front Image: Closer look at the starboard engine nacelle. Note how the fasteners stand out (visually) Image: Same area, port side Image: Wingroot on the port boom Image: Rear view Image: Inboard side of the port boom. Note the burnt iron supercharger - doesn't look as "metallic" as most hobby paints of that color. Image: Another rear view Image: Starboard tail fin Image: Inboard side of port tailfin, with rudder deflected. Note the hinge cutouts Image: Main gear bay (starboard side, looking forward) Image: Nose gear bay, same angle Image: Different aircraft with starboard side engine panels removed. Image: Rusty sailboat. Image: Tug, showing heavy rust, especially near the boy Image: Closer look at the bow. Image: Closer look at the stern. Why is this of interest? Space freighters, that's why! Sci-fi freighters would have many of the traditional operating concerns that sea-based freighters have always had, in addition to the newer problems of heat and cold, raw vacuum, radiation hazards - if you are reading this, you should know the drill by now. The images of the US Army's LCU2017 show that there is wear, tear, and weathering even on a currently deployed vessel which itself is fairly new (built in 1991). There's more data on these ships, the Runnymede class large landing craft, here".
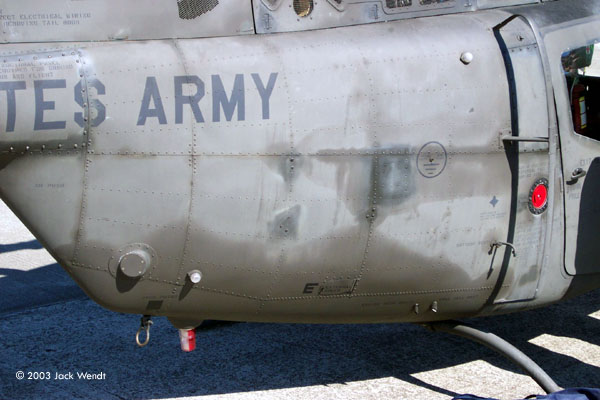
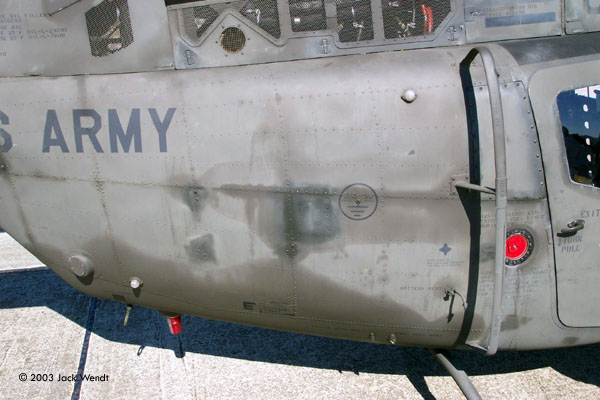
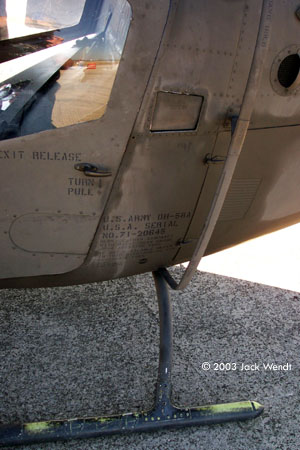
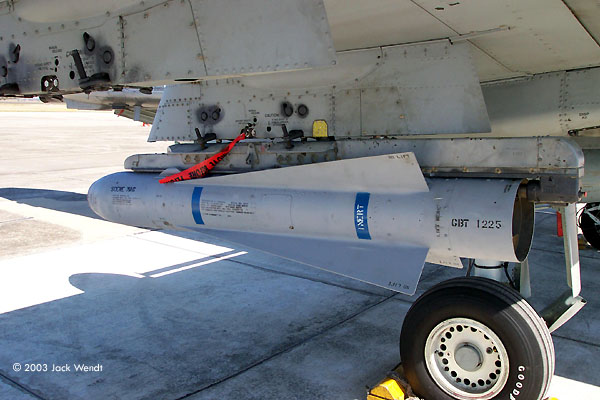
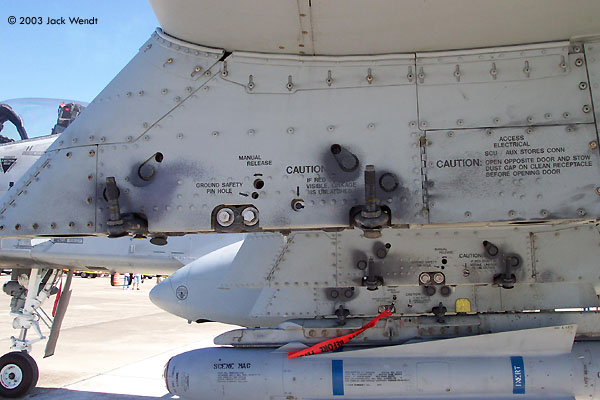
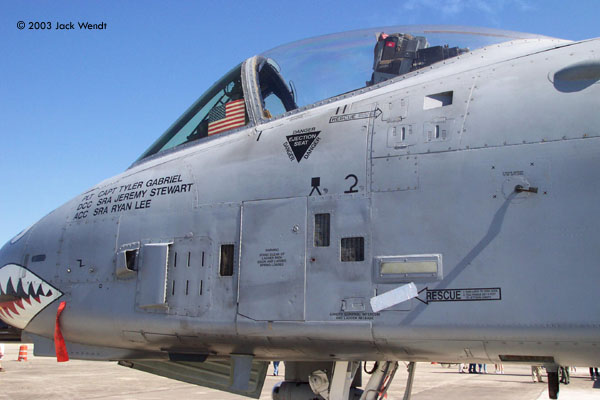
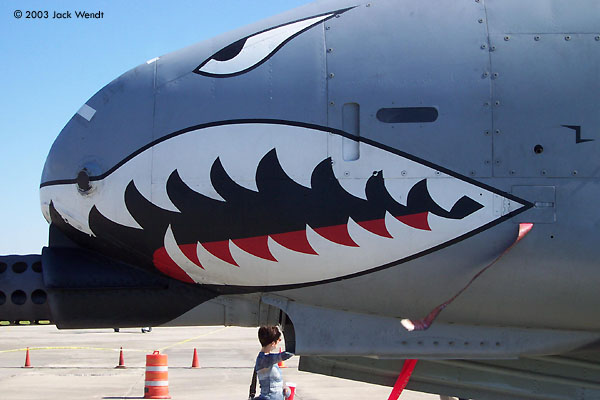
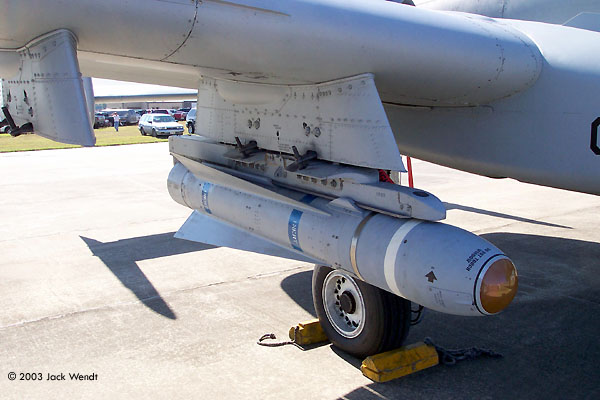
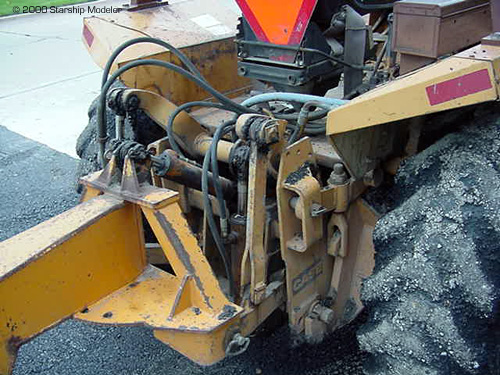
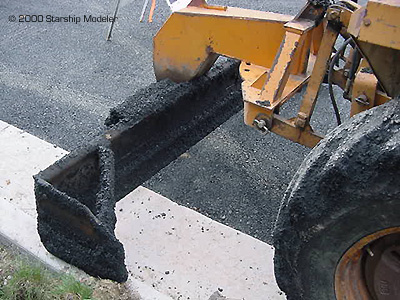
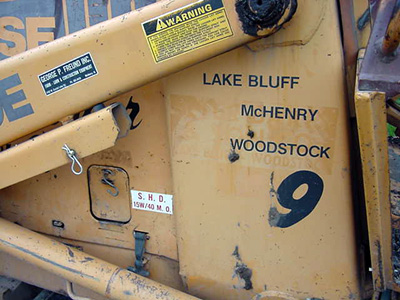
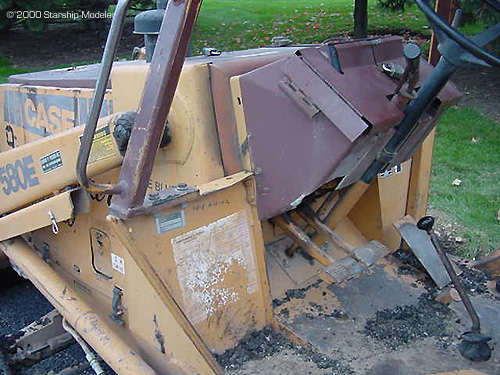
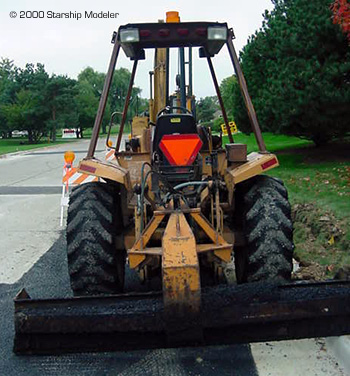
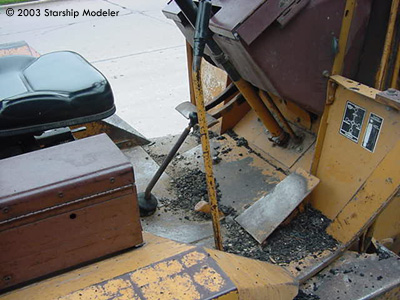
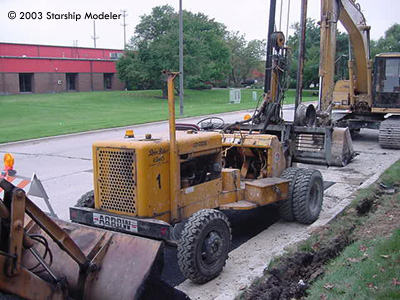
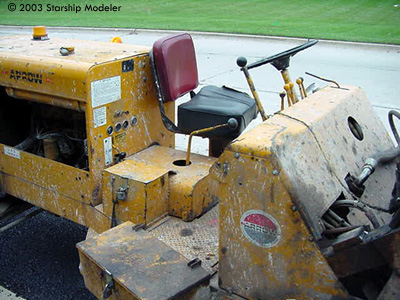
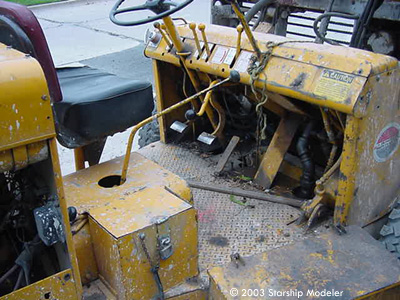
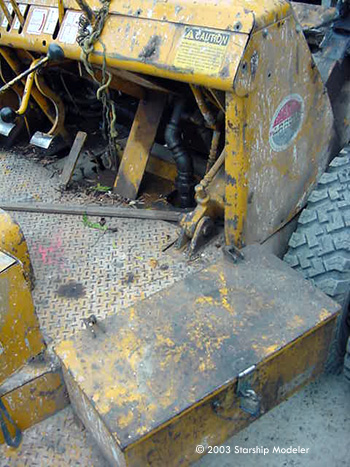
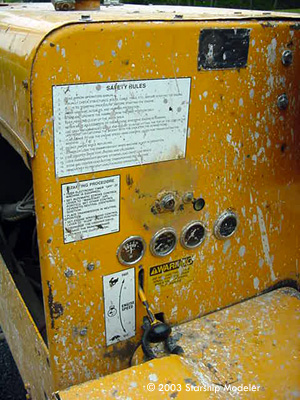
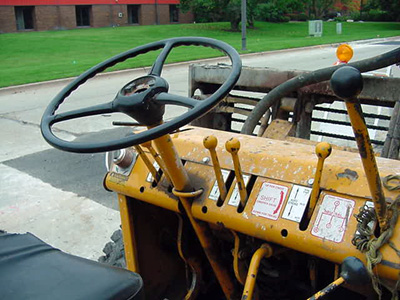
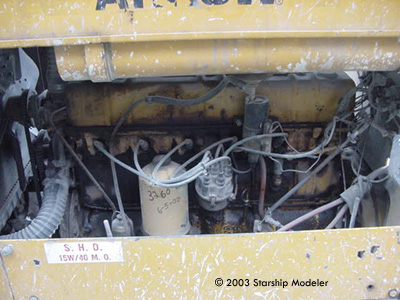
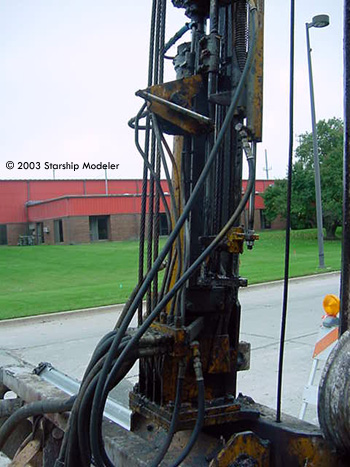
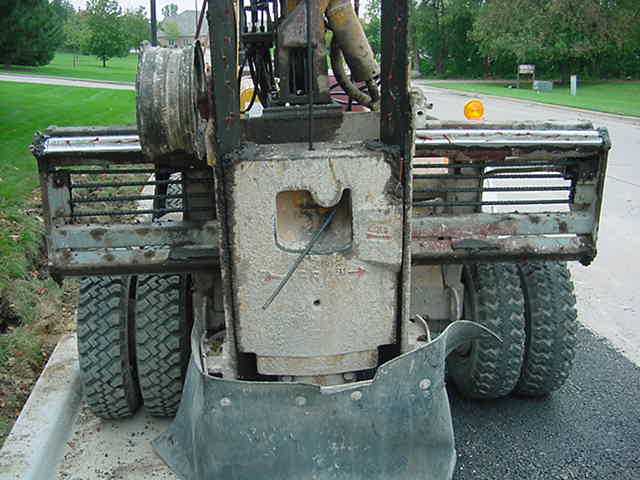
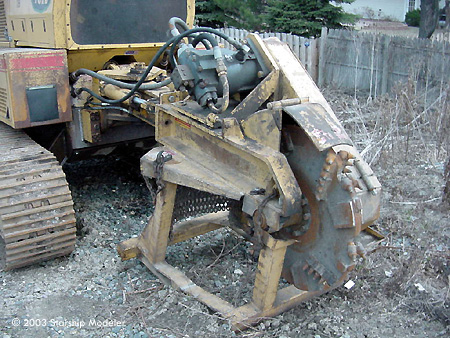
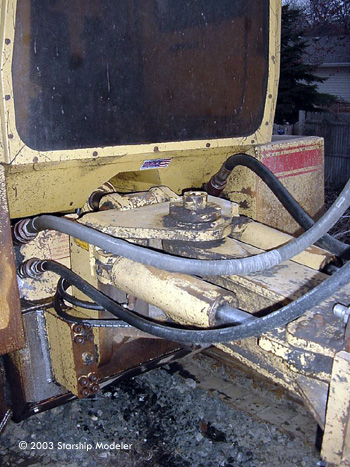
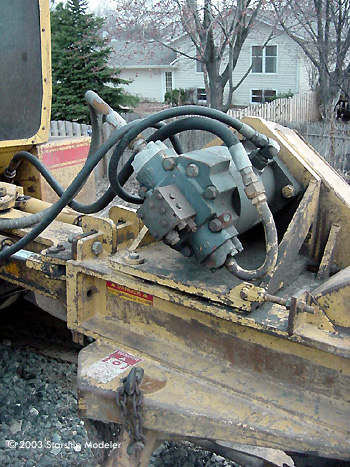
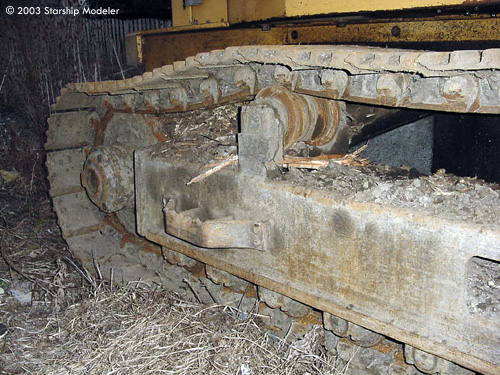
Image: Fuselage, Army National Guard helicopter, showing various fluid stains and paint touch-ups. "The side of this Bell Ranger helo has been washed several times. Typically, jet fuel is a corrosive mix, so the military washes their planes on a weekly basis to remove the fuel stain residues from the aircraft, as well as all the dirt & grime accumulated while flying. The soap will eat away at the paint if not properly mixed as it is also a solvent designed to adhere to fuel. The paint is petroleum-based as well, so you see the faded/washed out look. The darker areas/stains are from a hydraulic leak that probably occured during the flight and follows line-of-flight patterns. The black spots are temporary patches of touch up paint using a jet pac kit (aerosol kit with basic airbrush to do minor fixes). These are seen on tail rotor photo as well (next). Most of your rivet lines show were fluids had followed the drain-to-ground path". Image: Tail boom. Note the darker tone around various fasteners. Image: Closer look at the vertical tail surfaces. Image: Engine housing. Note how little you can actually see of the machinery behind the screens. "You can see at the exhaust manifolds the darker staining by unused fuel that spat out as a vapor and dripped out around and back toward the tail. As I noted earlier the leak must have been recent possibly during turn-up/rotor start as I've seen hundreds of similar stains on H-46s/ H-3s/H-53s all my Navy career. " Image: Another look at the fuselage. Note the stenciling. Image: Opposite side, pilot's door. Note the worn paint and primer on the top of the skid. "The primer was jet pack'd on as well, mainly due to wear was correct. But this was a quick fix to inhibit corrosion on any bare metal spots, so a primer was put on after they ran out of black or just had not gotten around to putting a final coat on the skids." Image: Missile (Maverick?) on A-10 pylon. Plenty of stenciling evident. Image: Note the wear-and-tear evident on the pylons. Image: Left side fuselage, cockpit area. Image: Nose art Image: Missile on the opposite side pylon. Image: Except for the tires and scraper, which are encrusted with asphalt, this front-end loader is fairly clean - and yet is heavily weathered. Image: Hydraulic lines and lifting mechanisms. Note how crushed gravel sticks to the tires. Image: Asphalt-encrusted scraper. Image: Clean but worn Image: Stenciling and data plates. Note how old ID lettering has been removed, but leaves a "ghost" of itself in less-weathered paint. Image: Operator's position Image: In between the tire and body Image: Rear view Image: Floor of the driver's position, front-end loader. Image: Front wheel and linkage, front-end loader Image: Front of front-end loader. Image: Rear view, odd little tractor Image: Driver's position, second tractor. Image: The operator's position here is more heavily worn than the front-end loader, but cleaner. Image: Serious paint chipping Image: Guages and placards Image: Exposed controls Image: Engine compartment Image: Hydraulic lines looking like burnt spaghetti Image: Front view Image: Rear view, ditch-digging vehicle. Note how the paint has oxidized and markings faded. Image: Business end of the "ditcher" Image: Hydraulic lines and rather battered-looking actuators. Image: More hydraulics and extensive rust/paint chipping. Image: Right side all-metal tracks. Note that even the high spots are rusty. Also note all the debris between track "teeth", roadwheels, etc. Image: Closer look at the right rear tracks. Image: Inboard side of the left-hand tracks. Note the oil stain at lower left.
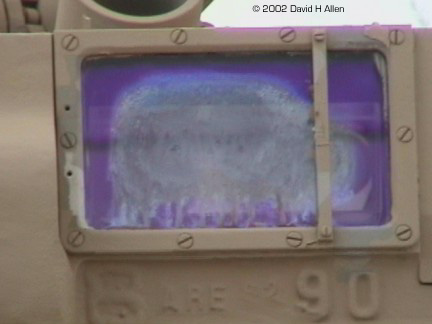
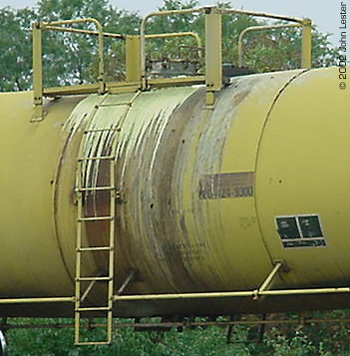
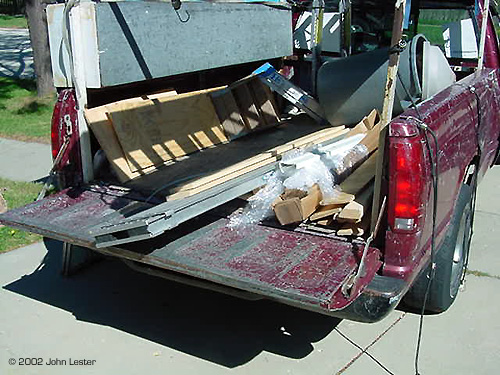
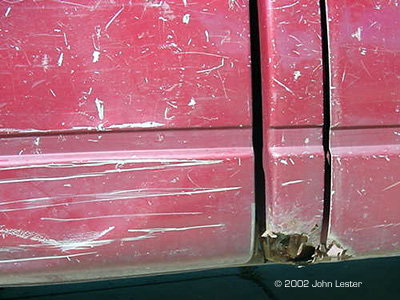
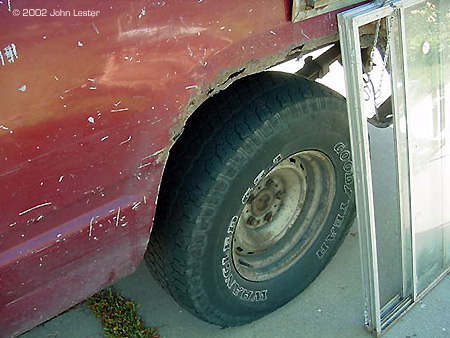
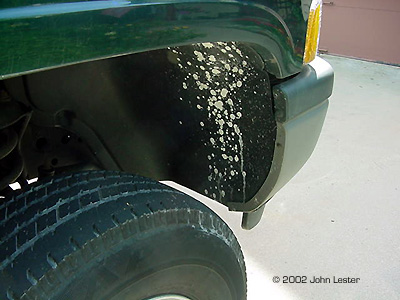
Image: Fuel stains around an access panel. Image: This tank obviously has been painted a number of times - look at how the paint has built up on these bolts. Image: Tracks. Note the wear and tear on the rubber track shoes. Image: Heavy applications of paint over existing rust on this cupola. The rough exterior indicates the was cupola was cast. Image: Periscope. Railroad equipment also ends up looking a lot like military equiment - both see hard, continuous usage in all kinds of environmental conditions. Both are also covered with stencils, identification data, numbers, insignia, and the like. Image: Dark tank car, in this case carrying sulfur. This one has it all - rust, liquid staining, stencils, faded paint. Superb example of weathering effects on a dark vehicle surface. Image: A closer look at the "spout" and surrounding access platform. Image: A closer look at the rust, stenciling and graffitti near the front. Image: Another tank car, this one a bright yellow. More staining from the cargo and rust. Image: Like armored vehicle tracks, the wheels on this rail car are heavily rusted and grimed - except where they actually contact the ground (rails). Image: A closer look at the central access area Image: Front end. Note how grime and gunk presumably thrown up by the wheels covers the lower front of the car. Image: Battered old pickup, rear view. Note the gouges and scrapes on the bed and tailgate; entrance ramps on utility vehicles, transports, ships, etc. look a lot like this in general. Image: Same truck, storage compartment open. Note how the inside of the door is no more pristine than the outside surfaces. Image: Same truck, rear wheel well and quarter panel. Damage to the edge of the well has caused the metal to start rusting away Image: More rust, making a hole become bigger with time. Image: The other side. Note how grit and grime accumulates in the wheel. Image: Spatter pattern (caused by driving through a puddle filled with concrete dust) Image: Spattering occurs in front of the wheel as well. Image: Driving on dry pavement has rid the tire of "mud", except inside the tread, on the sidewalls and in the hubcap.
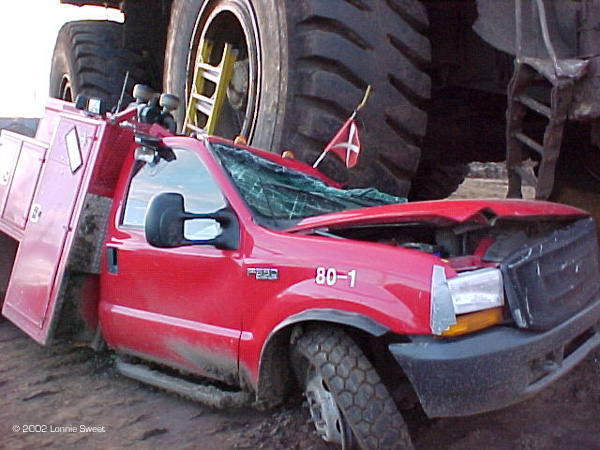
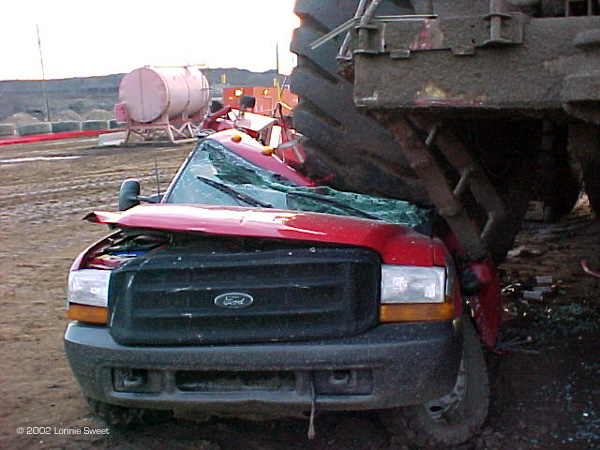
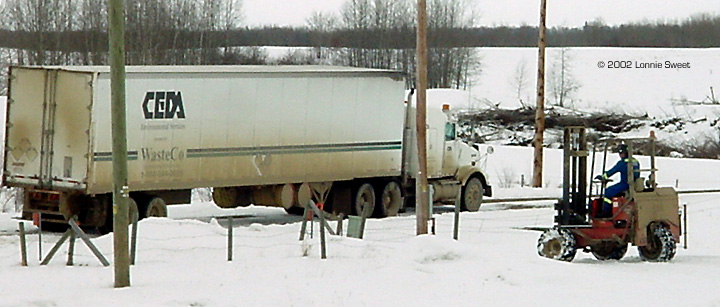
Image: A closer look. Notice the way the windshield has shattered, hood popped open and tire separated from the rim. Note also how the recesses in the tire treads are darker than the surfaces that contact the ground. Image courtesy Lonnie Sweet Image: Front view. Notice the accumulation of dirt and grime on the dump truck.Image courtesy Lonnie Sweet Image: Winter scene. Note the wear and tear on the truck, the relative cleanliness of the fork lift, and the accumulation of snow/mud in the wheels. Image: Same fork, different side. Note how the dry (relatively) snow clings to the wheels.Image courtesy Lonnie Sweet Image: Winter grime on white/ light colored vehicles. Image courtesy Lonnie Sweet Image: Another look. Note also the traffic tracks in the light snow.Image courtesy Lonnie Sweet Image: Fork and truck in motion. Note the way the snow is building up in the tire treads.Image courtesy Lonnie Sweet Image: "On 9 November 1962, an engine failure forced Jack McKay, a NASA research pilot, to make an emergency landing at Mud Lake, Nevada, in the second X-15 (56-6671); its landing gear collapsed and the X-15 flipped over on its back. ... The aircraft was sent back to the manufacturer, where it underwent extensive repairs and modifications. It returned to Edwards in February 1964 as the X-15A-2, with a longer fuselage (52 ft 5 in) and external fuel tanks." Note the extensive structural damage and what appears to be residue from fire-fighting foam all over the airframe. Link to NASA photo courtesy "OM" |
|
Structures |
|
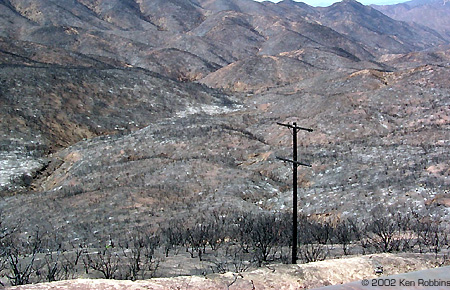
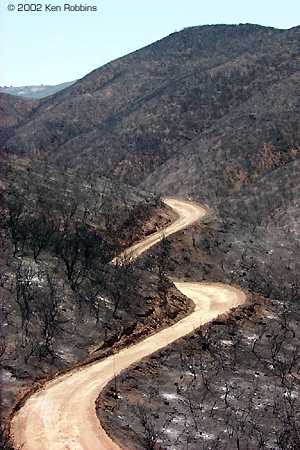
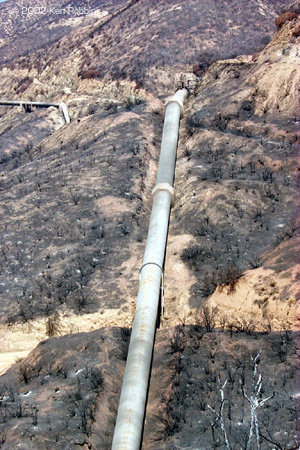
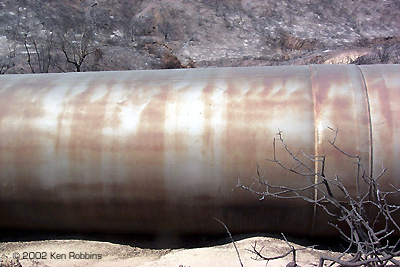
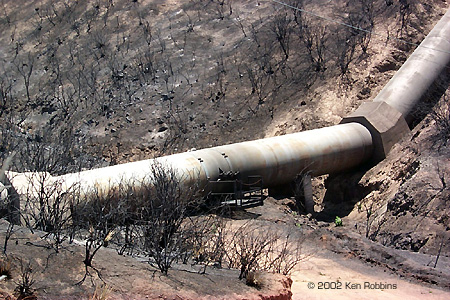
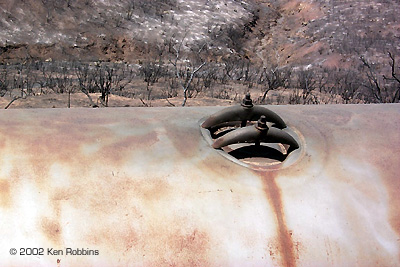
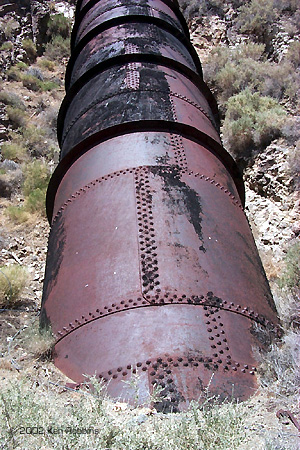
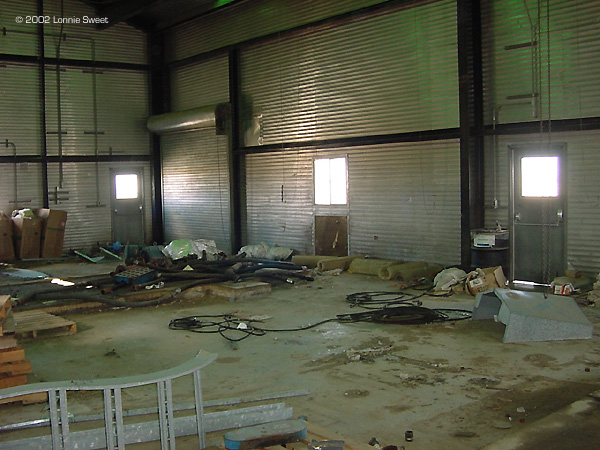
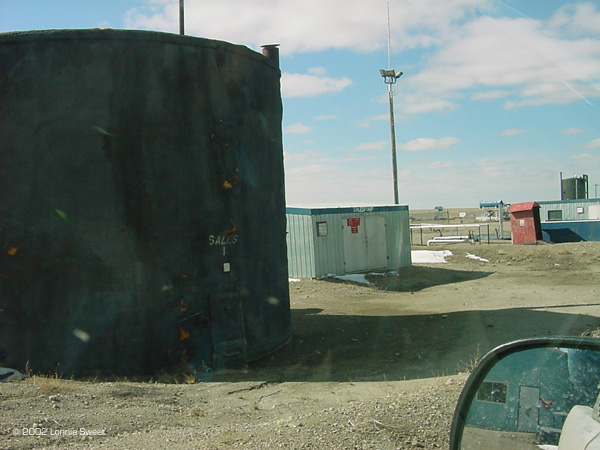
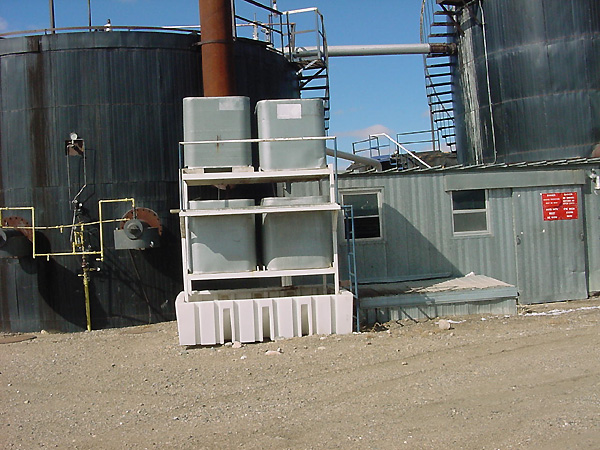
Image: Hillside in the aftermath. Image courtesy Ken Robbins Image: The gravel road is the only thing apparently uneffected. Note the piles of grey/white ash. Image courtesy Ken Robbins Image: Fire has a mind of it's own, and sometimes misses spots. Image courtesy Ken Robbins Image: From a distance, the pipe seems undamaged. Image courtesy Ken Robbins Image: A closer look shows how the sides and bottom were oxidized by flame. Image courtesy Ken Robbins Image: The scorching looks a lot like rust. Image courtesy Ken Robbins Image: Damage to an air vent.Image courtesy Ken Robbins Image: Scorched blow-out valve. Image courtesy Ken Robbins Image: A closer look at a burnt relief valve. Image courtesy Ken Robbins Image: This is a 90-year old half-buried pipe (not burned - in this fire at least). Image courtesy Ken Robbins Image: Inside an abandonned metal warehouse. Good shot of debris and refuse strewn around. Image courtesy Lonnie Sweet Image: Abandonned liquid storage tanks. Note the rust patterns and "dings" to the exterior.Image courtesy Lonnie Sweet Image: More storage tanks. Note the rust and fluid stains, and the way the structure of the tanks (especially the one on the right) is revealed by "drybrushing" effects.Image courtesy Lonnie Sweet |
![]()
This page copyright Starship Modeler ™ © 2002-9.
Last updated on 31 December 2009.
![[Click to enlarge]](http://www.starshipmodeler.info/instructions/weathering/tg_m113_165.JPG)
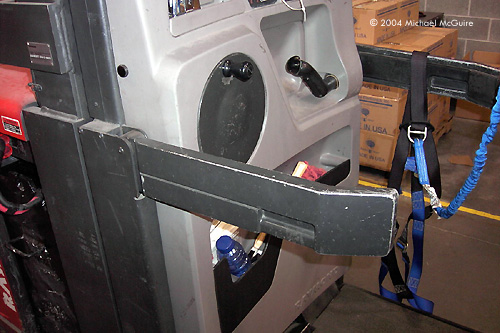
![[Forklift]](http://www.starshipmodeler.info/instructions/weathering/mm_fork_2317.JPG) Michael McGuire sent in these images of a well-maintained forklift in a busy warehouse. It's a good example of the toll daily wear-and-tear can take on equipment, even when it's taken care of properly and not abused by extreme climate conditions or enemy action.
Michael McGuire sent in these images of a well-maintained forklift in a busy warehouse. It's a good example of the toll daily wear-and-tear can take on equipment, even when it's taken care of properly and not abused by extreme climate conditions or enemy action.![[Click to enlarge]](http://www.starshipmodeler.info/instructions/weathering/tc_p38-01.jpg)
![[Click to enlarge]](http://www.starshipmodeler.info/instructions/weathering/jw_wx_m_1822.jpg)
![[Please click to enlarge]](http://www.starshipmodeler.com/tech/weathering/IMG_1250_lil.jpg)
![[Click to enlarge]](http://www.starshipmodeler.info/instructions/weathering/jw_av_1256.jpg)
![[click to enlarge]](weathering/const_001S.JPG)
![[Click to enlarge]](weathering/dh_turb1.jpg)
![[Click to enlarge]](weathering/ls_wx_crunch5.jpg)
![[Click to enlarge]](weathering/kr_SecondAVplatdamage2395.jpg)