
|
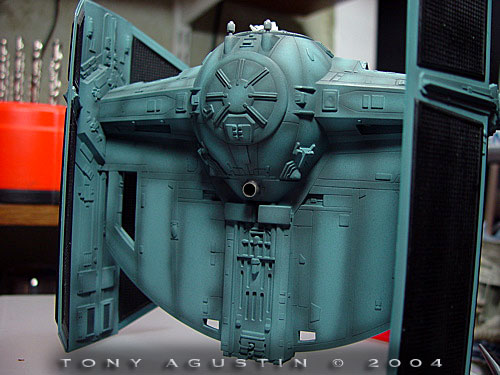
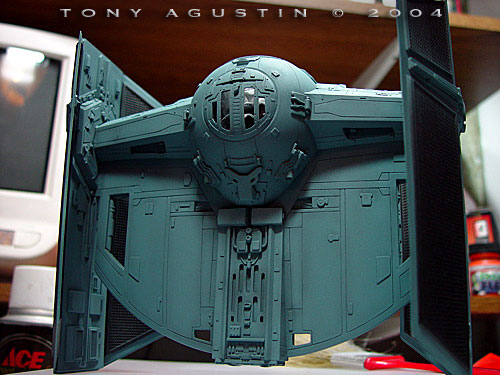
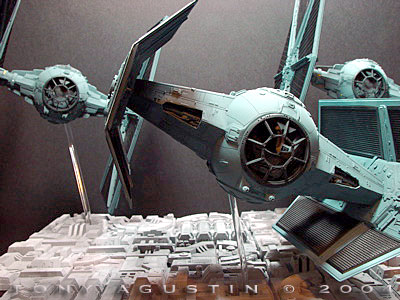
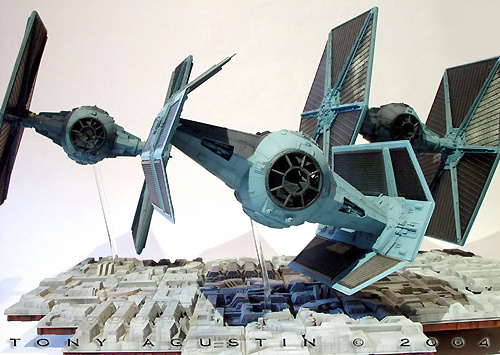
By Tony Agustin - images & text © 2004 This project involved the ERTL Darth Vader Tie Fighter and a pair of resin T.I.E. Fighters made by a UK company called B.C.I. The project also made use of the Deathstar surface panels I had made for ĹThe Last Mission of Gold Flightĺ diorama. This diorama took 2nd place in the Sci-Fi Fantasy Theme category at a local IPMS model show: The Northern Illinois Modelers Open 2004, and took a Bronze at Wonderfest 2004. |
![[Click to enlarge]](ta_trio_07692.jpg) |
|
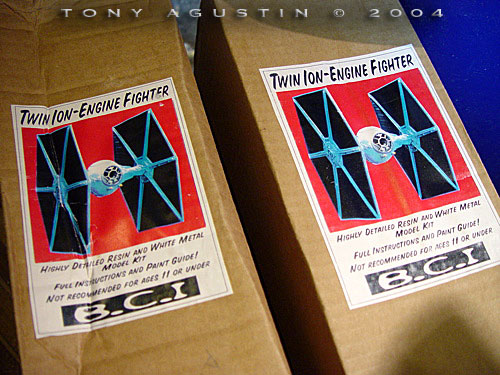
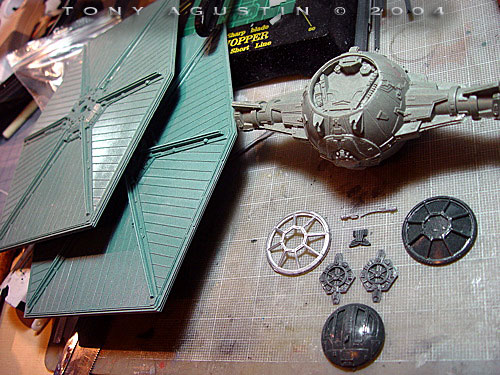
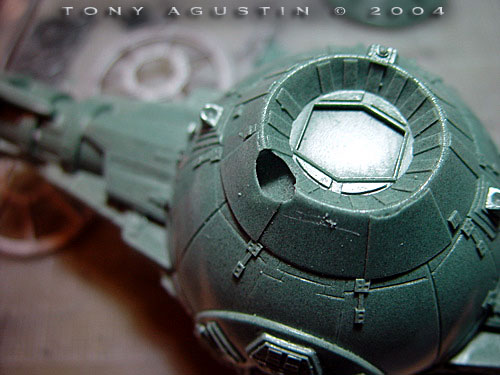
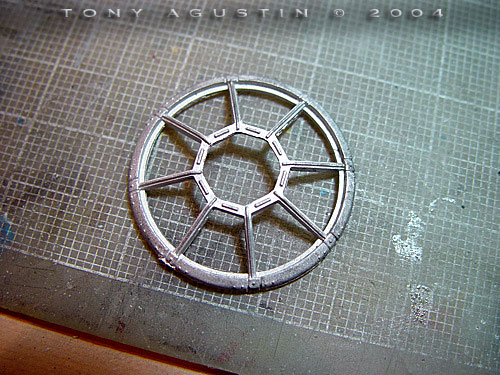
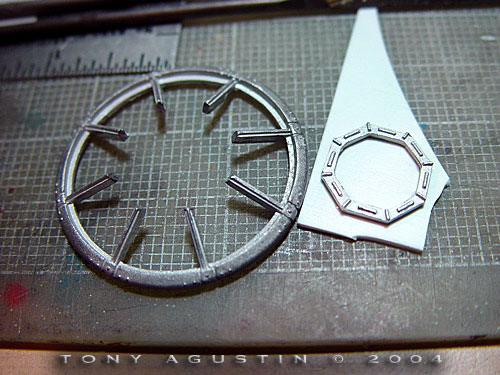
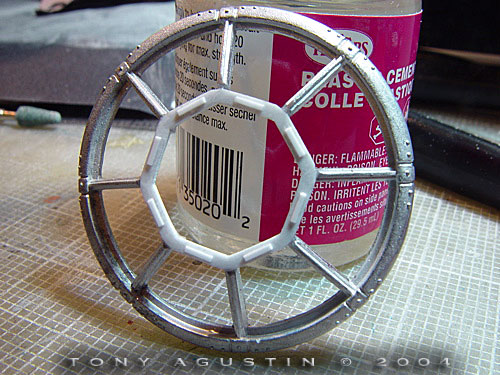
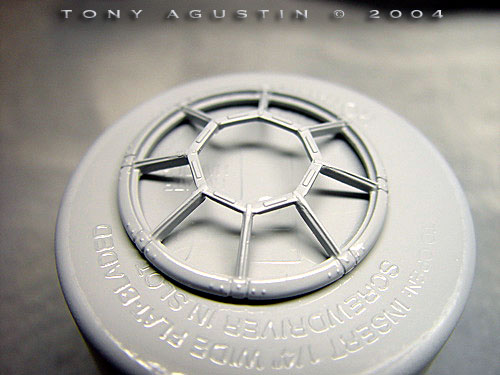
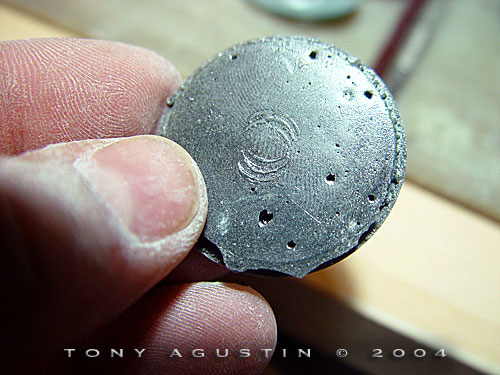
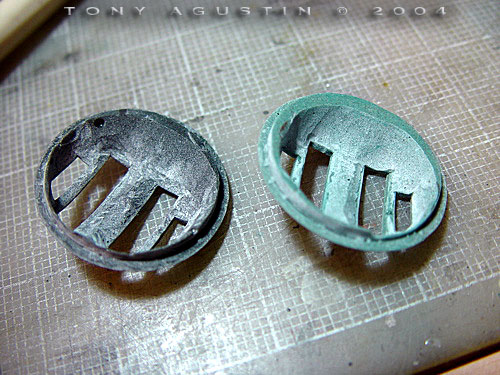
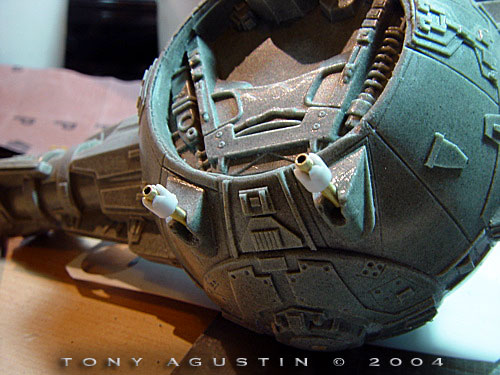
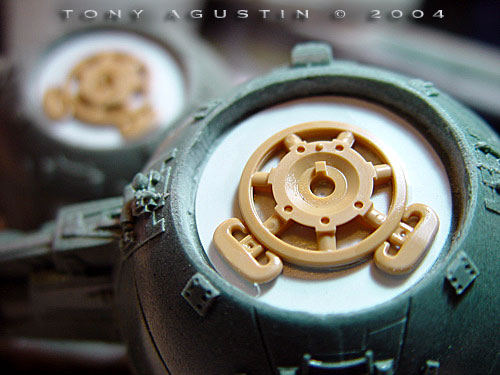
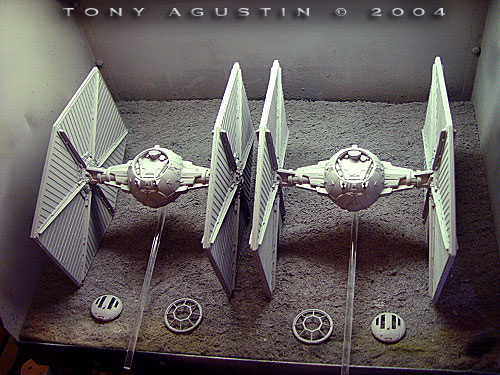
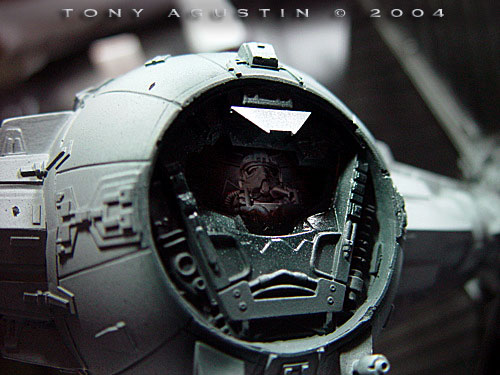
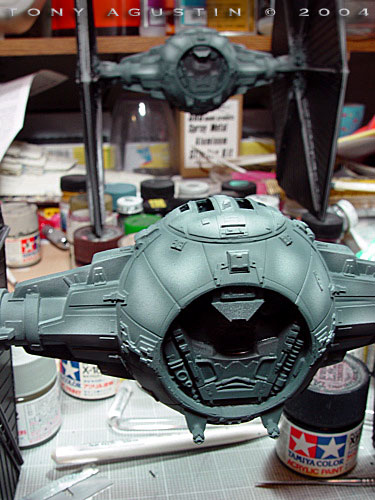
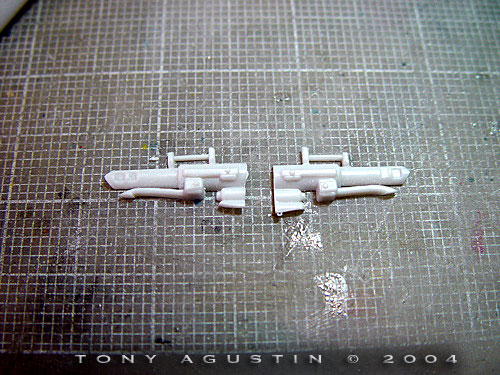
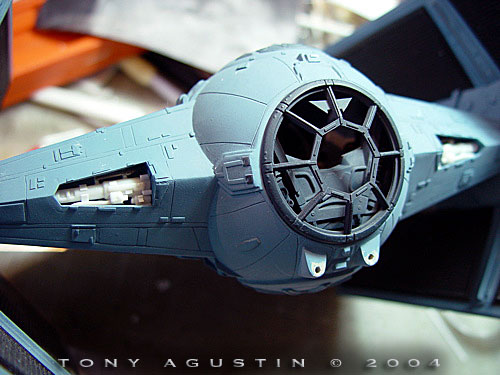
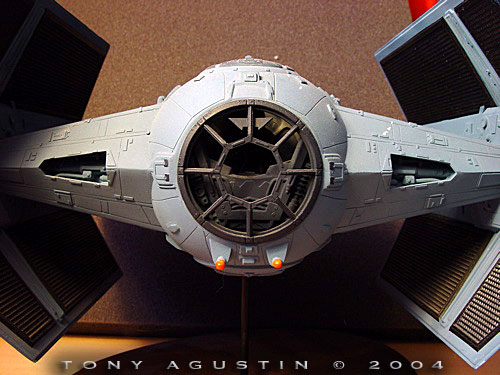
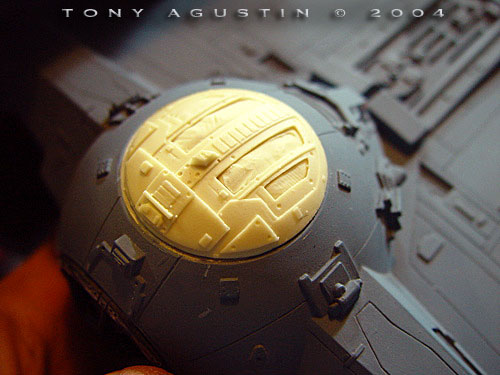
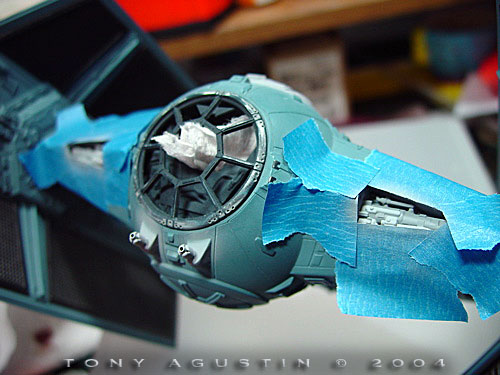
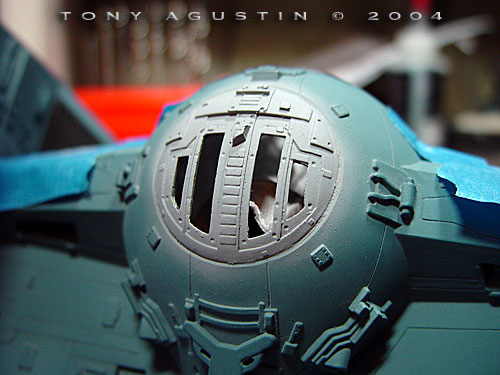
Image: A pair of ĹTwin Ion Engine Fightersĺ from B.C.I. Image: Beautifully detailed kits cast in crap resin. Image: Bubbles and flash in a fragile area. Image: A large void, easily fixable with epoxy putty. Image: The bubbles here almost look like some kind of nasty disease. Image: The canopy frame is made of white metal and recast from the ERTL Vader Fighter kit. Image: The center section of the frame is cut out. Image: The beginnings of new styrene frames are glued onto the centers to be worked on. Image: The new center frame being detailed. Image: The canopy frame is corrected and is hit with several coats of primer. Image: The top hatch is a solid piece of resin. Image: Both hatches are hollowed out. Unfortunately I didnĺt realize that the resin killed one of my precious Dremel bits. Image: The white metal twin laser cannons are replaced with ones made with brass and styrene tubing. Image: The delicate solar wing edges are cleaned-up as best as possible. Image: The empty space under the top hatch is just filled with some inconsequential detail. Image: The T.I.E.ĺs are now complete ready for priming. Image: Both fighters sit in the paint booth all primed up. Image: A decal is made from a picture found on the internet. Image: The decal is placed inside the front canopy. Image: Painting begins with Pre-Shading. Image: Small details are masked off for painting. Image: The wings are painted black first and than masked for the main body color. Image: These two left-over pieces trimmed of excess styrene will be used for the front of Vaders Fighter. Image: The pieces are installed on both front sides of the struts. Image: My original Darth Vader TIE Fighter is un-shelved and ready to be re-furbished. Image: A new resin top hatch is cast for Vaders fighter. |
Originally, I was going to make 'A Deadly Trio' from a converted ESTES Darth Vader TIE Fighter rocket kit and from the ERTL T.I.E. Fighter kit. The styrene Deathstar base from 2 ERTL T.I.E. Fighter kit was going to be converted to use as a platform for all three fighters. The ESTES Vader fighter conversion was almost to completion as was the conversions of the two ERTL standard T.I.E. Fighters, when I got information that there was a company in the UK called B.C.I. that made resin T.I.E. Fighters that were 'in scale' to the ERTL Darth Vader X-1 T.I.E. Fighter. Wow! I couldn't believe it. So through Federation Models, I ordered a pair and shelved the ESTES/ERTL T.I.E. Fighter project for another time. 'Crap' Resin The BCI Tie Fighters finally arrived. Looking at the pieces in front of me I was a bit disappointed that the cockpit was a solid piece and no interior was included. Hundreds of tiny bubbles were everywhere on this kit. In some areas the bubble build up actually made the hairs stand up on the back of my neck. Small bubbles needed to be removed off of fine detail especially on the large areas on the solar panel wings. I had to be really careful when cleaning up these bubbles because the detail was easily fractured. With all the work that was put into the detailing of the masters, the resin B.C.I. used to make copies was total 'crap'. I don't know what that type of resin is called but it was brittle. Modifications to the B.C.I. Kits The cockpit frame and twin lasers from B.C.I. were white metal re-casts from the ERTL Vader T.I.E. Kit. The framing still needed to be fixed to look right so I had to correct the white metal window frames by cutting out the middle octagon and replacing it with an enlarged styrene one. The white metal twin lasers were tossed and re-built with brass and styrene tubing. The top cockpit hatch was solid and had to be hollowed-out to open up the canopy windows. When I did this I discovered that I inadvertently ruined an expensive cutter on my Dremel while grinding away at that resin. It was like grinding away on solid concrete. One of the B.C.I. TIE Fighters had a large void in the rear of the cockpit that needed to be repaired. Epoxy putty would fix that. All four of the solar wings had hundreds of tiny micro bubbles in every crack and crevice and needed to be cleaned off. I took an exacto knife with a dulled broken tip and lightly scraped the bubbles off being really careful not to ruin adjoining detail. Some areas were already broken off in transit and were difficult if not impossible to fix. Those areas would have to be disguised with styrene strip or thick primer like Mr. Surfacer 500. Since there was no cockpit interior, I stuck some tank parts inside the top opening just to have some detail there. I then found a cool picture of a TIE Fighter pilot on the internet and shrunk it down in Photoshop to make a decal for the front opening. The fighters were primed with gray Plasticote Sandable Primer and given a very subtle Pre-Shade weathering effect. Tamiya acrylic enamel colors were airbrushed on and the black areas on the solar panels were given a coating of Future Acrylic for a nice shine. ERTL's Vader's Tie Fighter Close to ten years ago I had done modifications to the ERTL Vader TIE Fighter and for this project I needed to improve on them. I had some extra un-used parts from an old Vader kit for the interior openings in front of the angled strut areas between the wings. Detail needed to be beefed up a little more in those two areas. A mold was taken of one of the BCI hatches and a resin copy was made and used to replace the old top hatch. The twin lasers were replaced with brass and styrene tubing like I did with the B.C.I. kits and all that was left to do was to give it a new paint job using once again the Pre-Shade technique for an extremely subtle weathering effect. The Base The base was made with a 1" PVC tube and PVC connectors for a support frame and utilized the same Deathstar tiles from my other Y-Wing project I was building at the same time. The fighters were supported with custom bent acrylic rods inserted thru the base into a brass tube that is anchored into one of the thick PVC connectors. This entire project took approximately 2 months to complete. Images (continued) Image: The new modifications are masked off and primed.Image: The new top hatch looks much better now. Image: Painting begins with heavy shades of dark gray. Image: The dark gray is toned down. Image: Vaders Fighter is done. Image: 'A Deadly Trio' ready to hunt down those pesky Rebels. Image: Head-on Image: Vader's ride |
![]()
This page copyright © 2005 Starship Modeler™. First posted on 5 January 2005.
![[Click to enlarge]](ta_trio_07688.jpg)
![[Click to enlarge]](ta_trio_07693.jpg)
![[Click to enlarge]](ta_trio_07694.jpg)