
|
By Tony Agustin - images & text © 2003
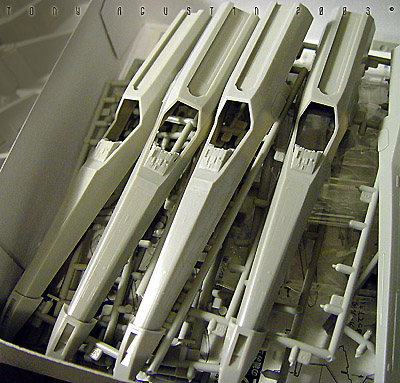
This diorama came about due to the fact I had bought four Fine molds X-wings but I didn't want to just stick them on a stand like I did to my other four ERTL X-Wings. This was going to be my first serious scratch build and I wanted it to look good. I prepared myself by digging into old Star Wars magazines and doing internet searches looking for Laser Tower references. I knew I couldn't duplicate the details from the actual filming miniature, so what I did was make it up as I went. I tried to capture the essence of the original. Besides I think it's more fun that way to invent your own details. |
![[Click to enlarge]](ta_tower_dst1.jpg) |
|
|
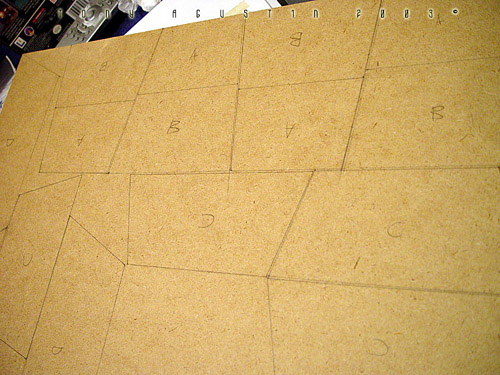
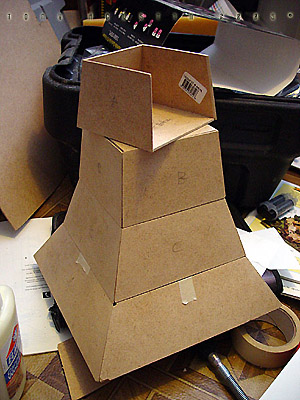
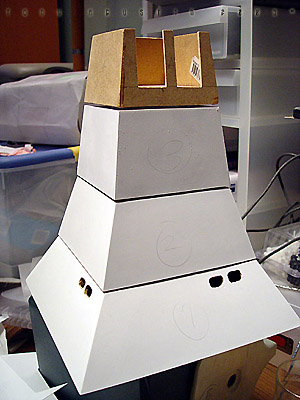
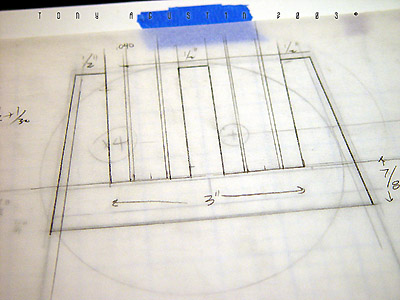
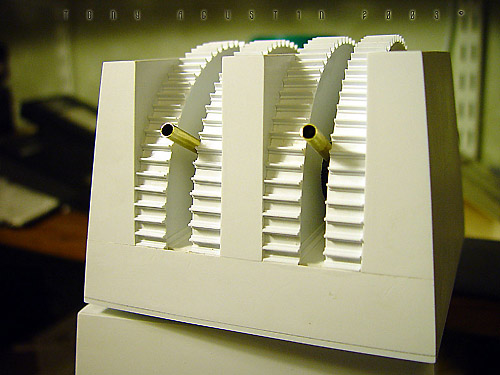
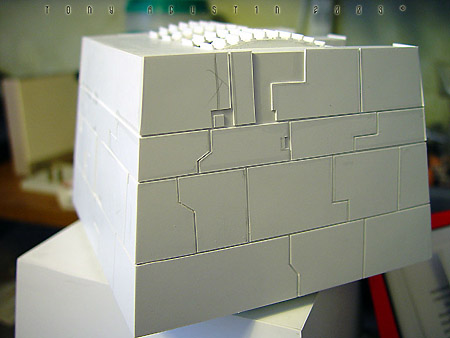
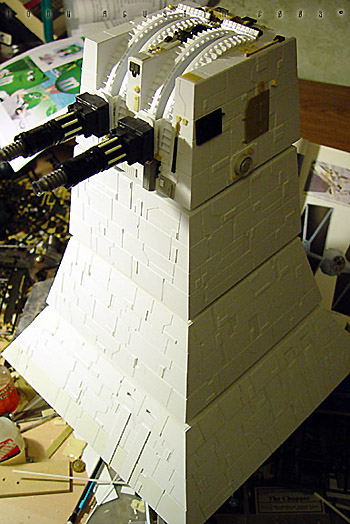
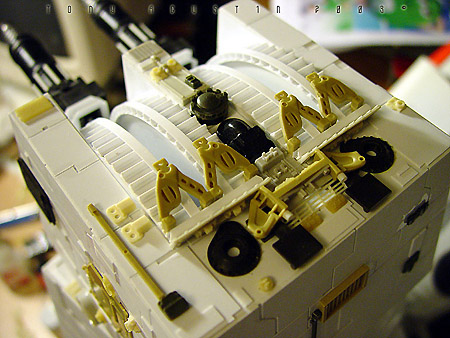
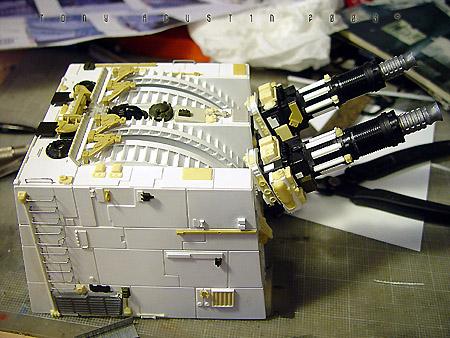
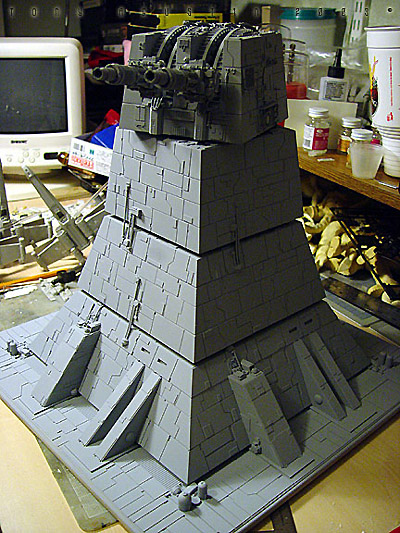
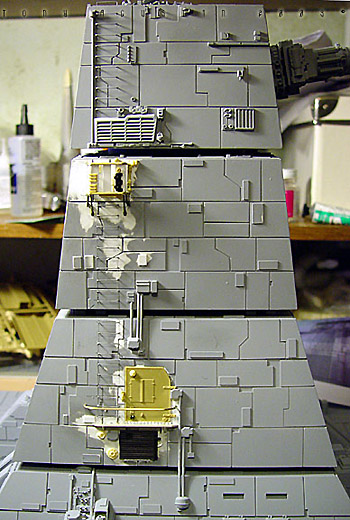
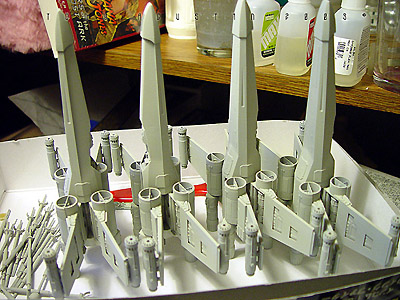
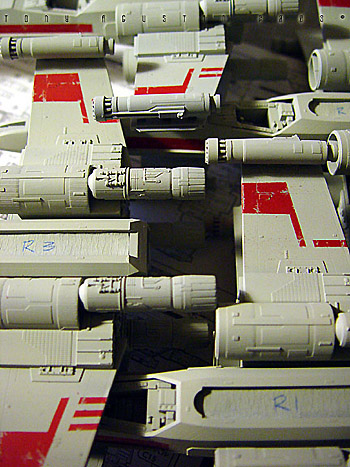
The understructure of the tower is 1/8" hardboard sheet cut to size and glued with a 2 part 15 minute curing epoxy. Then the entire structure was sheathed in styrene and the plating was meticulously cut one by one and cemented in place with liquid cement. I raided a local 'American Science and Surplus' store to search for anything that might make good candidates for the two turbo laser cannons. I raided my parts box and my 'never gonna be built in my lifetime' armor kits to locate appropriate details. I had to make multiples of some small parts so I used Alumilite's casting kit to make molds and cast the extra parts. Once all the details of the Laser Tower were put together, I sprayed the entire thing with Floquil Gray Primer. It was the perfect color for it. I weathered the tower in acrylics enamels using an airbrush and stippling with a paintbrush. The X-wings I built, painted and weathered in a little assembly line so as to finish them quicker. I ended up masking the bold red stripes and painting them on instead of using the decals. I didn't want the fuselage and wing panel lines to be obliterated by the thickness of the decals. Acrylic rod was heated and bent to shape to be the support arms for the X-wings. Holes were drilled into the both sides of the tower to accept the acrylic rods. For fun I wanted a couple of Storm Troopers to chase after the rebel fighters on foot brandishing their rifles, so I repainted two MicroMachine Stormtroopers and placed them in an inconspicuous area near the tower. This model got a Gold Award at Wonderfest 2003. Image: A simple profile of the tower was drawn up actual size to the model.Image: The drawing was transferred to a large sheet of hardboard. The pieces were cut out with a scroll saw. Image: The pieces were epoxied together to form the inner structure of the tower. Image: Sheet styrene was epoxied and superglued to the hardboard. Image: I made another drawing to figure out how to make the turret itself. Image: The turret mechanism was constructed from brass tube and thick styrene sheet. The cannons were made from pens and some electronic gizmos. Image: Here we see the turret sheathed and partially detailed with Evergreen structural shapes. Image: Plating started from the top on down. Horizontal strips were cut into individual pieces and secured with liquid cement. Image: Plating completed. A few kit parts were added around the turret. Image: Kit parts from tanks and a medical humvee were added next. Image: A base is constructed for the towerusing the same materials as the rest of the diorama. Image: Here we see the turret detailing finished. Staples were used for the ladder like hand grips. Small multiple parts were made from Alumilite (resin). Image: The Tower was primed and ready for weathering....or so I thought. Image: I found an additional reference photo that showed a more detailed picture of the side basket. I scraped off the primer on the appropriate side and added the additional detail. Image: I love how primer blends everything so nicely. Image: I weathered the tower with an airbrush using acrylic enamels. Additional weathering was done with a small brush. Image: Time to do the Finemolds X-Wings. Image: The X-Wings were primed, then a basecoat of Camo Gray with a touch of white was airbrushed on. Image: I decided to mask the bolder red markings instead of using the decals. I didn’t want the panel lines to be obliterated. Image: The red markings were airbrushed on. Image: All four of these X-Wings have their own distinct individual type of weathering and paneling. Image: The X-Wings were weathered and the remaining decals applied. A final coat of Gunze Sangyo Clear Flat was airbrushed on. |
![]()
This page copyright © 2003 Starship Modeler™. First posted on 16 October 2003.
![[Click to enlarge]](ta_tower_dst2.jpg)
![[Click to enlarge]](ta_tower_dst3.jpg)
![[Click to enlarge]](ta_tower_dst4.jpg)
![[Click to enlarge]](ta_tower_dst5.jpg)
![[Click to enlarge]](ta_tower_dst6.jpg)
![[Click to enlarge]](ta_tower_dst7.jpg)
![[Click to enlarge]](ta_tower_dst8.jpg)