
By Tony Agustin - images & text © 2003
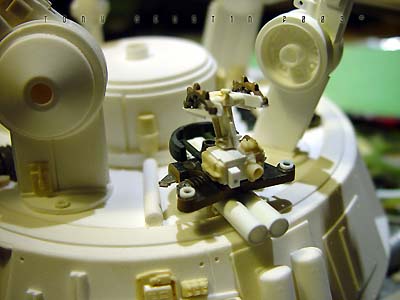
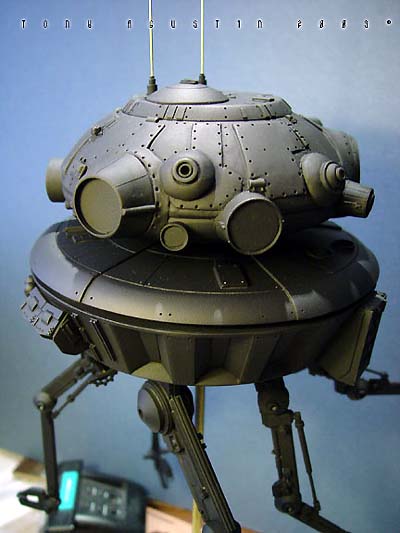
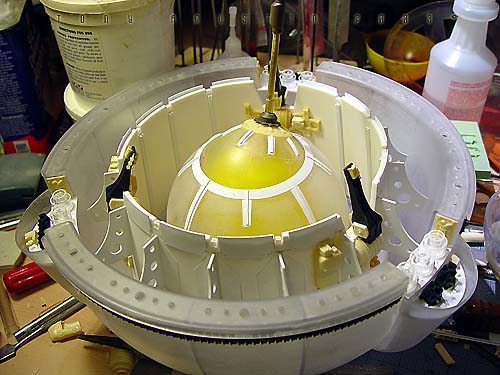
This was SMT's resin kit production of the Probot from the Empire Strikes Back. The 1/6 scale kit went for about $80 and was limited to about 100 kits I believe. Itąs been long since out of production. I had bought this kit over a year ago and started construction almost immediately. I found the kit needed a lot of added improvements to get it to look right, so I added extra detailing to beef up the underside and and added an extra 'eye' to the head/turret area. The neck attachment had to be raised a bit to get the head/turret to clear it's own laser when rotating. |
![[Click to enlarge]](ta_probe_pd1.jpg) |
|
|
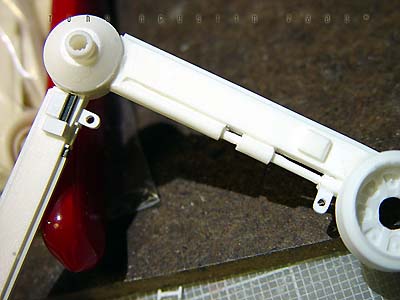
The actuator hinges and the actuators themselves on the arms were redone with styrene rod tubing. Eventually I lost enthusiasm for the project and shelved it. Rebuilding the
arms really burnt me out.
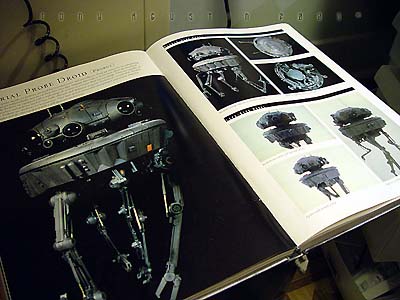
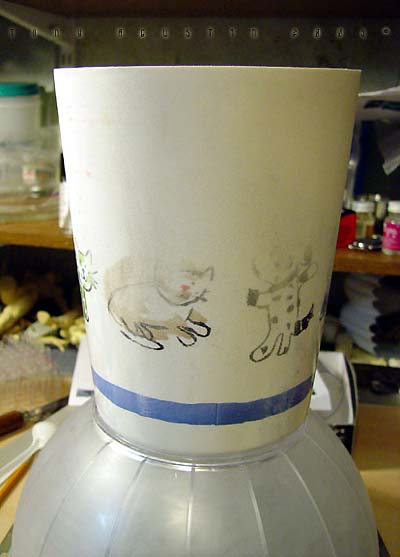
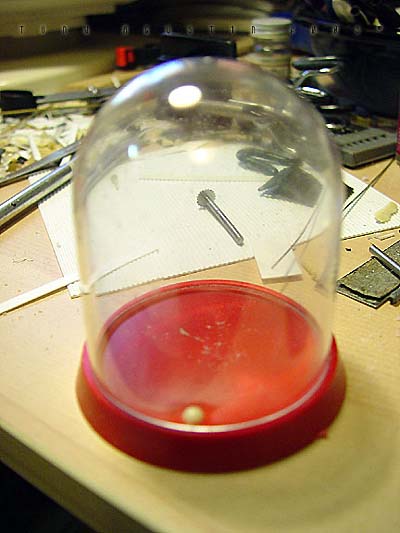
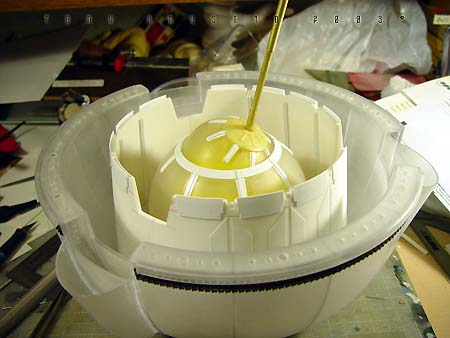
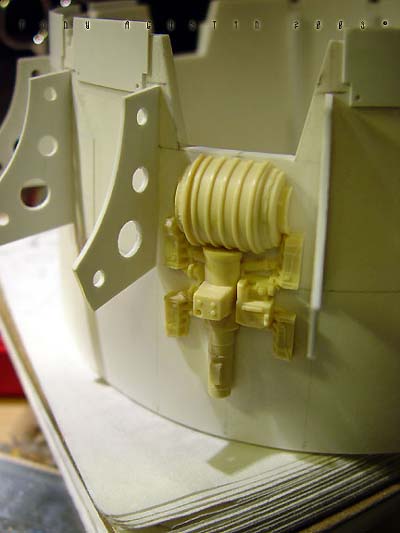
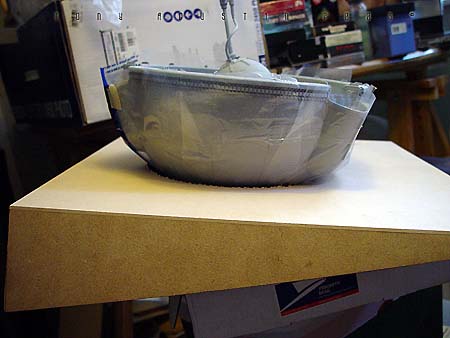
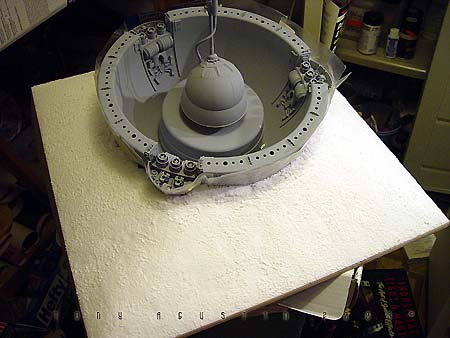
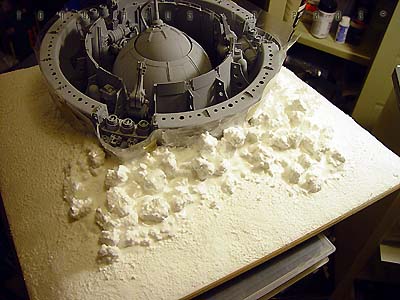
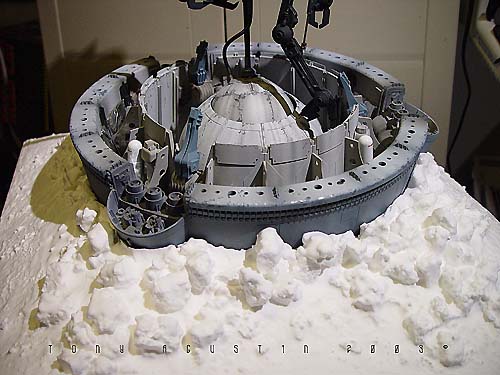
Plastic bathroom kickbuckets and clear craft bowls from a local Bed Bath & Beyond provided the basic parts to the pod. Another trip to 'American Science and Surplus' provided several small items to be used as well. Left over castings from past projects provided the extra detailing. The base was a box-like structure constructed out of hardboard and epoxied together. I built the snow up from styrene insulation foam secured with a hotglue gun. I covered the foam with a thick mixture of lightweight spackling and Future Floorwax to simulate the final snowy texture. This model won a Silver award and also a sponsored award for Best SF Vehicle/Mecha at Wonderfest 2003. Image: I found the kit needed a lot of work to get the detailing up to snuff, so I found some great references in this very large book called The Star Wars Chronicles.Image: The neck base where the head/turret rotates was extended a bit with sheet styrene. Image: Additional optic sensors were added to the head and the laser on the body detailed with bits of styrene Image: The actuators for the manipulator arms were redone. Image: The manipulators arms were detailed out and new hinges were made to accept the actuators. Image: The details of the kit were very simplistic so extra eyecandy greeblies were added to the undercarriage of the main body. Image: Black Krylon primer was sprayed on the kit. I think it was at this point I shelved the project. Image: Seven months later the idea of making a serious diorama re-energized me once again. This time I wanted the Probe Droid rising out of its half buried re-entry vehicle. A trip to Bed Bath and Beyond yielded a plastic children's Kick Bucket and a clear craft bowl. Image: An empty snow globe cylinder from American Science and Surplus. 3 were needed. Image: The snowglobe cylinders were halved and trimmed to fit. Again 3 had to be made. Image: The halves were now attached to the bowl. Image: A halved part of the kickbucket and some detailed spheres were dryfitted to add interest to the inside. Image: Some Alumilite castings were made for more mechanical details. Image: Coming together. Image: I primed the pod and the Probot was test-fitted on its gimbaled support. Image: A wedge shape base was constructed out of hardboard. The pod was secured with screws from the bottom. Image: Snow had to be replicated but I didnąt know how to go about doing it. I didnąt want to use plaster or baking soda because it didnąt look ight to me and wasnąt permanent enough, so I made up the following: To start off, styrene insulation foam was cut into little wedges and hot glued in place. This became the understructure for the snow. Image: Lightweight spackling was spread evenly onto the surface of the foam with an artist's trowel. Image: The result. But wait....... Image: ......a concoction of my own invention: Lightweight spackling and Future floorwax. Crumbly chunks of insulation foam was mixed in. Image: Itąs still wet, but the effect of displaced snow is taking shape. Image: The final result. Iąm not sure how permanent this technique is but so far itąs still holding up. |
![]()
This page copyright © 2003 Starship Modeler™. First posted on 15 October 2003.
![[Click to enlarge]](ta_probe_pd2.jpg)
![[Click to enlarge]](ta_probe_pd3.jpg)
![[Click to enlarge]](ta_probe_pd4.jpg)
![[Click to enlarge]](ta_probe_pd5.jpg)
![[Click to enlarge]](ta_probe_pd6.jpg)