
By Lionel Kong - images & text © 2007
|
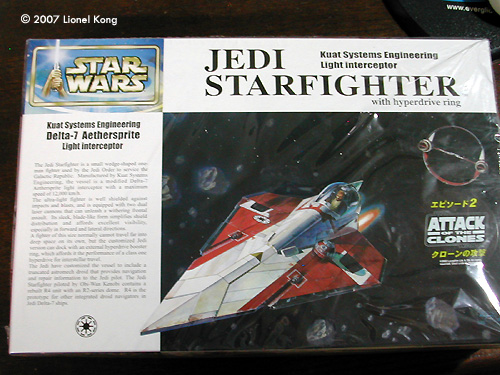
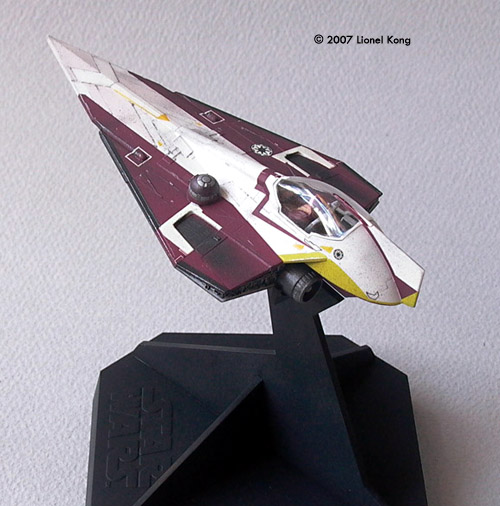
![[Please click to enlarge]](lk_jedi_combi06.jpg) The FineMolds model of the Delta-7 will probably be the only licensed kit of Obi-Wan's AOTC ship to be available for a long time, as no other manufacturer seems to be interested in making new Star Wars models any time soon. Like all other FineMolds Star Wars models to date, it is in 1/72 scale. |
|
Image: The Box Image: Ring Joint
Image: From behind Image: Painted ship Image: Left/front, on the stand Image: Left/rear view Image: Underneath Image: Combination, front view Image: Close-up Image: Left/rear Image: Underneath |
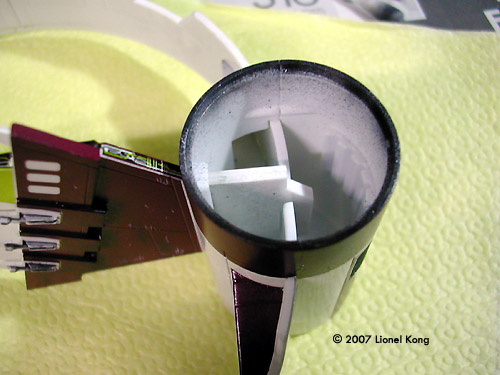
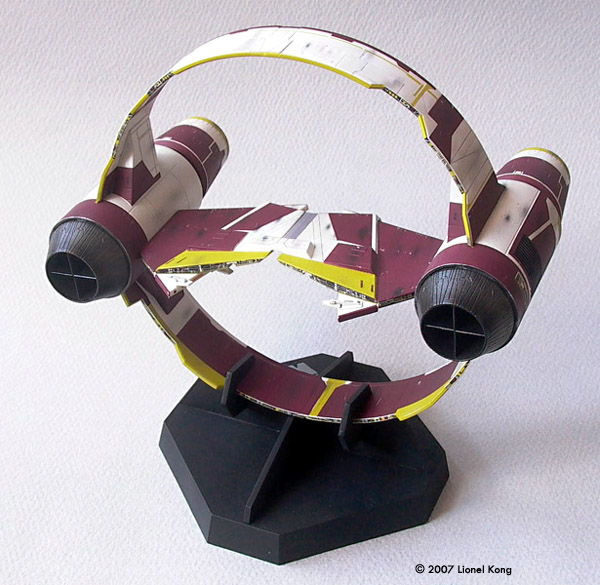
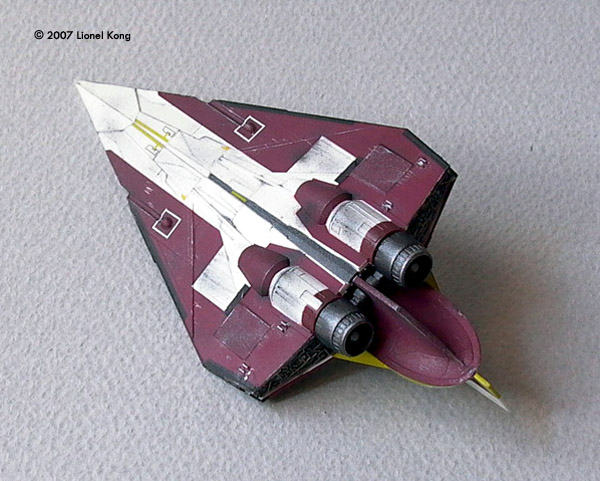
Detail is superb, matching the actual CGI model of the ship almost all the way. It is not perfect though, as the painting and decal guide omitted some details that we will get to during the build. The kit also comes with parts for two stands, one for the hyperdrive ring and one for the ship, should you wish to display them separately. Building the Hyperdrive Ring Even though the instructions start from the ship, I suggest building the hyperdrive ring first because it is actually the more complicated item of the two. Yes many have said that this model has so much decals covering it that the base coat of paint would only be a hint. But that is no excuse for getting lazy. Instead of pure white, I found that Gunze's acrylic off-white to be a better shade in this scale. All colors used were gloss, taking into account all the decals that had to go on later. A matt clearcoat will be used to tie in everything once complete. There are also a fair bit of details that need to be painted, but are sometimes missed because the instruction sheet is so cluttered with decal numbers. On the hyperdrive engines, the side grilles need to be painted black, a gray stripe runs down the center of the middle docking clamp, and there are two small red lines on either side of the main docking clamp's upper surface. It will help if you mask and paint outside the lines a little around the engine grille. This is because a decal surrounds the whole grille, and any gaps will need to be touched up later. On this kit, it really pays to study the instructions well. The paint numbers match Tamiya and Gunze Sangyo acrylics. You can easily find what colors they mean by using the Tamiya website. I built the hyperdrive ring in the following subassemblies for easy decaling:
Decaling the Hyperdrive Ring Decal setting solution is a must for assembling this ship. Don't even try and start without it. I used Mr Mark Softer and had near perfect results. It is also important to cut the decals exactly to shape, especially on those that butt up against corners. If you don't, it will be extremely difficult to align them on the model later. I found decal registration to be almost perfect, even around difficult panels and corners. The tricky bits like the round ring decal behind the front engine intakes went down perfectly with Mr Mark Softer decal softening solution. It just requires a lot of patience and careful aligning. Ensure that they are all straight, and do not settle for a slightly misaligned decal, especially on this kit where the placement of the next decal often relies on it being in line with the one before it. The large sheets of red around the center docking clamp will need extra care to ensure that they line up. A word about Mr Mark Softer: It is best applied over the decal with it is 95% dry. As it starts to work, the decal will wrinkle. Don't freak out! The decals will lie flat and over all folds and panel lines once its dries again. Strange, but true. If there is still water on the decal surface or underneath it, the decal may dry in a slightly wrinkled position. That is why it is important to only apply softening solution over an almost dry decal. I also never use decal set at all. Never saw the point, really, when softening solution alone does the trick for me. |
|
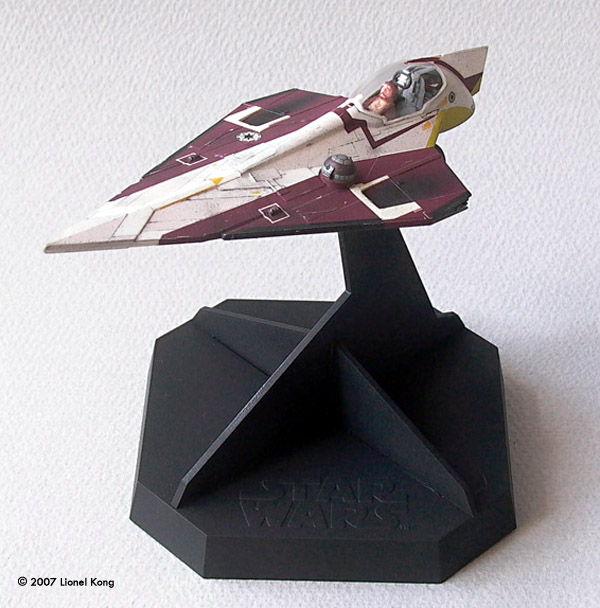
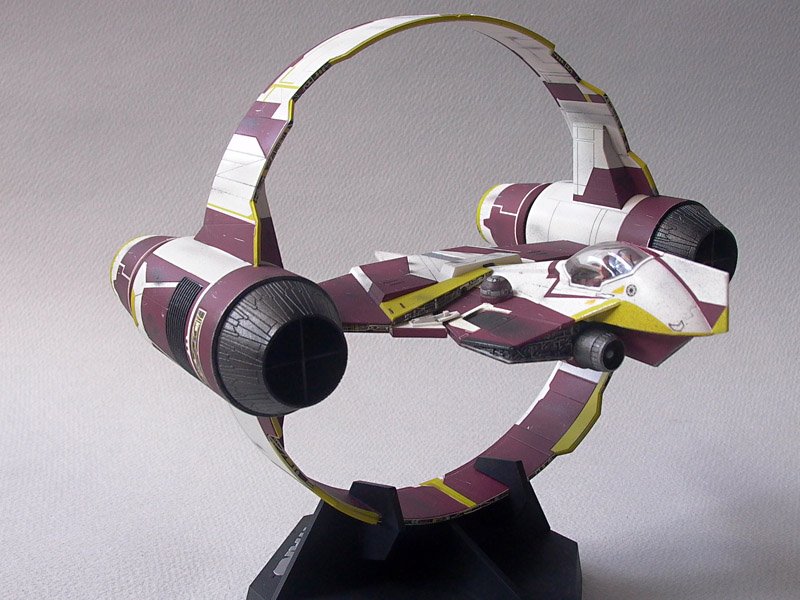
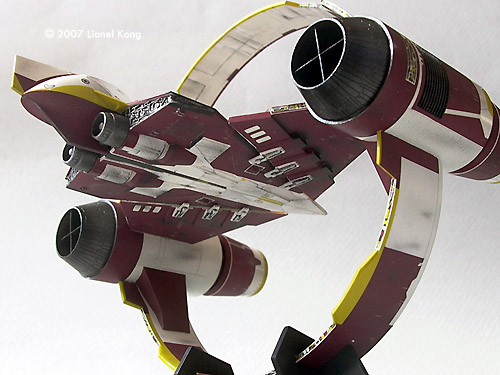
Weathering the Hyperdrive Ring Even though the decals provided are clean and unblemished, the Delta-7 seen in Attack of the Clones is quite worn. No where near as beat up as an X-Wing, but not as new as a TIE Fighter either. Watch the movie with an eagle eye and you'll notice the amount of weathering on the 'real' thing. Now's the time to chip the red and yellow decals, ever so subtly. Remember that we are working in 1/72 scale, so the chipping must very small. Add the around leading edges, panel edges, and where flying debris may strike. Then dry brush some silver highlights over the edges to make it look like bare metal is a very few spots. Dark gray/black streaks shot through the airbrush with a very fine setting completes the weathering. Keep aware that this is all in 1/72 scale, so keep to weathering effects small. Building & Painting the Starfighter Like the hyperdrive ring, the ship was painted in gloss off-white. As I was building it as an in-flight model, I assembled it with the landing gear closed. Building and painting the cockpit is tricky because of its compact size. Tiny decals replicate the instrument panels and a seated Obi-Wan figure is included. The second smallest part of the kit can be found in the cockpit, which is the pilot's HUD screen. The smallest parts of the whole kit are actually the four laser cannon tips, and a pair of spares are included in case you drop one. Handle these in a bright, clean area with a pair of very sharp tweezers. Believe me, no adult human has fingers small enough to pick them up. Careful study of the CGI Delta-7 reference images reveal that some of the panels have subtle gray shades on them. They are symmetrical, which means that they are not worn sections but rather have been purposely painted on as markings. I mixed off-white with some light gull gray, masked and airbrushed the appropriate gray panels. Another section that requires some minor paint work is the underside of the engines, where they are exposed under the fuselage. The paint guide calls for gun metal, but they are actually white with a band of red at the rear end, where the thrusters emerge.The middle section of the underside also needs to be painted gun metal, a detail that the instruction sheet left out. If you do not have the making of AOTC book, the asteroid chase sequence and the deleted scene of Obi-Wan leaaving the Jedi Temple found on the DVD serves up some decent shots of the underside of the Delta-7. The raised ring that R4 attaches to also needs to be painted red as the decal does not reach up to this area. The entire rear engine section was painted gun metal then dry brushed with silver.I found it easier to paint the ship in subassemblies consisting of the top, bottom, cockpit and engines before assembly. The canopy was left off and installed after the whole model was completed. There is a white frame around the perimeter that needs to be painted. I did this with a brush as the small size and curvature made masking very difficult. Decaling the Delta-7 The four main decals that make up the red sections of the ship will need lots of patience and Mr Mark Softer to set right. Do not worry about covering up the model's surface detail as it will show through after the decal softening sulotion does its work. As before, trim the decals right up to the edge because any extra carrier film will cause problems with alignment, or overlap and leave rasied corners. The instructions fail to call out the decals that go along the side edges. But they are there on the sheet, and it will be obvious what goes where as you progress along. There is a mistake on the decals that is easily rectified. The laser blaster tips on the ship's underside actually have the white square outlines around them just like those on the upper surface, but these are missing from the decals. FineMolds thoughtfully provided a bunch of extra markings for builders that would have preferred to paint the red sections instead of using decals. Amongst these extras is an extra pair of white squares. Use these for the underside laser tips. The tiny red cowls of the laser blasters have equally tiny red decals that go over them. A drop of Mr Mark Softer will set them right. A tricky decal to apply is the tiny red stripe that goes on to the top of the canopy. Trim carefully, and use small amounts of Mark Softer to avoid staining the clear plastic surface. Another pair of scary decals are the two large red sheets that go under the cockpit. Many have given up and just painted this area instead of trying to get the flat decal to conform to the compound curve. Once again, Mr Mark Softer and plenty of patience will see you through.Because of the surface shape, the decal will wrinkle like mad once hit with softening solution. I waited out, and an hour later it dried totally flat. Once totally dry, I chipped away some of the decaled surface to simulate paint wear. Weathering the Delta-7 After filling in the tiny panel lines with a wash of very diluted black, I clearcoated the ship with matt in preparation for drybrushing. The ship in the film had a moderate amount of wear on it, more so than many casual fans assume that there was. Silver was used to very lightly highlight the raised edges for more definition and simulate paint worn down to the metal. This was done with a very light hand. A mix of matt black and steel was spat from the airbrush in very small bursts to streak and dirty up the ship a little. The trick here is to apply weathering where you would expect the ship to be worn in real life instead of just randomly blasting away. Less is more in a case like this. Also consider that at 1/72 scale a heavy handed weathering application will look way over scale. Putting it Together Once complete, you can opt to display the ring and ship seperately or combined as one. I painted the bases matt black, to keep them neutral and also to visually recall the blackness of space.Conclusion I took close to a month to put this kit together, and despite its low part count it is not a kit for inexperienced modelers. A beginner will very quickly be overwhelmed by the small details and complicated decal scheme this model. Even if you decide to paint the red sections instead of applying decals, the small size of the model and complexity of the design makes it an equally complex task.FineMolds have created a near perfect miniature of the Delta-7. The only errors are in the painting instructions and a small section of the decals, something easily identified and equally easy to rectify. Click here to read another build review of this kit. |
![]()
This page copyright © 2007 Starship Modeler™. First posted on 3 July 2007.
![[Please click to enlarge]](lk_jedi_parts.jpg)
![[Please click to enlarge]](lk_jedi_ringassemblies.jpg)
![[Please click to enlarge]](lk_jedi_ring01.jpg)
![[Please click to enlarge]](lk_jedi_decaledship.jpg)