
|
By Jay Chladek - images & text © 2005
|
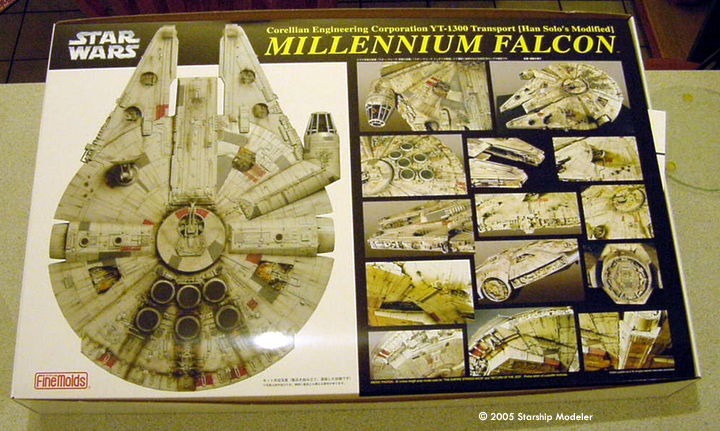
![[Big Box]](jmc_fmmf_01_FMkitbox.JPG) When word first trickled out that Fine Molds was indeed planning to do an all-new model kit of the Millennium Falcon, many in the community were overjoyed with the news. For years, the only kit readily available of Han Solo's shine runner was the MPC kit offered by AMT/Ertl and while good for its time, it needs a bit of work to really look good. |
|
Image: Closer look
Image: Closer look Image: Now, the good stuff
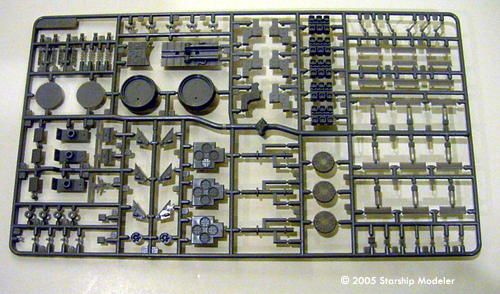
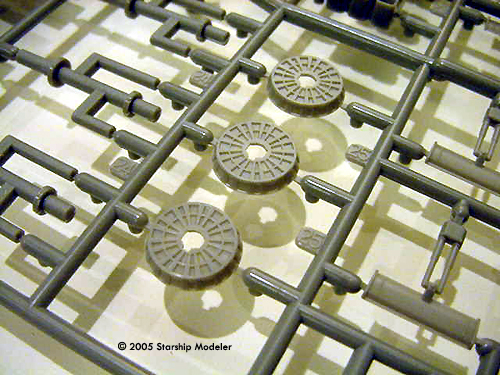
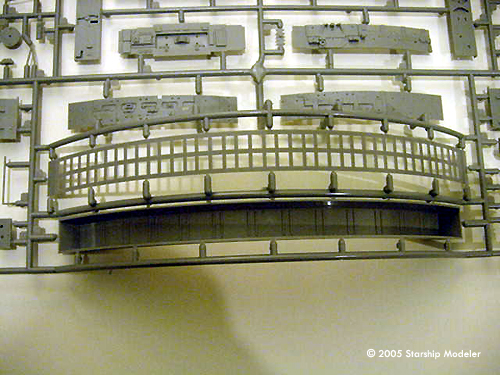
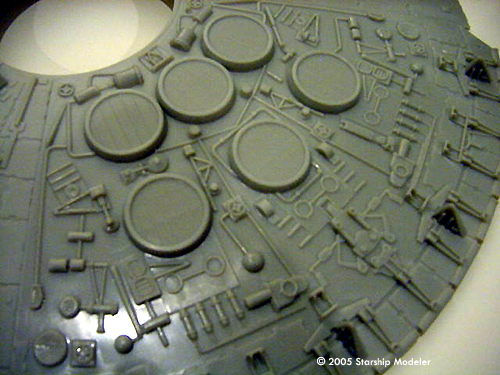
Image: Hull halves, plus the three 'A' sprues Image: Each sprue is jam-packed with detail Image: Closer look Image: Tank deck
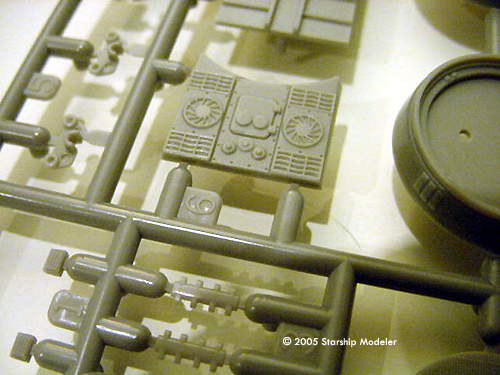
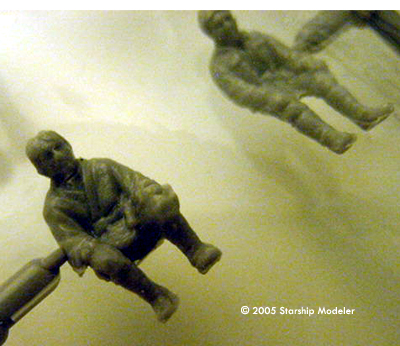
Image: Luke and Han Image: Never-before seen engine front and back Image: More detail parts
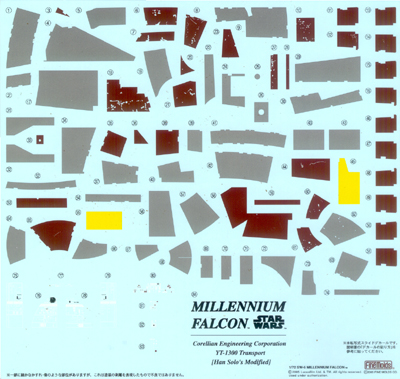
Image: Docking ring Image: Decals include exterior markings and cockpit lights/instruments Image: Sample instructions Image: Scale reference
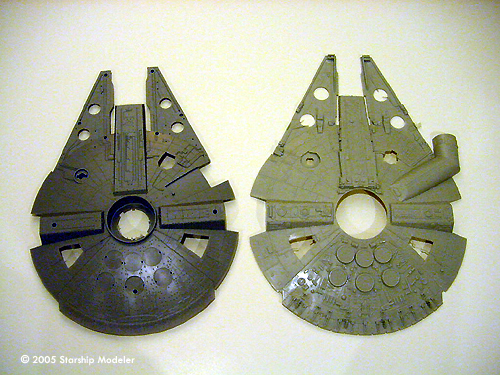
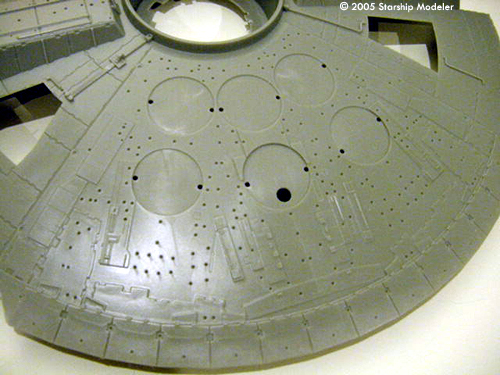
Image: FM (left) vs MPC hull top Image: The MPC is not that much bigger (so, maybe 1/68-1/70 scale?) Image: The MPC rear deck - every detail is hugely simplified Image: The FM rear deck - every detail is glued on |
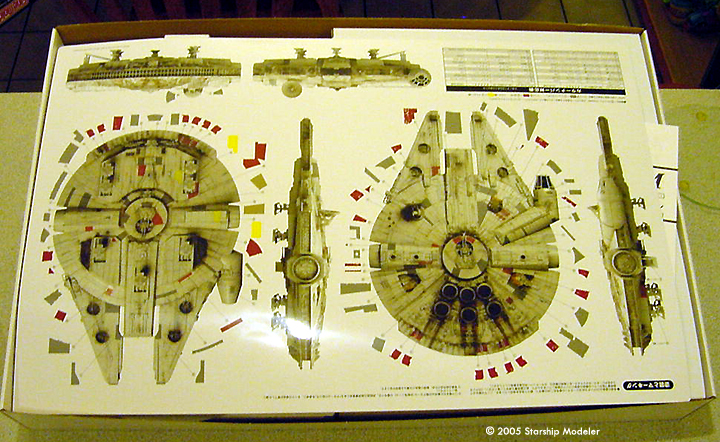
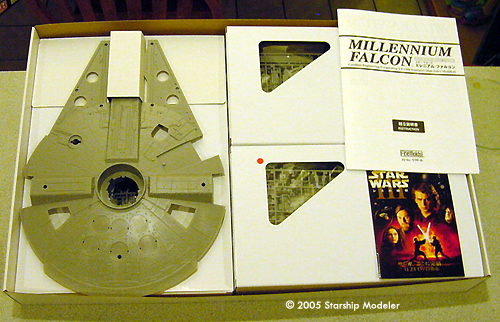
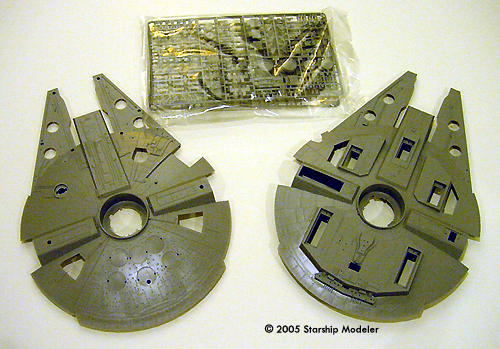
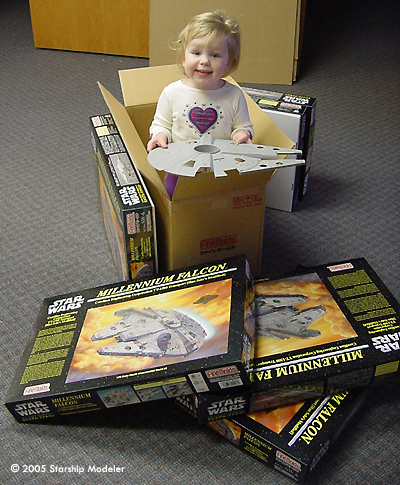
Then we heard what the price was going to be and many ended up saying "I have a bad feeling about this," as this kit was going to end up being the most expensive, officially licensed Star Wars kit ever issued. As such, the price meant that the stakes were high at FineMolds to deliver a top quality product that model builders were willing to shell out the equivalent of a royal reward for. So, have they done it? Is this kit really worth the price paid for it and the shipping? What You Get The box is huge and might be mistaken for a RC car kit given its weight. The box art is very nicely done and suitable for framing. Like the smaller FM kits, there is a brief history of the Falcon done in English on the cover and a similar history done in Japanese on the instruction sheet. Inside the box, you get two full color picture sheets that are the size of the box lid. One contains pictures of the ESB studio model in storage at the Lucasfilm Archives and the second one contains a six-view decal placement guide for the extensive decal sheet provided. Also contained in the box are a 22-page instruction book and a full color catalog of other Star Wars goodies available in Japan (Darth Vader boble-head?!). The model pieces themselves are contained in three smaller boxes and the top of the hull is packaged separately on top. All the styrene bits are packaged in bags inside the box and these help to ensure that no parts get lost, even if they get broken off the sprues (none of mine were). The decal sheet is also packaged in one of the boxes. I have a feeling that this kit has set a record for the most number of styrene pieces provided, but some large scale Naval ship models might also lay claim to that record. The way that FineMolds has tackled this kit is very much like how the studio model was built. The large parts represent the basic shape of the model and detailing is made up of hundreds of individual detailing bits that are laid out on the hull piece by piece. Look close and you can probably identify several of the parts if you've dabbled in armor modeling. This is one kit that I highly recommend following the instructions on. Use a highlighter to mark off which parts are used, otherwise it can be a bit confusing. There is very little English printed on the instruction sheets, but the diagrams are easy to read and the symbols are pretty well self-explanatory. For all that greeblie detailing on the exterior, I recommend plastic weld glues over CA glues for their strength and ease of use on these small parts. When finished building, you will have some extra pieces left over, due to the way the parts are laid out on the trees. The extra pieces are listed at the end of the instructions. When built, the model is slightly smaller then the MPC-designed Falcon kit. The exterior is well molded and looks accurate. No flash was present on the parts in my example and even the biggest pieces for the main hull show no signs of sink marks or ejector pin marks on the outside. This kit represents the studio model first seen in “The Empire Strikes Back” as the bottom piece has the two additional landing gear bays molded onto it. To build the original three gear configuration first seen in “A New Hope”, the bays will need to be removed and plated over. Given the price of the kit, I'm not sure too many modelers on a budget are willing to do that. Of course, for those that desire “uber” accuracy, other minor details were different between both Falcon studio models, so there is a little more to such a conversion then just plating over the gear bays. But these differences are tough to spot and not noticeable to most modelers anyway. The engine coil detailing represents what was first seen on the CGI Falcon rendered for the Special Edition releases of the Star Wars movies. None of the studio models have this feature. The engine coils are well represented, although all the parts are molded in gray styrene, making lighting of the core impossible without replacing with clear parts. Perhaps somebody will address this concern in the future. Construction of the major assemblies is done with screws to hold the top and bottom halves together while the side details are glued on. The screws themselves are covered over with additional detail bits. For those desiring to light this model, it wouldn't take much work to build the model so that it could be taken apart to access any interior lighting or power packs as needed. Lots of poly-caps are provided and these allow the modeler to display the kit in either gear-up or gear down configuration as desired and swap out relatively easily. Optional open and closed loading ramps are also provided Interior bits are provided for the cockpit and the two laser turrets. Detailing in these areas is a little simplified due to the size of the parts (the cockpit seats especially). But, they shouldn't detract from the overall look of the model. Six seated crewmembers are provided. You get Chewbacca, Han Solo, Luke and Ben Kenobi from “A New Hope,” C-3P0, and Princess Leia in Hoth gear from “Empire Strikes Back”. The Han figure can be painted in either ANH or ESB colors (with the long sleeve jacket) depending on which movie you are representing. No Lando or Nien Nunb figures from Return of the Jedi are provided. All of the seated figures are one-piece, with their arms on sitting on their legs. Four flight chairs are provided in the cockpit, as is a detailed instrument panel with a pair of separate control levers. Decals are provided for the wall instruments, including the “wrap around” light strip on the back walls. The gun turrets contain four-piece gun chairs that look very nice. The only drawback with the gun wells is they don't contain any of the interior detailing on the decal sheets like the cockpit does. Granted you can't see much inside the turret bays unless you decide to light the interior as the guns sit right over the viewports anyway. But I imagine some aftermarket decal producer will be along soon to make up for this shortcoming for those that desire the interior details. Walls and a roof for the loading ramp bay are molded on the hull bottom. Some extra greeblie detailing can be done here if you so desire. The shaft for the gun turret bays blocks the view at the top of the ramp rather nicely from prying eyes looking up the ramp. Other parts options include choice of clear styrene cockpit 'canopy' or framing without 'glass', a rather large in-flight display stand and several standing figures. |
|
Han, Luke, Leia and two Imperial Stormtroopers are provided from the docking bay escape scene in “A New Hope”. Luke and Han are wearing Stormtrooper belts and holding Imperial issue blasters as a result. The two troopers are not the same as those provided in the FineMolds TIE Fighter and Interceptor kits, as these come with separate arms for diorama display purposes. Curiously, no standing figure of Chewbacca is provided, but C-3P0 and R2 can be found in the latest issue of the FineMolds X-Wing kit if you desire to add them to a Falcon diorama. It is a bit odd though that only standing figures from “A New Hope” are provided when the kit builds into the “Empire” Falcon. I also see no sign of the anti-personnel laser turret used in “Empire” on the parts trees either (although it could be hiding in the sea of parts). Painting and Decal Options Color callouts are listed on the paint and decal guide for two types of Gunze Sangyo paints and Tamiya Acrylics. And for the first time in any FineMolds kit, you get the English names for the paint colors as well! The decals allow you to apply all the trim colorings on the exterior of the Falcon while only needing to apply the base coloring. These markings also have a chipped paint appearance to them also. This is quite a time saver, although the instructions also provide the paint color equivalents, should you decide to paint the markings on yourself. A combination of both decal and paintwork will probably yield the best results in my opinion, as some of the contours are a bit difficult to mask properly for airbrush work anyway. Given my experience with other FineMolds kits, these decals should snuggle down and react to solvent just fine. I've had no problems with using the Microscale system on FineMolds decals. The way the kit is designed, the cockpit pod can be added after major paintwork is completed, allowing for weathering work to take place in tight spots on the side panels in this area. Naturally, this model calls out for weathering work and everything from simple washes and drybrushing to pastel chalk work can be used to make the Falcon look every bit like “The fastest hunk of junk in the galaxy!” Accuracy? Well, based on my references, this kit does indeed look “bang on” to the ESB studio model in terms of detailing. I looked for various parts that I could see in my pictures of that model and indeed they are represented in this kit. Somebody would be pretty hard pressed to find a detail that doesn't look right. As to the scale, that has been and always will be a point of debate since the Falcon's dimensions have been a bit of a question mark. As it is, the size of the model compared with the figures looks close enough to 1/72 for me. Of course, this also means that the MPC kit is about 1/68 or 1/70 scale, given that it is slightly larger in overall size. Conclusions So, is the Fine Molds kit worth all the Imperial credits that one has to pay for it? I would say most definitely yes! But it doesn't quite have all the options I was expecting it to have given FineMolds' reputation for parts options. The MPC Falcon is a much less expensive kit, but it needs some resin bits or a lot more work to bring it up to the detail level of the FineMolds kit. For starters, the sidewalls on the MPC kit are too tall and the cockpit interior needs replacement as well. Then there is also the matter of adding turret gun bay interiors and the two additional landing strut housings if you want to do an ESB model. All this resin can add to the price of a seemingly inexpensive kit when the FineMolds kit has already done the majority of that work for you. But at the same time, the MPC kit does still have some advantages in that it more closely represents the studio model from the first Star Wars film with its three-gear strut configuration. If you want to build a very good quality model of the Millennium Falcon out of the box, then the FineMolds kit is the better option if you can afford it. If you are willing to do the work needed to get an MPC Falcon up to this level, then I say go for it. But that option will take time or money (or both) to do properly. I will say though that even without the options I was hoping this kit would have, I am still more then happy with my purchase and I will enjoy building this model quite a bit. Many thanks to Jay's wallet for providing the review samples. Manufacturers and retailers, interested in getting your wares reviewed and publicized on a site averaging 3500+ readers a day? Contact us! |
![]()
This page copyright © 2005 Starship Modeler™. First posted on 29 December 2005.
![[What you get]](jmc_fmmf_02_Whatsindabox.JPG)

![[Paint guide]](jmc_fmmf_03_FMpaintguide.JPG)
![[Parts is parts]](jmc_fmmf_05_FMparts.JPG)
![[More]](jmc_fmmf_10_EvenMoreFM parts.JPG)
![[Yum]](jmc_fmmf_14_MoreFMparts.JPG)
![[MPC's a bigger model in a smaller box]](jmc_fmmf_15_FMvsMPCbox.JPG)