
By Joe Jimenez - images & text © 2007
|
![[Please click to enlarge]](jj-ywing_f001.jpg) The revival of this Alfred Wong-mastered Y-Wing was a bit overdue, especially for modelers like me who barely missed out on the SMT offering as that company was forced to cease production a few years ago. |
|
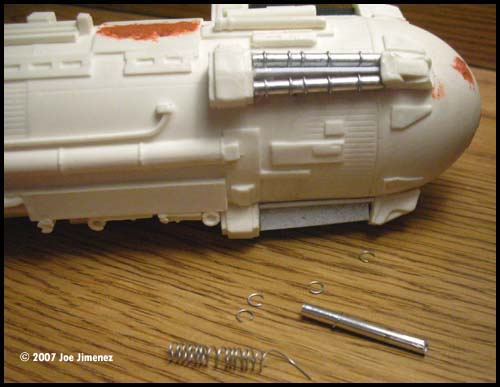
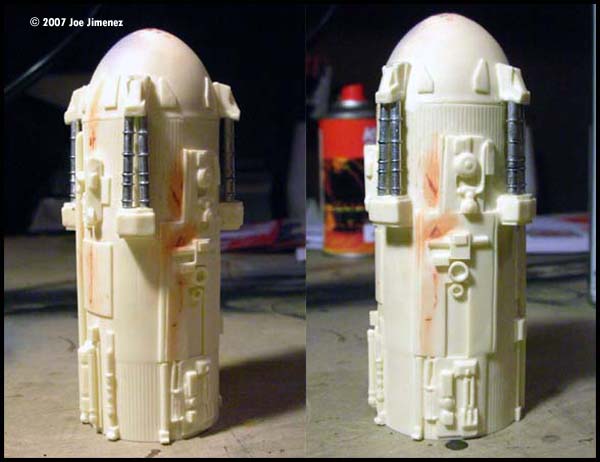
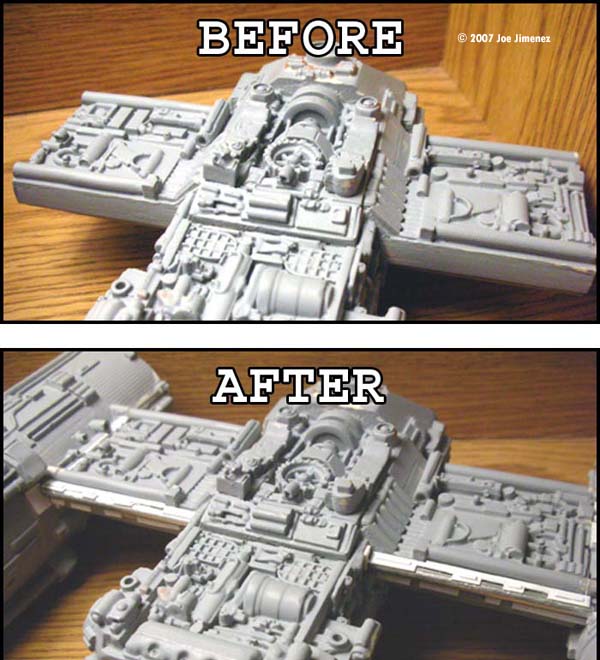
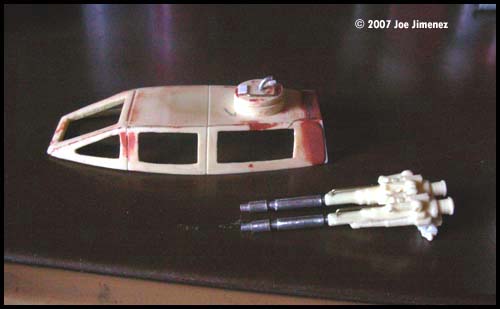
Image: Fixing the gap on backplate. Image: New tubing on pylon. Image: Cutting out the struts. Image: New rings. Image: Modified struts. Image: Engines, before and after. Image: Leading edge detail. Image: Scribing panel lines. Image: Torpedo tubes. Image: Canopy modifications. Image: Finished cockpit (top) Image: Finished cockpit (underneath) Image: Finished cockpit (rear) Image: Finished cockpit (front) Image: Finished cockpit (cannon)
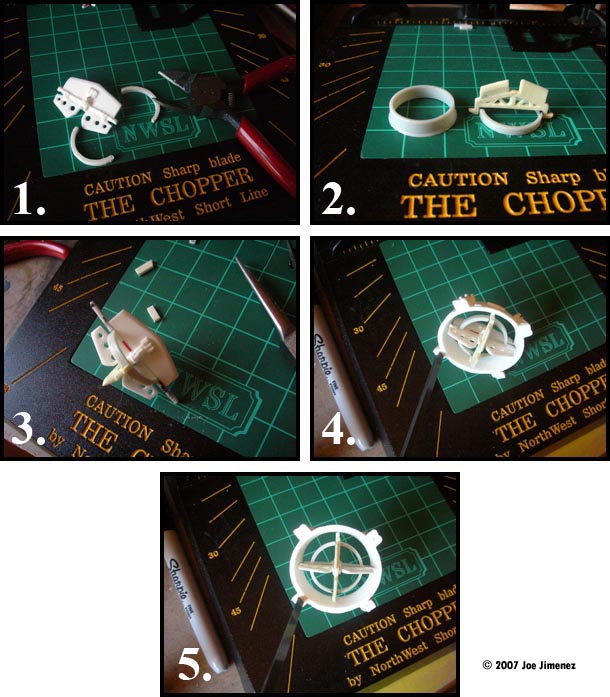
Image: Cleaning up the vanes.
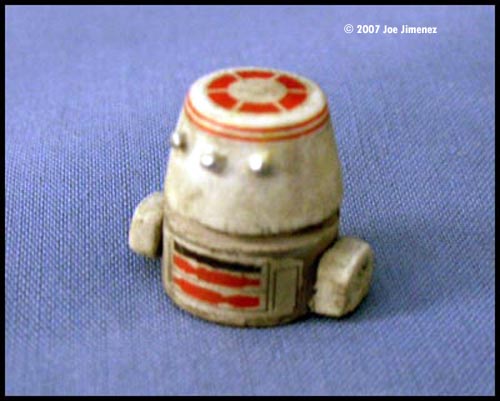
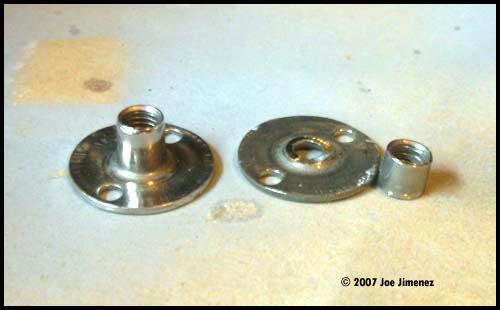
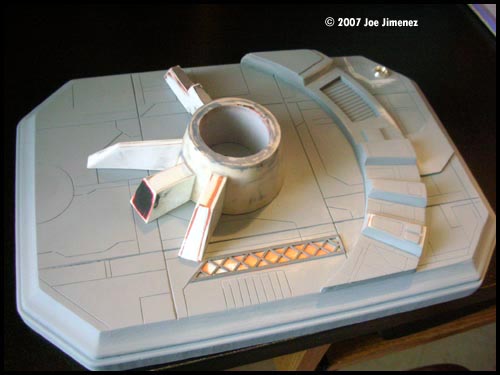
Image: R5 Droid. Image: Mounting hardware. Image: Mounting point. Image: Further along. Image: Base completed. Image: New greeblie on fuselage. Image: Cockpit Image: Port engine (front) Image: Starboard engine (rear) Image: Starboard engine (front detail) Image: Neck Image: Underneath Image: Base |
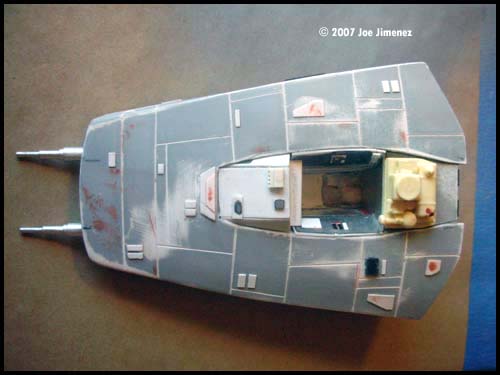
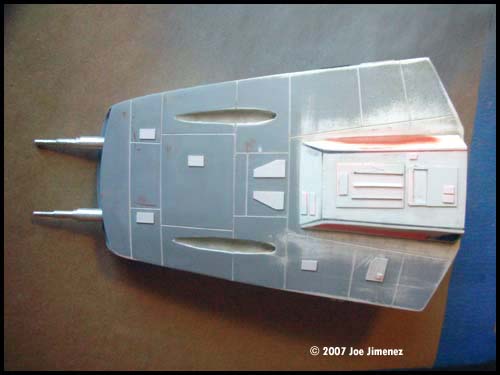
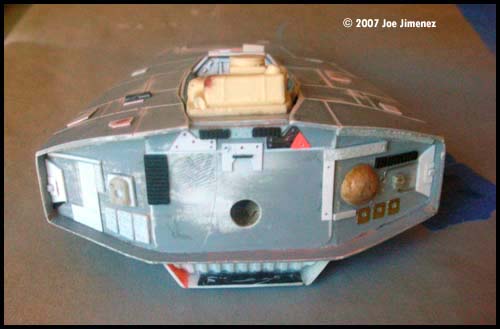
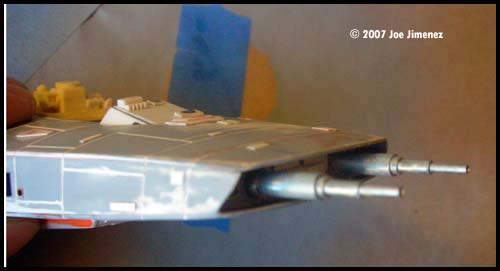
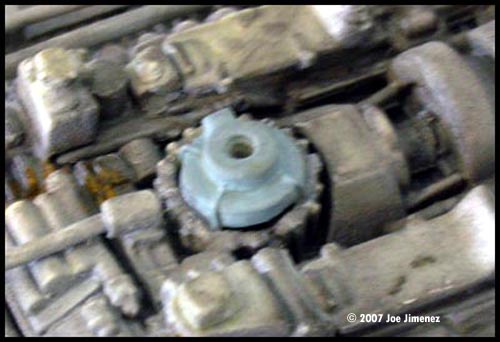
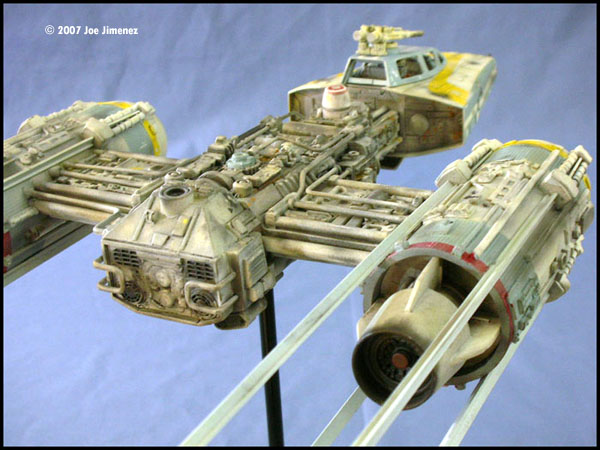
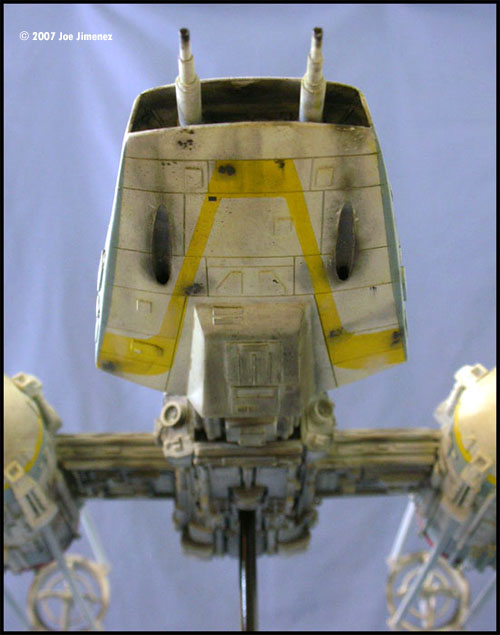
The wait was finally over in 2006! Sci-fi modelers were once again given a chance to add this awesome ship to their model collection. The Kit I am very happy with the kit but I did notice some parts had slightly more air bubbles than other Blue Moon offerings I've purchased. One of my engines was badly damaged but a replacement piece was quickly delivered demonstrating once again the great customer service over at SSM. Aside from air bubbles, this model is a charm highlighted further by an inviting level of complexity. Editor's Note: Joe received one of the first batch of casts of this kit. Subsequent batxches were produced by a different caster. I laid all the parts out for inspection and began to toss aside pieces that I would scratch-build later. The flash and mold lines were then cleaned up. Before moving on I re-read a few build-ups pertaining to the subject by some of the most talented modelers online. Tony Agustin's The Making of: “The Last Mission of Gold Flight”served as a guide for in-depth cleanup and modifications. Lasse Henning's and Rafael Mateo's scratch-built Y-Wings were also used for support and inspiration. Mid-Section The five fuselage pieces took some work to fit right. For example, the flat end of the large aft fuselage piece was so uneven that the rear maintenance panel sat at a hard angle during dry fitting. To level things out, I used shims cut out of sheet plastic and filled in all gaps with Aves Apoxy Sculpt. One quick mod consisted of removing the molded-on tubing on the aft end of the pylons and replacing them with aluminum tubing of equal or similar size. Not a drastic improvement but it beat having to sand the mold lines on that area of the model. The forward end of the fuselage received a length of threaded rod to strengthen the connection between the rest of the mid-section assembly and the cockpit. Afterwards, I spray painted primer on the assembled mid-section and looked for additional air bubbles and mold lines that I may have overlooked. Oh, and the pylons received heat treatment since they were sagging just a little. This next tiny mod came late in the build. I wasn't digging the wheel-looking greeblie in the center of the fuselage so I scratch-built a detail from one of the Y-Wings in Episode IV - A New Hope. It's just one of those little things that greatly improved the look of the model for me. Engines The domed engine is, in my opinion, the focal point of the model. Unfortunately though, the strut detail on this kit suffered a bit during casting. I felt it would be easier to reconstruct this detail rather than try and clean it up. I began by cutting out the resin struts with a hobby saw. Any left over resin was carefully scraped out with my Exacto. The struts on the filming miniatures taper in but I went ahead and used straight aluminum tubing. Each piece was measured, cut and prepared for the monotonous task that lay ahead. The rings on each strut were individually made from very thin floral wire. I would wrap the wire around a piece of the same tubing and cut each ring out with wire cutters. The end of my Exacto knife handle worked great for flattening out the rings which were then glued in place on the struts. The process really didn't take too long but it did test my patience once or twice...those tiny rings love to get lost! To further simulate the look of the movie models, I installed small strips of t-stock in between the strut boxes. I didn't have any extra t-stock at the time so I made my own using sheet styrene and "The Chopper II"...which really makes life easier! Anyway, the completed struts were then glued in place. There you have it! This makes this area look cleaner! Attaching The Engines The engines were pinned for added strength. The seams were covered with flat and patterned plastic bits which worked out because they easily blend in with the greeblies. While here, I added detail to the bare looking leading edges of the pylons. Prior to engine installation, I drilled holes into the fuselage and engines and inserted measured lengths of tubing. Bits of styrene were then glued underneath the tubes. To finish things off, I added two thin, notched strips of styrene over the tubes. This helps to make things look busier in this area. Cockpit As I prepared to work on the cockpit I realized that the bottom was too flat. I planned on modifying it but decided to scratch-build a new one instead. I chose to model mine after Bill George's Y-Wing which was used on Return of the Jedi. I've never seen a Y-Wing model on the internet built to represent this ship so I was happy that mine would be unique in that regard. Surprisingly, scratch-building a new cockpit was an easy task. I took a piece of balsa wood and roughed out the shape. Once satisfied with the shape, I wrapped the cockpit with styrene stock and super glue. Aves Sculpt was then used to seal the seams. Any other imperfections were covered with spot putty. The panel lines were pencil drawn first and carefully scribed out. The best advice here is to work slow and use Dymo tape! The torpedo tubes were also drawn onto the hull. I drilled holes around the perimeter and used a sharp blade to cut the unwanted plastic out. A bit of Aves Sculpt was used to shape the tubes and I finished by drilling holes at the aft end of shafts. The simple interior was scratch-built as well. Using reference shots of the life-sized Y-Wing and Bill George's ship, it quickly took shape. Once done with that, I took the time to add all the bits and pieces of styrene detail to the hull. It's funny how these simple additions positively affect the whole project! Following that, I built new and in-scale forward cannons using aluminum tubing. The canopy provided is a bit too narrow and tall so I cut the sides off and angled them outward a bit to give it a slightly flatter appearance. I also felt the need to expand the aft end of the canopy by using plastic card. The barrels of the cannons on top were replaced with aluminum tubing. Several found and scratch-built bits were then used to detail the canopy and guns. Exhaust Nozzles & Thrust Vectors I didn't want to overdo the detail on the exhaust nozzles so I kept it simple. The recesses seemed plain so I inserted different size tube and wire along with a kit-bashed part. Nothing major but worth noting. On the other hand, the thin inner rings on the vectoring vanes needed much more attention. Rather than clean them up I replaced them instead with kit-bashed pieces. I used a rim piece from the AMT Fruehauf Tractor Tailor and simply sanded the part down until I got the perfect sized ring. I carefully assembled everything together and proceeded to attach the t-bars. The kit supplied bars were scrapped and replaced with 1/8" T-bar for scale effect. The ends of the bars were pinned with very thin wire and attached to the vector rings. Pilot & R5 DroidThe pilot was badly formed but I used it anyway. Eventually I'll get around to modifying some 1/48 military pilot figures but for now this little guy will work. Floquil orange covered the flight suit and various acrylics were used to pick out the details. The kit came with an R2 droid head but I needed an R5. I found a mechanical pencil with the perfect diameter for the body. The head was a dowel turned on my Craftsman rotary tool and the legs were carved from balsa wood. Finally, it was painted, dressed up with some kit supplied decals and then weathered. Painting & Weathering Painting started with a grey primer coat followed by a coat of white primer. The yellow, red and gray markings involved quite a bit of masking. I made the mistake of using a spray can for the yellow. It's a good color but left a slightly thick coat. Although I was mimicking main details from B. George's Y-Wing, I decided to give the mid fuselage a slightly different tone. I really don't like the copper tubing and felt more comfortable with a solid color instead. I ordered a sheet of dry transfers off of eBay to create the little black squares and other detail but unfortunately I purchased a cheap set which peeled and didn't transfer well. I had to resort to masking and airbrushing. Pretty simple but slightly time-consuming. The outlined squares on the canopy were modified decals from the kit supplied decal sheet. Weathering was accomplished over a long period of time until I found the look I wanted. This consisted of a slew of techniques including airbrushed streaks, oil burn marks, pastels for blending and sludging, acrylic washes and a yellow filter to knock out some of the brightness in the white paint. My goal was to give a highly distressed appearance. I tried to follow advice of master modeler Mig Jimenez, which I found at missing-lynx.com. This dude knows his weathering! |
|
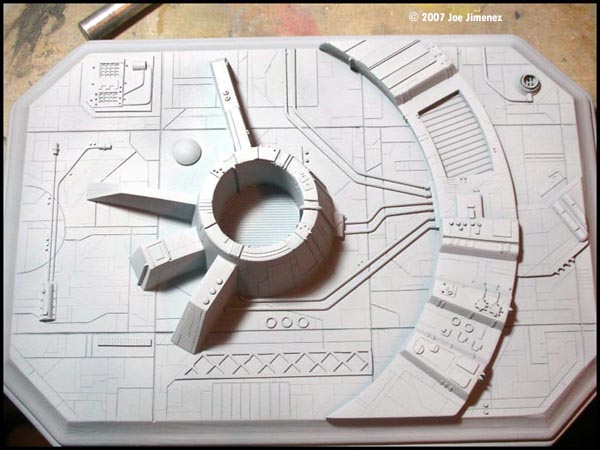
Mounting The Model I usually use brass rod to mount my models but I wanted something that would allow me to remove them from the base if I so desired. After looking around the hardware store I decided on using threaded rod, aluminum tubing and these little threaded mounts. One of those mounts was chopped up and the threaded section inserted into a drilled hole in the model, permanently held in place with epoxy glue. The other intact mount was attached to the base. After screwing in the threaded rod, I placed an appropriately measured section of aluminum tubing over the rod to hide the threads. Next, I simply screwed the model onto the rod and adjusted it until it was snug and facing in the direction I wanted. Now I can remove the models to fly around the room if I...uh, yeah... Another thing I wanted was a detailed base instead of just a painted wooden plaque. I settled on a Death Star (DS) theme. Instead of an accurate prop, I took details I liked from some DS tile references photos and meshed them together. I started with a wooden plaque which was laminated with plastic 'for sale' signs. Plastic card was also used for most of the structures. Before finishing, the entire base was scribed and detailed with plastic bits, Plastruct shapes, styrene tubing and metal odd-and-end pieces. The entire DS base was covered with a few coats of Plasti-kote gray primer followed by a gray-white mixture as a base color. I wanted to simulate the Y-Wing bring about 800 feet off the surface so I gave it just a touch of weathering using gray pastels. Finally, a coat of Model Master Acryl Flat Clear marked the end of this build! Finshed Well, there it is! There was a lot of downtime during the building of this model and I'm happy to finally see it done. With Fine Molds breaking into the 1/48 scale world with there up-coming X-Wing, I'm hoping a Y-Wing isn't far behind. Then I'll be able to have an Episode IV version to go along with this model. Hope you've enjoyed it, thanks for reading! |
![]()
This page copyright © 2007 Starship Modeler™. First posted on 24 October 2007.
![[Please click to enlarge]](jj-ywing_001.jpg)
![[Please click to enlarge]](jj-ywing_004.jpg)
![[Please click to enlarge]](jj-ywing_011.jpg)
![[Please click to enlarge]](jj-ywing_014a.jpg)


![[Please click to enlarge]](jj-ywing_024.jpg)
![[Please click to enlarge]](jj-ywing_027.jpg)
![[Please click to enlarge]](jj-ywing_f004.jpg)
![[Please click to enlarge]](jj-ywing_f007.jpg)