
By Erin Lantz - images & text © 2002
|
![[Cl;ick to enlarge]](el_gungan_Finished1.JPG) I really liked the Bongo sequence in the movie and hoped it would be kitted. Alas, none were to be found around here. Local shops had every other kit from the movie, but not the one I wanted! After asking around, Jay Chladek was kind enough to acquire it for me dirt cheap and sold it to me at Wonderfest last year. |
|
Image: Cockpit decals |
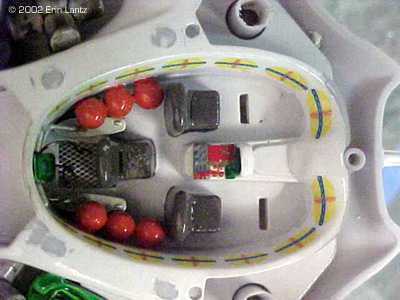
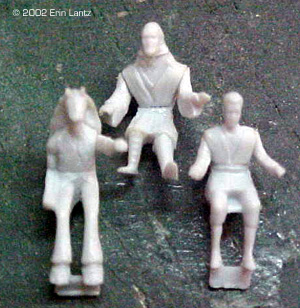
Upon opening the box I was surprised to find very few parts. I expected a larger kit, I mean the box DID say 1/48th scale! Oh well, this is what they gave us so be happy to have it right? I decided to add some additional flotsam to the cargo areas and reposition the figures to more realistic poses. The cargo netting was also missing and would have to be added.
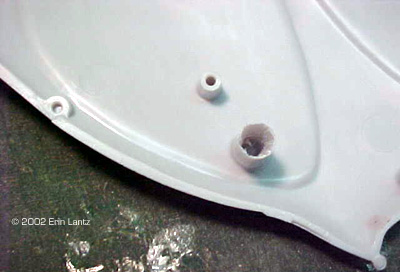
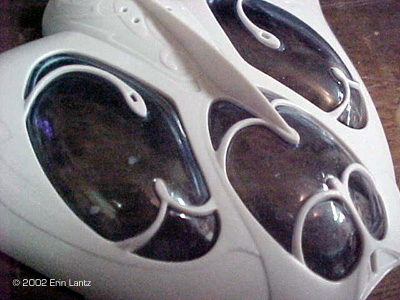
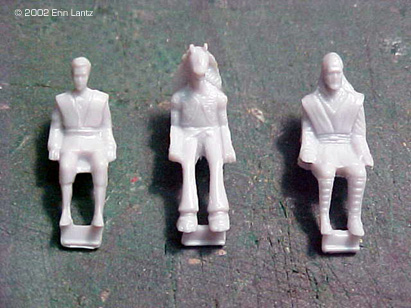
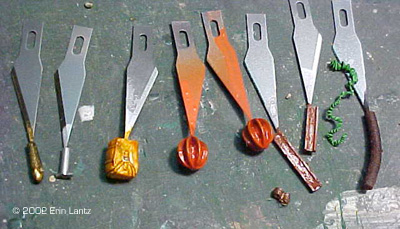
Assembly Assembly began with taking the parts and dry fitting all of them to check the fit of the parts. ERTL kits can be stubborn in this area, so doing this step really helped when gluing later, I knew where all the trouble spots were going to be. After the dry fit, I cleaned out the major snap fit alignment holes so that the parts would slide instead of locking, mainly to make the parts come together better. Flash clean up was annoying, this kit had little flecks sticking out all over the place! All edges were trued with an Xacto and mold lines removed. Next I coated the cockpit "glass" with several thick layers of MicroMask. This stuff is great for masking, but make sure you put it on thick. Previous experience has showed me that if you only put on one or two coats, you will never get it off without scratching the part underneath. I applied 5 layers, holding the part and rotating it slowly while drying with a hairdryer on low heat. Rotating the part allows the masking to dry evenly across the part, and the hairdryer dries the surface of the wet masking so that it stays where you put it. It takes some patience, but it really isn't hard to get it on thick and evenly, and that is vital to it working in the way I useed it on this kit. Next up to assemble was the cockpit tub. The walls of the tub are molded in one piece that just drops into slots in the floor. Fit is good, but it will have to be clamped tightly until dry or gaps will show in some areas. During assembly I decided that Qui Gon Jinn's seat was too far back, so it was cut out and moved forward. Some details on the back and side walls were missing, so I dug out the scrap box. What I assume to be air tanks were made by gluing bb's to the walls on each side. The hole in the floor left by QuiGon's seat was filled with a photoetched metal drain, and various helicopter parts were utilized to detail the back wall and the center console to roughly approximate the detail seen in the Cutaway book. Various other parts from the spares box were also test fitted in the side compartments at this time. Parts from the Anakin's Pod kit are in there as tubing, some resin curly shavings as seaweed, whiskers from the DSV kit, and a 1/35th Iraqi backpack, as well as the kit supplied cargo. Once all was dry, the whole cockpit was painted with Krylon White Primer and once dry was clear gloss coated. Decals for the displays were then added. The first disc in the decal design had to be cut so that it could be positioned separately from the others. It just didn't look right the way it was supposed to go down, the curve was too big for the decal to make it around. The figures as included in the kit looked WAY too stiff for me. I cut their arms off and repositioned them to more natural-looking poses, and in Qui Gon Jinn's case his legs were cut and repositioned so that he was leaning forward against the front seats. All the gaps were sealed up with CA and the figures were painted more or less to kit suggested colors. The flotsam was all painted at this time as well. Once dry it was all glued in permanently. The final step towards cockpit completion came in the addition of the cargo bay netting. My wife supplied the necessary bath netting for this. I cut two ovals slightly bigger than the bays from the netting, sprayed it all black, then carefully glued it to the outside edges of the cockpit bays with CA, stretching it as I went. Now that the cockpit was finished, hull work began. The canopy glass was glued with Ambroid to the upper hull with care not to rip or mess up the Micro Mask applied earlier. This part was clamped tightly to dry overnight to ensure that it was dried hard . Next the cockpit was glued hard into the lower hull and clamped tightly as well. This kit needs lots of clamps and clothespins, so get them ready if you build one! The little light scoops in the outside edges of the hull were also glued in and left to dry before proceeding. This eased the hull assembly; they kept popping out during dry fit! |
|
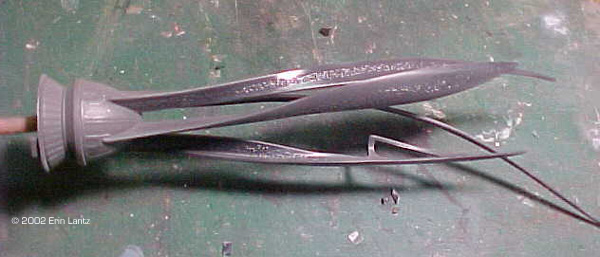
Once top and bottom halves were dried hard, they were joined and glued with Ambroid. Clamping must be done carefully so as to not crush the hull, so use weak clamps here. This is part of the reason I cleaned out the holes earlier; it made final assembly easier. It's bad enough that the cockpit tub holds the hull halves apart slightly! Careful clamping left gaps though. Once dry, the seams were addressed with Bondo Spot Putty, and then the whole kit was lightly sanded with fine steel wool.
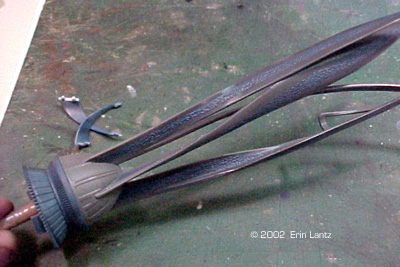
Next I turned to the tail section. The fin bases do NOT want to fit correctly! After fooling around with them for what seemed like forever, I finally just jammed them in there and glued them with CA, taking care to get them straight. The snap fit features were in the way and there really was no good way to get around them here, so I used brute force and CA. |
|
|
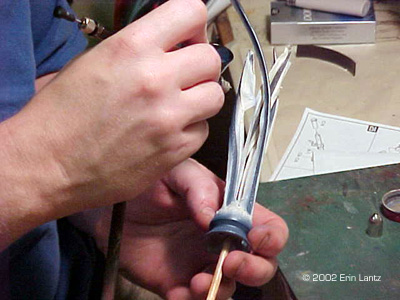
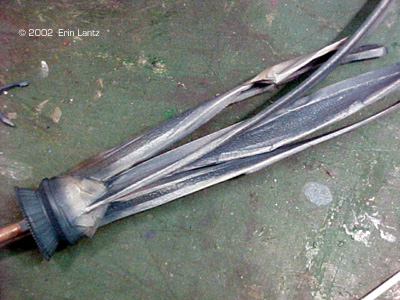
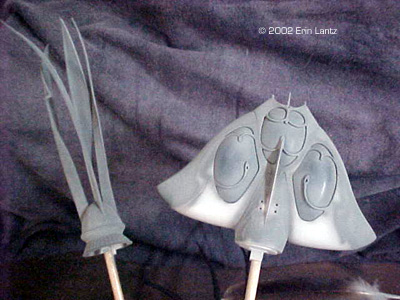
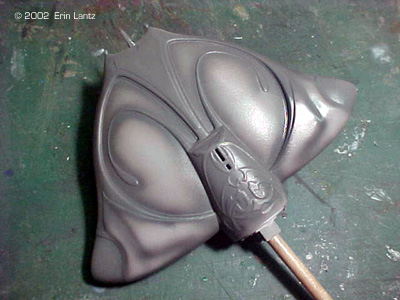
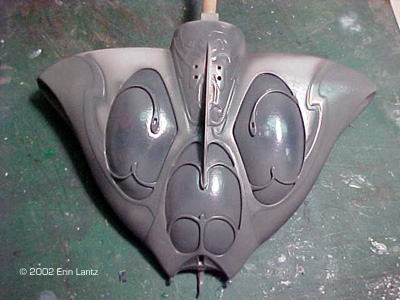
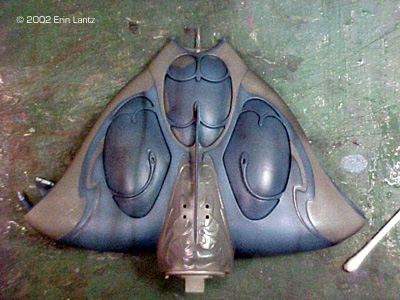
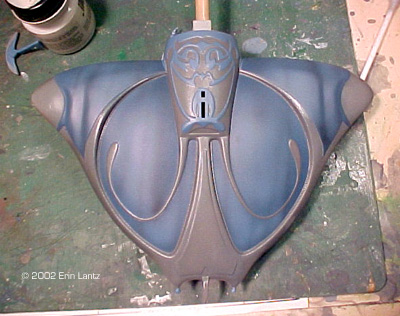
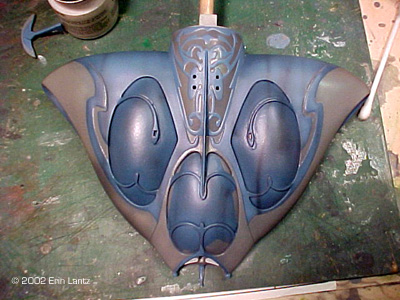
Painting The hull and the tail were now glued to a wooden dowel to facilitate holding during painting. First step in painting was to airbrush Testors Model Master (TMM) Swartzgrau RLM 66 into all of the recessed detail. After setting for a few minutes, a darkened version of this color was applied to the deeper recesses. I also airbrushed some of this color over areas of the open areas of gray to add some staining effects that go from front to back. Once dry, all of it was brought together by an overall misting of TMM Light Gray, hitting the highlights harder with paint to produce lighter areas (fading). The tail was done the same way except a base coat of Flat Black was sprayed over the centers of the fins for more contrast when done. Now, here's where the fun begins. Like masking? No? Well, it isn't as bad as it looks, but it does take some patience. The details edges of the designs on the hull are very soft, making cutting tape down the grooves very difficult. What I did was to put on the masking tape loosely, then burnish the seam between sections only, then cut the seam, remove the tape not needed, then burnish down the rest of the masking. The center rear tubular section of the hull was completely masked out and handpainted later, that design is just too intricate for tape IMHO. The tail fins were also masked as to show only the roughened areas down their centers. Once all of the grey areas were masked out, Testors Model Master (TMM) Dunkelblau RLM 24 was darkened a little with Black and sprayed into the recesses and again certain areas were sprayed to produce a stained look. Next, straight RLM 24 was sprayed into the highlight areas. The tail fins were also coated with this color. Next I thinned out some black and carefully misted a few dirty stains down the hull in the direction of water travel. Once dry I removed the masking and handpainted the rear tubular area details with RLM 24, and touched up problems from masking mistakes. Once dry, the hull was clear coated with acrylic gloss and left in a dust free area to dry. |
Painting the Tail Image: The base coat for the fins Image: Fins with grey coat Image: Spraying the darker blue Image: Adding the Lighter blue Image: Tail mostly painted Image: Masking the raised detail Image: Wiping detail with mineral spirits Painting the Hull Image: The first grey Image: Top view Image: Adding the shadows Image: Finished with the grey Image: Blue sprayed and streaks added (bottom) ... Image: ... and top Image: Finished hull (bottom) ... Image: ... and top |
|
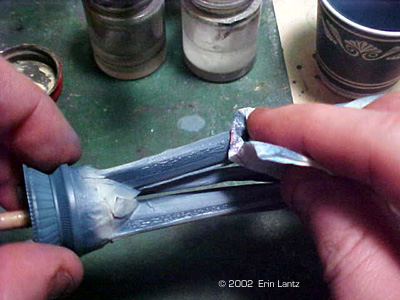
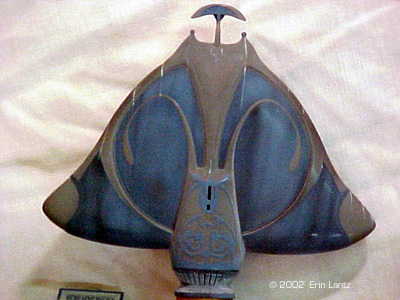
The tail fins were left masked after the application of the blue. Using a napkin dampened with mineral spirits, I removed the blue from the raised detail on the fins to leave the earlier applied grey that was sealed with acrylic clear. Once done, it was again sealed with acrylic clear. After allowing the clear to dry on the hull and tail for about a week, I next masked the lights in the nose, the "sensors", and the glowing bulbs in the hull sides. These areas were first painted white, then pink was added to the "sensors" areas only. The tail cone was painted in Tamiya Gold, then the ribs on it were painted in Testors Brass. The blue sections of the tail cone assembly were then drybrushed with Light Grey to bring out the details. At this time I also added some Light Gray streaks from the front to back, allowing the color to fade out towards the rear to simulate strikes that removed the blue coloring. Now that painting was done, the tail was added to the hull and the whole ship was coated with Humbrol Matte to flatten it all out. I almost left it glossy, it looked good, but I have heard some people commenting on glossy models as being unrealistic. Either way it looks good. Maybe I shoulda built two? Finishing Touches The base was painted in the same colors and fashion as the hull. The nameplate was painted in the same fashion as the tail fins, only reversing the colors to blue base with gray over top of that to produce blue letters in the napkin wiping step. The key is making sure the acrylic clear dries so that you don't remove the base color. If done right it looks as if all that detail was handpainted, nice and sharp edges. The last step is to remove the Micro Mask from the "glass". Using a steel surgical probe, I ran the tip along the gap between the hull and the masked area, dragging it into the rubberized masking to get it to bubble up. Once a bubble was formed I used an xacto to get an edge raised up to the point that it could be pulled by hand. I carefully pulled it all off of the windshield bubbles until clean. Overall Impressions Once finished this little kit is quite cool looking. I had wished it to be bigger, but the size is ok, especially with my dwindling shelf space! I still say it looks Minbari in origin, and may do a Minbari vessel using another kit if I can find one. If you see this kit in the bargain stores, pick it up. Its one of the nicer of the ERTL kits from Episode One, and I highly recommend it to the average modeler who has a few of their kits under his or her belt. |
|
![]()
This page copyright © 2002 Starship Modeler™. Last updated on 17 April 2002.
![[Click to enlarge]](el_gungan_Finished2.JPG)
![[Click to enlarge]](el_gungan_Finished3.JPG)
![[Click to enlarge]](el_gungan_Finsihed4.JPG)
![[Click to enlarge]](el_gungan_Finished5.JPG)
![[Click to enlarge]](el_gungan_Finished6.jpg)
![[Click to enlarge]](el_gungan_CockpitDetailing.JPG)
![[Click to enlarge]](el_gungan_CockpitPaint.JPG)