
By Brian Miller - images & text © 2007
|
![[Please click to enlarge]](bm_mf_0003.jpg) The ERTL kit of the Falcon has a nearly legendary status for the amount of work that can be put into it to make it a worthy model of one of the most famous spaceships of all time. Many modelers have performed epic feats to convert the kit into spectacular displays; the shortcoming of the model are numerous and take patience, as well as extensive refence material, to correct. When Fine Molds released their version of the kit, it seemed to make the ERTL kit near worthless. |
|
Image: Inspiration Image: From the front Image: Details
Image: Closer look Image: Completed mandibles Image: Another look Image: Port side docking port Image: Finished grilles Image: Cockpit and surroundings Image: Underneath the engine Image: Lower hull Image: Upper deck details |
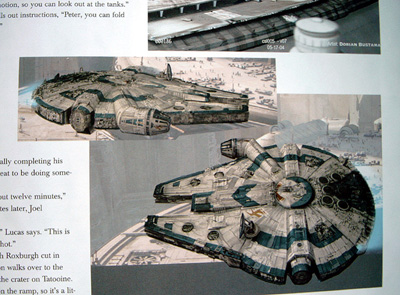
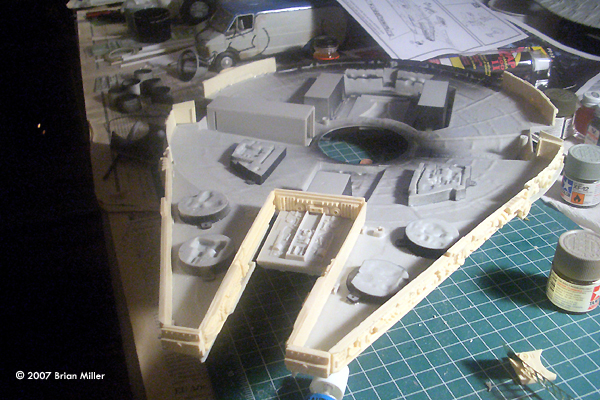
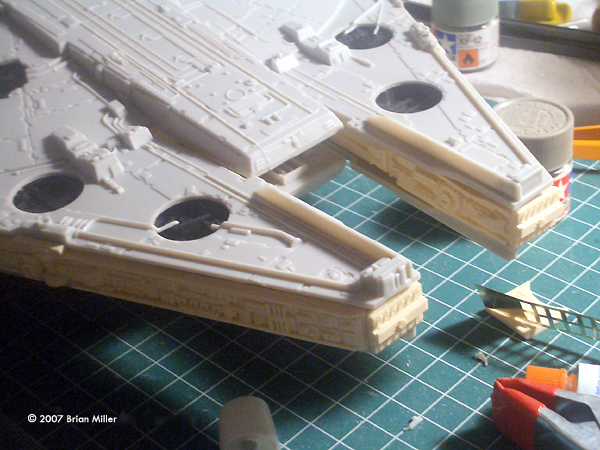
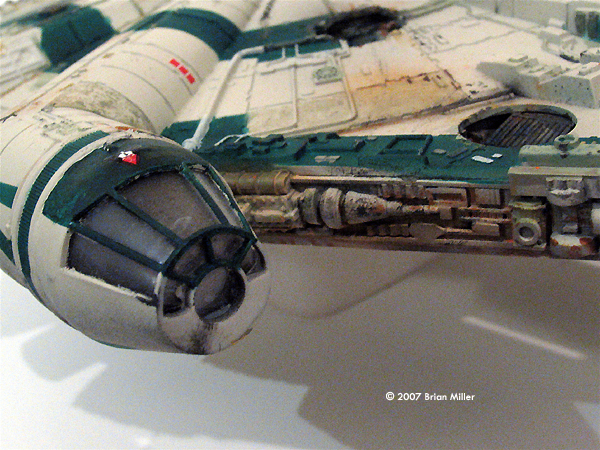
While not perfect (and I don't think any kit could ever satisfy everybody, since the movie versions featured so many different arrays of details), the Fine Molds model is close enough to instantly become the definitive version of the 'hunk of junk' - and made many modelers wonder what good all these old ERTL kits were anymore. Eventually, I chanced upon a graphic from a book showing a YT-1300 in alternate livery and I decided this would be a perfect use for my ERTL kit, as well as providing practice so I can do my FMMF justice. Getting Started Of course, the first step was to decide how to approach the inaccuracies of the kit. The most bothersome, to me, was the excessively hgih sidewalls. I breifly toyed with the idea of keeping them, and since the ship I was planning was not the Falcon specifically, I could invent a 'high-cube' alternate with greater interior volume. However, it would take some additional greebly work, because the sidewall are much plainer than can be seen in the movies. However when Blue Moon released a set of accurizing sidewalls, the choice was clear. The resin aftermarket pieces, mastered by Alfred Wong, are nice and crisp and provide an good visual representation of the movie models, as well as a better grill piece for the rear. I also obtained the Grill Upgrades from Millenia Models International, which includes nice photo etch pieces and 'fans' to go below them on the back deck. Construction After standard prep work of all the pieces and black primer to the major pieces to provide preshading, I installed the mechanical recess details into the hulls. The alignment lugs were to be removed so the hull haves would fit closer together. I also took the precaution of drilling and sanding out the engine grills for the MMI pieces prior to installing the sidewalls, so I wouldn't have to handle the hulls too much after the sides are installed. Care needs to be taken with the sides to ensure that they are as perpendicular to the hull as possible, and some adjustment is necessary where the sidewalls fit together. I used a flexible epoxy glue on the sidewalls to ensure excellent adhesion over any gaps, as well as being able to stand up to handling during construction. Since the original alignment lugs are removed, the new sidewalls are providing the only support and attachment between the hull halves. The MMI grills are inserted from below, and taking a bit of time to sand the openings perfectly round will make it easier to fit and glue them. If you get them tight enough, you can slide them into place and then 'seep' some super glue into the joint to adhere them cleanly. The sidewalls need to be carefully aligned as you put the hull halves together. I fitted the walls all the way around and taped the hulls together, then went around raising portions of the hulls to be able to get glue into the gap, then clamped the halves together. The ERTL kit reportedly has some fit issues, but with the new sidewalls, much of it seems to disappear. And primary assembly was done. I still haven't decided whether I want the landing gear to be extended or not; The ERTL kit allows you to remove the gear and hinge the doors, so I can make the decision later. (Shameless promotion: Blue Moon has a corrected set of landing gear - plus the extra bays seen in ESB and RotJ - Ed.) The sidewall upgrade also includes new panels for the engine, in two pieces; a translucent ribbed resin panel, very flexible; and a gridded photo etch piece to go over it. I thought I'd try an alternate lighting approach, and I tried to use Glow Inc.'s blue glow-in-the-dark paint on the ribbed piece, but the glow paint was excessively thick and completely concealed the detail. Furthermore, when concealed by the metal and recessed in the back of theship, the paint receives very little light, and so the glow effect is negligible. |
|
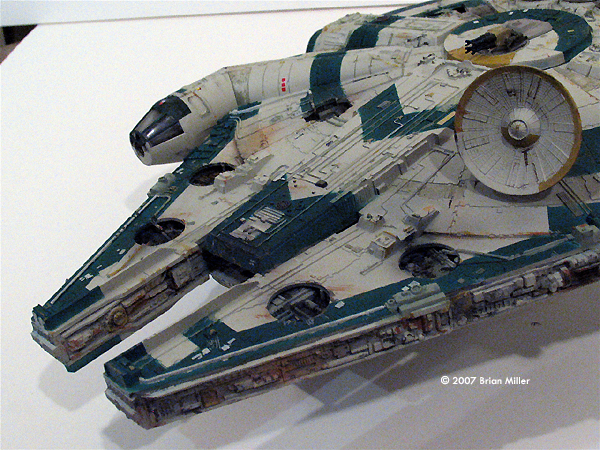
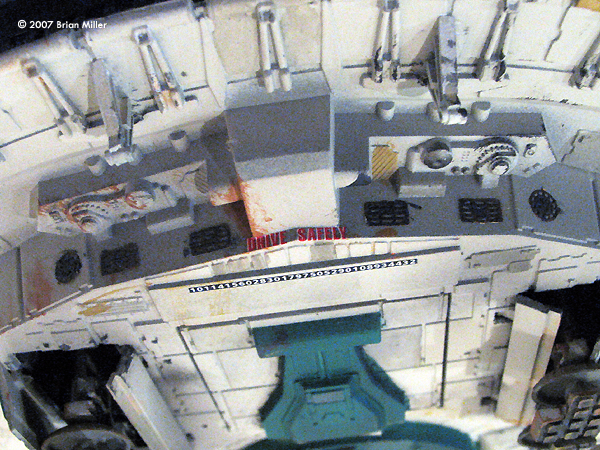
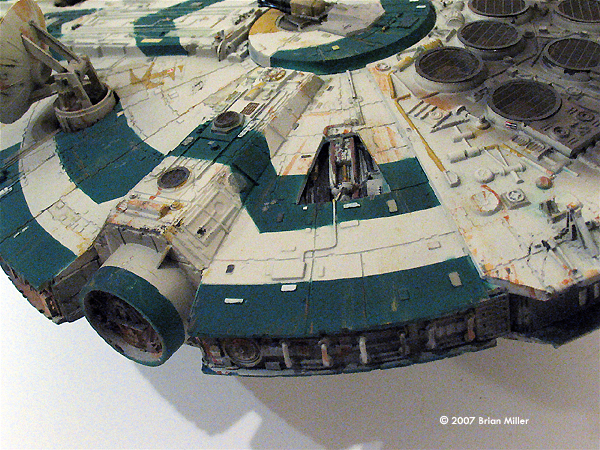
Painting & Weathering I used Light Camo Gray rattle can to paint the overall ship, then masked it for the blue green livery. The picture I was working from has some distortion in it, so the painting pattern does not quite fit the real model the way it does in the photo. I had to adjust it quite a bit, but I think it came out with the right look. I first airbrushed PollyScale dark Green, then a light dusting of Testor's Cobalt Blue to get as close to the shade as I could. After removing the masking, I hand painted-paneling variations, washes, and details, and applied Tamiya weather powders, both from the bottles and from the pads. The Tamiya powders are great and I am a convert. The molded hull detailing was difficult to paint in place, and as has been noted, the detail is relatively light and inaccurate. After highlighting, though, it looks pretty good on this model. The fans even got several layers and colors of detail paints before the PE grills were applied. The PE is very well done, and snips off with a very sharp knife. The grills are applied, then an additional ring to build up a lip around the edge. It took a bit of squinting and eyeballing to align the grill directions. After installing, the fans below are still visible, creating an excellent depth to the model. I had originally intended to keep the ship pretty clean, anticipating that the skipper would be able to keep it a bit more well-kept than that smuggler. But once I hit the grill areas with a sooty airbrush spray, it got to be kind of difficult to hold back on the weathering. The result is a pretty healthy covering of oil, dirt, rust, and mud. The small JBOT decal sheet provided the finishing touches. A YT 1300 isn't complete until it has those five Champion decals. It should also be noted that the 'Drive safely' decal that JBOT reproduces from the original ship does not have a proper corresponding location on the ERTL kit. The rear underside area is not configured to fit the decal, and it has to be modified to fit in the area. Of course, it can be put anywhere you might want. Conclusions The inaccuracies in proportion of the ERTL kit are largely minimized by the new sidewalls, which also add an intense level of detail that offsets the lighter detailing on the hulls. The cockpit and tube are still on the small side, but it's much less noticeable. Overall, the use of these aftermarket pieces transforms the kit from the vaguely Falcon -like ship that we built in the 1970's into a quite reasonable and presentable facsimile, especially if you want to explore some alternate versions. I enthusiastically recommend these aftermarket pieces to anyone with an ERTL unbuilt, or if you can't afford the Fine Molds version. Adding them makes the ERTL kit respectable and The result is a model that nicely represents the famous Millenium Falcon to all but the most obsessive (which is probably most of the SSM readership, now that I think about it). After finishing this, I also feel like I have a good handle on approaching the FMMF. The angle of the mandibles, however, is still up to the modeler. |
![]()
This page copyright © 2007 Starship Modeler™. First posted on 26 September 2007.
![[Please click to enlarge]](bm_mf_1084.jpg)
![[Please click to enlarge]](bm_mf_1088.jpg)
![[Please click to enlarge]](bm_mf_1089.jpg)
![[Please click to enlarge]](bm_mf_0006.jpg)
![[v]](bm_mf_0014.jpg)