
By Vince Hoffman - images & text © 2000
|
![[Boxtop]](vh_x38_boxtop.jpg) With all of the new technology being aquired by the work done on the new International Space Station, it seems a little off-note for NASA to be drawing from 70s era technology to produce what will become the newest cutting-edge spacecraft in the world's inventory. |
|
Click on any image to se a larger version
|
But with NASA's "cheaper, faster, better" mantra, this reversion to older, tested technology is probably the best way to go.
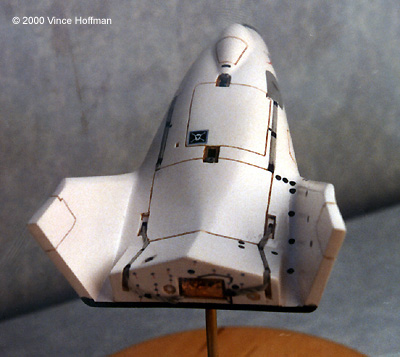
The Kit The kit, produced by Muroc Models, is very accurate with clean, crisp castings which are completely devoid of air bubbles, mis-aligned molds and other common resin casting faux pas. The decal sheet included with the kit represent V131, the first flying test vehicle. The kit contains one wire, 2 plastic and 9 cast resin parts, most of which make up the complicated landing skid assemblies. The parachute risers and foreward riser attachment farings must be provided by the modeler. A full color 3-view painting and decal guide accompanies the single page text-only instructions. The kit cost $23.00 including shipping (the price has risen due to shipping costs, as of 3/1/2001) and I received it within a week of placing my order. ConstructionI decided from the beginning I wanted to display the model with the landing skids extended - with all of the beautiful castings, I could not let them go to waste. After carefully cleaning the parts and straightening the two slightly warped main gear struts, all of the parts were washed to remove casting residue. The model has very finely scribed panel lines around the control surfaces and various hatches. With such care put into sculpting the master, I was quite displeased to find the two hatches on either side of the cabin to be rather crude scratches, requiring a lot of very careful re-scribing with a sharp dental pick. Being just about the only flaw I found in the kit, I was content with taking the time to fix the hatches. With everything now cleaned, all of the parts, including the inside of the gear bays, were painted with several light coats of gloss white and left to dry. After one day, the gear struts and skids were temporarily tack glued into the fuselage in the closed position. With this minor bit of assembly out of the way, the fuselage was ready for black paint. The black areas were masked off with low-tack tape and painted. Minor touch-ups to the black were required around the trailing edges. After the black paint dried, the landing gear struts and skids were removed and the aluminum parts of the gear painted and set aside to dry. At this point, the drogue chute was covered in bronze mylar and glued in place. With the gear parts cut to fit and painted, everything was now assembled in place. Great care must be taken to place the main skids at the correct angle, the box top photos are (unfortunately) the only reference material I could find which shows the gear extended. Because the landing skids are so delicate, the model was now permanently attached to a wood display base. Final Painting and Decals The model was evenly sprayed with clear acrylic gloss and set to dry for several days. To accent the panel lines, artist oil "burnt umber" was thinned with airbrush thinner and applied to all panel lines and the mortar caps in the back. When the wash had several days to dry completely, a paper towel dampened with thinner was used to wipe away the excess wash, leaving behind very thin lines. The parafoil door latches, camera recesses, mortar caps and tan fiberglass areas were now painted according to the instructions and my reference material. |
|
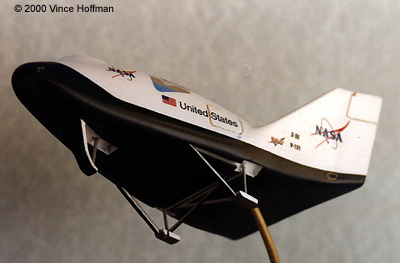
Each decal on the decal sheet must be trimmed close by the image and carefully applied. The decal sheet comes with hundreds of tiny airflow ribbons, the majority of which I chose to leave off greatly reducing my stress level. The model was then given a final gloss acrylic coating to seal the decals. Conclusion I am very satisfied with the quality of this model. It's turned quite a few heads in the airplane sect of my local model club, as well as getting a lot of attention from the sci-fi groupies. I think I have finally found common ground between the two ! |
![]()
This page copyright © 2000 Starship Modeler™. Last updated on 28 February 2001.

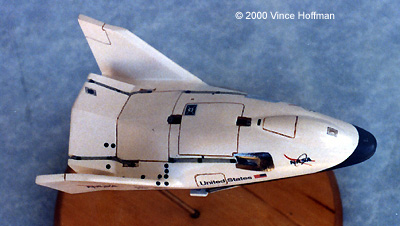


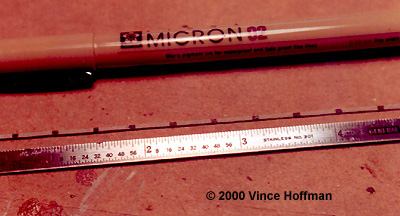
 The final step for the model is making and placing the parafoil riser lines into the riser channels and making the aluminum faring over the forewared riser attachment wells. The risers are made from nylon line, painted and given black stripes with a fine permanent ink pen. The fairings are carefully cut from Bare Metal Foil using the painting and decal guide as a template, then burnished onto the surface over the wells and risers.
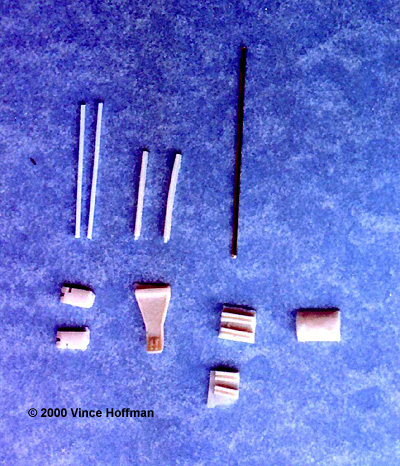