
By Vince Hoffmann - images & text © 2006
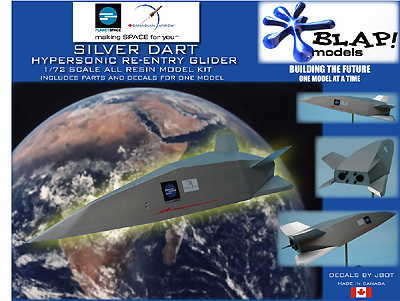
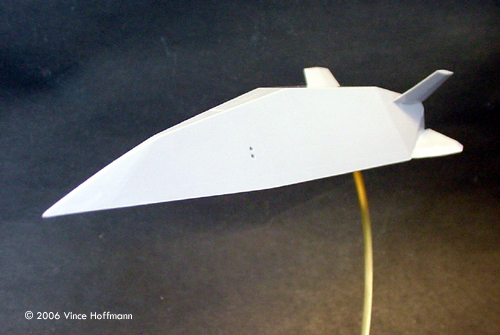
The Silver Dart is a an eight-person suborbital rocket ship derived from experimental aircraft studies in the 1970s which doubles as a hypersonic glider. |
![[Please click to enlarge]](vh_dart_01.jpg) |
|
Image: Box art Image: History and description fills one side of the instruction sheet.... Image: ... and a simple assembly guide the back. Image: Alihnment aids are provided to correctly place the fins Image: Decals Image: Castings are crisp and bibble free Image: Top/left view Image: Rear detail Image: Left/rear Image: Right/front Image: Left/front Image: Another look at the business end Image: From the other side Image: Left/rear view Image: Above/left Image: Above and behind |
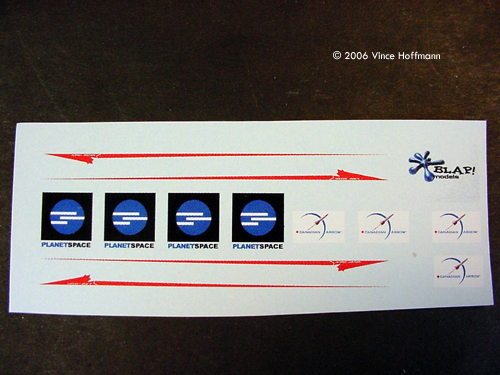
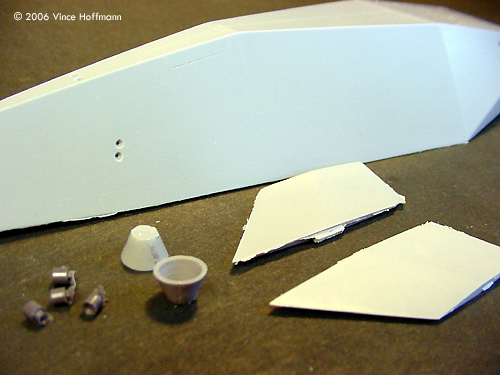
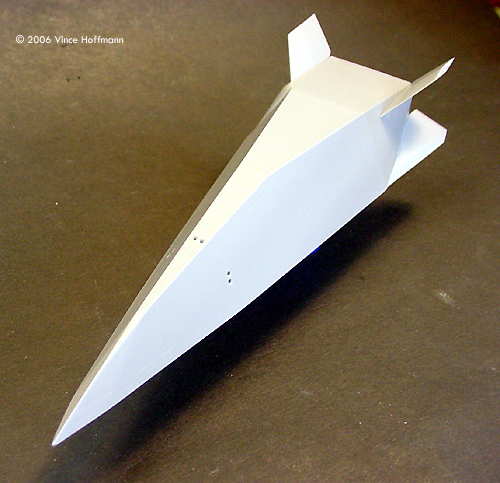
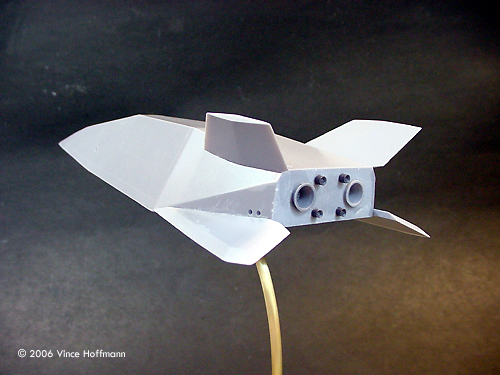
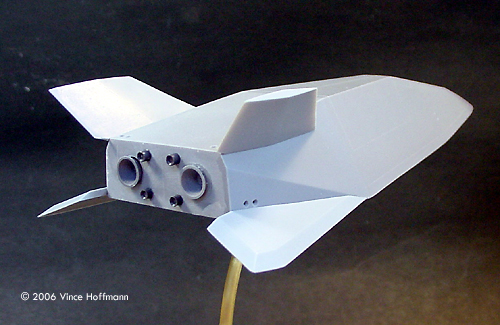
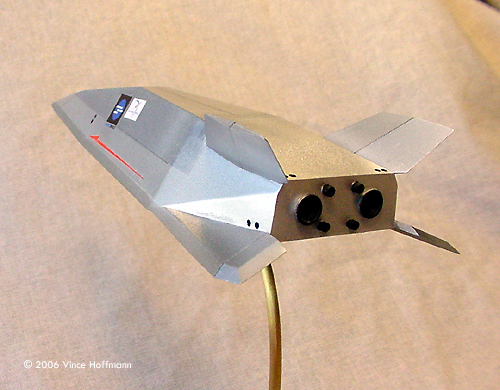
The Canadian firm PlanetSpace, a space tourism group based in London, Ontario, unveiled designs for its Silver Dart spacecraft with hopes of carrying fare-paying passengers into orbit and re-supplying the International Space Station (ISS). The Model Sculpted and cast by Blap Models, this 1:72nd scale all-resin kit consists of 11 parts, instructions and painting guide and decals by JBot. Parts include a solid cast one-piece fuselage, wings and engine nozzles, but lacks landing gear. My sample also lacked a display stand, but kits produced since do include a simple base. All resin parts are beautifully cast with little to no flash and very small pour stubs, which were thoughtfully trimmed back by the manufacturer before packaging. The decal sheet contains twice the number of decals needed for this kit so you always have a backup in case of a decal disaster. Assembly Construction is very straightforward. As usual for me, all parts were scrubbed with Formula 409, my favorite grease-cutting cleaner, rinsed and left to dry overnight. Wings were test fitted and, per the instructions, glued into their appropriate locations on the fuselage. Engine nozzles were located and glued in place last. Within 10 minutes construction was complete and the glue was dry! This model was now ready for some paint. Prior to painting, I drilled a hole into the bottom for the display stand (which will come later) but for now it will have a dowel which will allow me to paint the model without touching its surface with my hands. Painting I broke out the SnJ metalizer for this kit. SnJ is a metallic lacquer based paint intended for airbrushing. It dries very hard and will not come off with masking tape if the surface is prepped properly. Aluminum color makes up the main color of the fuselage with a bit of polishing in between coats to smooth out the paint. A total of 6 light coats of metalizer make for a nice smooth finish. After the basic color had dried for 1 day, the model was masked half way down the sides and Testor's metallic aluminum was airbrushed. The Testor's paint has a different sheen than the SnJ and makes for a nice, if slight, variation on the surface of the model. The final metallic color is Testor's metallic “exhaust”, a sort of metallic grey. The model was masked and the last color sprayed onto the bottom of the vehicle where the heat shield delineation line is scribed onto the model. Panel lines were highlighted with a .005 black drafting pen and a straight edge. Thruster nozzles were painted Testor's “Rubber” (dark grey/black). Then the decals were applied and the model was now done! Since my copy did not come with a display stand, I fashioned one from 1/8” diameter brass rod and a 5” wooden base. Conclusion This model will make a very nice addition to my collection. It is a very easy model kit to build and paint and is recommended for the novice resin kit builder interested in real space subjects, as well as the intermediate builder who wishes to experiment with metallic finishes. The kit is very well engineered and assembles with virtually no effort. Thanks to Blap Models for providing the review kit. Materials Used
|
![[Beauty, eh?]](vh_dart_17.JPG)
![]()
This page copyright © 2006 Starship Modeler™. First posted on 28 August 2006.
![[Please click to enlarge]](vh_dart_02.jpg)
![[]](vh_dart_06.jpg)
![[]](vh_dart_10.jpg)
![[]](vh_dart_15.jpg)