|
By Cliff Erasmus This article originally appeared on Quantum Science Fiction Magazine, and is reprinted with their kind permission.
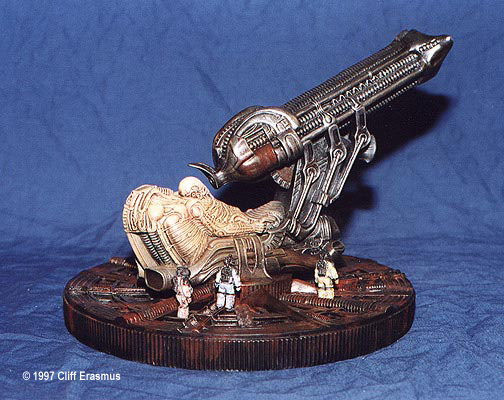
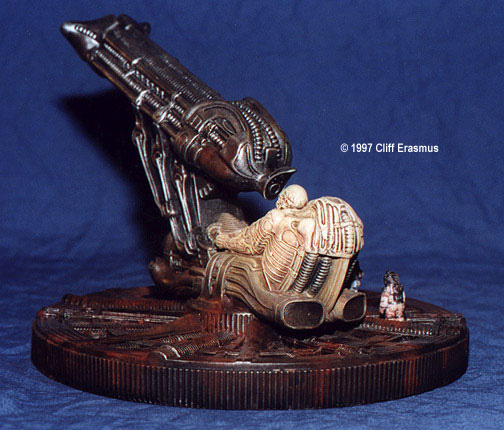
I saw &ALIEN during the summer of 1979. I was fifteen years old and my uncle snuck me in to the then rated 'R' film. To put it mildly, it scarred the crap out of myself as well as half of the theatre. People actually got up and left after the chest-burster blew out from Kane's chest. From that day on ALIEN had become and still is my favorite science fiction film. Some time later that same uncle found the MPC model kit of the alien itself and purchased it for me. I still have that kit today. Then ten years later a small model company by the name of Halcyon released some model kits from the very successful sequel ALIENS®. This was cool. Two years later Halcyon decided to release models from the original film. Well, now I was in seventh heaven. For me the coolest moment in the movie was when Dallas, Lambert and Kane discovered the Space Jockey in the derelict spacecraft. When this kit appeared on shelves I snagged it. Unfortunately the price just about stopped me from buying it. Holy S... t! $ 80.00. The hobby shop clerk saw my dismay and offered to open the kit. Inside was a total of thirteen pieces. Whoopdy Doo! Then at closer inspection, the detail was phenomenal. When I got home I dug out all my books on the movie. "This kit is magnificent", I thought to myself. Well for me the Space Jockey was well worth the eighty bucks. So let's get down to business and start building this kit. As I stated earlier, this kit comes with thirteen pieces, which are all molded in black vinyl. Clean-up and Preparation Clean up of vinyl a kit is fairly straightforward. To cut off the flashing you need a hair dryer and a x-acto knife with a new blade. Heat up the areas to be trimmed. Once the vinyl has softened trim the excess off with your hobby knife. Once all of the flash has been cleaned off, scrutinize the model carefully for small air bubbles from the molding process. My kit was pretty much free of bubbles. The ones that I did find were filled with gap filling superglue. I then filed the area to the same contours on the model. Some extremely tiny bubbles were discovered. Those I left alone. Once painted they completely vanished. Research
1. Giger's Alien H.R. Giger, Morpheus International. 2. The Book of Alien Paul Scanlon & Michael Gross,Simon & Schuster. 3. Starlog #23, O'quinn Studio's Inc. 4. Alien: The Movie Novel Richard J. Anobile, Avon Publishers of Bard. 5. Cinefex #1, Don Shay. By far the best reference books are Giger's Alien and The Book of Alien. Giger's book has a complete section dedicated to the Space Jockey. It shows the development from art to maquette to full size stage set. It has some of the best colour photos ever printed from the film. Assembly
The telescope support struts were molded hollow. So I filled them with resin and sanded to a smooth flat finish. These were then attached to the telescope base. The astronauts and the base were fairly straightforward. The opening in the base floor in which Kane was lowered to the egg chamber was heated up and cut out. If you notice, there are actually two of these on the base. The second one should be opened up as well. Giger's Alien shows that both of these are open to whatever lurks below. Now that this had all been finished, I washed the pieces off with dish soap to remove all mold release agents and oils from my hands. Due to the massive amounts of detail, I let the parts thoroughly dry. Any water trapped will ruin the paint job. Painting &; Techniques
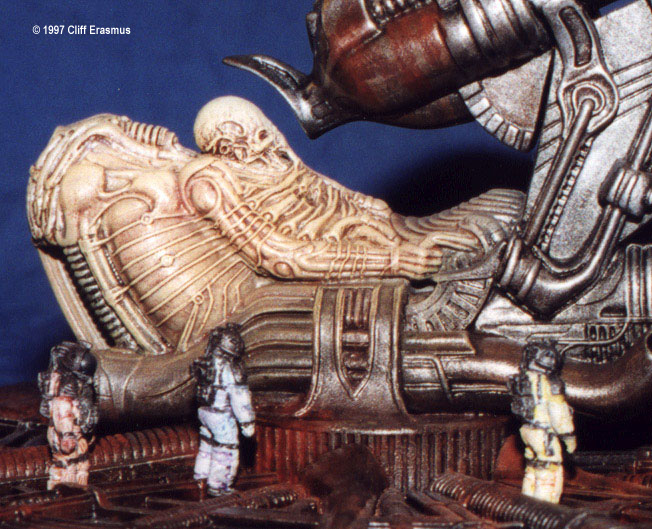
The painting instructions that come with the kit are very accurate. The colours recommended are true to the life-size one that appeared in the film. Use your references to aid in following where the colours start and finish. The painting on the box art is also a very accurate representation. Now that the model has dried from being washed it can be primed. The Jockey and the astronauts were primed white and the base was primed black. I have found that when you're using light or bright colours white primer keeps the colours nice and vivid. |
![]()
This page copyright © 2000 Starship Modeler™. Last updated on 6 March 2000.