
By Malcolm Millard - images & text © 2003
|
![[Click to enlarge]](mm_pulse_Finished.jpg) The Pulse Pistol is the standard sidearm of the Peacekeepers from the Sci-Fi show Farscape. The pistol fires energy bolts derived from a store of Chaken oil in the grip. |
|
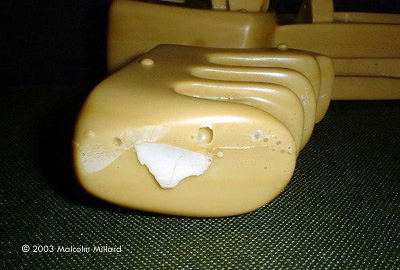
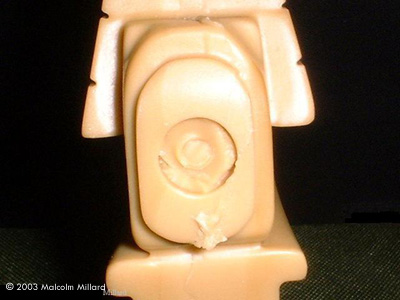
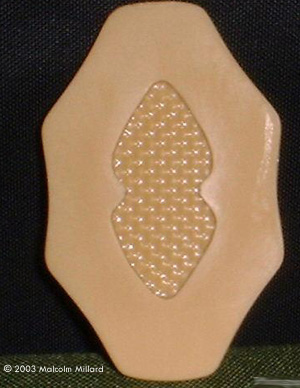
Image: The only real flaws I found where at the base of the pistol grip, and they were easily fixed Image: Business end Image: Comm pin Image: Instructions |
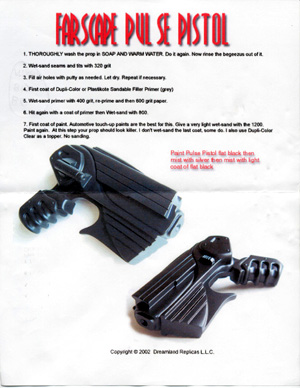
The pistol is reloaded in much the same way as a automatic hand gun is by sliding a new magazine up inside the grip. It's far from a subtle weapon, designed to kill, maim or blow big holes in things - and with a magazine capacity of 600 charges itÆs always ready. The kit itself is comprised of two parts: the main body and the laser sight. A full size communicator pin and a single sheet of instruction were found under the packing. This all arrived in a very sturdy white cardboard box with enough foam peanuts to protect it from any postal abuse. The instructions make for good preparation and painting. The parts themselves are well cast in a good heavy polyurethane resin (not much chance of this falling out of the holster). My copy had only a few air bubbles on the base of the grip next to the pour stub. Clean up was quite easy. A nice idea on the instructions was to give the correct grit grade on the wet & dry paper. There was a slight mold line around the pistol. After sanding most of it disappeared. A small section that was left was easily filled with epoxy putty. Because dry sanding of resin is dangerous I suggest wet sanding - also, the results appear to be better. |
|
My next area to work on was the muzzle, which I drilled out to a depth of 1 inch. I know some people donÆt bother on black weapons, but I think it looks better. At this point I decided to leave the laser sight off and paint the pieces separately. Priming and Painting Another reason I decided to drill the muzzle was to hold the pistol while priming and painting. A piece of dowel secured in my vice acted as a stand, giving me hands free 360░ access. After a good wash to remove any release agent and other contaminants, the pistol was air dried, then slid onto its stand and given a light coat of gray primer ( I like automotive primer, but I know most people have their own favorite, and any primer that will give a good surface bond will do). The pistol was allowed to dry for a couple of days. The laser sight has a series of small holes. I drilled out one, and inserted a small straight pin and attached vice grips to use as a stand while priming. A few words on safety while spraying. Yes I know weÆve all heard it before, so just bear with me. Always spray any kind of toxic chemicals in a well ventilated area, outside if possible. If you canÆt spray outside then ALWAYS wear a protective mask designed to catch small airborne particulates, I use a cartridge type mask with filters designed to catch paint droplets. Another good piece of kit is a pair of safety glasses. They will block any spray that might blow back into your eyes (especially if you spray outside where a gust of wind might blow the spray back into your face). When the primer was fully cured I gave the weapon a very light sand with 0000 grade steel wool. This helped scuff the primer for the top coat. If you wish, you may give it a second coat of primer. I find that one even coat is enough. The paint I choose is Plasti-Kote ōBlack Goldö. This is a gloss black with almost microscopic gold flecks suspended in it. The enclosed painting instructions say to spray with black then mist with silver and to finally mist with a flat black, but I wanted a more unusual finish. After the first coat had been allowed to dry (about 2 days) I scuffed the paint with 0000 steel wool and applied a second coat, again this was allowed to dry for 2 days then I pinned and glued the laser sight in place. The last thing was to paint the inside of the gun barrel flat black. I havenÆt decided if I want to spray flat sealer over the paint to dull the high gloss down, or just leave as is. Conclusion Overall, this is a nice simple kit if thatÆs where your interests lay and a good addition to anyoneÆs ōstar armsö collection. As for the communicator pin IÆve found some gold leaf and when IÆve mastered leafing I intend to gold leaf the pin. Next up - IÆm thinking of making a Peacekeeper thigh holster. |
![]()
This page copyright © 2003 Starship Modeler™. Last updated on 4 September 2003.
![[Click to enlarge]](mm_pulse_Parts.jpg)