
|
By John Klein - images & text © 2015
|
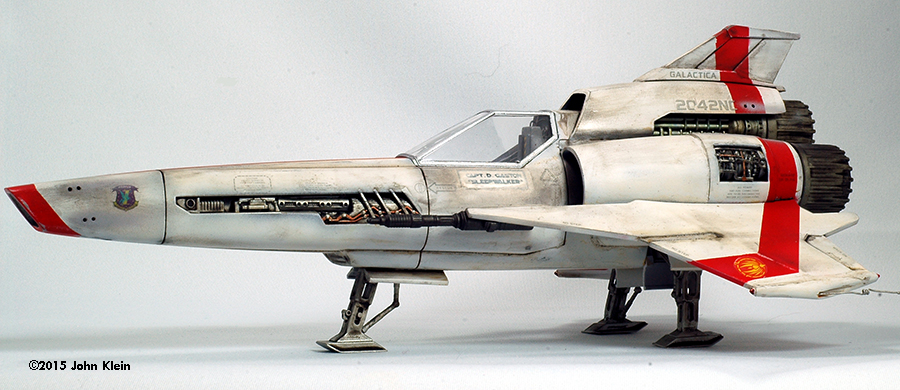
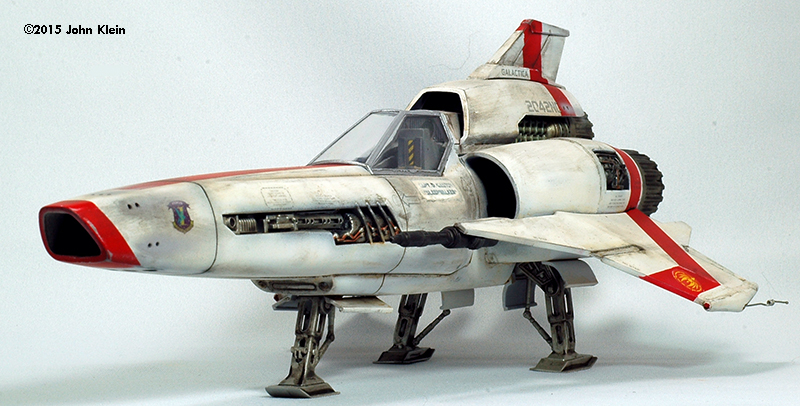
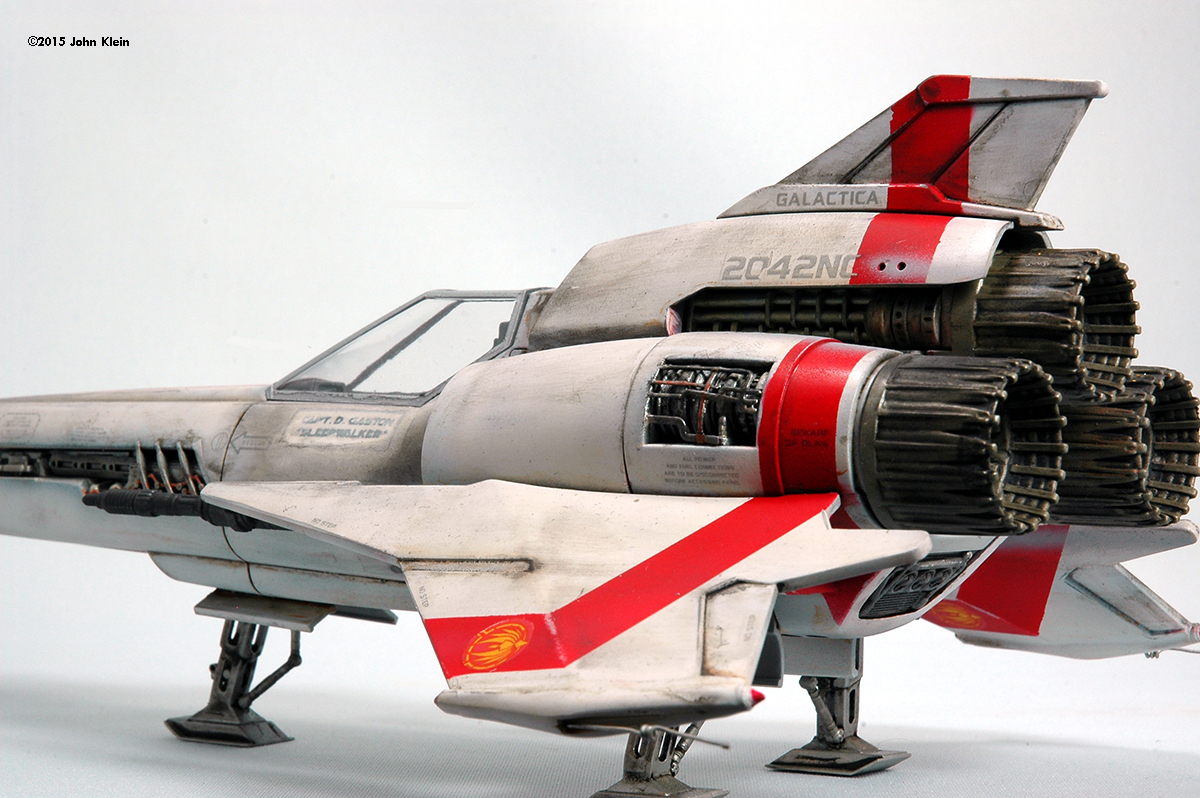
Here's a look at my build-up of Moebuis' 1/32 Viper MKII from the re-imagined Battlestar Galactica series. I added a photo-etched detail set and created a custom pilot's nameplate and tail number. The Viper MKII is kitted by Moebius in 1/32 scale and comes very well detailed and researched straight out of the box. The instruction sheet clearly lays out the structural and cosmetic differences between the CGI and practical models, allowing the modeler to choose exactly the version he or she wishes to represent. Though the detailing is quite accurate, there are still one or two areas which could use improvement. |
|
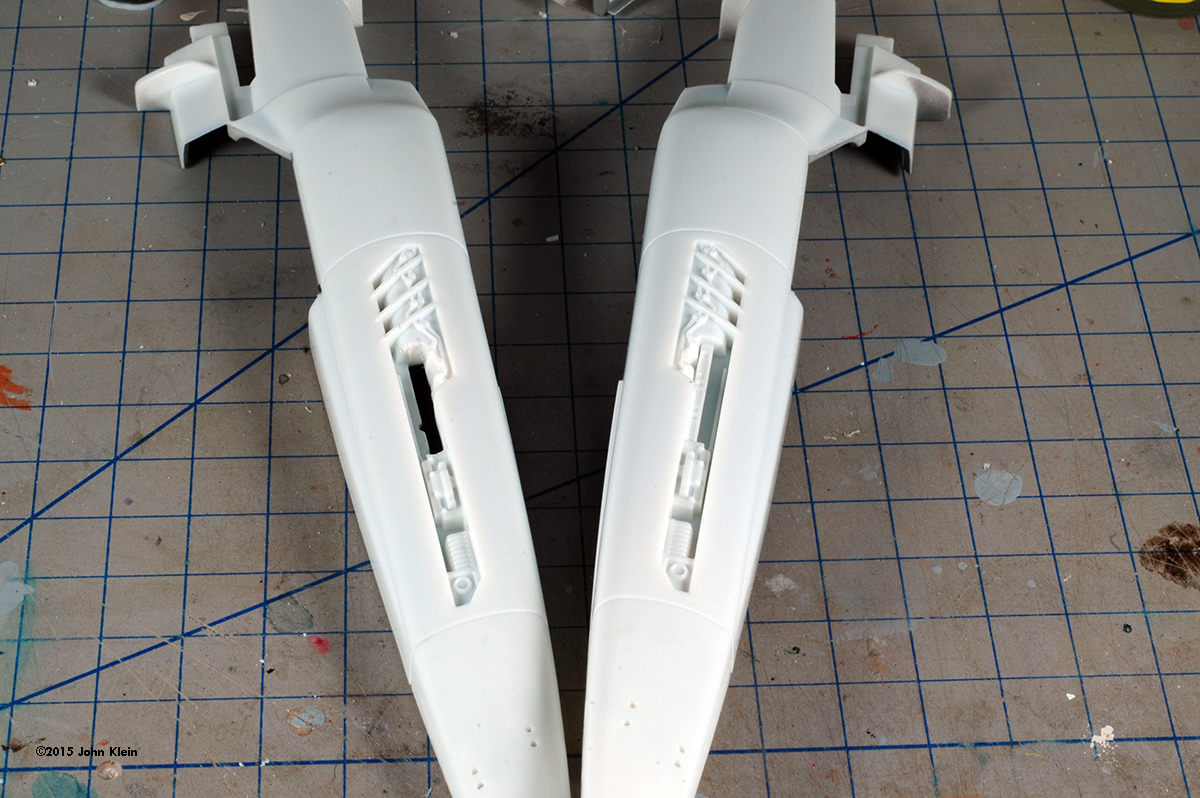
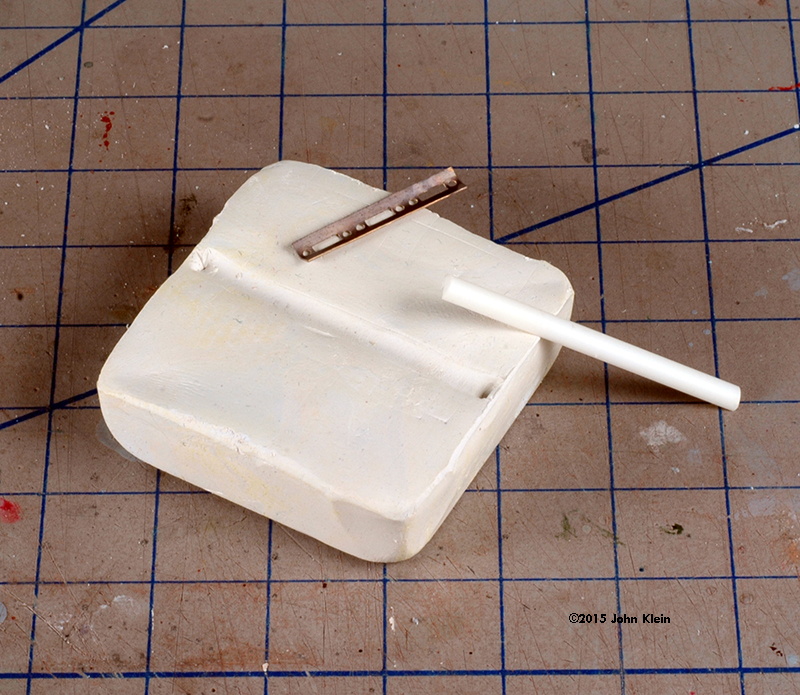
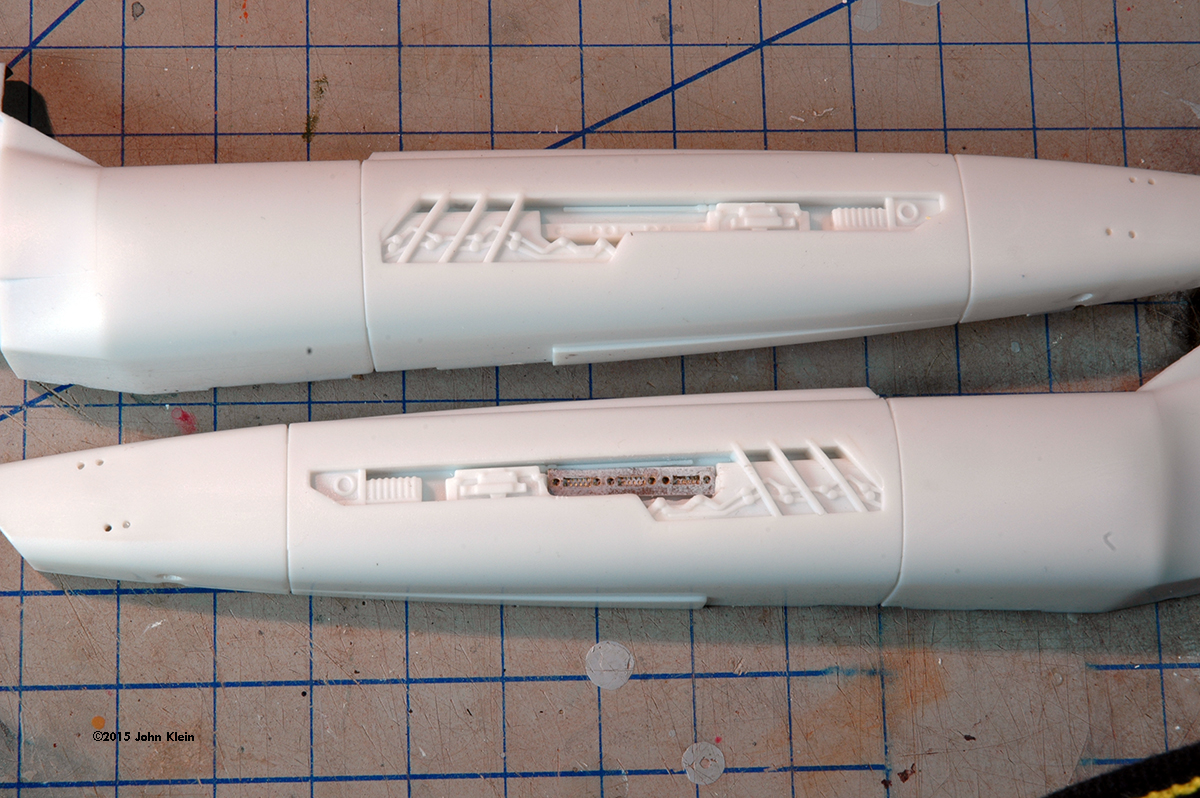
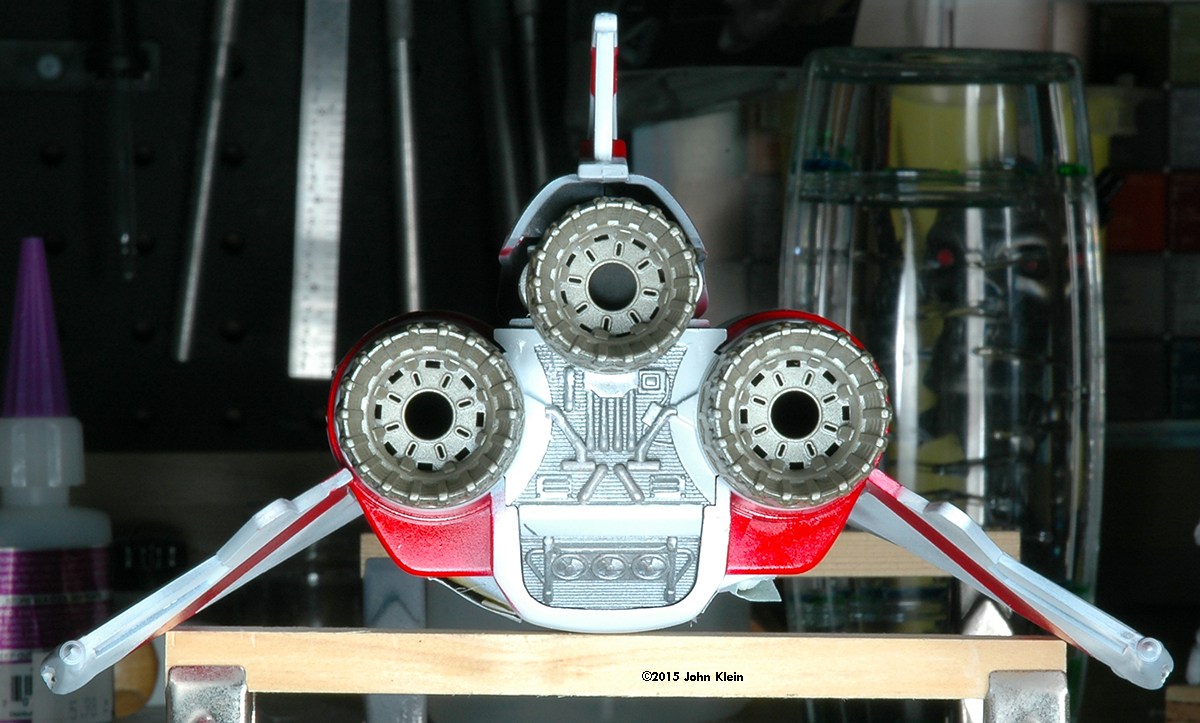
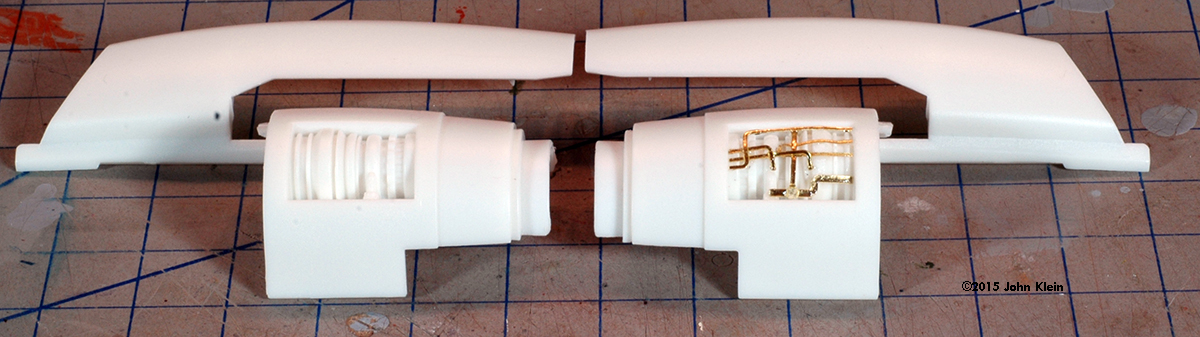
^ Completed cockpit Image: Thruster decals used as drilling templates Image: Paragrafix's PE really dresses up the stock cockpit Image: Additional detail added with wire Image: Finished Image: Intake detail above the cockpit Image: Before adding the sensor detail, plastic had to be removed Image: DIY bending jig Image: PE in place Image: Revoving plastic from the engine exhausts Image: PE details Image: Preventing see-through Image: Done. Image: Launch bar hook Image: Engine panel wiring |
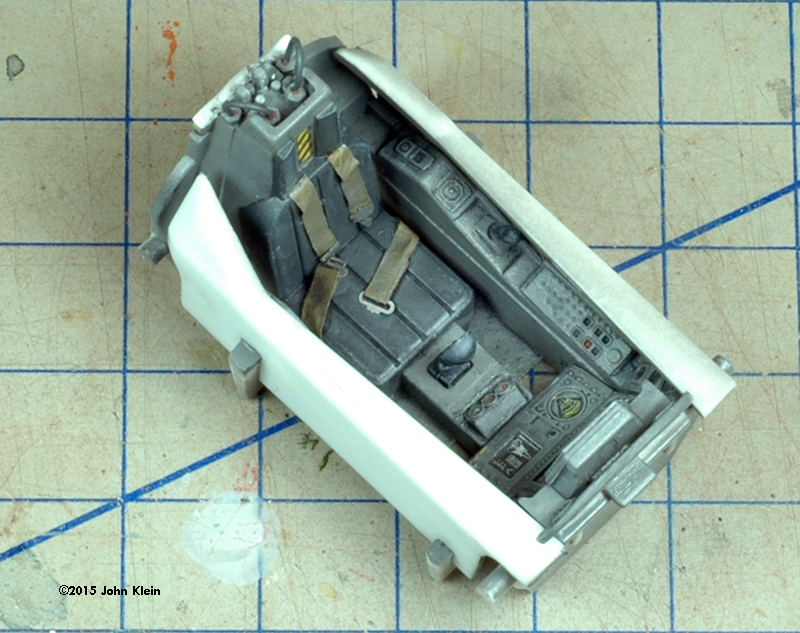
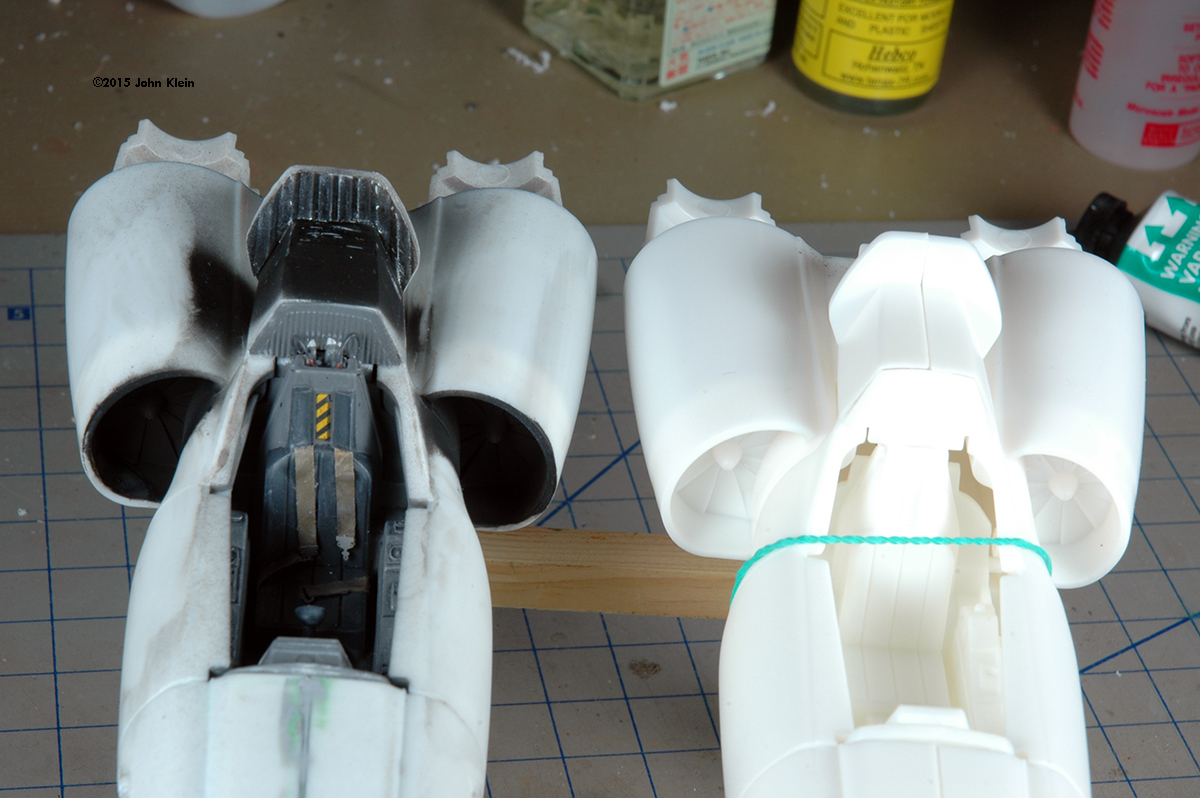
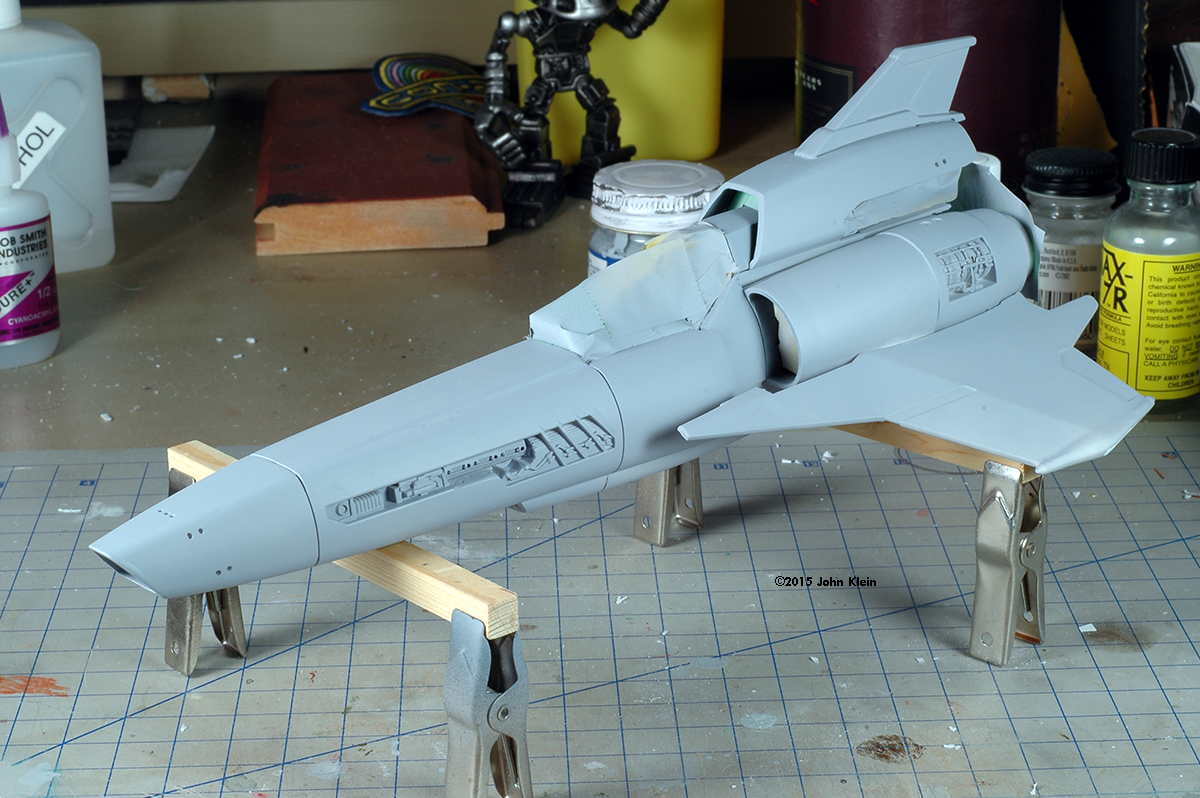
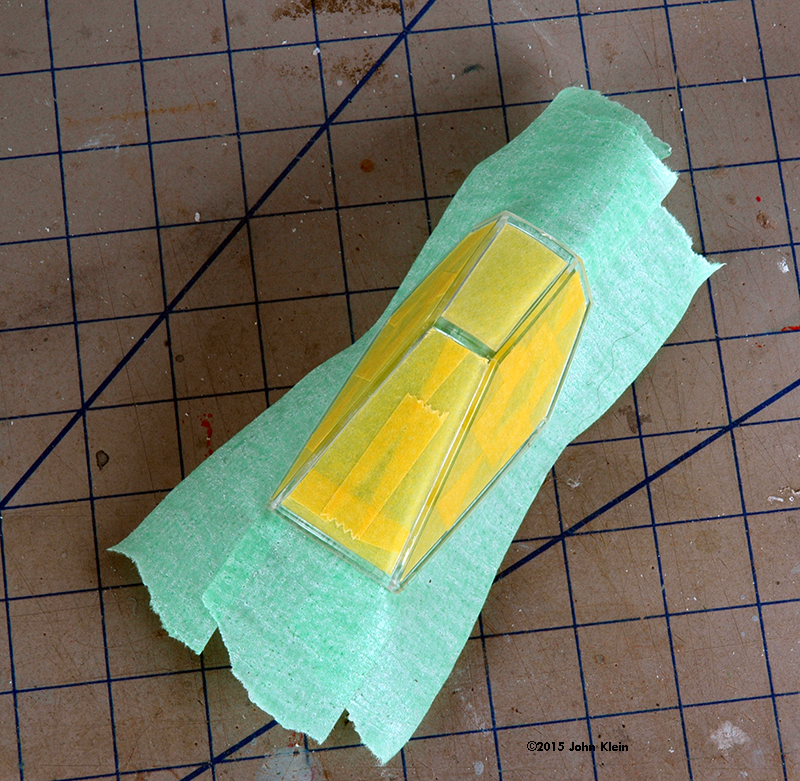
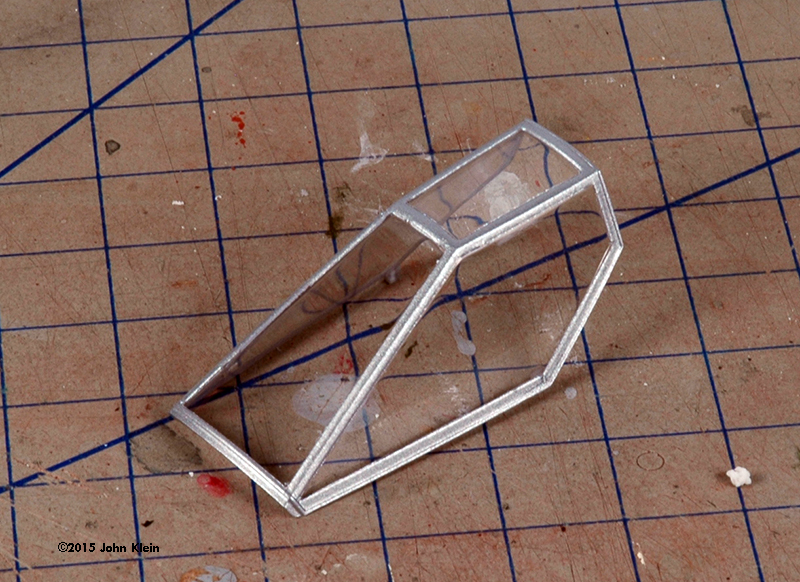
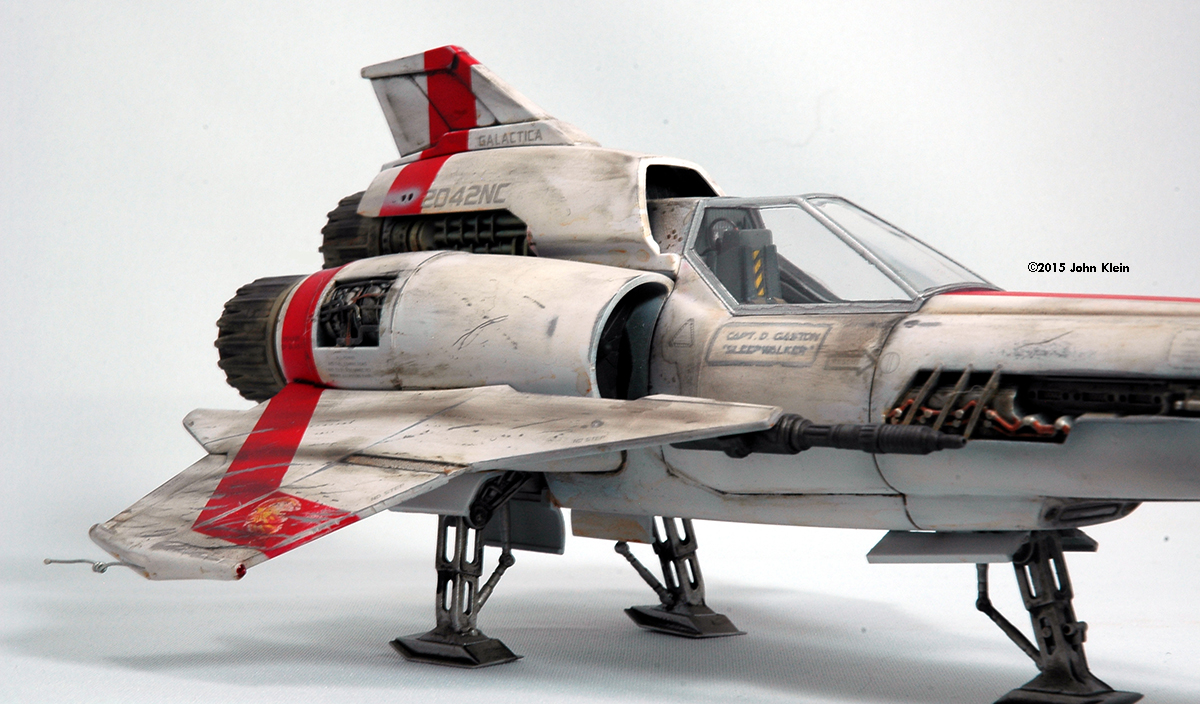
Modifications One major design feature of the MKII is the prominent Reaction Control System (RCS) thrusters which consist of various-sized ports located throughout the fuselage. They are represented in the kit as decals; I felt that these didn't look realistic enough so I set about drilling out the RCS ports. To get the size and spacing of the ports correct I applied the RCS thruster decals in their appropriate locations and used these as templates for the drilled holes. The decals easily detach from the raw plastic surface so I marked the centre of each port with the tip of a hobby knife before I started drilling. After the ports were drilled, I backed each set of holes from the inside of the fuselage with plastic strip. I added a photo etched detail set from ParaGrafix to refine the detail that extra little bit. One area which is greatly improved through the use of PE is the cockpit; the ParaGrafix set provides PE panels for all of the switches, gauges and displays as well as acetate and decals for the display and gauge faces. To install the panels in the cockpit tub, I removed the existing detail with a scalpel blade and jewelers' files, then glued the PE in place with cyanoacrylate. I then cut the acetate displays and gauges to shape and glued them in their appropriate places with white glue and then replicated the glass faces with a few coats of Future. After it all dried, I masked the displays with making fluid and painted the cockpit tub semi-gloss grey. I also added seat belts made from painted masking tape with photo etched buckles as well as the prominent tubing above the pilot's seat which I represented with copper wire. The ParaGrafix set also includes two pieces which more accurately represent a mystery component and its heat shield which are located in the front weapons bay. To install this, I removed the existing portion of the fuselage with a Dremel tool and files and then backed the opening with sheet styrene. The photo-etched replacement component installs flat, but its heat shield is bent into a half-round shape. To achieve a consistent bend, I pressed a piece of half-round styrene rod into a block of Milliput. When this dried, I used it as a forming jig by pushing the PE into the groove in the Milliput using the half-round rod. These were the most difficult PE components to install. The rest of the PE consisted of replacement engine exhaust rear walls which were installed after the existing plastic was removed and engine wiring which was simply attached on top of the exposed engine components in the rear nacelles. The only other structural modifications I made were to scratchbuild the launching hook assembly for the front landing gear out of styrene strip and tube; and to blank off the see-though nature of the exhaust openings with black painted styrene disks. Painting I masked off the cockpit and used Rustoleum Painter's Touch grey primer to prepare the surface for paint. I primed the fuselage and engine exhaust assembly separately to save time making and painting the exhaust later. I pre-shaded certain areas with Tamiya XF-1 Flat Black and then over coated this with Tamiya XF-2 Gloss White for the fuselage and Model Master Acryl 4676 Jet Exhaust for the engine cans. The fuselage and recessed areas between the engine canes were masked and painted gloss white and Model Master 4677 Flat Aluminum, respectively. After this had dried thoroughly, I attached the engine exhaust assembly to the fuselage and masked off the areas which would receive the red "go faster" stripes. I painted these on with Tamiya X-7 Gloss Red. The recessed engine panels were masked off and painted with Model Master 4679 Steel, as were the landing gear assemblies. The exposed engine plumbing and wiring were picked out with various metallic paints. Heat staining on exposed parts of the top engine was simulated with Tamiya X-23 Clear Blue and X-24 Clear Yellow, over coated with Tamiya X-19 Smoke. The canopy framework was masked off and painted Flat Aluminum, as well. The model was sprayed with Future in preparation for the decals. |
|
Image: Primed Image: Pre-shading Image: Masking the stripes Image: Finished striping Image: Masking the canopy frames Image: Completed Canopy Image: That invisible decal Image: Pre-weathering
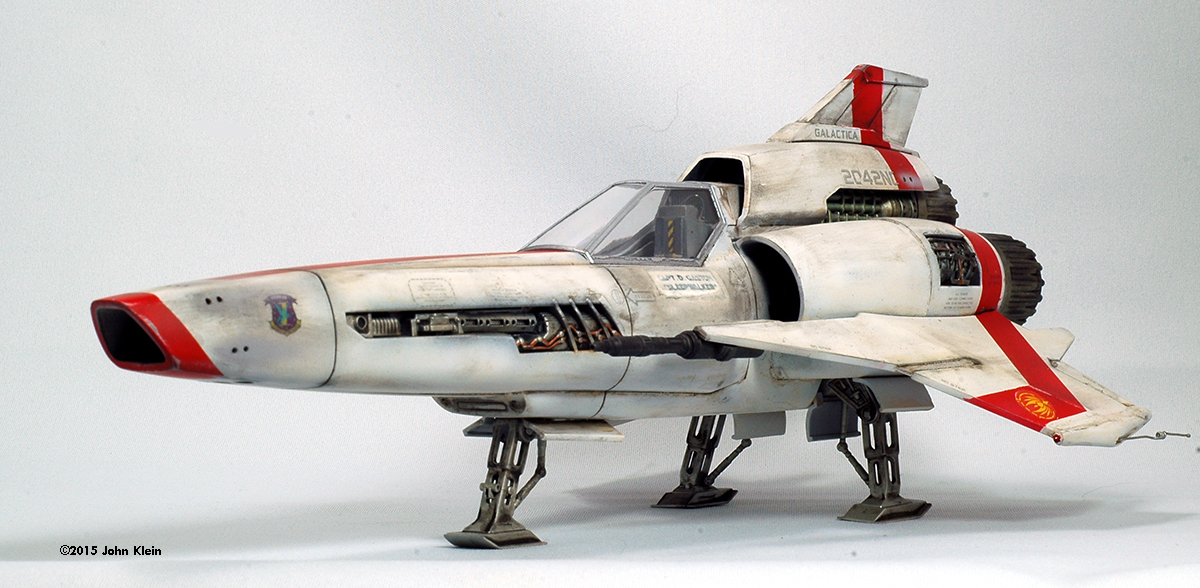
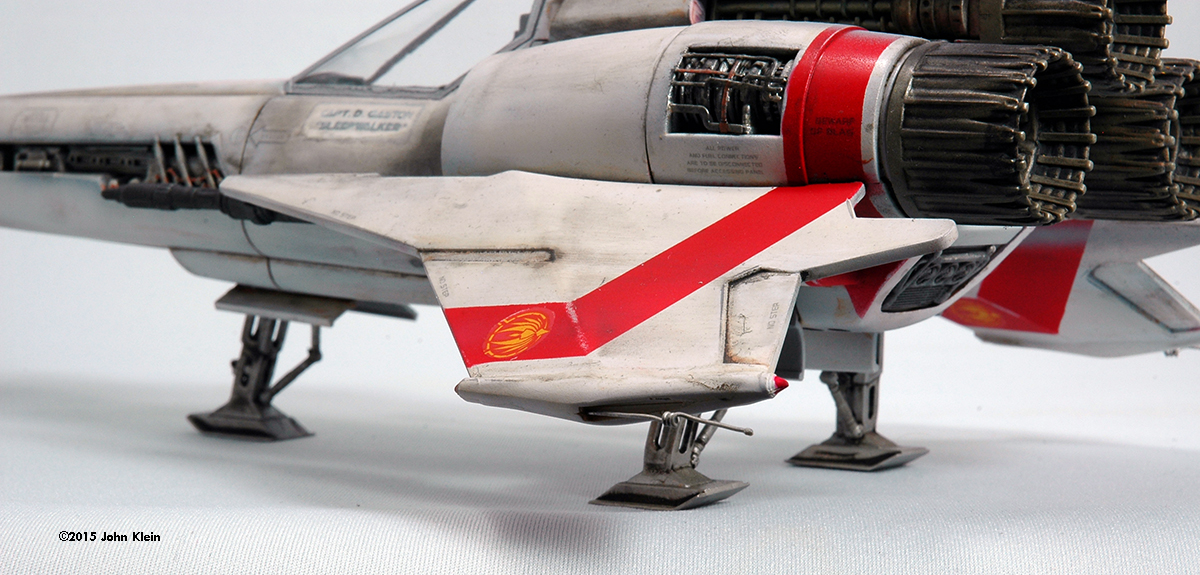
^ Completed model Image: Front/left view Image: Right/front Image: Top/front Image: Right side detail
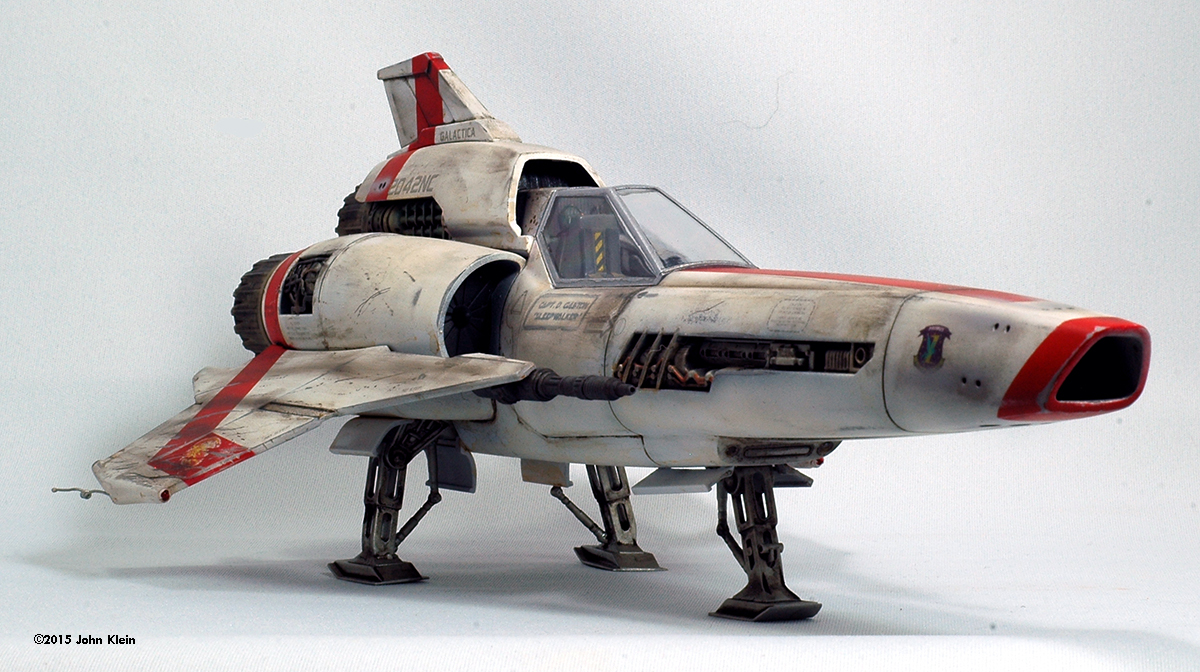
Image: Left/rear Image: Left/rear detail - note the static discharge Image: Closer look at that discharge Image: Weathering & insignia |
Decals The decals included with this kit are very fragile and must be handled with extreme care. Micor-Sol eats right though them (I lost one stencil decal learning this) but Micro-Set worked just fine. Another problem which many modelers have noticed is that the individual yellow wing insignia decals are printed without a white backing layer. This causes them to be rendered transparent when applied over the red wing stripes. I attempted to work around this problem by cutting the insignia portion out of the red "go faster" stripe decal which is provided as an option on the decal sheet; this was more-or-less satisfactory except that the insignia now has a sort of roundel-like appearance. Only two pilot nameplates and corresponding tail numbers are included on the decal sheet; I printed my own nameplate decal onto clear decal film and then sealed the decal with Krylon Crystal Clear prior to application. The tail number (2042NC) is a hybrid of the two tail numbers included on the decal sheet (2220NC & 7242NC), cut apart and applied in pieces to create a new number. The rest of the decals went on without incident and were sealed-in with another coat of Future. Finishing After an overall wash with black oil paint and mineral spirits, I applied various pin washes of burnt sienna and black oils. The insignia decal on the port wing got stuck to the glue residue of the previous, transparent decal and got mangled beyond repair during application. To disguise this, I scribed some scratches and battle damage into the wing's surface, emphasized the damage with a silver coloured pencil and using pigment powder and airbrushed dark streaks to simulate a "near miss". Pigment powders were also used on various areas off the fuselage to give a used appearance. I airbrushed light grey streaks leading back from the RCS ports to simulate propellant residue. After the weathering had set, it was sealed in with Liqutex Matte Varnish thinned with Testors Universal Thinner. Conclusion This was a very enjoyable kit to build. The instructions are a bit confusing at times and the decals are a bit of an uphill climb but the end result is very satisfying; a highly recommended build for any BSG enthusiast.
Many thanks to John's wallet for providing the review sample. Manufacturers and retailers, interested in getting your wares reviewed and publicized on a site averaging 6000+ readers a day? Contact us! |
Please note that the opinions expressed in this article are those of the reviewer.
Read other reader's reviews of this kit ![]() Submit your own review of this kit.
Submit your own review of this kit.
![]()
Go back up | Other Sci-Fi Index | Starship Modeler Home | Site Map | Feedback
This page copyright © 2015 Starship Modeler™. First posted on 2 April 2015.
![[Click to enlarge]](jk_viper2_03_Cockpit.JPG)
![[]](jk_viper2_25.JPG)
![[]](jk_viper2_27.JPG)
![[Click to enlarge]](jk_viper2_29.JPG)