
By Clyde "EntilZog" Jones - images & text © 2002
|
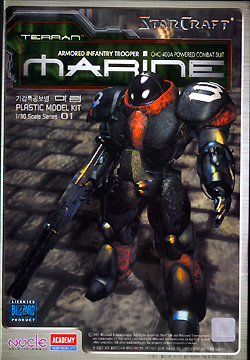
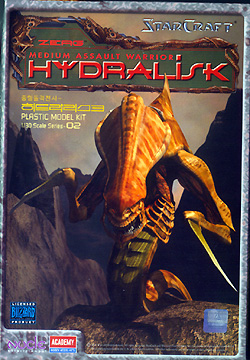
![[Box art]](cj_star_boxes.jpg) I’ve never played “StarCraft” but I’ve built some of the characters.... Wandering through the ‘lost in the woods’ hobby shop in the wilds of Wausau, I found a couple of interesting looking SF kits I’d never seen before. A Snakigator looking critter called a “Hydralisk” and a man in a can, a Terran Space Marine or SpaM. They looked neat, I adopted them, and brought them home for construction. Good move. |
|
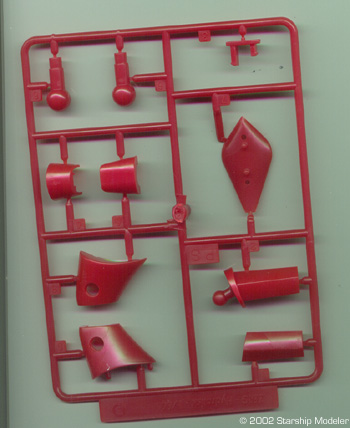
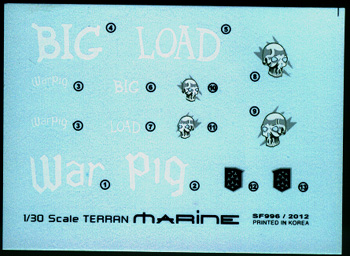
Image: Terran Marine box Image: Zerg Hydralisk box Image: The Snakigator's styrene "skeleton" Image: This sprue contains the parts common to SpaM, Nurse, and FireBat Image: Decals for the SpaM |
Fearsome, Toothy Snake-oid Warrior Prying open the boxes I found a surprise. The Zerg warrior was made of both red injection styrene for a semi-flexible skeleton, and soft rubberoid for the outside. Shipping had apparently been a bit rough and some of the rubberoid parts had pulled almost loose of the sprues leaving damaged spots rather like wounds. O.K. - wounds they are.... Construction of the Zerg is quick. The styrene parts fall together well, and the rubberoid outsides attach well with thin superglue. The torso then snaps onto the lower body, the head onto the torso, and the arms go together at the elbows and then onto styrene ball and socket joints at the shoulders. Very quick, very solid. They you get to gently force the jaw into place - all of it. Well, a ‘jaw’ and two mandibles. The jaw clamps onto a block under the head, and the mandibles have pegs that plug into holes in the sides of the head. And everything can move. yay! I was rather curious as to how the rubberoid would take paint. And what kind of paint? I tried some pollyscale paint on the sprue. It stuck. Permanently. Without degreasing the sprue or anything. Neat. Since the Zerg was already a sort of tan, I figured reds would be appropriate (like the illustrations). I filled in all the little crevasses in the ‘musculature’ with red, then wiped it away to give a ‘marbled meat’ sort of texture. Red Gel pen accented crevasses in the hide, and around the visible ‘rib cage’ bits, and anywhere else I needed to differentiate parts. A little tan acrylic, dry brushed on, accented the bits even more. A little red in the eyes, some white on the fangs, some ‘aged white’ on the - er - slashy bits, streaked with a bit of yellow and white, and the snakigator was done. The Man in the Can The Terran was supplied on two sprues of gray styrene, one marked "Marine/Medic/FireBat" meaning that there were at least two more variations to come. Good. (The right hand sprue, without the head, etc.) I was surprised a bit by the small size of the model, since I've been building Dorvak 1/24th scale figures. This guy would be very out of place among those. And he's a little big for 1/35th standard Military scale, but not too oversized. |
|
Construction starts with the arms. Simple, standard construction, no elbow joints, a pivot for the shoulder, and the hands are held in place by friction and a Teeeny little ridge. The styrene is slightly (VERY slightly) flexible but does NOT take the place of discrete polycaps or O rings. Legs are next (surprise!) with limited articulation. (NOW I see why all those kits have articulated ankles. So they can stand up. This one doesn’t, easily.) The knees flex, and are well designed to keep glue off the joint, and the hip has a nifty ball joint for excellent posability. Unfortunately, from the back, the ball is very visible - a human can’t fit into this suit. The torso goes together well, with a waist joint, and a mud flap (butt protector), but the codpiece (horn like sticky up thing) in the front can interfere with the chest plate. Either do some trimming so the chest plate fits very snug, or do some carving on the back of the horn so that it doesn’t scrape off paint from the chest plate. The legs and arms slip onto the body via rods. Rods come from the shoulders into the body, rods come from the hip joints into the legs. No O rings. No poly caps. These joint will ‘wear out’ quickly. One of them was already a bit weak after the first ‘fitting’ session. The arms and legs do articulate well. Lots of motion, and the legs can pivot out and in a bit for balance. From the front and sides, the figure looks fine. From the back you can see too much of the ‘workings’ for good all around photo use. The head can be handled in several ways. Although it looks very hunched in place, you can use a half helmet with a full head, or a full helmet only. I was (and still am) tempted to rebuild the helmet so it stands higher, letting the occupant actually have a neck rather then have the appearance of his head growing directly out of his chest. I painted this SpaM with a mix of ‘oily black’ and ‘stainless steel’ Pollyscale paints - yes, mixed together for a ‘sparkley grey’ finish. Better than straight ‘gunmetal’. The accent areas were painted with a brick red, rather than bright anything. The faceplate of the helmet was done in gloss black. “Wear areas” and ‘dings’ were picked out in Testors solvent based chrome. And all the painting was done with a brush - no streaks, no lumps, no missed areas. Looks airbrushed. I Love Pollyscale. Conclusion All in all, these were quick fun models. Not too complicated. Nicely detailed. Imaginative. Chewy, with a delightful flavor of.... (No, wait. That was lunch.) A set of ‘medical’ figures has been announced - apparently women in power armor. Good choice. M*A*S*H in Space. Wonder what the next figures will be? More Zerg? Some Protoss? And what’s a ‘FireBat’? Many thanks to Zog's wallet for providing the review sample. Manufacturers and retailers, interested in getting your wares reviewed and publicized on a site averaging 2000+ readers a day? Contact us! |
|
![]()
This page copyright © 2002 Starship Modeler™. Last updated on 3 April 2002.
![[Click to enlarge]](cj_star_hy_parts.jpg)
![[Click to enlarge]](cj_star_mar_parts1.jpg)