
|
|
|
|
By Jack Wendt - © 1998. References: I could not have achieved this level of detail that was put into this model if it were not for all the screen captures, artist renderings, and 3d models that can be found out in cyberspace. The primary picture that I used as reference is Michael Stetson's AGGYVIEW.JPG, courtesy of Craig Condu's Epsilon Jumpgate. |
|
Another side view, looking aft
|
I assumed that the artist renderings were in scale to the "actual" model as seen on television. I used the side and the top view as a blueprint. You will notice that the scale for the front view is different. Using my photo editor, Adobe Photo Deluxe, I scaled down the front view to the dimension of the side and top view. I also collected around 20 pictures for reference in applying detail. Unfortunately most of the "beauty shots" found on the web are oblique looking from the front down the side. There is little reference to the rear available at the time I built this ship. Size and Materials:
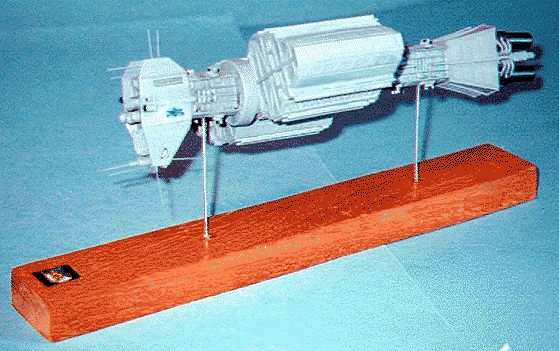
The ship I built is approximately 10 inches long. I chose this size so that detailing would be possible, but the exact nature of detailing would not have to be extremely accurate. The larger the ship, the more discriminating the detailing will have to be, and the reference material is simply not out there. This is not like kitbashing a Star Trek model. They make actual models for filming Star Trek. All the models in Babylon 5 are computer generated imagery. The ship is broken down into the following parts:
|
|
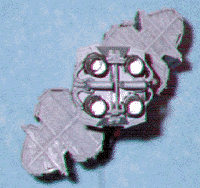
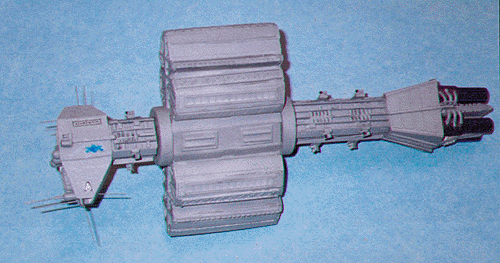
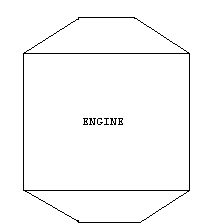
I used flat sheets of plastic, of different thickness; square and rectangle pieces; and round and semicircle rods. These were all 'Evergreen' styrene which I bought from my hobby supplier. Assembly: The FRONT section was traced from the primary picture I used for scale. The antennas are thin piano wire I had purchased from my hobby store. The forward round cannons, mounted on each side of the front section, is aluminum tubing that I purchased. The three dome shaped pieces protruding under the landing bay are large swizzle sticks from my spare parts box. The dome in the center is a slightly smaller diameter. I purchased a set of black decals for the lettering of Agamemnon. The striping that forms the box is left over decals from another project. The large 'A' is a 3 step process. I cut a solid black decal just larger than the white letter 'A'. I cut out the center of the black 'A' mounted it, let it dry, then applied the White letter 'A' over it. I could not find a gray colored 'A' which is the color the letter appears in TV, so I used a soft #3 pencil and colored the decal, after it had dried. This seems to give the general color of the decal. If you can find a sheet of gray decal that would naturally be better. At one of the internet sites you can find a lapel pin with the Earth Force Alliance insignia. I downloaded this insignia, and used Paint Brush to fill in the colors in better. I then used my Epson 600 color bubble jet to make the decal. If you look closely at pictures of the Omega ships, you will notice the Earth Alliance insignia is a raised area and not just painted flat on the ships. Using my photo editor I shrunk down the size of the insignia and then printed it on HP Glossy Photo paper. This paper is super thin and has the texture of plastic. It takes forever for the ink to dry on it. I cut out each decal, one for both sides, and used gold paint around the edge to hide the white paper. I then mounted the decal with white glue, and put Future floor wax on the decal to protect the ink. I then coated it with a clear flat finish to take out some of the luster. For the SECOND section I essentially built a rectangular box (diagram 1, looking forward). I then added a thin strip of plastic protruding out on both sides of the top and the bottom. After this I made the four pitched roofs as seen in the diagram. Two thin strips run the length of both sides dividing the area into three sections, each side. Looking at photographs I then used a series of semicircle, square, round, and flat pieces to simulate the detail on both sides of the ship. I mounted the four cannons last, which consist of thin flat, and round pieces. The ROTATING section was probably the hardest part to do. I used the front view picture from the internet site provided, and cut out the outline and traced it on two pieces of sheet plastic. I used the top view of the ship as a guide for width. The detail consists of the same things listed above. I also scribed some of the panel lines. The very top and bottom of the rotating section are simply panels of thin sheet plastic, cut into rectangular pieces. The ends that attach this to the other sections and allow it to rotate are the dreaded bottom of black film canisters. They seemed to be about the right size for this scale. The THIRD section is essentially a repeat of the second section of the hull with the exception that is about twice as long. Note that there is a total of eight cannons mounted on this section of the hull. The ENGINE HOUSING took three tries before I got it close to what I think is accurate. Again, the further you go to the rear of this ship, the less reference material is available. It is essentially an eight-sided section. The two outboard sides are flat, and tapered towards the third section (hull). The top and the bottom are also tapered towards the third section, but have angles (see diagram 2). The ENGINES themselves were easy. I used four ink pen tubes for the engines with other tubing around the bases of the engines to give the tapered effect. What appears to be manifolds on the side of the engines is just that -manifolds from my spare parts box.(I couldn’t figure out what other thing most closely duplicated this feature). Final Assembly:
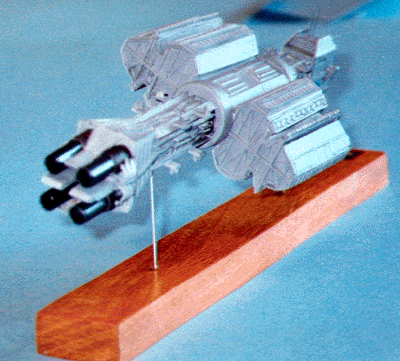
In one of the pictures that is with this article the third hull section looks droopy. That's because I didn't glue the rotating section to the others. I ran a wire through the rotating section to each hull section so I can position the rotating section in various poses. Unfortunately, the rear section is to heavy to be properly supported this way and it droops a little. At some point I will remove the wire and glue everything together and the fit will look as it should be. The entire ship was painted a dark gray. It is darker than it appears when photographed using a flash. I applied a wash of thinned black paint in every corner of every piece of the ship, to bring out the detail and shadows. I spent about 150 hours, over several weeks assembling the Omega. This is not including the time spent on the internet downloading all the pictures. I could not have built this ship without the creative efforts of those the use their computer as canvas to create art. I think it is a fairly accurate model of something that doesn’t even exist in this three dimensional world. |
![]()
| BABYLON 5, the Babylon 5 logo, all photos and images, and related indicia from the series are copyright and trademark 1992-1997, PTEN Consortium. |
This page made possible by The Lester Press - copyright © 1997-8.
Last updated on 27 April 1998