
|
By John Lester - images & text © 2008
|
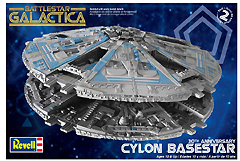 The Cylon Base Star was one of four kits released by Monogram in 1978/1979 in conjunction with the short-lived (but cult favorite) Battlestar Galactica TV series. |
|
Image: Outer hull Image: Inner hull Image: Original detail parts
Image: New pulsar cannon has gaps |
It was reissued once, in 1998, and is now back again for the 30th anniversary of the show - with new parts. What You Get I should start this with a confession: I have never built this model before. Or bought it. I had a squadron of Vipers as a kid, each with the rubber band-powered missiles, and I don't know how many Raiders fell prey to firecrackers or BB guns. This ship never did anything for me, however. It's too obviously a Star Wars wannabe, without being Star Wars. Fast forward 30 years and I have one to review. Opening the box I see two baggies of parts, plus one with the new base - six sprues in total, plus the 4 circular hull halves. One decal and an instruction booklet round out the package. A quick scan of a previous issue's instructions reveals that parts 13-17 are new. These comprise details around the center of the ship, shrouds on the top of the upper hull, and one mega-pulsar unit (2 parts called 'pulsar unit' in the instructions). Thirty years have been kinder to these molds than they have been to me (but then these molds haven't been to Mogadishu either). My kit had no flash and very little in the way of mold seams. Detail is what you would expect from late-70's Monogram (the company's heyday, when they were doing their best work): crisply rendered. The new detail pieces do not look out of place, having the same level of detail. Instructions are typical Revell (Monogram): adequate for the job. Exploded diagrams walk you through 7 assembly steps to complete this thing. The paint guide is less helpful. The boxart shows some medium blue accent painting, but aside from a mention of 'Flat Light Blue' in the instructions, there's no mention of markings. The only decal is a nameplate for the (new) stand. Assembly and Finish With only 17 numbered parts, how hard can this model be? Answer: not hard. In fact, it's pretty near a slammer. Fit is really pretty good, considering the age of the kit. I used Testors' Model Master liquid cement to glue the dinner plates …. er, I mean 'hull halves' …. together. It gives you more time to spread glue around the diameter of the parts without it setting up on you before you can press the parts together. I came back later with my capillary applicator and Tenax to weld shut any gaps. Tenax also joined the rest of the detail parts to the hull. Fit was … was good as the Monogram B-17, TBD or B-25 from the same era: ie, good enough. I still need to go back and sand down the edges of each saucer, but that's more tedious than it is difficult.
|
|
The new parts give you one mega-pulsar cannon and details to cover the central 'spindle' that joins the upper and lower hull halves. Fit is OK for the most part, though there are gaps all around. I found two non-trivial problems:
Otherwise, assembly isn't difficult and it does speed along. I'd suggest, based on my experience, that you fit parts #17 first, let them dry good and hard, and only then fit parts #16. Otherwise you'll be reaching for a hammer with which to impart discipline on some recalcitrant parts …. and don't ask me how I know that. There's not any real painting guide other than the boxtop, though the instructions list a number of paints (and each step has 'grey' and an arrow pointing to parts). I never noticed any color other than grey as a kid, and since I find the original series unwatchable anymore, I'm not going to get the DVDs and do actual research to settle the question. If you find the preceding bit too flippant, you'll already know what exact shade of grey it needs to be. Conclusions You have no doubt surmised, Gentle Reader, that I am not a fan of the subject of this kit. However, I like the model. It goes together well enough I could do one while keeping one eye on a hyperballistic 4-year-old. Detail is nice and will really reward careful painting, washing and drybrushing. Honestly, looking at this thing in the box my first thought was: Best. Greeblie. Kit. Ever. The hull halves alone are a fantastic start on a cool base, and the detail parts ….. oh, yeah, I can find alternate uses for those. Whether you build it as a (no school like) old-school Cylon Basestar or part it out for bigger and better things, it's well worth the money. Recommended. Many thanks to Revell for providing the review samples. Manufacturers and retailers, interested in getting your wares reviewed and publicized on a site averaging 3500+ readers a day? Contact us! |
![]()
This page copyright © 2008 Starship Modeler™. First posted on 6 March 2008.
![[Please click to enbiggen]](cylonbase_new_0467.jpg)
![[Fit]](cylonbase_fit1_0472.jpg)