
By Adam Ladd - images & text © 2003
|
![[Click to enlarge]](al_LOGH_Complete1.jpg) Heldensagen vom Kosmosinesef, loosely translated as Legend of Galactic Heroes, is a long running book, anime, and OVA series in Japan, telling the story of a future interstellar conflict. |
|
|
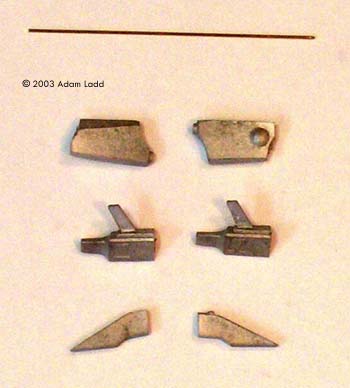
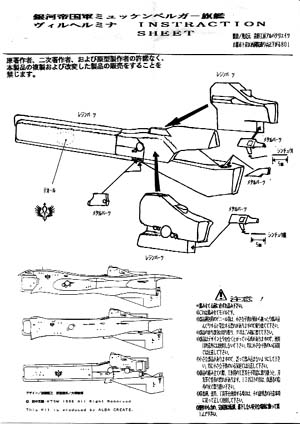
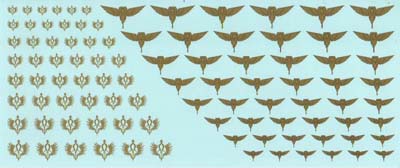
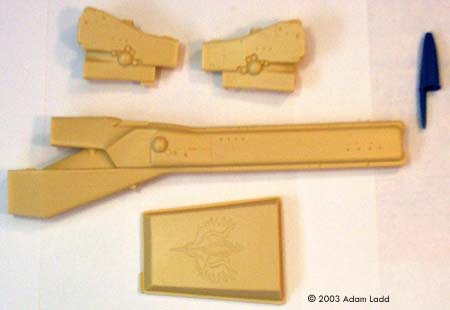
The series features stirring space battles where thousands of warships maneuver against each other in huge formations to the sounds of classical music. Alba keeps making new models of the dozens of various ship and fighter designs from both sides, many of which are very similar. I chose an Imperial main cruiser as my first try. What You Get A simple black box contained a simple resin model kit, with a resin display base, a baggie of metal detail parts, a 1 page instruction diagram, and some generic decals. The kit is really just 3 yellow resin pieces, very crisp: the main hull and two side engines. The metal bits, consisting of 2 guns, 2 engine vanes, 2 veniers, and a piece of wire for antennas, add just a touch more protrusions to break up the sleek, gun-like lines of the ship. The display base has a recessed image of the Imperial Crest, but its lines are too thick. The instructions suit the simplicity of the kit, but the decals are a disappointment. In the series, most of the warships have unique signature banners, aggressively painted in bright colors across their subdued gray hulls. The included light gold decals would not be very effective in replicating this effect. Preparation Unlike nearly every other resin kit I have done, this one didnt have a single bubble or pit. Virtually all the cleanup is in removing the mold line running down the top, bottom, and bow, and some seams on the white metal parts. Totally a sand paper and file job: no putty necessary. The fine detail of the "sensor" areas and "radomes" may as well have been die-cast. |
|
I try to do as much of the dusty work as possible before washing, so at this stage I Dremel-ed the mounting holes, and deepened the bow weapons ports. The side weapons ports, being a smaller diameter, I felt were proportionally deep enough.
Assembly & Finish For an 11 piece kit, assembly is just not going to be much of the work, and I decided after test fitting that the two engine vanes that fit into the side engines just didnt work aesthetically. From behind, the 6 massive engines are too solid and straightforward to have these spindly things sticking out of them. Deciding to toss these also eliminated the antennas, bringing the kit down to 9 parts! The guns and verniers were attached to the main hull, and then these three subcomponents were primed (Testors Grey) and given 2 all-over coats of Testors Navy Aggressor Grey (#1994). Originally, for the aforementioned main engines, I had envisioned a blue-white effect, but after watching my one video of the show a few dozen more times, I went with a plain white. The "radomes" on the sides of the ship are an important detail, and are a common feature between ship designs. The domes and the surrounding details were all painted black, then the domes painted silver, leaving all the recessed areas dark, for a nice contrast. On a dark grey warship, an even darker color is necessary to bring out the details. I have really grown to like the method of using a stubby paintbrush and charcoal shavings to shade, make streaks, and bring out panel lines and details. Testors Dullcote was then applied to seal it all in. As I mentioned above, the ship should have a banner across the forward hull, but I am not yet a good enough artist to freehand this, so I elected to leave the hull bare, for the time being. The included display stand posed a bit of a quandary: I wanted to use it, and I liked the crest recessed into it, but I was not thrilled with the size of the lines. Puttying over the whole thing and leaving it bare, or even using one of the generic decals were also options. I ended up taking advantage of the design instead, and using a heavy ink pen, traced over all the lines, intentionally emphasizing their width. I am rather pleased with the result: the thick lines are very anime-ish. A piece of brass rod, bent at two angles, for the stand, and assembly was complete. Conclusion And so, another warship is added to the shelf. I fear my empty wallet will be getting emptier as I procure brothers and sister ships for it in the future. The relatively low cost (for a resin import), very minimal cleanup and straightforward painting should make this a snap for beginners on up. Links of Interest |
![]()
This page copyright © 2003 Starship Modeler™. Last updated on 26 August 2003.
![[Top-ish view]](al_LOGH_Complete2.jpg)